

rafi266
-
Posts
37 -
Joined
-
Last visited
Posts posted by rafi266
-
-
Hi SF!
I said previously that I have sympathy with your frustration, and following what I am now reading between the lines of the above- I understand completely what you are getting at. I too have a background of years in camera usage, and I also thought that buying the workbook would be a magic wand into understanding and starting to work with Affinity. Unfortunately, it wasnt. As you said- the book starts with the assumption that one understands the basics and more or less skims over this extremely important part of the learn curve. I assume that other enterprising people will put out a book that fills this void - check out this link: https://theeagerlearner.com/blog/
by DrippyCat. (Thanks, Simon!). You can download there a 90 page PDF with great explanations of a lot of stuff that is probably puzzling you.
And of course- there is a huge amount of info out there in Youtube (did I say Drippycat?...)
-
Ive noticed recently that when cropping in Photo Persona, in order to exit the crop tool one has to choose the Apply button, otherwise the crop dosnt take place.
But when editing a raw image in Develop Persona, there is no 'Apply' button and all one needs to do is to choose another tool, such as the 'Move' tool, and the crop is finalised.
Is this just one of those things that weren't planned well and I just have to get used to, or is there some rational behind this?
-
Hi SF!
Ive been following your questions with sympathy, since we all have been where you are at the moment! (By the way Cedge- great explanations for newbies.)
I have a few remarks which I hope will be useful:
When you open and 'play around' with a raw file, and then save it- as you already understood, it is automatically saved as a afphoto file, which can only be read by Affinity. If you havent changed the place for saving this file, it will be saved in the same folder where the original raw (NEF etc) file is situated. you will see the two files next to each other- the original raw file, untouched- and next to it the afphoto file, which now sports a purple Affinity logo on its icon.
One thing to be careful of- is saving a JPEG after editing via Affinity. When trying to close this file via 'exit', or clicking on the little X on top right of image or trying to close Affinity, you will be prompted with something like this: "the *** file has been modified (IOW changes have been made to it). Document about to close - would you like to save your changes?"
Choosing NO will cancel your editing that you just did. Original JPEG is unchanged.
BUT!!!! choosing YES will change the original image! And unless you have made a copy somewhere you have now no way to get back to the original JPEG.
The only way to save your edits and keep the original is to choose 'save as' via File tab (or control-shift-S). Now you will get an afphoto file with changes, next to the original, unchanged JPEG.
Hope this helped!
Rafi
-
Ok- great! I'll try Darktable out. Do you have any tips or know of any good youtube channels that are user-friendly?
-
I am- thats why Im interested in Darktable. (Raw converter).
So youre saying that when I edit and export as TIFF from Darktable- all changes are baked into image, for editing as an original image in Affinity?
-
Thanks Kenn- I was intrigued by Darktable, it looks like a great piece of software, especially as it has image management (which Affinity hasnt dealt with yet). I was wondering whether there would be any issue transferring the processed image after using Darktable, to Affinity, with its sidecar info. Do you know if Affinity can recognise this info as such and continue to edit the image as regular JPG?
-
I didnt notice any continuation to this thread- have the above raw issues been fixed?
-
I am using Windows, and when using the paintbrush tool and clicking on 'width' and 'opacity' sliders above, paintbrush cursor (a circle) changes back into a move cursor (arrow), and I have to click again on the paintbrush icon on left toolbar to change it back again to the paintbrush cursor.
Is this a bug which hasn't been dealt with yet or is there something which I haven't understood about the workflow?
-
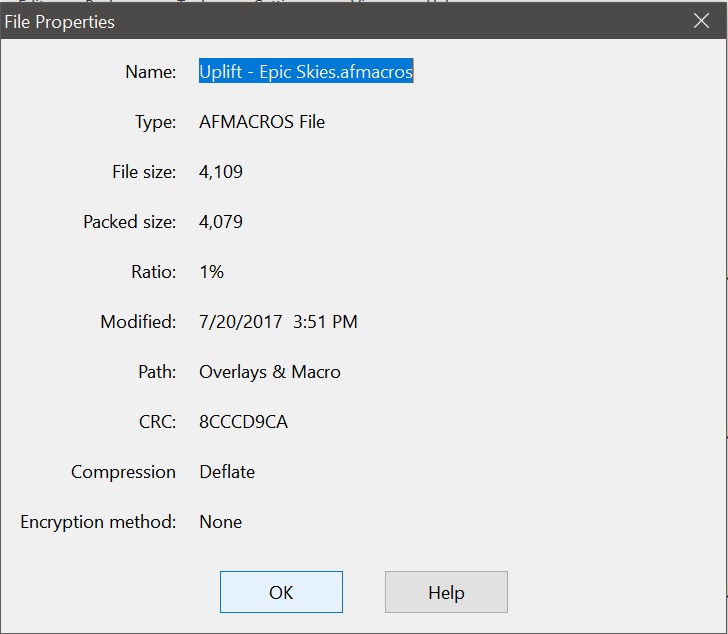
After downloading the uplift epic skies zip file and unzipping to destination, I get an Overlays and Macro folder containing 50 JPEGs of skies, and one nondescript file with an afmacros extension, but with no Affinity logo on it (see attachment).
When trying to drag this afmacros file onto an image, nothing happens.

-
Thanks Simon- great PDF!!! Kudos.
-
Drippy cat- is the Affinity Photo book you are preparing, the official (TA DAAA!!!) work book that has been spoken of over the last months??
-
-
Hi Walt! Thanks for your feedback. Ive been taking photographs for the past 50 years, and usually end up with about 10% of 'good' images out of the hundreds that I take. My remark about not knowing if an image is worth 'fiddling' with, deals only with the 'good' ones, because I dont even waste my time with the bad ones- they are chucked right at the start.
-
I'd like to add my tuppence worth to what Mikep just wrote- in effect it is what has been bugging me over the months that Ive had Affinity Photo on my PC, staring at me every time I logged on.
Everyone has a particular way of learning, so I can only speak for myself, but my particular need is more of a philosophical thing: Why do I need to change my image? How can I tell if an image is worth 'fiddling' with? Looking bewilderedly at the 2,347 (or so it seems...) different controls, layers, options etc. on Affinity and saying to myself- do I need to change blackpoint/ exposure/white balance/ etc etc in order to get a better image? And doing so with the odd 450 raw images that I have just brought back from that amazing holiday in Crete?
This is the kind of video (or even just a good workflow sheet) that I need desperately, in order to 'break through the pain' and start using Affinity with confidence.
-
Yes- another of those pesky messages about that manual...
But really- is this something that will be offered by Affinity? or will I have to buy it via Amazon etc.? and any idea that you can give (wink wink- nudge nudge) about the probable date of publication would be great!
-
I would love to see a video about 'removal of grain from scanned negatives and photos'...
-
Great feedback, guys! Thanks for all the tips.
I wonder if Affinity/James will come out with a new Vimeo dedicated to ''removal of grain from scanned negatives and photos', and thus not needing to deal with the Epson/nikonscan etc. tweaking at all. Wishful thinking...?
-
I would really like to see a video about dealing with images from high res (3200 dpi) scanning.
I have been scanning old negs. on an epson V550 photo bedtop scanner, for archival purposes, but obviously I would like to bring out the full potential if them and display/print some of them. They are in TIFF format- do I just deal with them as if they were regular JPGs? What about the high chromatic noise found in some of them?
Or maybe I should be basically scanning them differently? I am using the built in Epson software that does a very good job of reverting the neg. colours to positive, but should I switch off the built in Unsharp mask?
Glad to hear of anyone with experience with this type of project.
-
Kudos to James for the amazing work with the Tutorials- and its great to see the new videos coming in and addressing problems that Im sure everyone has but dont know exactly how to deal with.
-
I would like to suggest putting a download button next to each video in the "In-house Affinity Photo Video Tutorials" list, for downloading the same image that James uses in his excellent how-to videos.
I understand that these pictures are probably copyrighted but pressing an "I agree" button in a panel spelling out legal consequences if misused , plus a watermark on the image, would, I hope, avoid problems in that direction.
-
I would like to suggest a series of videos via Vimeo/Youtube, giving, say, 101 examples of photos and how to deal with them, for complete beginners. Obviously any tweaks done are subjective, but I believe that there are a common series of tweaks (adjustment layers, filters etc) done to each type of photo. Dont get me wrong- I think that the vimeo series is great, but the emphasis there is showing what each adjustment can do, and I personally (and I presume lots of other beginners too) feel that I would like to know what I could do with a particular kind of bad image. For instance, kids at the beach with water over exposed, image of a gloomy grotto with too many highlights in the water, a completely grey sky, etc. More advanced examples could be: retouching a torn and scratched photo, etc. The photos presently in the Vimeo series are all too good- my problem is dealing with say 70% of the images we (sorry- I!) take and chuck because I dont know what to do with them.
Another idea is whether there could be a way for members to upload images (could be a security problem) and ask for comments from other guys about how to deal with them.
-
Thanks Kodiak for taking the time to do that sound bite!
So basically, until I actually save the raw info as a JPG or TIFF etc. via Export, I am dealing with values and a temporary graphical translation of those values for optical tweaking purposes?
But again- if all I am doing is tweaking values, why do I need to do it twice- once while using the Develop Persona and again after moving to the Photo persona? IOW- why do you have a (for instance) White Balance slider in both Personas?
-
Can some kind person point me towards a video/article that explains what happens during a 'developing' while in raw? I cannot understand why I spend time developing a NEF raw file using Blackpoint, Brightness, Contrast, White Balance etc., press "Develop" to move into the Photo Persona, and find myself faced with roughly the same set of tools! Not only that, but Affinity allows me to jump between Develop Persona and Photo Persona, to do... what? Surely White Balance is- White Balance, no?
Another thing that I find confusing is the word (modified) after developing my NEF file and moving to Photo Persona. Is it still a NEF file? But I thought that a NEF is raw...?
I realize that some folks find these sort of questions strange- since basically all you need to do is wade in and play around with the controls until you get the idea, but personally I need a logical flow to the work I'm doing and so far I've been missing something.
-
has anyone an idea why the icon for healing brush disapeared after using it for 10 seconds?

Cropping- Quirk or bug?
in Pre-V2 Archive of Affinity on Desktop Questions (macOS and Windows)
Posted
Thanks! But I think that there is still a problem here that hasnt been addressed: When cropping a JPEG- after OKing the crop via doubleclick or pressing Enter, the View Tool icon is highlighted and the crop grid disappears, and if another crop is still needed, when choosing the Crop Tool again a crop grid is overlaid onto the new, cropped image for further cropping.
So far- so good.
BUT- if I need to do the same thing with a raw file in Develop Persona, after OKing the crop in the same way as with the jpeg (doubleclick/Enter), the image will crop, the grid will disappear, the View Tool cursor (a hand) will appear, but the crop Tool icon is still depressed!
Also- if I press the View Tool icon, so as to correct this, if I want to crop again and I press the Crop Tool icon again, I get the original uncropped image (from before my first crop) on screen, overlaid by the crop grid.
Any ideas, anyone, on why this happens?