Matthew Gore
-
Posts
5 -
Joined
-
Last visited
-

Zoom at 100% is different to other programs
Matthew Gore replied to Imprex's topic in [ARCHIVE] Photo beta on Windows threads
Of course I understand that I can get a 1:1 pixel by reducing the zoom level for an image if my Windows is set to a higher scaling level, but ultimately that means that the "zoom" level indicator in Affinity Photo will be inaccurate. Most of the time that won't make any difference, in practical terms, but during a busy work day, it's the sort of thing that might lead to an error on my part... especially here at the beginning when I'm still used to Photoshop working differently. It's hardly a deal breaker, but it would be nice if it just worked as expected. -
Zoom at 100% is different to other programs
Matthew Gore replied to Imprex's topic in [ARCHIVE] Photo beta on Windows threads
Just wanted to throw in my two cents worth here: I agree with the commenters above. My Surface Pro 4 has a nearly UHD resolution, but a very compact screen, so it makes sense for me to keep my windows scaling at 150 or 200%. When I open photoshop, though, the images are still 1:1 pixels on my screen. To get the same behavior in Affinity, I have to change my Windows scaling settings, and that's a bit annoying. Keeping the windows scaling at 100% makes the interface awfully small and hard to use. Hope you all decide to work on this! Thanks -
Color Picker with Surface Pen unusable
Matthew Gore replied to Yufa's topic in [ARCHIVE] Photo beta on Windows threads
For what it's worth, I'm using Affinity Photo on a Surface Pro 4 / Win10 and the color picker is working just fine for me with the Surface pen and yesterday's update (.42). That is, if we're talking about the same thing... the color picker in the color palette that is, by default, in the top of the right side bar. - Matt -
I see... the "swap" view is really only intended for the Syncing. Thanks for the quick answer.
-
 Matthew Gore reacted to a post in a topic:
Before/After Labels in Develop Split View Not Switching
Matthew Gore reacted to a post in a topic:
Before/After Labels in Develop Split View Not Switching
-
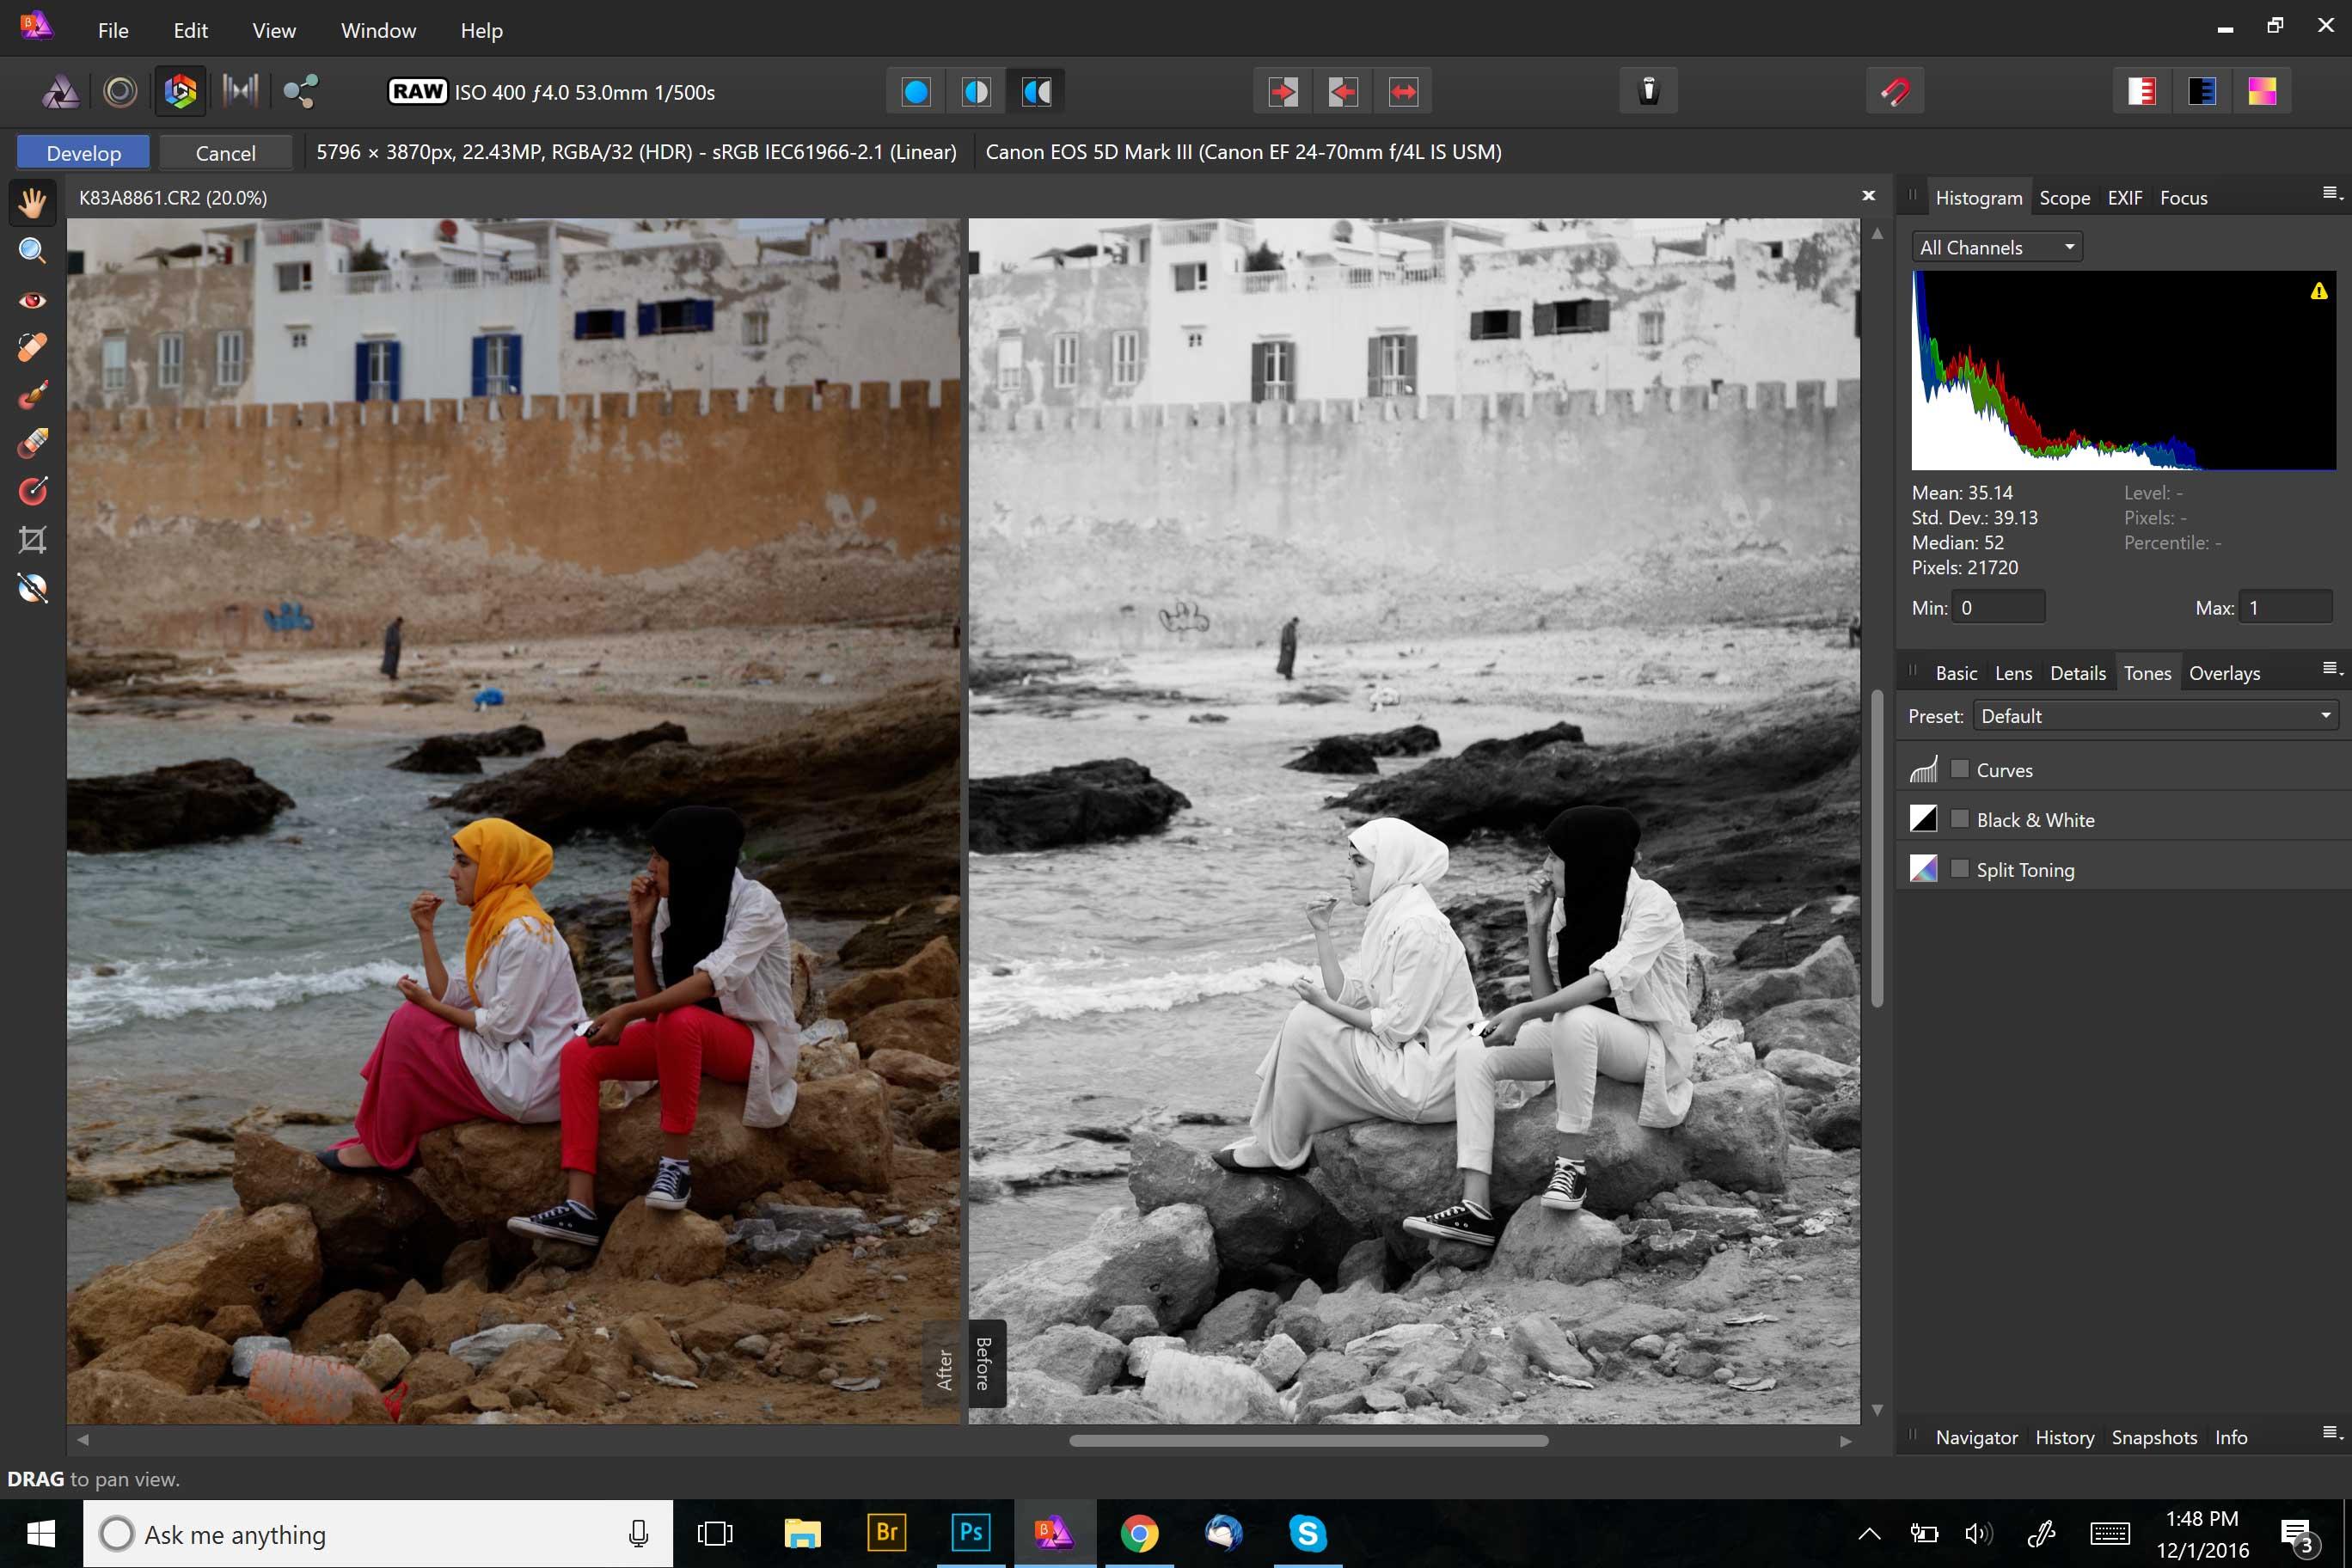
This is a pretty minor issue, if I'm understanding how it's supposed to be used. I wanted to see the Before/After view of an image in the Develop Persona, so I clicked the "Mirror View" icon at the top of the window, and got what I expected... the After image on the left, the Before image on the right. But I prefer the "Before" view to be on the left, so I clicked the "Swap" button to the right. This switched the images, as expected, but the labels did not switch... the original is now labeled as "After". That looks like a bug to me. Or perhaps there's some kind of functionality there that I'm not catching. Thought I'd mention it either way. - Matthew