user_0815
-
Posts
242 -
Joined
-
Last visited
Everything posted by user_0815
-
The only explanation was that layers might cause unexpected results. Technically they can and are willing print a layered pdf but I would have to live with whatever that unexpected outcome is. I'm not experienced enough to know what layers can cause or not.
-
It depends on the export settings. For example using PDF/X-4 you cannot flatten all layers at export as far as I know. I had the same question recently and my solution was to remove all "Layer" layers within the afpup document. You can still use groups to organise in the layers panel but not "Layers".
-
That looks very complicated. However, the OP needs just one layer for the foil content and a base layer below. Could you test this pdf that I have exported? I think it should be what he needs. layers test 1.pdf
-
So the brochure was printed and everything went well. Thanks to all of you for your help! What I have learned is that "Layer" layers won't be flattened at export to pdf/x-4 and need to be removed in the afpub document before export. Otherwise they will be converted to optional content layers and remain in the pdf file. No big deal but it's something to know in advance. Perhaps it works that way because X-4 supports those optional content layer types and in some cases they are needed. But that's just my assumption. However, it would be useful to have that "flatten layers" checkbox active to toggle. I think an option for flattening at export would be a good thing, especially to be sure that really everything is flattened if you have a larger document.
-
Not sure about Designer, but Publisher exports those "(Layer)" layers in to PDF including their name – the colour too if I recall correctly. At export, the optional content option should be checked (otherwise it might create even more layers).
-
I wonder why nobody mentioned blend-ranges (the little gear/cog). That's what I usually use, as I find it the easiest way. 1. Add any adjustment layer 2. Limit to highlights/midtones/shadows as needed.

-
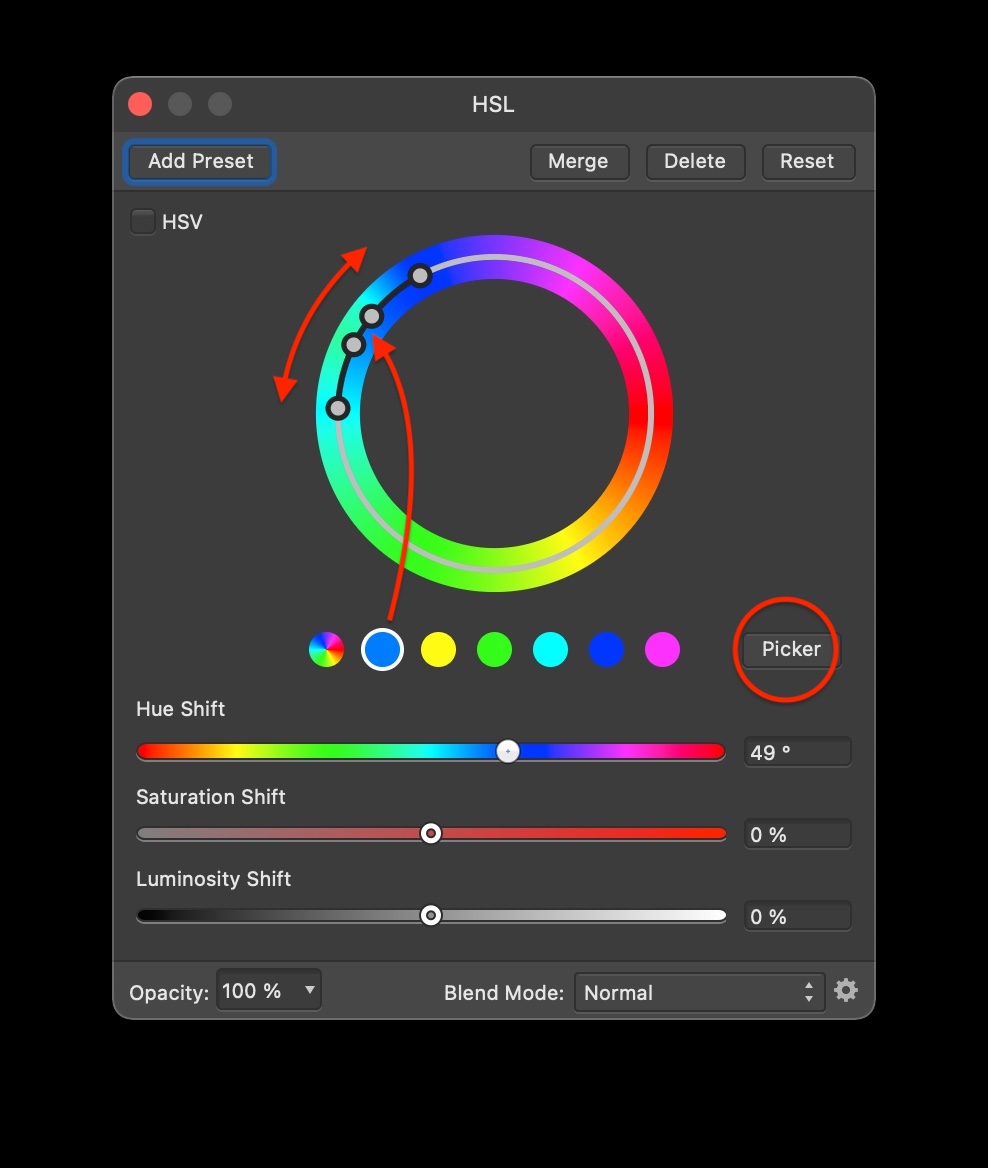
With the HSL Method I don't know a precise way. Only a work-around by using the "Info" panel. Place a sample point on the blob and read what HEX colour it is. Change the HSL slider until it matches what you need. With the second method I would do it non-destructively like this: 1. select the colour like you did. Klick Apply. 2. Create a new FILL-layer: Menu Layer > New Fill Layer and then hit the Mask icon. (With this, you can change this later very quickly.) 3. Click on the fill layer and apply the colour you need in the Colour panel. You can skip number 2. if you only want to change the colour once. However, with a new layer you can change the colour later much quicker because you don't need to do the selection (1.) again. select colour and change-.mov HSL-.mov
-
I don't have Acrobat, thanks a lot for the offer. For now it was sufficient to remove the "Layer" layers from all 12 pages to get my pdf accepted. I ordered a hardcopy proof and we'll see how it turns out.
-
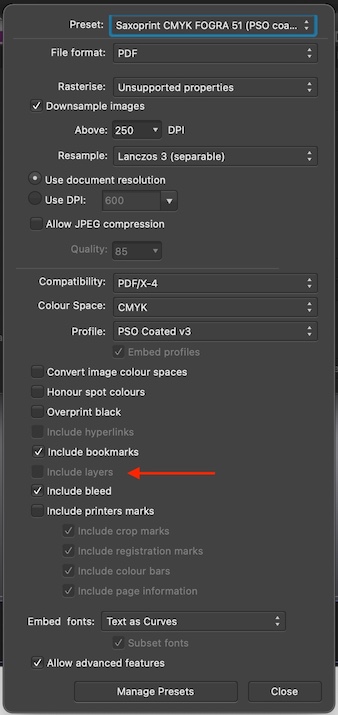
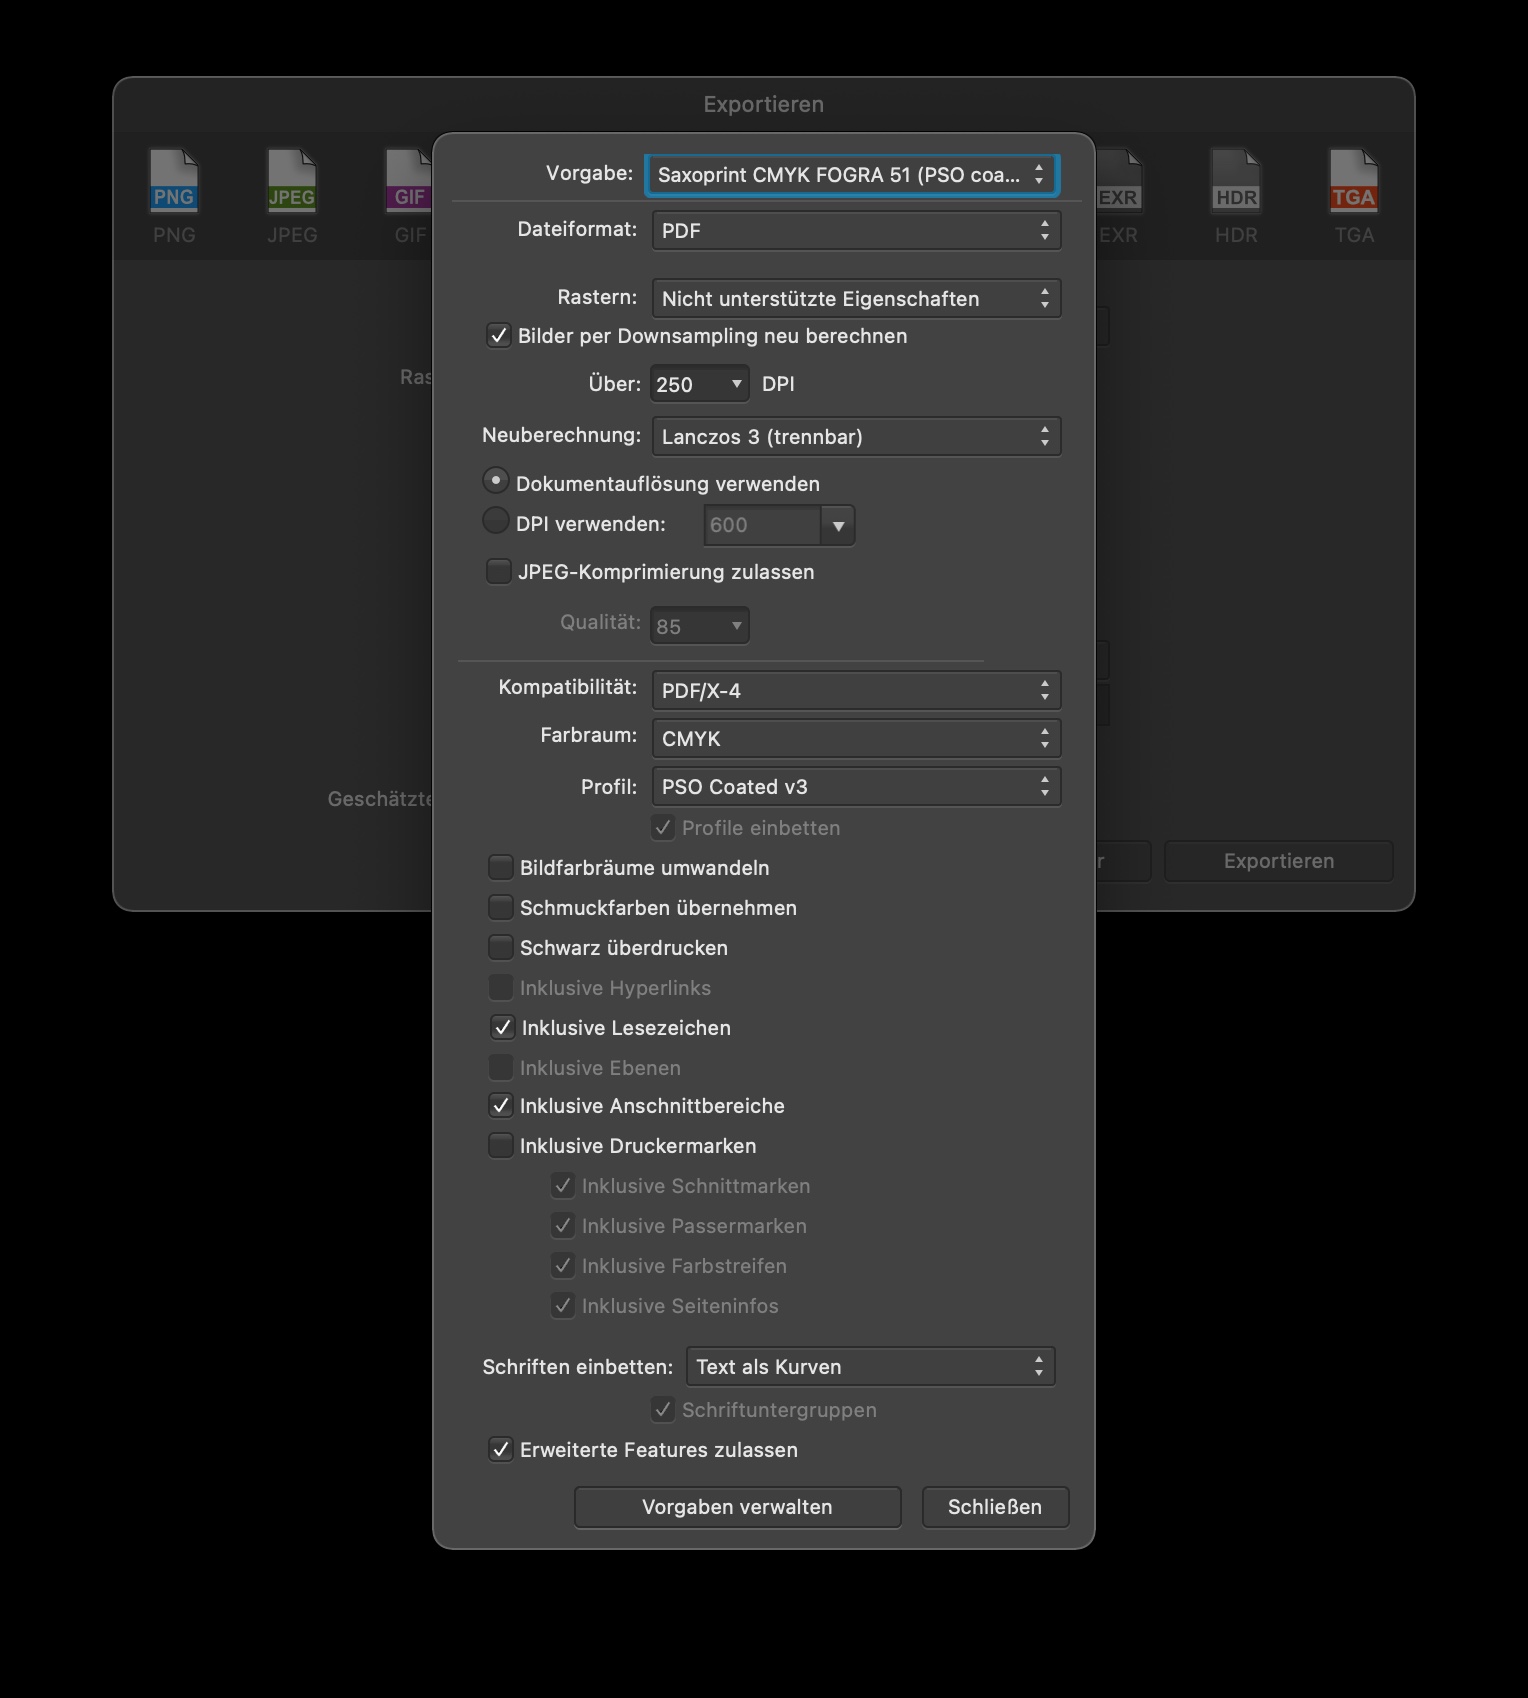
So what I found out that the PDF/X-4 specification actually supports layers – but those are "optional content" layers which does not include "regular" layers as we see them in our layers panel. So, my print shop specified this requirement (translation by me): ...in your PDF avoid multiple layers (optional content), native transparency should be preserved ... Unchecking "Allow advanced features" in the Publisher export panel still got my PDF rejected at the print shop (because the layers were still included). What I didn't find out is this: - In the Publisher Export "More" panel, at the bottom there is the checkbox "Allow advanced features". Is that identical to "Optional content" or does that include more than that? (I assume not because it is not called as such.) - How to export for PDF/X-4 and exclude optional content? Any ideas?
-
Thanks for your replies. I have tried different things for export. Removing bookmarks made no difference. However, removing "Layer 1" in the original document did. Somehow it does not get flattened at export. I moved all elements (text, shapes, images) on to the base/background. "Layer 1" was basically on every page because this 12-page-brochure was originally set up as 2-page spread which I changed to single page view. All the left pages were Layer 1 and all the right pages were on Layer 2. Question: with export settings for PDF/X-4, shouldn't layers get flattened? I assume so because the checkbox cannot be altered.
-
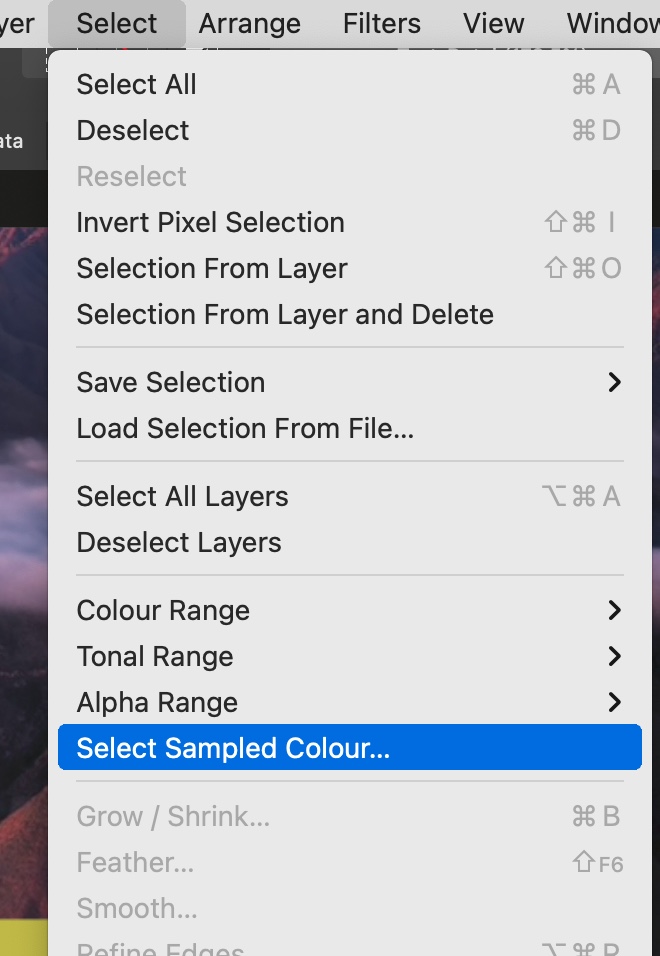
Two ways I am aware of: 1 - Menu Select > Select colour… (the bottom one in that section). Now click and drag on the colour you want to select. All pixels of the colour will be in an actual selection with those marching ants. Now use any adjustment layer you prefer to change the colour. 2 - Use an HSL adjustment and use the colour picker. Click on one of the solid colours below the colour wheel and use the picker to set it to that colour which you want to change. Then dial in the colour you want it to be via the slider. Move those 4 control points inside the wheel to narrow down/feather the selected colour.
-
RAW Workflow
user_0815 replied to stefanjan's topic in Pre-V2 Archive of Affinity on Desktop Questions (macOS and Windows)
This is how I do it in Photo: After doing the adjustments to the raw file, I use that result as a base layer and do not make destructive adjustments to it. I try to do as much as possible non-destructive when I am not sure about having to re-do the raw adjustments. In case that I need to make re-edits to the raw file, I do so and just swap out the base layer (which is the developed tif file). All the adjustment layers on top remain in place. However, there are limits to this approach. If you do some massive changes to the previous raw edit, you might have to re-do most of your edits any way. But if you only make some local changes in the raw edits, this method works just fine. But to be honest, If you get the raw adjustments at least roughly in to the ball park, you should be able to do even major adjustements in the developed tif file. -
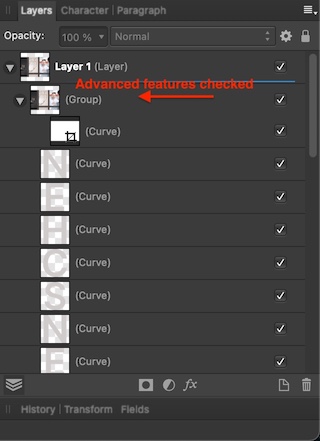
Yes, I have. After inspecting the exported pdf, I found that it adds an additional group to the "crop adjustment layer", basically making a group where the original group is in. Screenshot attached. However, I'll try to upload that variant to the datacheck as well. Perhaps the cause is something else within the advanced features.
-
That's what we have done. I called them and together we looked at the PDF that I submitted. The support person then also asked a pre-press person what was wrong. But nobody could identify the cause of the error. They asked me what software I used and then suggested I should send in all 12 pages as flattened jpeg. But rasterised text is a no-go for me in this brochure. However, since their data check is automated and not done by humans, I'll try out a few different export settings. I'll upload again and again until that error is gone.
-
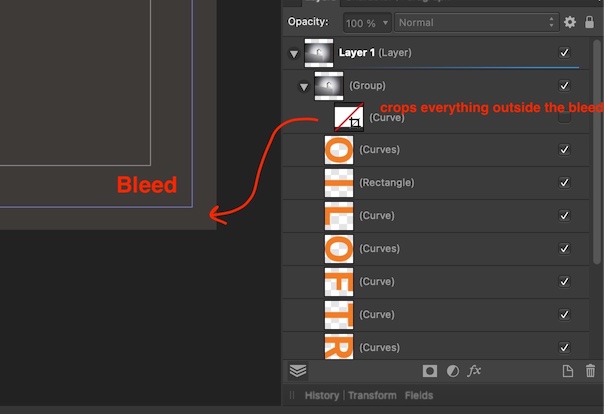
Ah ok thanks I was wondering about that. However, that rasterises really everything inclucing text (converted to paths)? Reducing everything to one background layer would be ideal but Text should be preserved as paths. Is that possible? Thanks, I was thinking about that. I used these settings in screenshot below which is set to PDF/X4. After opening the exported PDF in Publisher, I found that the content outside of the bleed area isn't actually removed/deleted but cropped by a "cropping adjustment layer" (for lack of a better word). See screenshot. Are these the OCG? I'll contact the print shop and ask whether that is what they mean. EDIT: I have contacted the print shop support. They couldn't tell me what the additional layers are that I should flatten. Only that their automated data check outputs this error.
-
Feathering
user_0815 replied to bluntlarry's topic in Pre-V2 Archive of Affinity on Desktop Questions (macOS and Windows)
Yes, the checkbox at the very top. -
Feathering
user_0815 replied to bluntlarry's topic in Pre-V2 Archive of Affinity on Desktop Questions (macOS and Windows)
Try turning off contrast edge detection in the refine process. Then it will only refine the original election edges. -
Hi, I am currently submitting a pdf to the print shop. It is a 12 page brochure with lots of images, text and shapes. Their data check rejected the file because it contains layers. They say it should be flattened. I couldn't find how to export as pdf with their necessary requirements, perhaps someone can give me a hand: – PDF/X-4 compatible (pdf 1.6) – Avoid multiple layers (optional content) – keep native transparencies Any ideas how I can achieve that? Thanks!
-
Perhaps too much for the original question, but with the Contour thing you can also add the shadow at the same time. You can control almost every detail of the stroke, the shadow and the transition. Use the opacity of the individual colour stops for more soft or harsh edges.
-
Thanks Bruce, very useful Info. Now I understand it much better.
-
Hi, sorry for a more basic question as creating things in Designer and Publisher for print is still somewhat new for me. My question is about that single slider when using global colours. On Screen it makes that colour "brighter" or "lighter". But what does it technically do for the printing machine? There is no white in cmyk so I assume it reduces the amount of "paint" that is applied on paper. Is that correct? What is the difference to the opacity slider? Can I safely use it to create different shades of my main colour (for example on business cards or letterheads)? Thanks!
-
Hi, is there a way to see any metadata of images that are placed (embedded) in a publisher document? For example when I want to know the pixel dimensions or colour profile of a particular image used? (Or actually all of the images...) Thanks!
-
Ok, that's where the profiles need to go (Thanks Walt): ~/Library/Containers/Affinity Publisher/Data/Library/Application Support/profiles
-
Thanks. On my Mac there is no such folder in the user library. After creating it manually, it won't be recognised. There is a folder /Application Support/Affinity Photo... but it does not have a profiles folder although I have imported profiles previously. Is there a workaround for this? Would it work to open a Publisher file with Photo, then import the profile, and then continue working in Publisher?
-
Is there anything new on this topic? I'm trying to install the PSO uncoated v3 FOGRA52 but it won't show up in Publisher (Big Sur 11.2.1).