AndiR
-
Posts
11 -
Joined
-
Last visited
Everything posted by AndiR
-
How to Create DXF File?
AndiR replied to AndiR's topic in Pre-V2 Archive of Affinity on Desktop Questions (macOS and Windows)
Thank you, gdenby, for taking the time to try and find me a workaround. Just before I read your reply I received an answer on another site. I used CloudConvert https://cloudconvert.com/svg-to-dxfand it seems to have worked fine - quick and easy! -
I've been using AD to draw quilting designs which will be sent to a robotic quilting machine. In order to work with the robot, the files need to be in DXF format. I know we can't export as DXF, but is there some way I can convert a file to that format? I tried saving as SVG and then using Inkscape to convert, but I really don't know enough about Inkscape to be sure I have the settings correct. You can see the difference of what I exported from AD as a SVG, and how Inkscape exported it to a DXF - they don't even look close! Any suggestions would be most welcome.

-
How to Join Curves?
AndiR replied to AndiR's topic in Pre-V2 Archive of Affinity on Desktop Questions (macOS and Windows)
Thanks, all. I still have the problem on my original curves. However, when I re-drew them (I created a circle, converted it to curves, then split it), it didn't seem to happen. I'm thinking somehow I got an extra node in the first version (even though I created it the same way). Alfred, unfortunately deleting the extra node didn't work as it changed the shape of the curve, which I was trying to avoid. Andi -
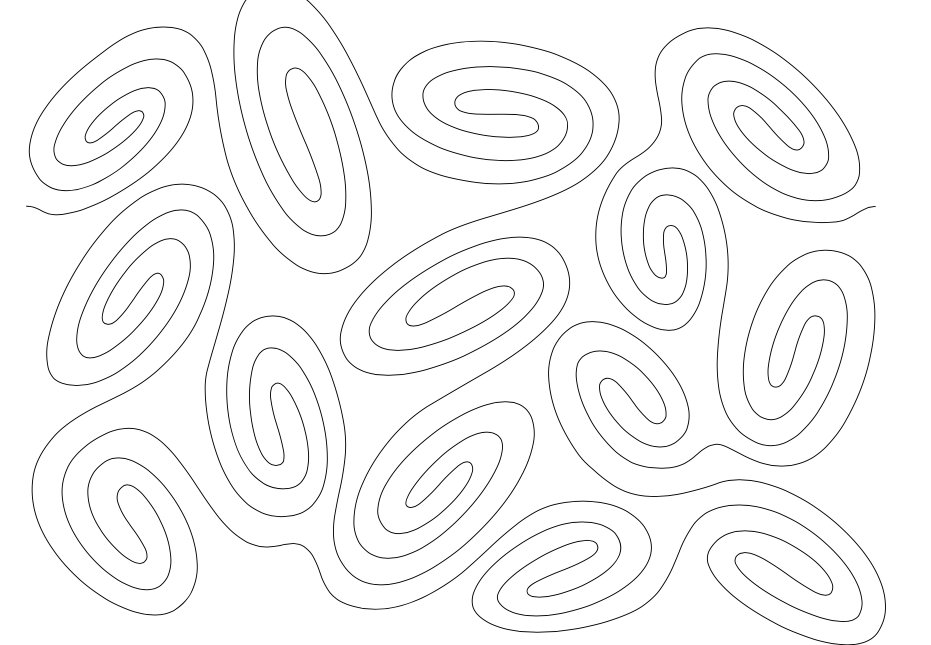
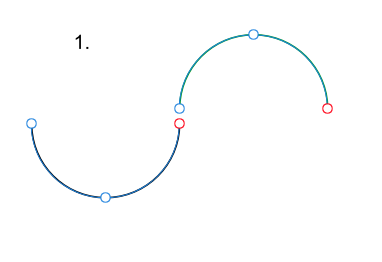
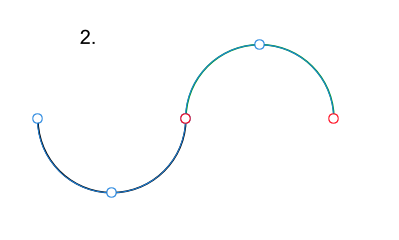
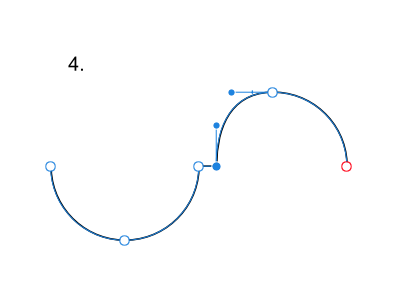
I'm hoping someone can help me figure out what I'm doing wrong when trying to join curves. 1. I have two separate curves 2. I have snapped them together 3. I've selected both curves with the node tool and clicked "Join Curves" 4. But if I click on that center node and drag it, it's still actually two nodes. I'm trying to make it one node. Any ideas??
-
Thank you Stephan.
-
Is there a way in AD to move my 0,0 point on the rulers to a specific point in my document? (I want 0,0 to snap to one of the nodes of my design, not be at the top left corner of the workspace). Andi
-
Thanks Alfred!
-
Got it! I must have typed something wrong yesterday as it didn't seem to work, but now it does!! But there is no option to save as a BMP. If I save in another format I can't use it as a fill. Sorry to be so full of questions, but if I can get this to work it will help me immensely and I won't have to revert to using AI ;)
-
So that worked okay although it's a bit awkward. I had to add 8+ in front of the current value in the Transform panel to go to the right or bottom. Then had to add -8+ if I were going up or to the left. Once I have my tile, how can I save it in AD as a bitmap to use as a fill? Thanks for your help, Alfred! Andi
-
Thanks, Alfred, that worked well to fill the shape! But what I REALLY want to be able to do in Affinity is create the seamless tile. I only have a trial version of Illustrator, and I MUCH prefer working in Affinity :). Is there some way to easily do the seamless tile other than manually measuring and moving each and every motif? Andi
-
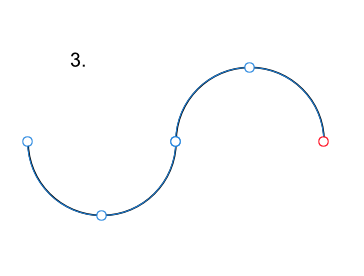
I'm trying to make repeating patterns or tiles but do not know how to do it in Affinity. In Illustrator I set up a square artboard (say 8"), place a motif, and then I can double-click the selection arrow. A pop up allows me to make a copy of the motif and place it precisely 8" to the right or above or below. Once I have all my motifs placed, I make a square (no fill, no stroke), place it at the back of the layers, and select all. Drag these into my swatches and I have a new pattern that seamlessly fills any size object I create. (See sample tile) Is there a way to do something similar in Affinity? Thanks, Andi