

douglasrthomson
-
Posts
52 -
Joined
-
Last visited
Posts posted by douglasrthomson
-
-
2 hours ago, Dan C said:
Thanks for your report @Lyndhurst & @douglasrthomson!
I can confirm that our team have recently identified a crash that can occur when right-clicking a misspelt word, after navigating to said word through Preflight.
This crash has been fixed in our latest beta version, which if you want to test for yourself, you can find out more regarding here -
I hope this helps
")
Great. Many thanks for your reply.
-
I am having the same problems on my MacOS. Going through the pre-flight spell check causes the application to crash.
-
9 hours ago, Dean C said:
I have both Designer v1 and v2 installed, and when I examine the PDF export options I see that, for me, both versions have the "Allow Advanced Features" item selected. I don't recall having ever changed this setting. So... 🤷♂️
Curiouser and curiouser!
-
Sorry for going on about this. Was the 'Allow Advanced Features' setting always 'on' by default in Affinity 1x? I was looking at some old artwork PDFs generated in Designer v1 (that include transparency and gradients) and they are fine. I know I never selected 'Allow Advanced Features' previously.
-
1 hour ago, walt.farrell said:
I don't think I understand that comment.
From the prior discussion, wasn't it explained that they are supported, but you need to "Allow Advanced Features" in your Export settings?
Hi Walt, thanks for your reply.
Apologies, I realise I'm not being clear. What I don't understand is, if I "DON"T Allow Advanced Features", why does the SVG embedded file render perfectly within the PDF - but the native vector graphics rasterise themselves? Especially as the SVG is exactly the same vector artwork.
None of my other vector software, by default, rasterises its vectors on PDF export. Vectorstyler doesn't, Illustrator doesn't. Designer and Publisher do.
I cannot actually get Illustrator to export the file with any rasterisation. I've tried... and it never rasterises the vectors.
-
Actually, thinking about it, why can I export an SVG perfectly, re-import it and then export it placed within a PDF - without problem. But without exporting as an SVG, the native vector files are unsupported by the PDF exporter. This doesn't make sense.
-
Also, why - by default - isn't allow advanced features switched to on?
-
29 minutes ago, Hangman said:
Hi @douglasrthomson,
When selecting the 'Digital - small file size' preset in the PDF export window add a check mark against 'Allow advanced features' towards the bottom of the available options and you should find the file exports without rasterising the transparency fade...

This seems to work (I'll do some other tests). Has Affinity export always been like this?
Thank you very much for your help.
-
Dear Affinity and fellow forum members
I'm having issues exporting PDF vector artwork from Design and Publisher. I've attached example files to help explain.
I've designed a "logo" in Designer (file:logo) that is all vector curves. It has a transparency fade within the design.
When I export as a 'Digital - small file size' PDF from either Designer or Publisher, the areas featuring the transparency fade rasterise. This happens with all the PDF export options. If I export as SVG, nothing is rasterised.
If I open the SVG in Adobe Illustrator and then save as a PDF, the resulting PDF has nothing rasterised.
If I set up a Publisher document (file: Publisher logo) and then...
Import/place the native Designer file, and also Copy and Paste from Designer into Publisher, the fades rasterise.
If I place the original SVG or the Illustrator generated PDF, everything is fine and nothing is rasterised. (file: Publisher logo.PDF)
This is a new issue to me. I asked a fellow designer on a different computer to replicate this and he has exactly the same problems - so it's not unique to my set-up.
Any thoughts as to what the problem could be? I have a project where there are dozens of 3rd party logos plus graphics with fades etc and I don't want to have to save them individually, export them as SVG, eps or open and save from illustrator, and then re-import them.
Pretty sure I didn't have this issue in v1.
Many thanks
Logo.afdesign Logo_Export_from_Designer.pdf Logo_Export_from_illustrator.pdf Logo.svg Publisher logo.afpub Publisher logo.pdf
-
13 minutes ago, anto said:
This is a problem with external monitors. Not solved yet. Try to use Windows-->Zoom.
Thank you for your reply Anto. This helps a lot - and works for me.
-
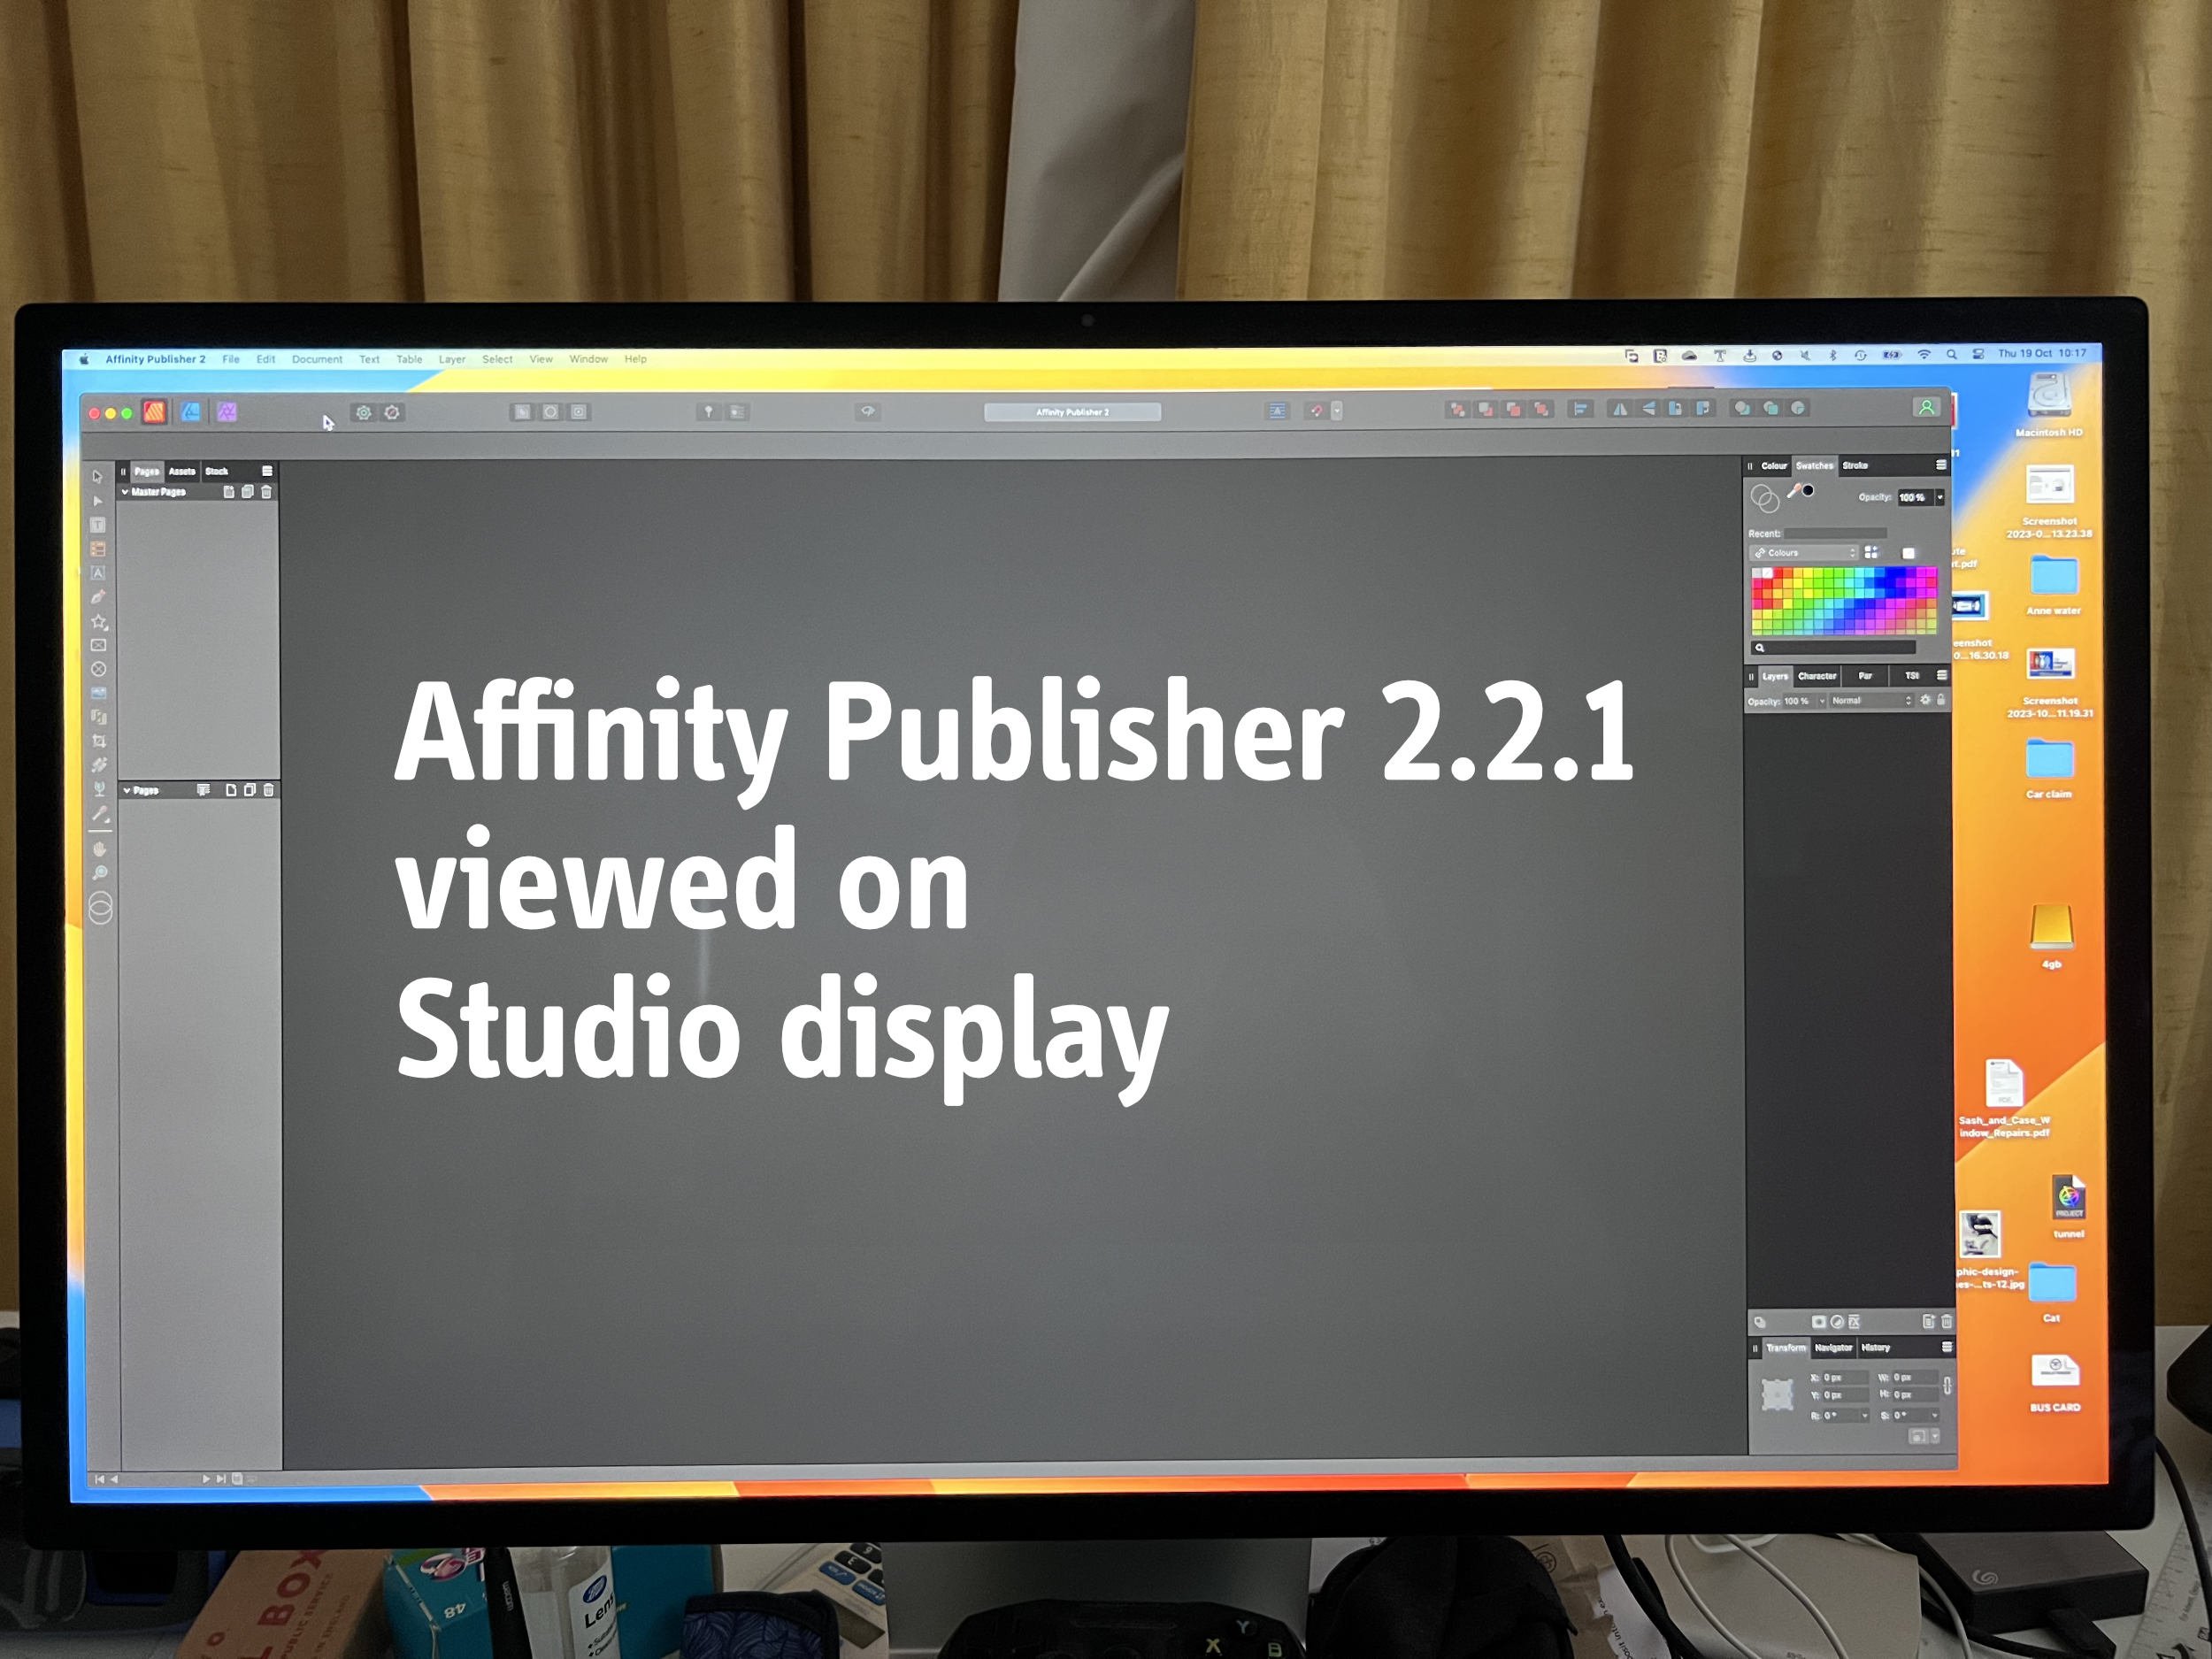
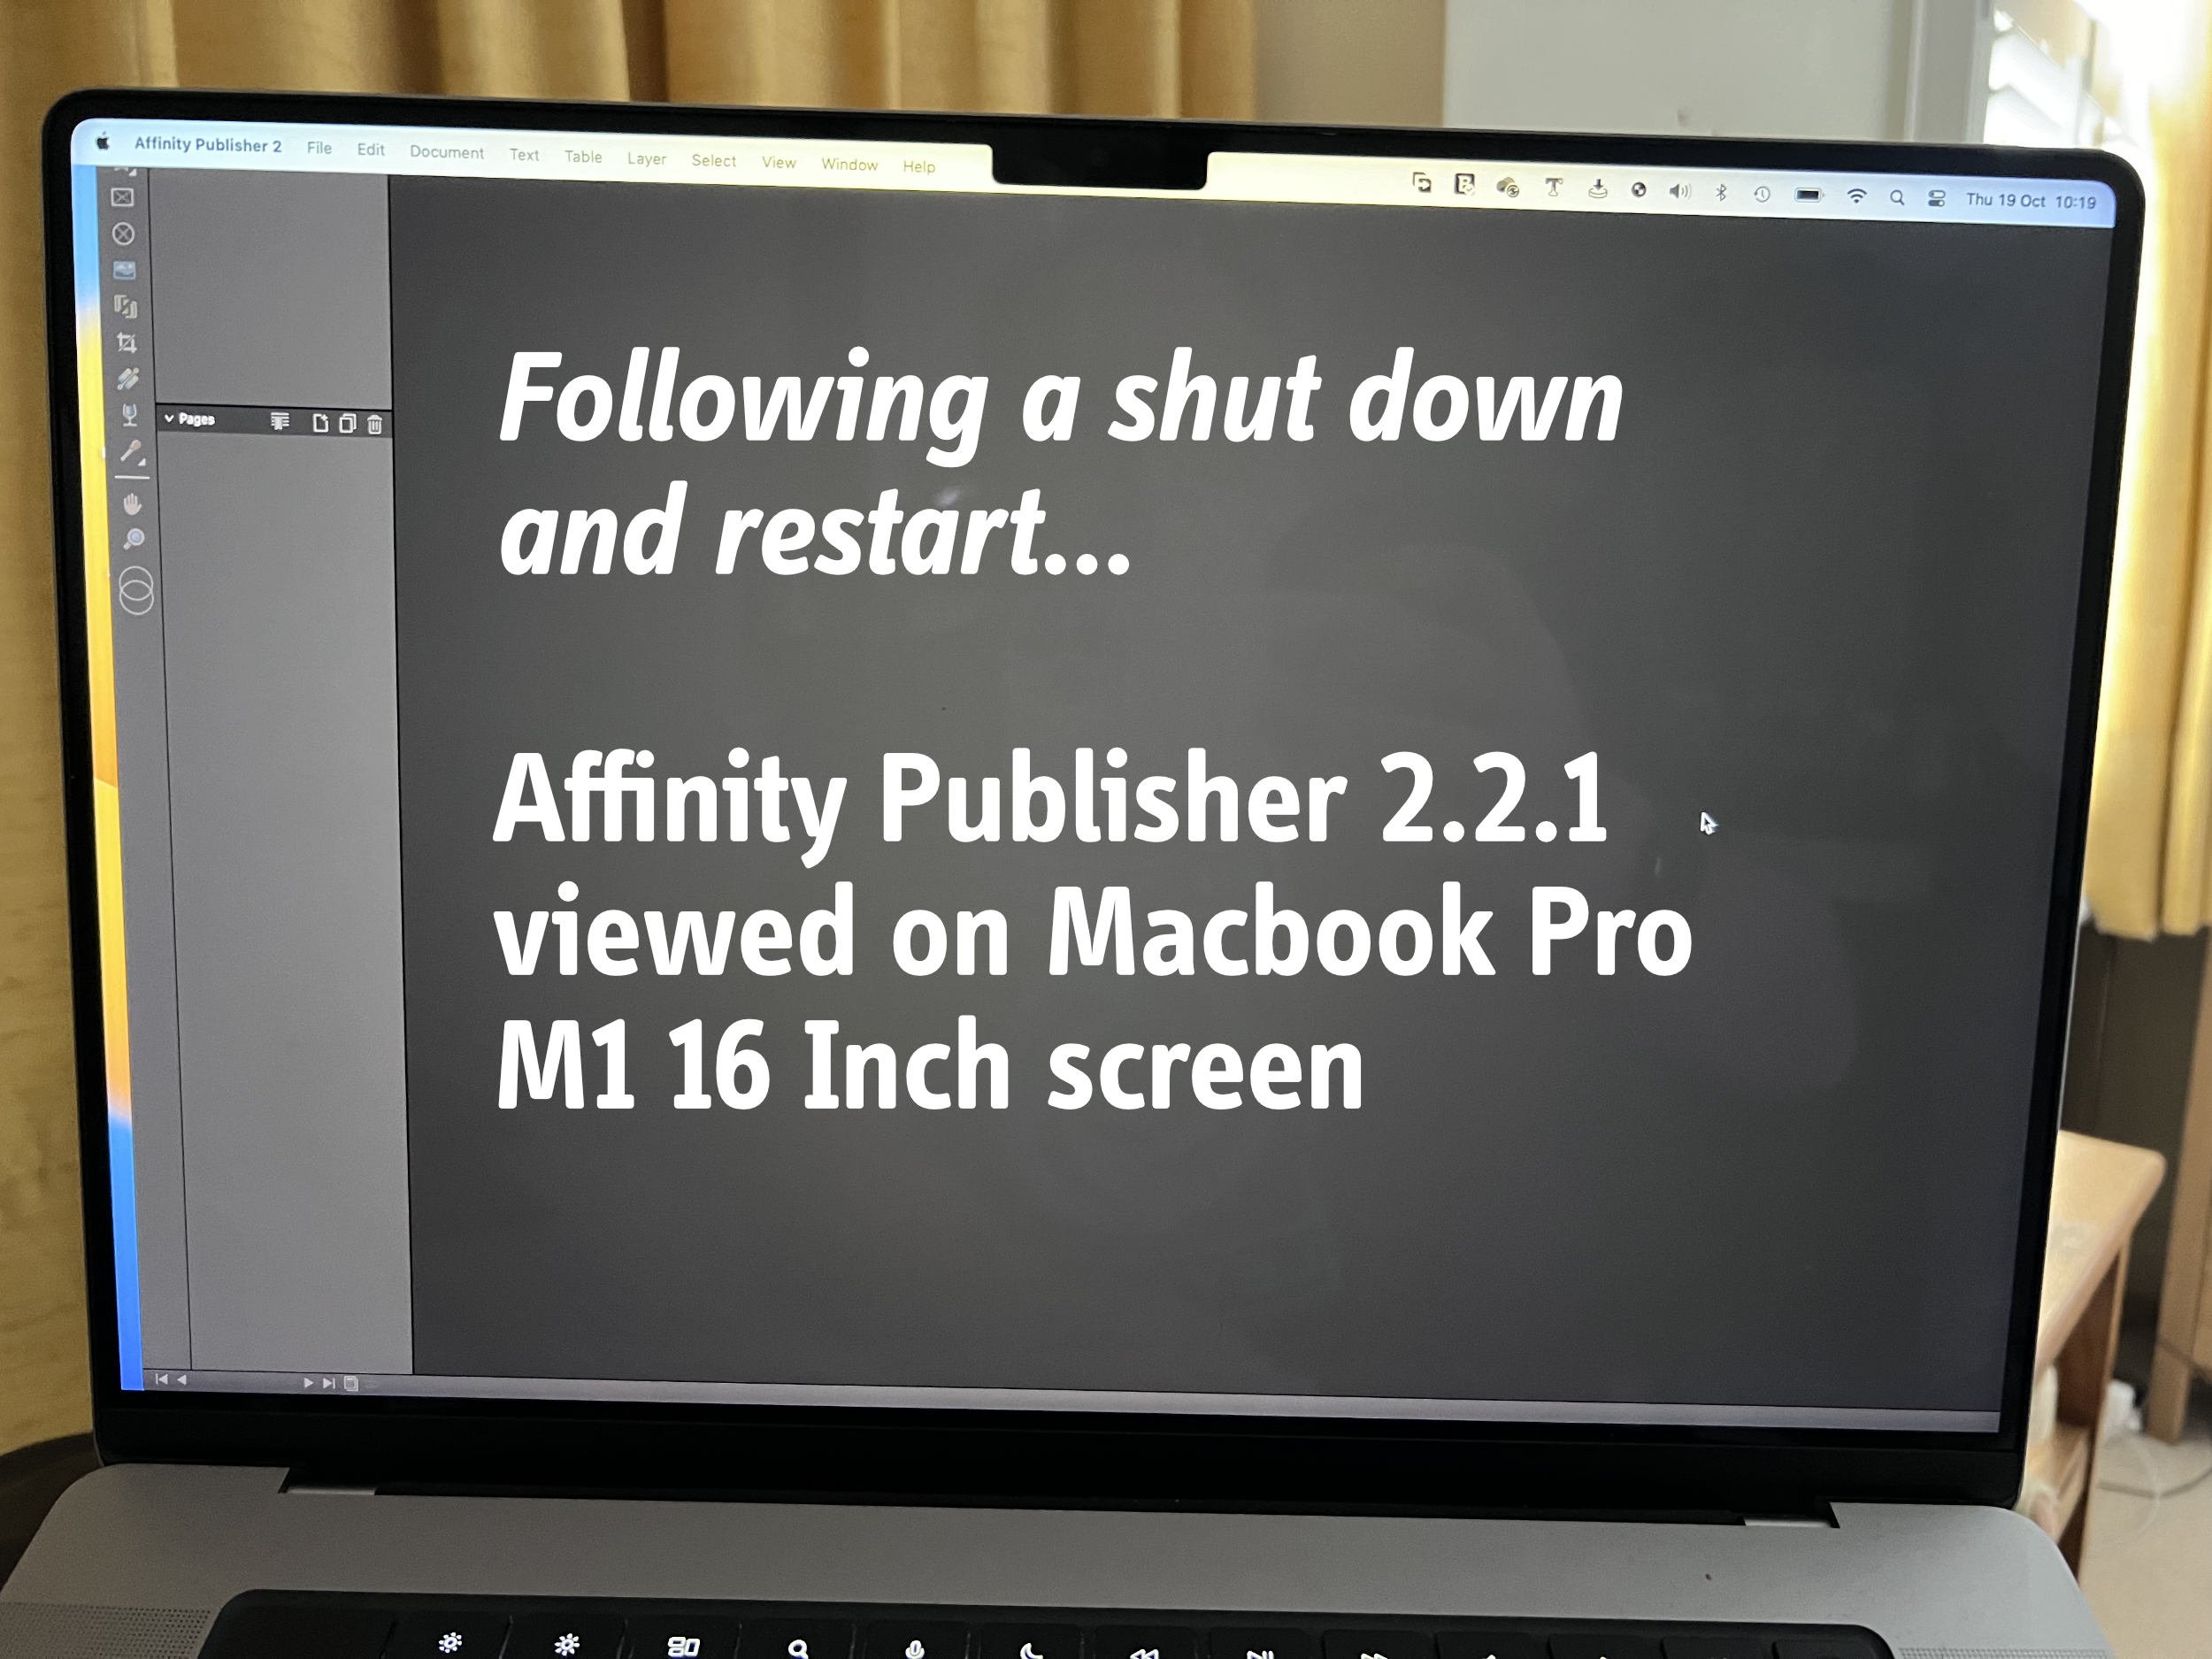
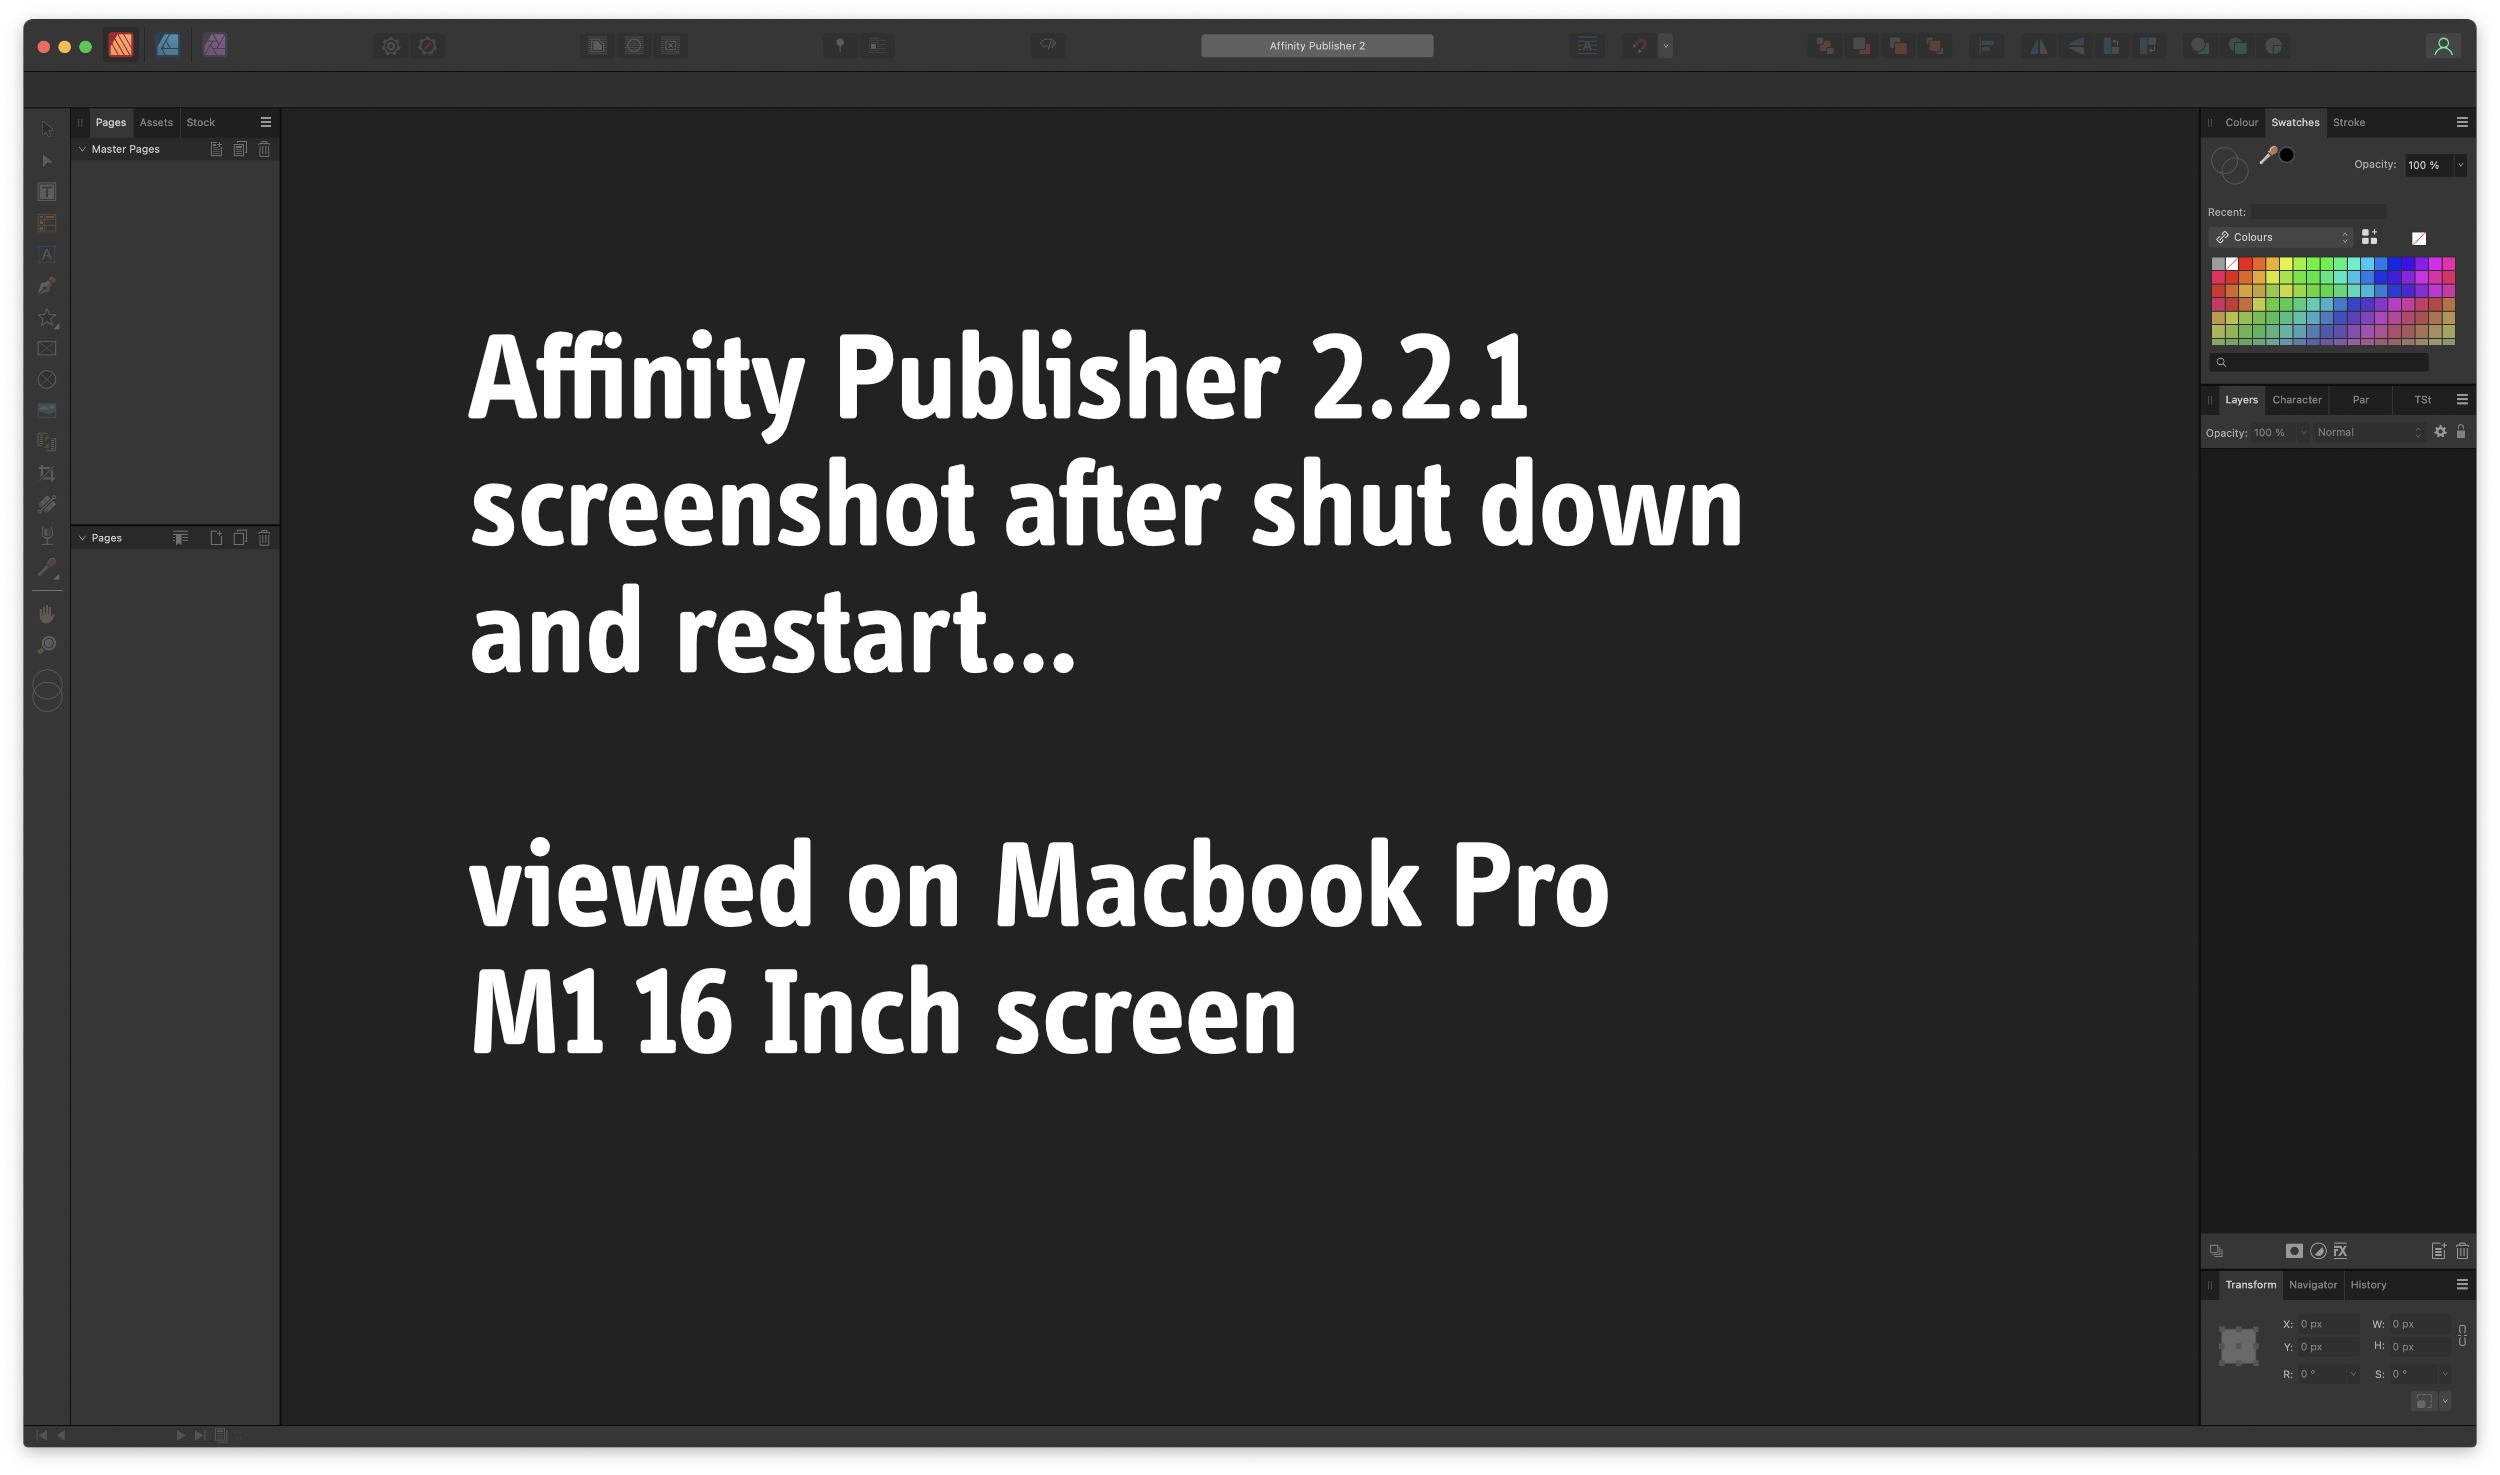
Dear Affinity, this still hasn't been fixed.
If I work on any of the three apps via my Apple Studio Display and then decide to work solely on the laptop, the Affinity apps STILL DO NOT RESIZE to fit the laptop screen. It's like trying to view an A3 sheet of paper through an A4 aperture. I have to try and grab a corner of the app window and shrink it - which isn't easy.
I've attached 2 photographs showing this. Weirdly, if I take a screenshot of the oversized apps, the resulting screenshot is correct. So the screenshot is not showing what I'm actually seeing.
Please fix this. It's pretty basic stuff.
Many thanks
Dougie

-
11 hours ago, Bryan Rieger said:
In using macs for almost 40 years (with dual monitors for 25) I’ve never had this problem before.
I'm having this problem too. It is only happening with the Affinity suite. All my other apps are resizing without issue.
-
1 hour ago, thadeusz said:
@serif
If you still listen and find this topic at least not too boring, PixelmatorPro just released a Motion file export option. I'd love to see that too - even I have the solution mentioned above running for now. At least on the Mac it's a good idea to have Affinity and Motion/FCPX side by side.
Latest update for PixelmatorPro adds Motion support: https://www.pixelmator.com/pro/updates/
(I'm not using it and not planning, but I like this new option - and some of their AI functions)I’ll be buying pixelmator just for this function. Its been long awaited and looks excellent. I use both Motion and AE and you really need to stick with Illustrator when using AE. They integrate really well. Hopefully pixelmator may give us similar integration with Motion.
-
10 hours ago, JET_Affinity said:
Tap Ctrl-A to 'select all'. That will select all the nodes of the highlighted path(s), but nothing else.
This is what I meant. Thank you. Having used Illustrator for years I have a lot of 'muscle memory' and I couldn't figure out how to do something as simple as this.
It would be nice if there was a key+click combination to select all the connected nodes (and paths).
I had posted a couple of videos explaining what I was trying to do. I've edited that post and removed them as you have answered my question.
Cheers.
-
-
Hi there,
Has this been improved - or is it on the horizon for development? I need a quick way to select all the neighbouring nodes on a path so I can delete them (like option+ click with the node tool in Illustrator).
I don't want to spend time click-selecting individual nodes or trying to select them with a lasso tool.
I'm still having to paste AD work into Illustrator to do this kind of thing. It literally takes a second to do it within Illustrator whereas it can take minutes to select all the nodes manually in AD - particularly with complex designs.
Is there is a way to do this that I've not understood?
Cheers
-
I just renewed my subscription today (I have some legacy stuff I need CC for). I used the 40% off link here (https://www.creativebloq.com/features/adobe-deals). - UK only I think.
I negotiated 40% off last year too. If you need CC, negotiate. Never pay full price.
Having said all that, I'm about 90% Affinity now with my workflow. -
23 minutes ago, Stephen J Whitworth said:
I log onto the web site and whether I like it or not the local currency is displayed and then come to buy the books only then do I find out they cannot be shipped here. You deliver and sell the software what is the point without the guide which seems absolutely necessary to learn about it and why is this not even available through Apple. I will be making a similar complaint to Apple that the guide is an integral part of the software and without it makes it difficult to use. Perhaps they should withdraw it from their Itunes store and is it really BEYOND the scope of Serif to supply the book even through a local bookshop in an ENGLISH speaking country? Seems so. Stop making excuses and make it available. Expect a post on Apple recommending AGAINST buying the software as Serif cannot even supply the book in any form to support the software.
You could try the help files that are included with each application? This is the first place to start learning any application.
If that doesn’t work for you, why not try some of the official video tutorials? You can find them on the official affinity site. Here is the link: https://affinity.serif.com/
If that doesn’t work for you, try google.
I’ve created some clickable links for you here (just in case you’re having any problems).
https://www.google.co.uk/search?q=affinity+photo+tutorial&ie=UTF-8&oe=UTF-8&hl=en-gb&client=safari
Merry Christmas
- jmwellborn and R C-R
-
 2
2
-
53 minutes ago, kaffeeundsalz said:
Hi @dinosaura,
we often use the Add Noise filter here in magazine publishing to give digital photos a more analog, grainy film look. Provided that you do offset printing with a standard 300 dpi, we had good results with a value of 9-11 percent for a very subtle noise effect. We'd then go as high as 25 percent for a more grainy look. Added noise is much more visible on large single-colored areas. This means that for images with very few details, we'd generally use lower values. Also note that the Add Noise filter doesn't have a grain size slider which limits the types of effects that you can achieve.
Hope this helps.
All the best
kaffeeundsalzThanks for the info. Very useful.
-
I would like the X-3 2002 export option added to Affinity Designer too please. The ability to flatten transparency from .pdf export would be helpful.
-
Interesting discussion about imperial and metric measurements on (UK) Radio 4 yesterday.
https://www.bbc.co.uk/programmes/b0bk1gsy
-
Thanks for your reply.
-
Hi all
Does the Left-handed mode only change the interface - or does it have an effect on palm rejection?
As a leftie, I've had apps in the past that I've had to use 'upside down' as the palm rejection only worked properly for right-handers.
Thanks.
-
Being from the UK (and being of a certain age) I buy my fuel in litres but I measure fuel efficiency in miles per gallon.
I measure distance in mm, cm, inches (but not fractions of inches), feet, metres and miles.
I measure my food weight in grams and kilograms but I measure my body weight in stones.
To me though, the most important measurement is the pint!

Canva
in Affinity on Desktop Questions (macOS and Windows)
Posted
Oh well. It was fun whilst it lasted. As soon as you become a £100 a year subscription service (which you will), I'll just go back to Adobe.