

Moksh
-
Posts
30 -
Joined
-
Last visited
Posts posted by Moksh
-
-
Hi
So I worked on a design last few days and somehow the project file has disappeared. I have the exported png file - however the project history - under OPEN RECENT doesn't even show the project in the list ! I don't remember deleting the project.
Is there a way to recover symbols from the lost project or will I need to re-do the whole thing ?
Wondering if upgrading to Mojave on Mac has anything to do with it.
Thanks in advance
-
26 minutes ago, JimmyJack said:
@moksha I think the guys are onto a good process! I just think the geometry needed is something more like a tear drop
 ... .
... .
Thanks Jimmy Jack - Yea I had tried with Tear drop yesterday but was struggling with the process - With the replies today, however - looks like am going to succeed
Thanks again for the support and guidance !
-
-
Wow
Reglico - great link by the way.
Using the video link - I got to
Close but not quite
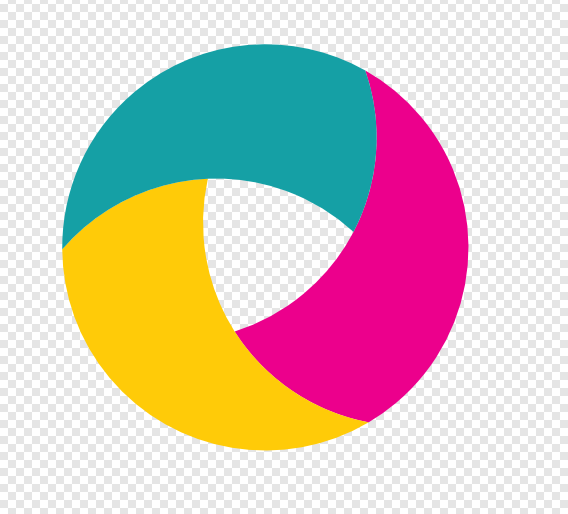
firstdefence - Looks like you're mighty close - Wow - thanks - just wondering if we can get the curvature like the pic below - the ref
Really loving the support
-
Hello Callum,
Here's a copy of the project.
I've created one vector logo - however it isn't a perfect circle - so was trying to recreate it again.
thanks
-
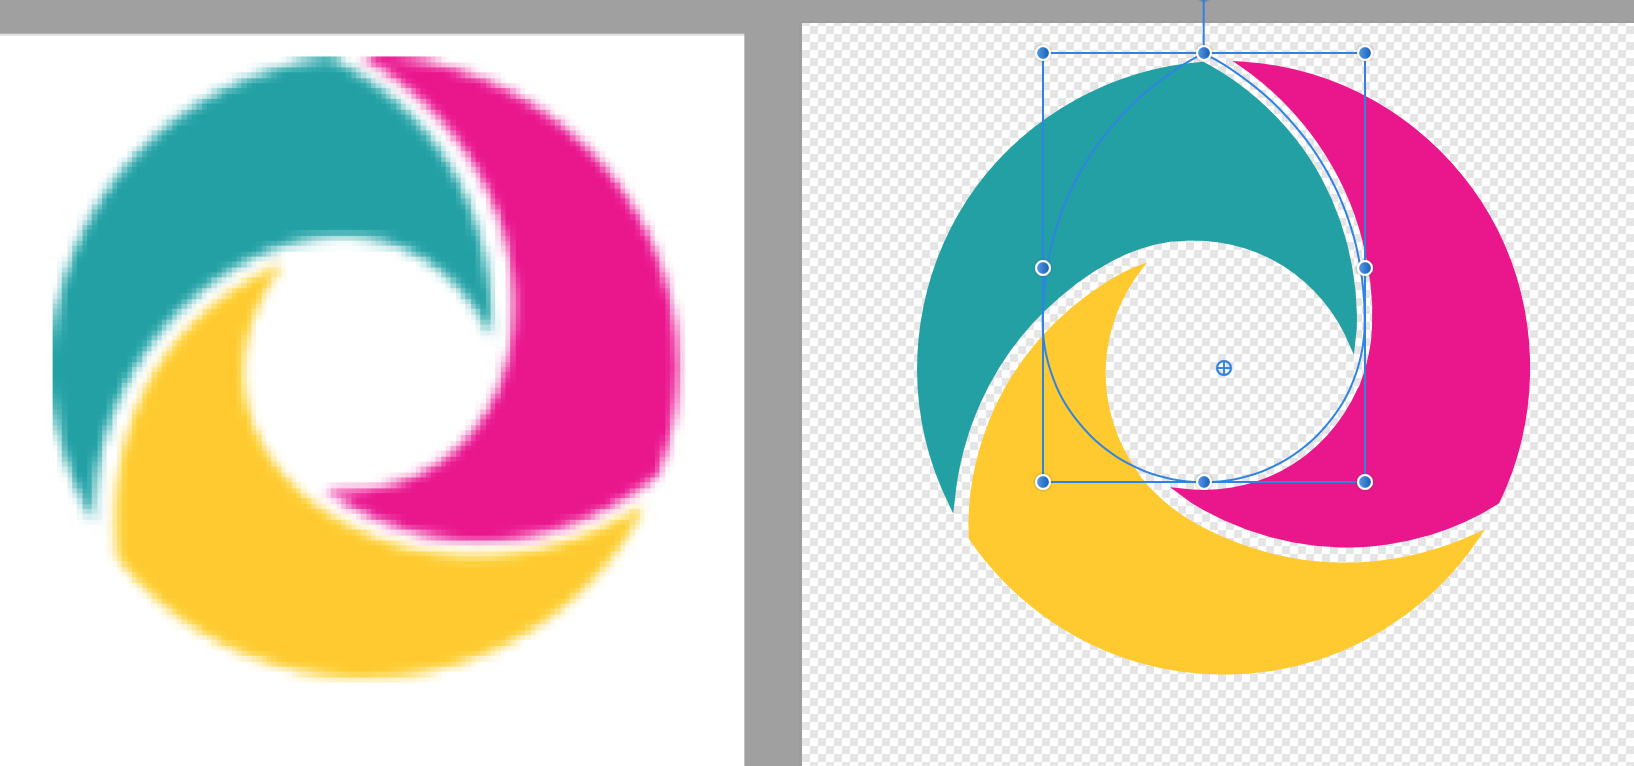
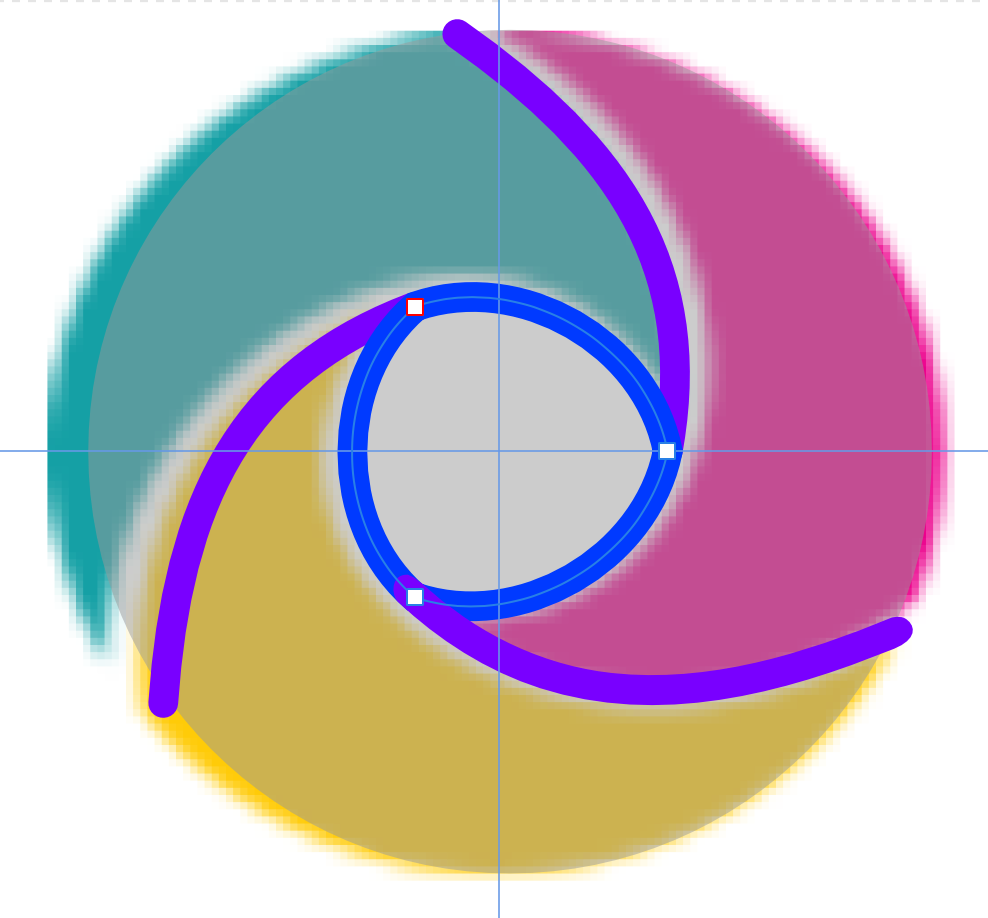
Hello
Am trying to learn and achieve a logo copy by drawing curves and am running into issues.
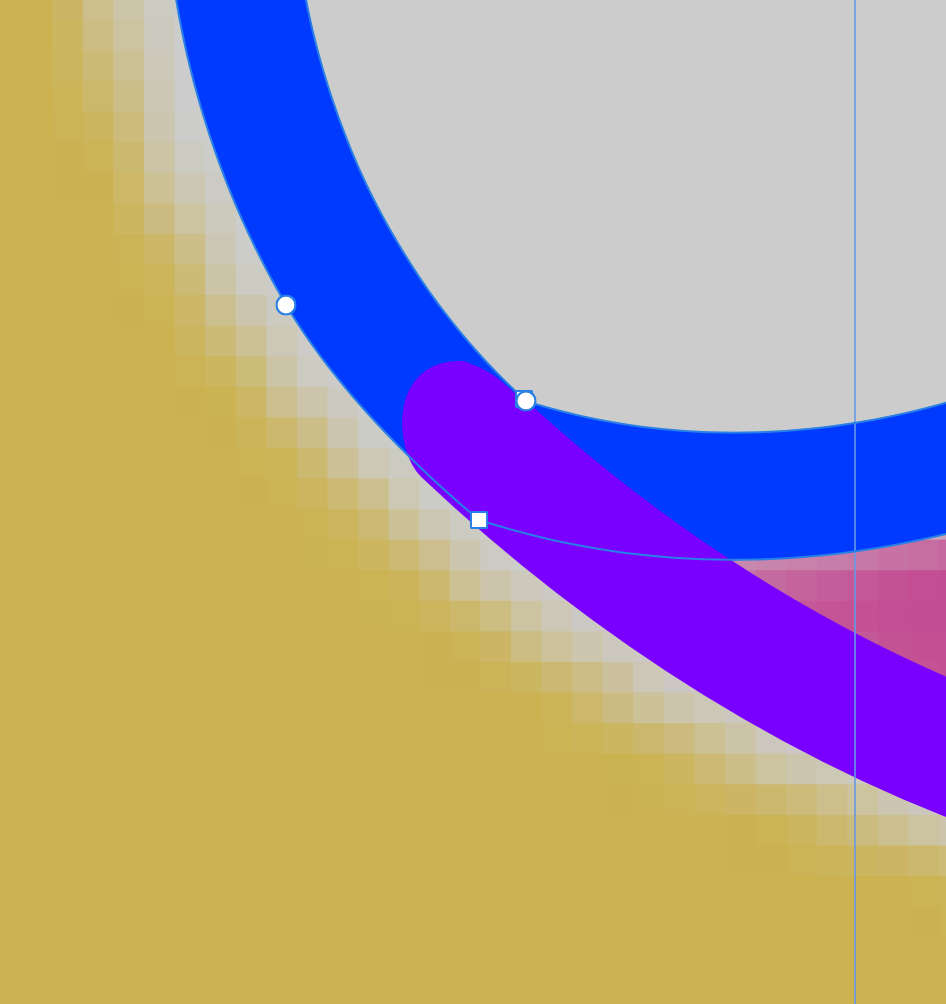
1. Is there a better way to achieve this logo trace ? the figure 1 is what am trying to achieve and have drawn curves to match the underlying drawing. I propose to subtract curves from the underlying light grey circle to get solid bodies.
2. When I go and expand the stroke to add/combine the curves for subtraction - I get the figure 2 issue with uneven boundaries. Can someone help me with combining the curves or show a better way to achieve the result ?
thanks
-
Hi
Is there a way to delete the line segment and nodes connecting them easily.
Using break nodes - is proving to be cumbersome in cases esp when nodes overlap - making simple tasks difficult and impossible in some cases.
Attached is a simple example of a shape created by joining mirror images.
The centre line is unwanted and break nodes isn't working for me.
Any simpler workflow is appreciated :)
Also - join shapes is resulting in this centre line in all cases - when stroke width is zero - is there a workaround to eliminate this whilst joining shapes ? In this case am using Fill - so stroke is not required...
Thanks
-
The Windings font has a star character so you try using it as "text on a path"
Note: In the attached, at the end, I converted the Windings font to curves. Just in case you do not have the font, and it would have looked a bit weird
Thanks Carl
Ya understood that - however Since I've designed the 'g' - the text path is making things more messy - may be I need to check out the tutorial to get a better handle on this..
-
1. Type the letters
2. Convert to curves
3. Select all the individual letters in the "Group"
4. Use the Node Tool to select all the bottom nodes of the letters
5. Drag the nodes down to extend the lower half of all the letters (about 0.5 inches in my example.)
5. Add an eclipse on the lower half of the letters, colour it white to hide the bottom of the letters giving the curve to them
PS Individual nodes on each letter can then be tweaked as needed (or not)
Thanks Carl
I'll give it a go...
Wondering when will the warp tool would be available for the same...
-
1. Type the letters
2. Convert to curves
3. Select all the individual letters in the "Group"
4. Use the Node Tool to select all the bottom nodes of the letters
5. Drag the nodes down to extend the lower half of all the letters (about 0.5 inches in my example.)
5. Add an eclipse on the lower half of the letters, colour it white to hide the bottom of the letters giving the curve to them
PS Individual nodes on each letter can then be tweaked as needed (or not)
Use InkScape or another software that is capable of envelope warps. That said, I think it is a waste of time on two lower case letters and rounded ones at that.
Find an image of stars you like. Clip it into a circle slightly larger than the counters of those letters. Send it to the back and duplicate it. Move them into position.
Thanks for the reply Mike
Ya I suspected it won't be easy in designer...
Reg - 'Go' - I've only shared a part of the logo - the real name is 'mango films' so the warp may look good - remains to be seen.
I didn't wanna use clipping - I want it to run along the spine (or stroke) in the centre like a text path - within the GO curve...
-
Hello
Am working on a logo and was wondering how to
1. Give a group of (text or shapes) a perspective like Netflix Logo.
I have AF photo and AF designer - however I wasn't able to effectively use the perspective or mesh tool for the same.
2. Can one fill a shape with patterns ?
Here's part of the logo - I've converted it into curves - wanting to fill it with patters - say like stars or something around the spine...
Idea is to make it look like fancy movie glasses
Thanks
-
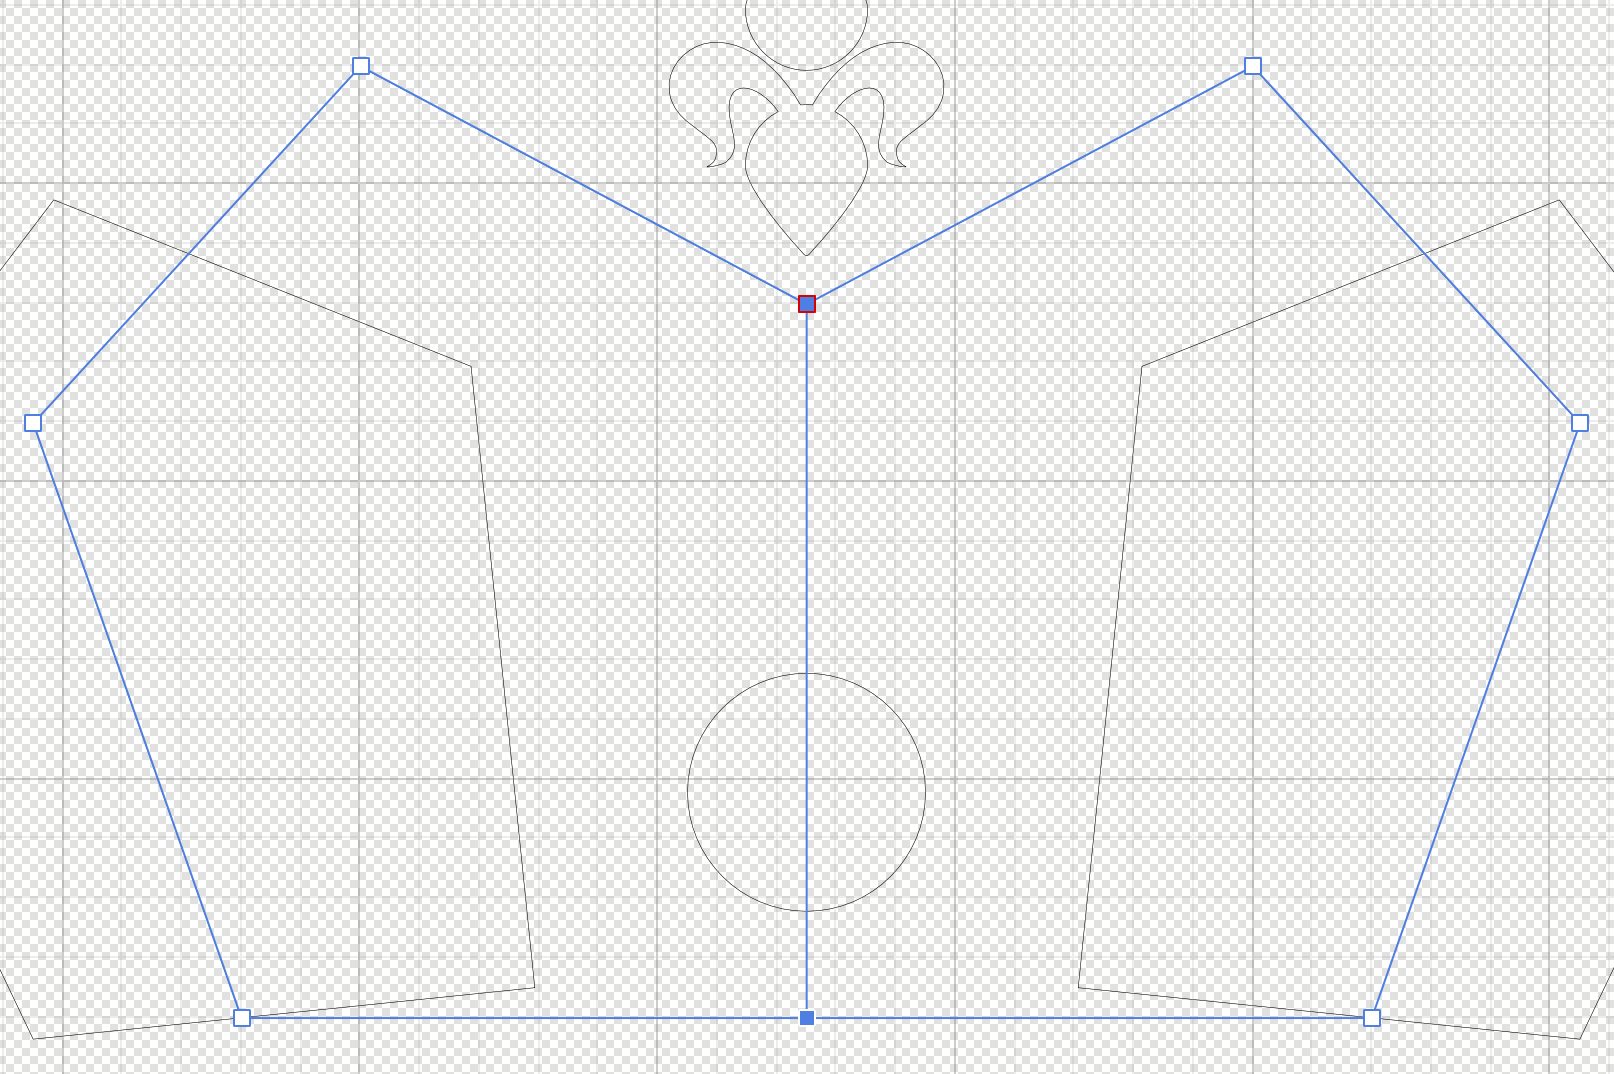
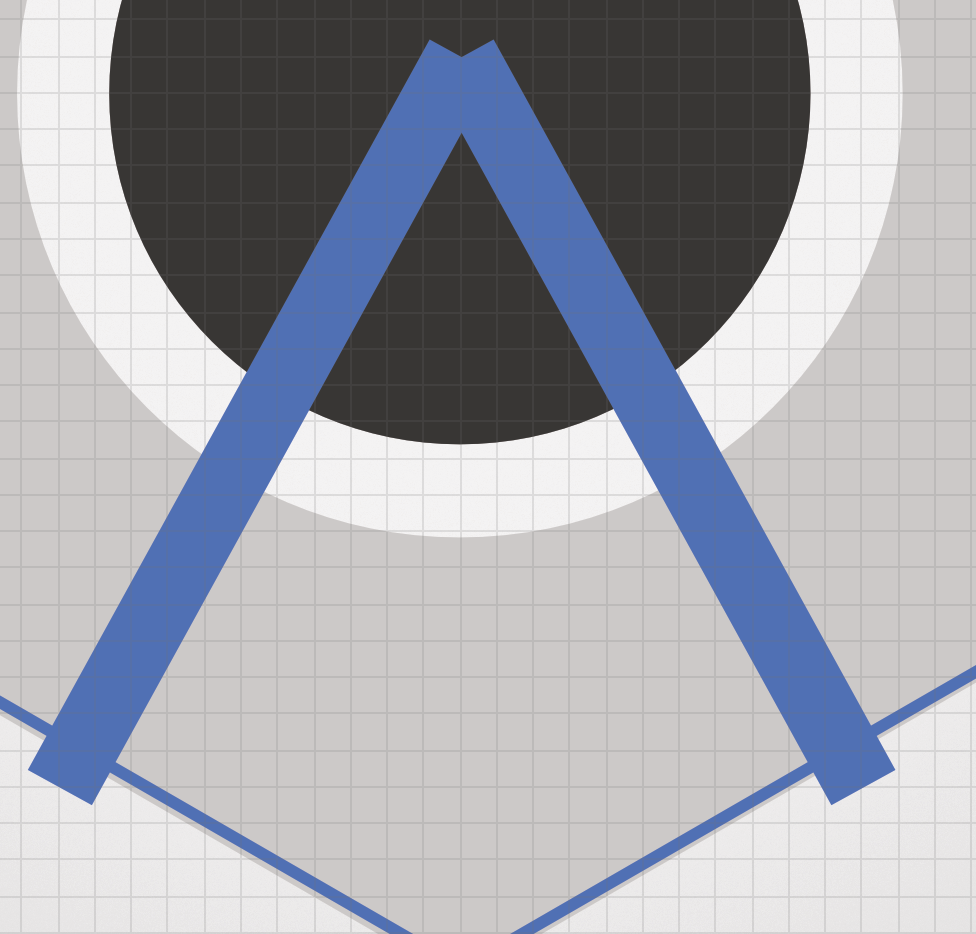
Hello
So in figure 1 - am trying to join the pen strokes as defined by the strokes as in figure 2 - to construct letter A
However
1) It only works as intended if the lines form a shape such as a triangle and not if the lines are left open as in the figure
Am I missing proper workflow ?
2) Also when I use the pen tool to draw a line segment from the node point within the black circle to the top point of the blue stroke to form an A - if I choose the node point on the hexagon (within the black circle)
- the pen tool doesn't function as a pen tool but acts like a node tool.
The hexagon nodes are showing as it's the selected layer - so I can use the nodes as reference points to draw an A
Am sure my workflow isn't correct - just looking for an easier way to draw the blue lines to connect with each other and through the midpoints of the hexagon.
thanks
-
Hi moksha!
Your #1 is not as elementary as you might think because there is no way (that I know of, anyway) to create & snap a node to the midpoint of a line segment that is not aligned to some other existing snapping point.
There may be some other ways to do this but what I ended up doing is as follows (modifier keys are for a Mac):
1. Duplicate the hexagon with CMD+J
2. Hold down CMD & SHIFT (to scale proportionally from the center) & drag a corner handle of the dup inward until it snaps to the vertical sides of the original hexagon.
3. Hold down SHIFT & rotate the dup by 45°.
At this point the corners of the dup should be touching the midpoints of the segments of the original:
4. Convert the original to curves & with the Node tool add a node anywhere on the segment you want to divide.
5. Drag the new node to the corner of the duplicate. It should snap there if the 'Snap to shape key points' snapping option is enabled.
6. Delete the dup, break the curve at the new node, & go from there.
Your #2 is much easier: Just create a 3 sided polygon (or a triangle), convert to curves, add a node on the bottom segment, & drag it wherever you want. With snapping enabled you can position it horizontally aligned with the top node if you want.
Ha - thank you
Got it working - ya I was wondering - since they construct the polygon shape, there must be mid point geometries available for each element of the shape...
I had to rotate by 90 degrees to get to your result - figured thats what you meant anyway..
-
Re #1: maybe easiest to start over with a 6 point star? Pull the inner adjustment handle all the way out.
Otherwise, as RCR says, you'll need to snap to geometry..... or guides.
Another geometry option is to draw out a simple rectangle over half of the hexagon.
New points A & B will snap to the horizontal midpoint. New point C will snap to the vertical midpoint.
Points for the right side will snap in line with the new points you just created on the left.
(just make sure you use shift drag when moving the nodes to constrain to the segment's direction)
.... but yes, an add midpoints feature would be very nice.
I Like the 6 point star idea - will try it out later for faster workflow. Am using 150 x 150 px box for the design....
Thank you
-
Hello
Am learning AF designer via tutorials and working on a logo - I have couple elementary questions
1. Can one snap to the mid point of the sides of the hexagon like shown in the figure marked by a black line.
I am trying to divide the side into 2 line segments
2. How to create a 3 point star like in the figure below ( it's a rough diagram )
I do have the snapping enabled
Thanks
-
-
thanks - am still waiting for a solution - been looking through the forum and it seems - it's called blend/distort replicate tool - hopefully to be included in the next update...
-
Serif's in-house quick demo is at
vimeo.com/110124748
Thank you - I was however also looking at how to
https://www.youtube.com/watch?v=pqyNCFgLX8Q
Like you mentioned - "If the objects are combined, a gradient of image can be used to fill all of them."
The help section doesn't elaborate much on this.
-
AD does not do 2D to 3D.
AD does not have a shape blend command at this point. It does have a "power duplicated" that will repeatedly move, scale and rotate vector objects. If the objects are combined, a gradient of image can be used to fill all of them.
Thanks for the reply.
Could you please point me towards a tutorial/info to what you mean in the second point "Power Duplicated" ?
-
Hello
Am absolutely a newbie and had couple questions :
1. Here's a youtube tutorial on 3D Revolve effect and pattern warp/layer on a Circle shape done in illustrator.
https://www.youtube.com/watch?v=w17oOuts5Og
Can this be achieved in Designer or Photo ?
2. Is there a blend mode equivalent to Illustrator -
where one can multiply no of shapes in vertical or horizontal direction - like duplicating shapes to avoid cut paste x no of times ?
Thanks
-
Hello !
Am owner of Affinity photo and was looking to check out the Affinity designer as well.
I was watching the video at
https://affinity.serif.com/en-us/ui-design-software/
And there seems to be a 20% discount - which is not reflected in the iTunes store pricing.
Just wondering if am missing out something.
Regards
-
Hi there
Could anyone please help me find this font/typography and also help me understand how to implement ligatures in Photo ?
I saw this in the video for typography and also have downloaded the FoglihtenNo6 -
However I can't find the shown ligatures.
1. I have clicked the Text-Ligatures-Use all and when I use the shift+command+T - it shows up the dialog for open fonts but doesn't show the ligatures.
2. Am using a web template for practise.
-
Hello !
Am a newbie to Affinity Photo - so still figuring my way around - might wanna check under Questions/ Photo FAQ.
Alternatively the easiest way I have discovered is to use a program Pixlr from Autodesk - it's FREE and has a straightforward STYLIZE menu - with various templates like Sketch, Pencil etc.
Check it out if it suits your workflow/needs.
-
After you've made the text on top of the image, go to the Layers panel, drag the thumbnail of the image layer onto the label of the text layer... and that should be it! Your text now clips the image :)
Thanks Matt !
Discovered this last night and am glad you've just reinforced that finding.


Help needed to recover lost project from AF Designer
in Pre-V2 Archive of Affinity on Desktop Questions (macOS and Windows)
Posted
Hey
Searched the mac - haven't used time machine ever - is there a way to look for it ?
It was in the same project folder as other components I was working on - and others are still there except this one I was looking for. Also why has it disappeared from the open recent files tab ??