Frank Jonen
-
Posts
382 -
Joined
-
Last visited
Everything posted by Frank Jonen
-

Professional Pre-Press Persona please
Frank Jonen replied to Frank Jonen's topic in Older Feedback & Suggestion Posts
Licensing the Callas code would be a way to do it quick. But really it's a huge job for anyone looking to change things up and make it simpler for the user. So far the pro level pre-press tools are anything but that. UI design is callous at best. It could be both, a separate app and a mode inside the apps (so it's always accessible). The apps then just all call the same API to invoke the pre-press app. Like a WebView is an instance of Safari for iOS and macOS apps. For book content I still prefer pure untagged CMYK, it just truly sucks for images. Maybe because I dealt with the goo in person for a bit and know what the mix looks like when I type in the percentages. Fun times, especially when we poured indigo (not the gummy towel printer) into the black ink to get it shinier and richer. I looked the Creo tool up. It was called Seps2Comp and had a plate viewer built-in. Hideously expensive still for a student, often regret it, but I learned a bunch from using it. -
Professional Pre-Press Persona please
Frank Jonen replied to Frank Jonen's topic in Older Feedback & Suggestion Posts
New application would work too, like a central hub all other apps can send their data to for proofing. I once had a neat tool from Creo-Scitex ages ago that did just that. Load in PS separations or full CMYK .ps files and combine them to print an offset simulation on a regular inkjet printer (and on screen with PDF output). Was bloody expensive too. If the output is right and the print shop is fine with a PDF that doesn't say Acrobat in the creator line, I don't see a reason to stick with Acrobat. I had Ghostscript generated PDFs printed before (PDFTeX) without issues as well (without ICC profiles even, just raw CMYK+Coat+Deboss). Having Acrobat isn't as important to print shops as many people think. As for the font, thanks for remembering :). An updated version of 'Book of Days' was briefly in use by a greeting card company, gained a layered colour (SVG) version because of it too in 2011 and that was it. Now that we can have multi coloured SVG fonts in OpenType I might release that version at some point, time permitting. -
Today I went through Affinity Designer scouring for pre-press tools, there were none. No separations, no channel view. Only the workaround to freeze all layers in Affinity Photo and export each CMYK+ channel separately. Bit of a surprise. But since there's nothing there, here's what I wished were there. That and a decent printing dialogue. For the print simulation, I used to recommend Substance Designer (setup) + Marmoset Toolbag (presentation) for a while now. Not anymore though because I always end up doing the work. -_- Scope: A new persona for all apps to address basic pre-press that are currently unaddressed. Views: Toggle between several views for dedicated control options on each task. Some views can be combined to get a better idea about the end result. Noted with [separate] when one stands alone. Overprint Check View Show realistic rendering of how the overprint will look based on selected profiles for ink, printer (optional, based on PPD) and paper. Tools: Range Selector: Like a mix of UPoint + drag and move, for fixing and optimising ink trapping (live dilate/erode on vector and bitmaps). Coverage meter: Show where the ink coverage exceeds or meets 100% with a heat map overlay. A range selector then can be used to lower the ink as: lower total, lower c/m/y/k/+. Buttons could be used to control that: e.g.: [c] [m] [y] [k] for working on magenta and yellow at the same time. Output Image: Render the simulation output of a whole document to an image (or PDF for multi-page) Font Trapper: Local overrides on font trappings that didn't turn out as planned in the style and colour settings. Print Simulation A simple simulation for base paper types and the ability to create custom ones (folder with absorption values, reflectance and a texture image for example) would be great to give clients a feel for it before someone has to spend money. Tools: Moveable light source: (useful for checking special inks, embossing/debossing, foil stamping and UV coats) Review light: Choose between a set of standard review lights (e.g. Just Normlicht LED proofstation) to judge the print under various lighting conditions and help avoid ambiguous colour situations (like that dress). Output Image: Render the simulation output of a whole document to an image (or PDF for multi-page) Separation View [separate] View all separations in a gallery view with an option to overlay them to check whether they can be optimised further or whether they work as planned (how is the yellow faring with the black? Did the overprints turn out as desired in the OC view? Are all special ink channels present correctly?) Tools: Drag overlay: Drag a sheet onto another to see their interaction in the printing context. Print separations: Print dialog allowing output of separations on a standard laser printer. This allows for a final manual check and also is of sufficient quality for a lot of silk screen printers out there. Export to PDF: Save all/active/selected artboards/pages in separations to a multipage PDF ready for lightjet ripping
-
Here's one from my library that I'd like to see available in a more procedural manner. (attached) Organic patterns are tough to automate though. One thing that'd be great for noise options is an XOR noise for alphas. It only adds noise where alpha is neither 1 nor 0. This helps to blend in complex masks better. Especially when you have the option to sample/learn the noise pattern of the source material. KODAK VISION2 200T Color Negative Film 5217.ACEScc.exr.zip
-
AP beta 1.5.0 - RC3 and NIK Collection
Frank Jonen replied to Jonas14's topic in [ARCHIVE] Photo beta on macOS threads
The plug-in couldn't generate a new layer within the host app and now is rendering on the selected layer. To go around this, duplicate the layer before starting the plug-in. Same end result. -
Could it be that the Soft Proof layer is 16-Bit integer? Loaded an ICC profile I made and it looked quite faded in 32f. I'll also check through my profile piece by piece and see if that has issues that I've overlooked (looks normal in Lattice with the same image). EDIT: Turned out "neither". It's a larger issue with the workflow.
-
The blocking bug is back in 32f to 16-Bit transforms. It also manifests in 32f Clarity live layer which additionally looks like a chroma blur + colour contrast with a luma sharpen. When I export directly to 16-Bit I get white flashes around the eyes too, like 1-Bit tears. Also: I think white balance live layer in 32f needs some looking at. Colours go flat immediately. Develop in 32f: 1% of a 32-bit scale is significantly more than 1% of 16-Bit scale, it tends to get very jumpy. How about changing the sliders to 0 - 1 in 32-Bit Develop mode (possibly in general for live layers too)?

-
Develop Persona Can we have the White Balance tool write to Overlays too? This is one of the features in Capture One I use constantly to balance mixed light sources. Right now the (w) tool defaults to the Master adjustment, not the active brush or gradient. Would be nice to not have to do it manually for selections.
-
I can select Apple RAW btw with NEF files. This might be camera specific. The major UP Capture One now has on Affinity in the develop persona sense is controller support. Which makes sense since there isn't really any tool yet in the Affinity line that mirrors the gestalt you control with a Tangent panel. Now… and this is a stretch: You have Serif, Apple as RAW modules. If you had Capture One as a develop module, workflow for a lot of pro photographers would become seamless. Just an idea. I think it'd be kinda cool, especially Phase One doesn't have a full fledged compositor with them yet, they have to play ball with Photoshop right now. The 32f develop mode just had me smiling ear to ear. Like the Joker, without makeup… kinda.
-
Might be the reason why RC2 doesn't launch? Dyld Error Message: Library not loaded: @rpath/../Frameworks/libliblf.dylib Referenced from: /Applications/Affinity Photo Beta.app/Contents/Frameworks/liblibpersona.dylib Reason: no suitable image found. Did find: /Applications/Affinity Photo Beta.app/Contents/MacOS/../Frameworks/../Frameworks/libliblf.dylib: code signature invalid for '/Applications/Affinity Photo Beta.app/Contents/MacOS/../Frameworks/../Frameworks/libliblf.dylib'
-
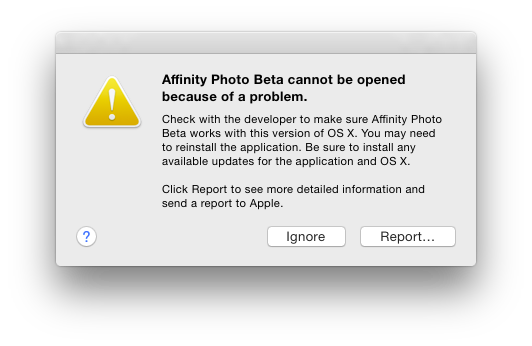
Affinity Photo Beta cannot be opened because of a problem. Yosemite isn't supported anymore? :(
-
Affinity Video Editor?
Frank Jonen replied to Epic-dude9807's topic in Feedback for the V1 Affinity Suite of Products
Here are some vector/line animation tools. Studio Ghibli's Toonz: https://opentoonz.github.io/e/index.html ToonBoom Harmony: http://www.toonboom.com/products/harmony Synfig Studio: http://www.synfig.org/cms/ Anime Studio (now Moho): http://my.smithmicro.com/anime-studio-2D-animation-software.html Pencil2D: https://www.pencil2d.org For logo animations and animated typography you could just use Apple's Motion. It doesn't do SVG but .ai and .pdf files. -
Affinity Video Editor?
Frank Jonen replied to Epic-dude9807's topic in Feedback for the V1 Affinity Suite of Products
Maybe because Scratch has a fairly capable editor. It's not exactly rare that ads are edited on it. Just like people edit ads on Smoke. If something works for you, it doesn't matter what it says on the package. When Hiero came out I used that as an editor even and it was just a conform tool. The price it got afterwards chased me away though. Nuke Studio is free for the non commercial version. That's how you learn the tool so you can join a production where they have a license server. Nuke is not priced for freelancers. Depends on what your product is. If you're doing a VFX heavy ad, Nuke Studio is a great option, plan your time right and rent it for that time +1 month for post delivery changes. I don't have any experience with HitFilm but a bunch of YouTube narrative shows (not vlogs) are done with HitFilm. Also Sony Vegas. They seem good entry level options. If you're doing long form, context management and meta data become a big deal. For that stuff FinalCut Pro X + Lumberjack, or Avid are probably the best options for now. -
[AP] Is a Live Rotate tool in the works?
Frank Jonen replied to jarombra's topic in Older Feedback & Suggestion Posts
It's in there but you have to buy an Apple Trackpad. Trackballs aren't supported (yet). You can step by percentage by setting up a custom key combo. I did that and I keep forgetting it. I'd rather just set up like SHIFT+CMD and rotate the ball/wacom wheel though. Right now you can do it via the 'view' menu, Rotate left/right/reset. -
I use the Mesh Warp Tool to manually de-lens panoramas post stitching to get as much out of the coverage as reasonably possible. It would be great to be able to lock the axis of the point I'm dragging with a modifier key (shift, option, CMD… I think shift works best ergonomically). Also for more accurate matching (matte painting for example) it'd be great to be able to shift the points using the arrow keys like with the Move Tool. In general this helps avoiding unwanted distortions while warping.
-
"Publisher" might be a bit of a misnomer, but there is not much known about it yet. I'm hoping for a hardcore typesetting tool that rivals TeX. But with a better UI than I did back then ;) I'm doing the same thing I've done before Illustrator had that feature. I look where the text ends. Put my cursor there, select to the end (SHIFT + End key), cut, paste to new frame. How many columns can an illustration possibly have? Five? If it's more than five, do it in Quark. Takes too much time to balance more than 5 columns by hand.
-
Deselection seems to bebroken. I select a layer's transparency and now I can't get out of selection mode. Can't even add a new layer to select 'nothing'. CMD+D and the Selection menu both yield nothing.
-
affinity photo My first panoramas, finally doable
Frank Jonen replied to Frank Jonen's topic in Share your work
Spent some time over the weekend to figure out a better way to showcase panoramas. Using parts of PTGui's WebGL viewer and tying it all together with Tumult's Hype and very little custom code. I found PTGui's viewer to be the most true viewer while still having good performance and not messing too much with the picture quality. I got the most control there over how the cyclorama is constructed. Mini map is made as an SVG in Designer and the image of the map is done in Photo. Constant back and forth with the two apps, no hitch no glitch. Here's a test link if you want to check it out: http://panotest.frankjonen.com What you can do: Double tap or tap the double arrows icon on top right to enter full-screen mode, just the pano, nothing else The mini map has finger friendly tap targets to get more info on the respective areas Looking around can be done by turning around while holding your tablet, by swiping with your finger, by dragging your mouse or rotating your trackball around the Y axis. Disclaimer: It's designed for touch use mainly at this point and to be integrated into desktop websites later as a stand-alone item like an image or a video. I've tested it on iPad (which is the target platform) and desktop. I definitely won't go all out and build in special crutches for every Android device out there, just too many variations to count. If it works, great if it doesn't ¯\_(ツ)_/¯ — as for iPads: I haven't tested it on the iPad Pro yet. It's designed for recent browsers on Desktop and iOS 9+ on tablets. It's "hosted" on Dropbox, so download performance won't be like on a real web server. Fonts are stored on cloudfront, which is reasonably fast. -
RC = Release Candidate
-
One more thing I keep forgetting to nag about: Constraints with the crop tool. It would really be so much easier if the Crop Tool worked like Move Tool. Hold OPTION and drag, it modifies the respective axis in both directions. Hold OPTION + CMD, scale the tool with the current aspect ratio locked.
-
Will the 'mondrian invasion' effect be addressed in b12? (HSL + Levels + Gaussian Blur in 32-Bit = Mondrian Painting). I can work around it by flattening and round-tripping, but that's not really that much fun with large files. BTW: using the arrow keys with the hand/view tool still is broken. Used to work but since a few beta iterations it's gone for some reason.
-
affinity photo My first panoramas, finally doable
Frank Jonen replied to Frank Jonen's topic in Share your work
Almost spot on Jer, it's 9 segments/frames. :) Yeah, I hear you Alfred. :mellow: It's difficult to get a good pan in on 15 seconds. I had to up the framerate to 60 fps to avoid smearing at that speed. Maybe Instagram will add a panorama viewer in the near future (Facebook's is just maddening to use. You're off by a little bit in calculations and they give you some pixellated mess. -
Affinity Video Editor?
Frank Jonen replied to Epic-dude9807's topic in Feedback for the V1 Affinity Suite of Products
Affinity OS coming? :P There are so many NLE's out there that aren't Adobe. Ranging from capable to great, you'll find what you're looking for without a marriage to Adobe. HitFilm - http://hitfilm.com Lightworks - https://www.lwks.com Final Cut Pro X DaVinci Resolve (free up to UHD, 4K and up cost money) Assimilate Scratch - http://www.assimilateinc.com/products/- subscription or permanent license Nuke Studio / Hiero - https://www.thefoundry.co.uk/products/nuke/#nukestudio -
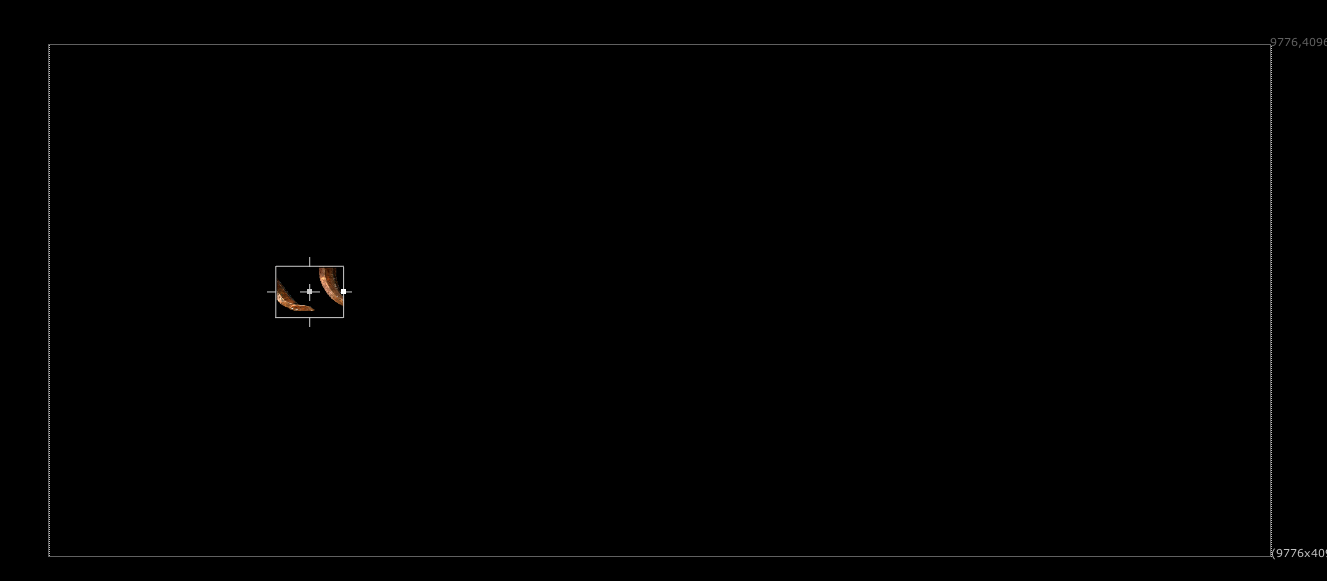
For large images, especially in 32-Bit mode you have to constantly wait for the entire screen to be processed at the zoom level you're at. That kinda ruins the moment quite often. Attached is how Nuke solves that. A 'region of interest' widget that you draw over the portion you want to work on and only that gets processed. The rest of the image is just a buffer dump. A good option would be to have a way to clear the outside area to a constant colour fill when moving outside the previous buffer or clear it in general.
-
Hide bounding box / transform handles
Frank Jonen replied to matt.baker's topic in Older Feedback & Suggestion Posts
The hand tool used to work for that but not anymore. Only holding the spacebar still works still for moving items. Which means you have to hold 3 keys now just to move an item. Used to be 1 or 2 keys.