Greyfox
-
Posts
312 -
Joined
-
Last visited
Everything posted by Greyfox
-
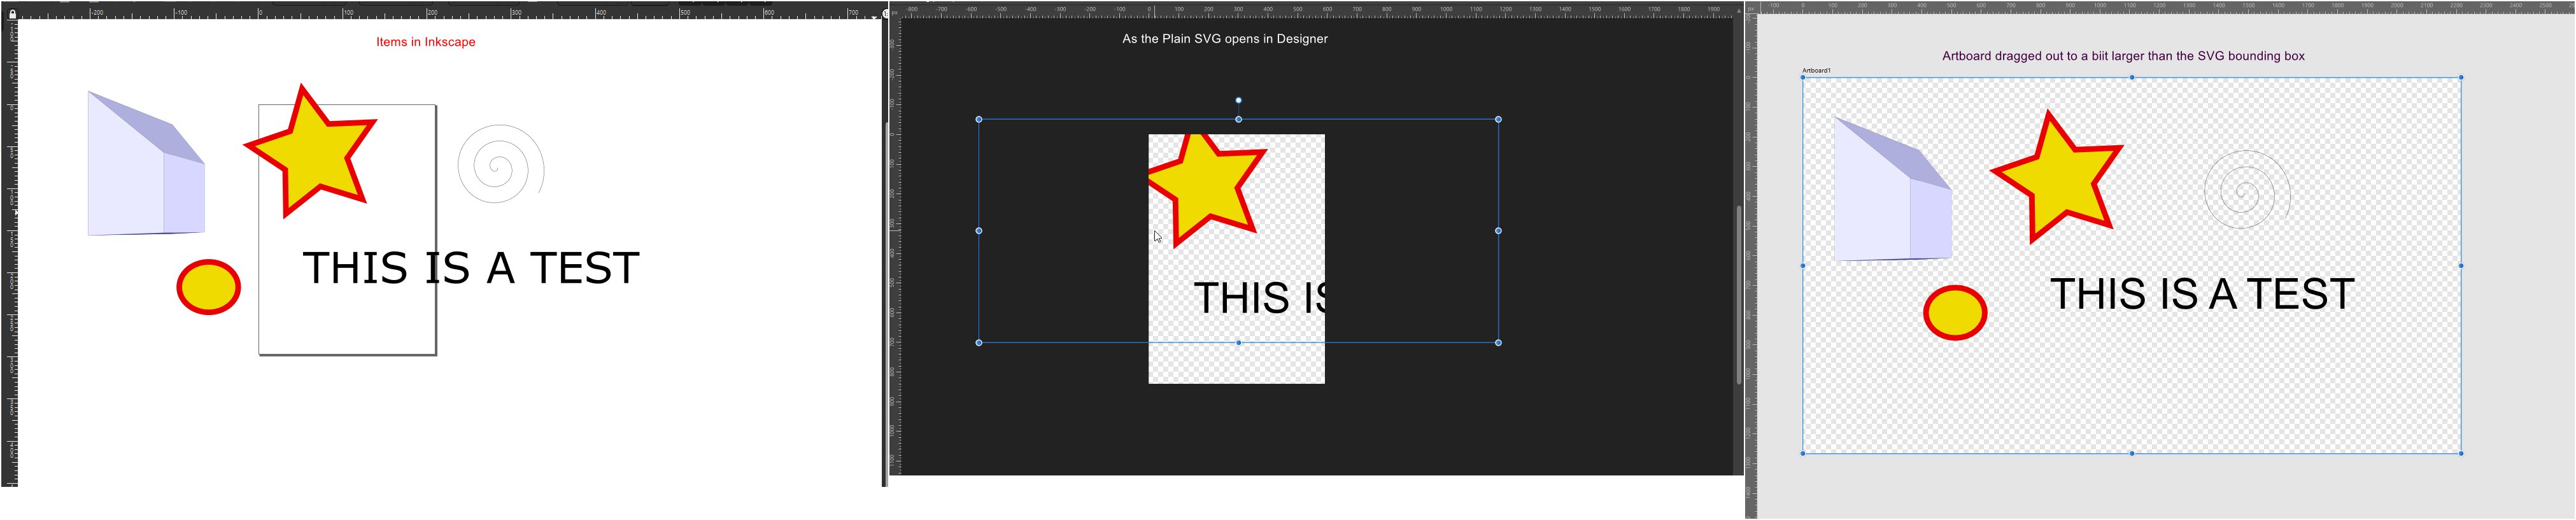
 Perhaps an alternative is to simply open the Plain SVG in Designer, then use the Artboard tool to drag out an artboard a bit larger than the SVG bounding box.
-
Make Blend tool
Greyfox replied to tbhockey's topic in Pre-V2 Archive of Affinity on Desktop Questions (macOS and Windows)
The broken link to the roadmap near the start of this thread raises a question. Is there a current road map for Affinity Designer (and if so where do I find it). I'd find it hard to believe that developers aren't following some plan. -
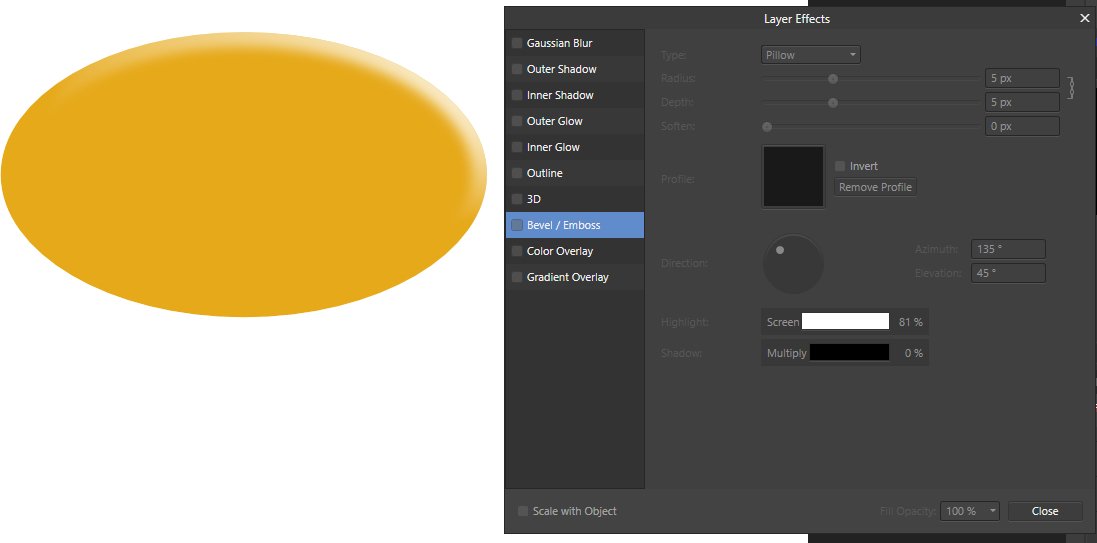
Try using Bevel/Emboss instead of 3D, and set the Shadow to 0%
-
Specs are here https://affinity.serif.com/en-us/designer/full-feature-list/
-
+1 I've been using ACDSee for around 8 years, currently on ACDSee Ultimate 2021. Can call Affinity Photo as external editor from manage mode.
-
So can you post a link to one of the ex camera, un-edited photos? (ie. Dropbox or WeTransfer)
-
.. or if it is a closed curve or shape you want to cut, you could draw another closed curve across it and use the subtract function.
-
In Layers pane untick the padlock on the background layer, then on the toolbar select the move tool.
-
Is working here in Windows version
-
For what it is worth, that's not happening here. PDF exports of "ff" from Affinity Photo, Affinity Designer and Affinity Publisher are all correctly showing "ff" and all showing ArialMT as the font in use. Not sure which application you are using, but could you perhaps post an .afphoto or afdesign or .afpub file with the "ff" in it.
-
Bending a group
Greyfox replied to Greyfox's topic in Pre-V2 Archive of Affinity on Desktop Questions (macOS and Windows)
Here is an example based on the file I posted initially. ShapedRibbon.svg -
Bending a group
Greyfox replied to Greyfox's topic in Pre-V2 Archive of Affinity on Desktop Questions (macOS and Windows)
@John Rostron, @Dazmondo77 Thanks for your replies. After some struggling to come to grips with it, I've been able to do what I wanted using Inkscape. It has path effects which allow both bending of groups, and also perspective envelopes. At the moment I'm just running it as a Portable App, but will probably eventually install it as it does have some nice features. -
Bending a group
Greyfox replied to Greyfox's topic in Pre-V2 Archive of Affinity on Desktop Questions (macOS and Windows)
Thank you for the response. That is very disappointing. I'd even settle for trying some "tedious long-winded node editing methods" if that could achieve what I need. -
I have a group of shapes that together form a rectangular ribbon in Designer. What I want to be able to do is to apply a slight "S" bend to the grouped object, but still retain it as an editable vector object. If it was a single rectangle I could convert it to curves, and use the node tool, but that doesn't seem to work with a grouped object. Any ideas ? Ribbon.afdesign
-
Place inside
Greyfox replied to pcdlibrary's topic in Pre-V2 Archive of Affinity on Desktop Questions (macOS and Windows)
I'm not sure exactly what you are trying to achieve, but this puts the image into the shapes. test_image_placement-m.afpub If not that, then perhaps this test_image_placement-m2.afpub If the latter one is what you are trying to achieve, then it isn't a case of placing a graphic inside of a shape, but rather on top of one, and you need to remove or mask out the background from the graphic. -
Thanks for that. I'm using Firefox. I think this should post should be OK, but as far as I recall I haven't done anything different to what I did with the other post. Edit: Actually I think the problem might have occurred because after using the Quote, I deleted the screen shot that came with it.
-
@GarryP I just used "Quote" which in other forums puts the quoted text on a different background color. It obviously doesn't do that here, so how do I achieve what you are asking? Edit: OK, I know what went wrong. Have edited the post so it should now be OK
-
What size was the rectangle? What was the zoom amount when you took your screen shot? Can you post a screen shot of your Edit->Preferences->Performance settings?
-
Formatting Tables
Greyfox replied to Dai777's topic in Pre-V2 Archive of Affinity on Desktop Questions (macOS and Windows)
-
Place inside
Greyfox replied to pcdlibrary's topic in Pre-V2 Archive of Affinity on Desktop Questions (macOS and Windows)
Yes Draw shape Select shape, right click, select convert to picture frame. From context tool bar (picture frame) select replace image .
-
It is indeed not working as it should (and it did apparently work in an earlier version) and Serif are aware of the issue. See
-
Can't add nodes to curves with the pen tool
Greyfox replied to Aleksandr Novakov's topic in V1 Bugs found on Windows
+1. I've spend quite some time today trying to get Ctrl to access the node tool from the pen tool without success. I guess I should have searched the bugs forum earlier. Note the issue applies to both Designer and Publisher 19.1.979 -
Thanks @R C-R The status line says Ctrl to use Node tool. My expectation from that is that pressing the Ctrl Key should bring up the Node tool and that doesn't appear to be the case. Maybe it doesn't work like it should in the Windows version or perhaps I'm not interpreting it correctly. I also don't know whether it was like this earlier versions. Ideally I'd like some confirmation that other Windows users are having the same issue before raising it as a bug. Incidentally it is the same in both Designer and Publisher.
-
Sorry, I'm obviously missing something.... Yes, when I select the pen tool, the last item in the status bar is "Ctrl to use Node Tool'. but that's not working for me. (a) I click to place a point/node, move then click to place a second point/node, As expected they are joined by a straight line. (b) With the nib on the second point/node and the left mouse key held down, if I drag it I get a control line/handle that enables me to bend the line into a curve. (c) Now I want to add a shaping node somewhere along the above curve to reshape it further. If I hold down the Ctrl Key and move the cursor the content of the status line changes, and when the cursor is over the curve it no longer says Ctrl to use node tool, but rather Click + Ctrl to delete, which is exactly what happens if I click. That's not how it appears to be in the video mentioned in the OP If I just click somewhere on the curve, it adds a node, but also continues the line from the second point to this latest node, which is not what I want.
-
You are not on your own. It doesn't work for me either. When I have the cursor above the curve and press the Ctrl key I see a red cross, and if I click it deletes part of the curve. I'm on the current version 1.9 something (the version number is too small to read). The help file says "Ctrl-click a segment to delete it, creating two separate curves within one curve object"). Maybe using the node tool is the only way to add nodes.