Sara72
-
Posts
322 -
Joined
Everything posted by Sara72
-
 You can with Power Duplicate: Copy, paste and power duplicate
-
Hi, Try Document>Canvas>Clip to Canvas.
-
Studio content AP IPad pro
Sara72 replied to Fmidy's topic in Pre-V2 Archive of Affinity on iPad Questions
Hi, You need to copy/paste your selection to a new layer to select it with the move tool and add it to the Asset Studio, make sure the image your working on is a Pixel layer and not an image layer, you’ll need to rasterise it if it’s an image layer. -
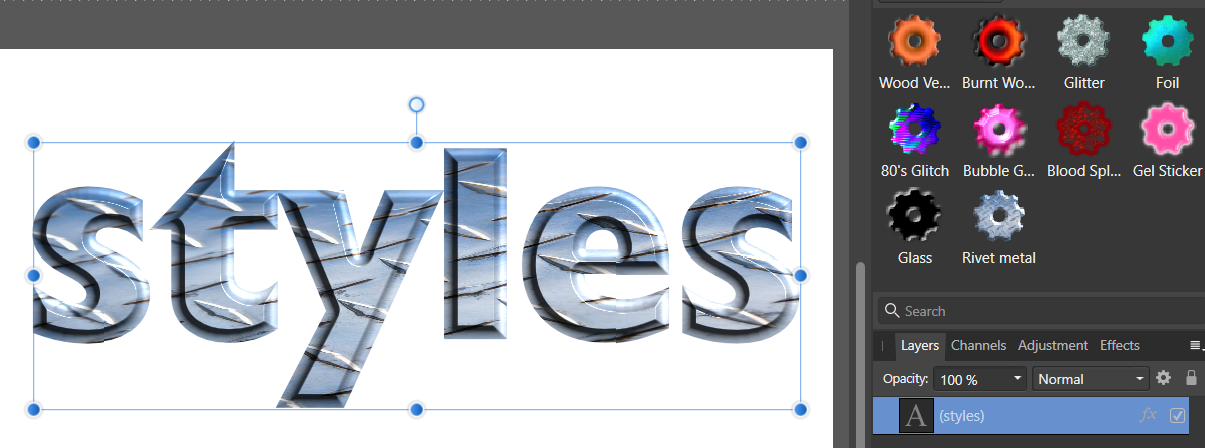
Hi, You can place your bitmap image into your document and right click 'Convert to Curves', this gives you the option to add the selected bitmap to the styles category, adding the fx effects also before saving, you can also do the same with the gradient tool and changing the 'Type' to a Bitmap fill and right click, Create Style.
-
That looks too irregular to be a grid, did you add some kind of effect in illustrator that isn't supported in Affinity Designer? Can you not hide the effect in the layers or delete it?
-
Pixel Brushes too pixelated
Sara72 replied to Heidi715's topic in Pre-V2 Archive of Affinity on iPad Questions
Hi, Long hold on the brush to bring up the menu settings snd go into edit, you can reducing the spacing settings to smooth out the basic brushes. -
On the Apps start screen, with all your document thumbnails, click on the cog wheel in top right corner, then click preferences>Fonts.
- 6 replies
-
- 1
-

-
- font
- font manager
- (and 3 more)
-
BUG: Affinity Photo High Pass Filter Add Grid to Images
Sara72 replied to WalkInVerse's topic in V1 Bugs found on macOS
I think it's up to the Moderators to move but i have reported the thread and that it should be moved, hopefully they do and it gets looked into more there -
BUG: Affinity Photo High Pass Filter Add Grid to Images
Sara72 replied to WalkInVerse's topic in V1 Bugs found on macOS
My feeling is this a grid bug, on the Mac with your combo of filters and adjustments and after using the grid after an update, im on Windows so can't test, i think this post should be moved to the Bugs forums, have you tried resetting the program or reinstalling? -
Selecting Issue
Sara72 replied to DarkLimit's topic in Pre-V2 Archive of Affinity on Desktop Questions (macOS and Windows)
Try turning off Edit all Layers, its on by default when you create a new document. -
Pen Brushes
Sara72 replied to Designstuff123's topic in Pre-V2 Archive of Affinity on iPad Questions
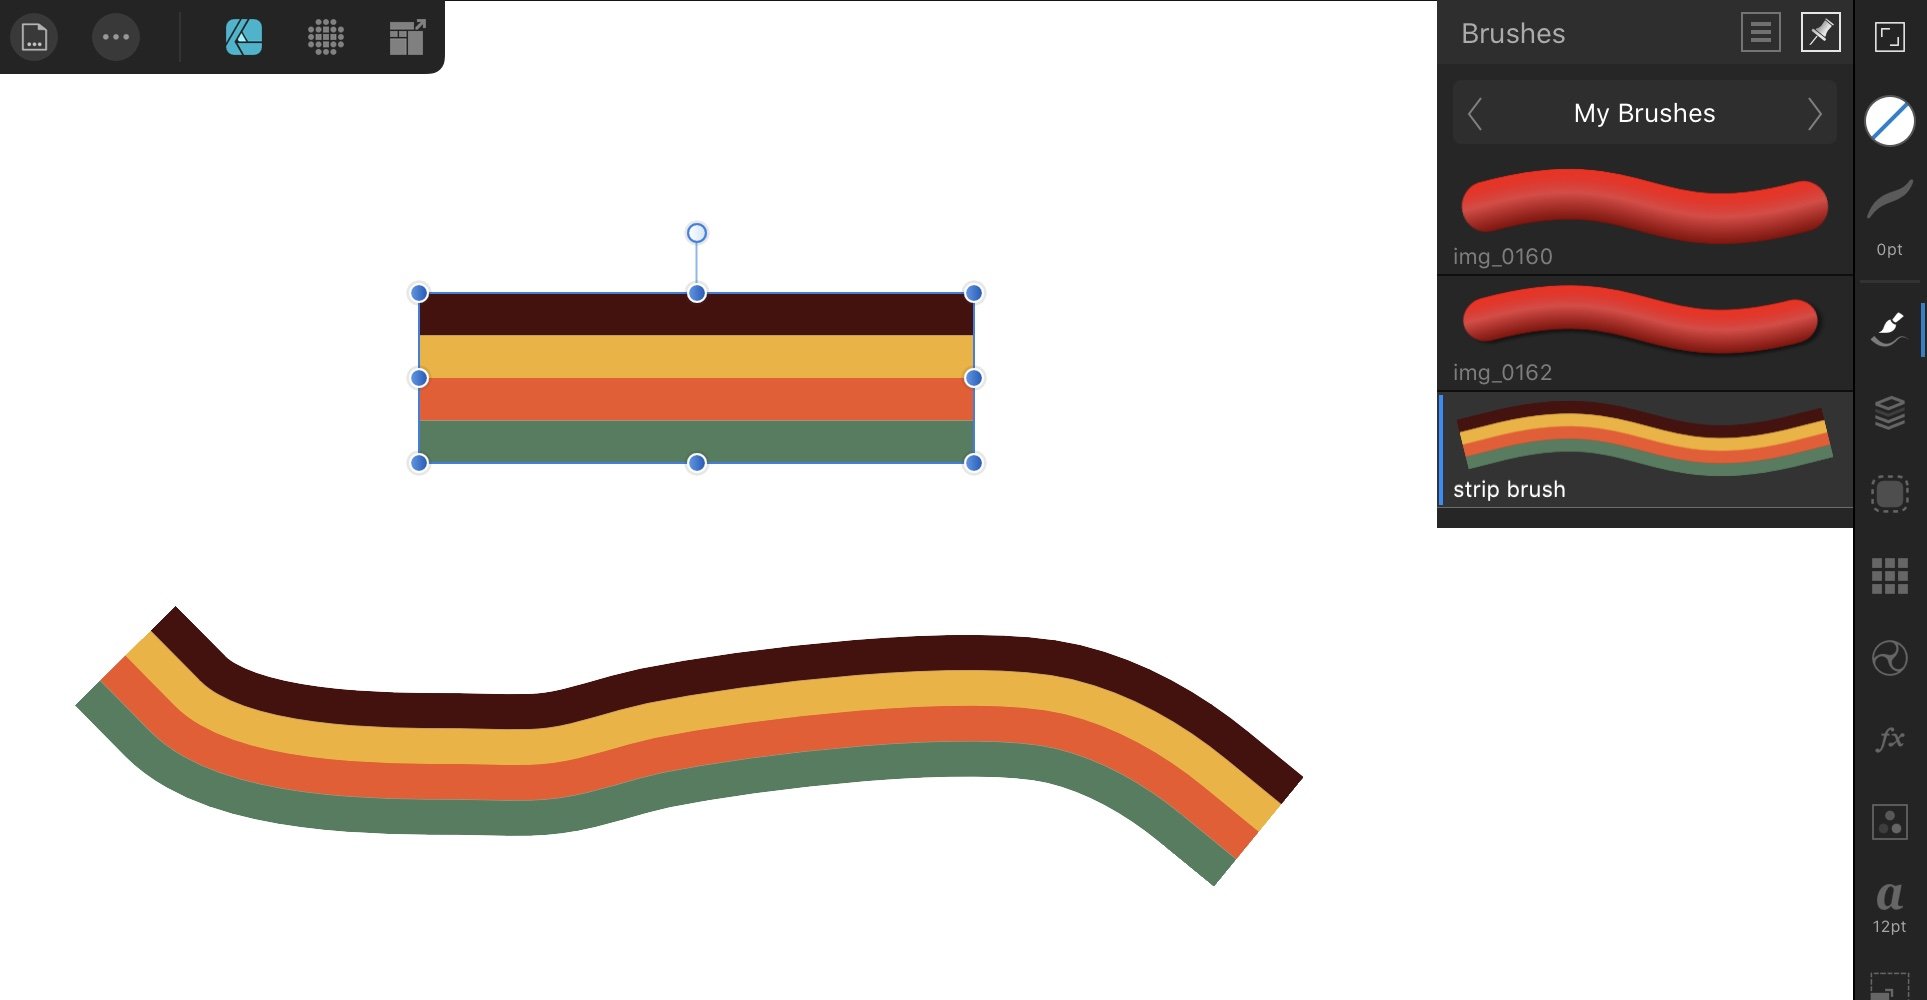
Hi, you can create a New Textured Image Brush with grouped, Rectangle vector shapes, you’ll need to export the grouped shapes with a transparent background and save to the cloud so you can add the new brush. The brushes in Designer are pixel/bitmap images along a vector path.
-
Manual for Affinity Designer for iPad
Sara72 replied to David AAAAAAA's topic in Feedback for Affinity Designer V1 on iPad
Also in resources forum posted by @DM1 : Affinity Designer 1.6 on iPad PDF Help File -
Manual for Affinity Designer for iPad
Sara72 replied to David AAAAAAA's topic in Feedback for Affinity Designer V1 on iPad
Hi, The hard copy is actually a Workbook not a manual and for the desktop as you mention. Try using the in app help on the start screen (where the thumbnails for your saved documents show), there is a question mark, in between the settings cog and + sign for creating a new doc, lots of help on offer, including videos:
-
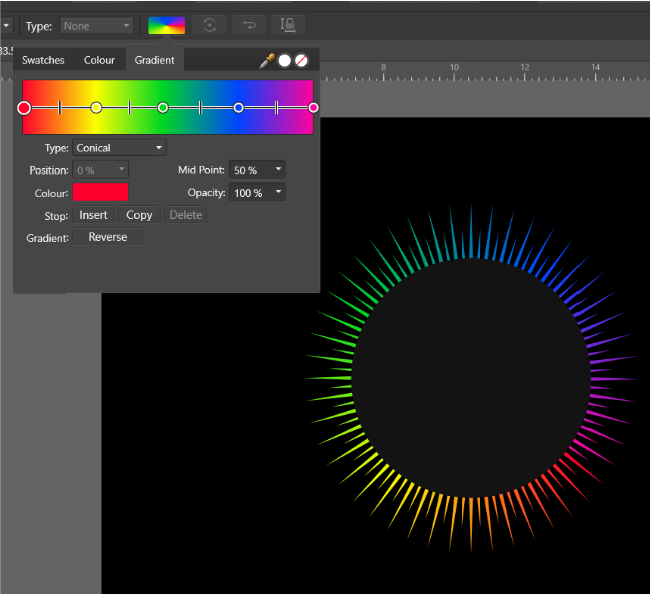
Hi, Do you mean something like the below image? I used the Conical Gradient, adding more nodes for each colour, you should be able to add the gradient to the grouped objects.
-
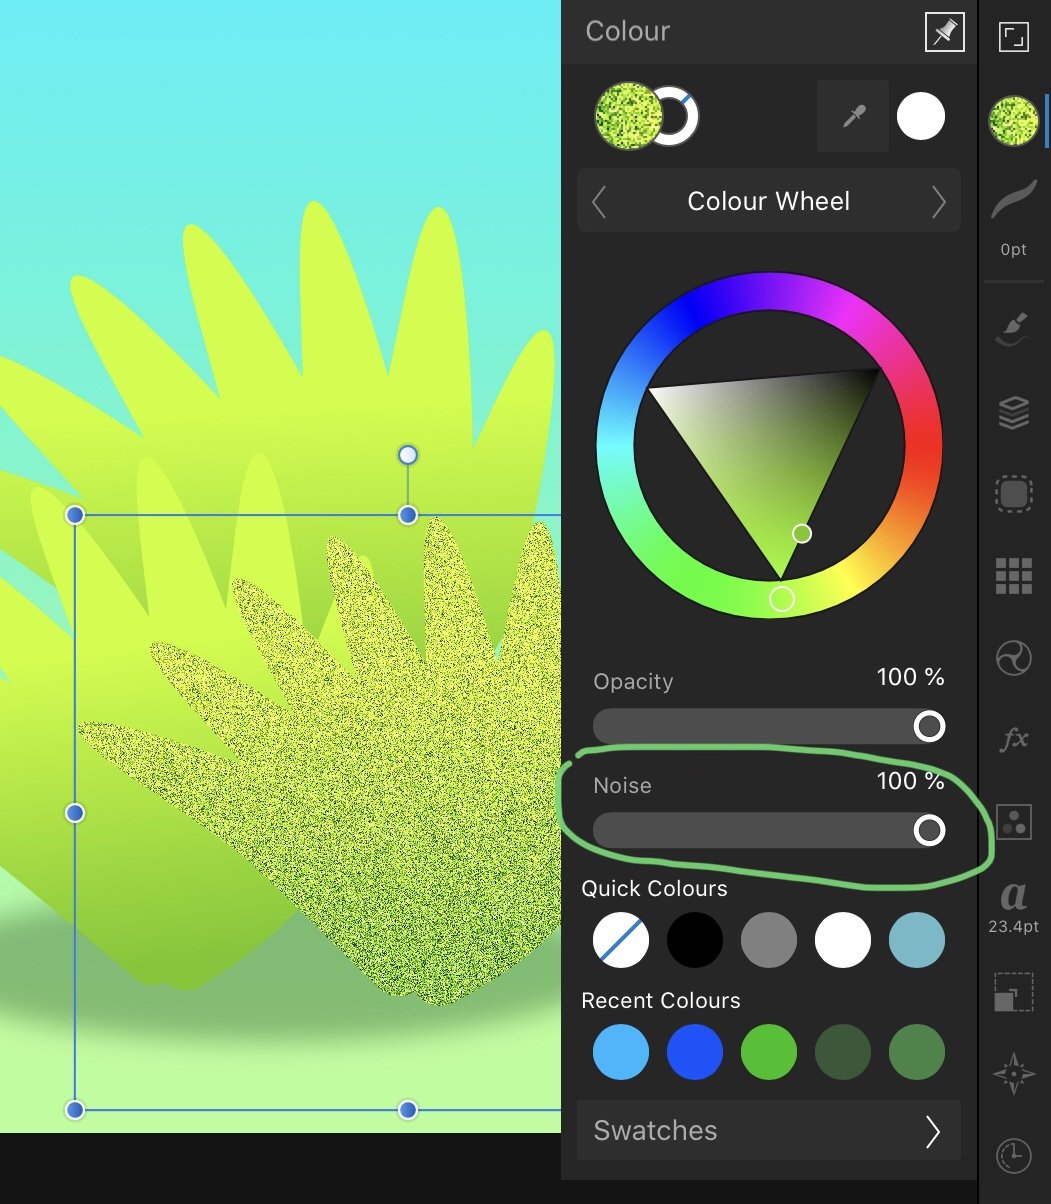
Required vector grain or spray brushes
Sara72 replied to Abinash Mohanty's topic in Feedback for Affinity Designer V1 on iPad
Thanks for the clarification, im guess something like a sub setting to the Noise toggle that's like the Perlin Noise in Photo and lets you zoom to increase the size. -
Why you not added rtl.
Sara72 replied to Rasoul's topic in Pre-V2 Archive of Affinity on iPad Questions
Hi, Maybe read Moderator Dan C’s reply on this recent post: Arabic text not supported -
Required vector grain or spray brushes
Sara72 replied to Abinash Mohanty's topic in Feedback for Affinity Designer V1 on iPad
Hi, There is a Noise option that adds grain to any vector shape in the Colour Studio, is that what you mean? But it would be easy enough to convert the pixel brushes you use to New texture intensity brushes for the Designer persona.
-
Hi, This thread might be of interest to you: Brush Edges Are Too Jagged/Pixelated
-
Hi, What you quoted is a Macro not a video, (aka an Action in Photoshop) and needs installing into Affinity Photo to utilise.
-
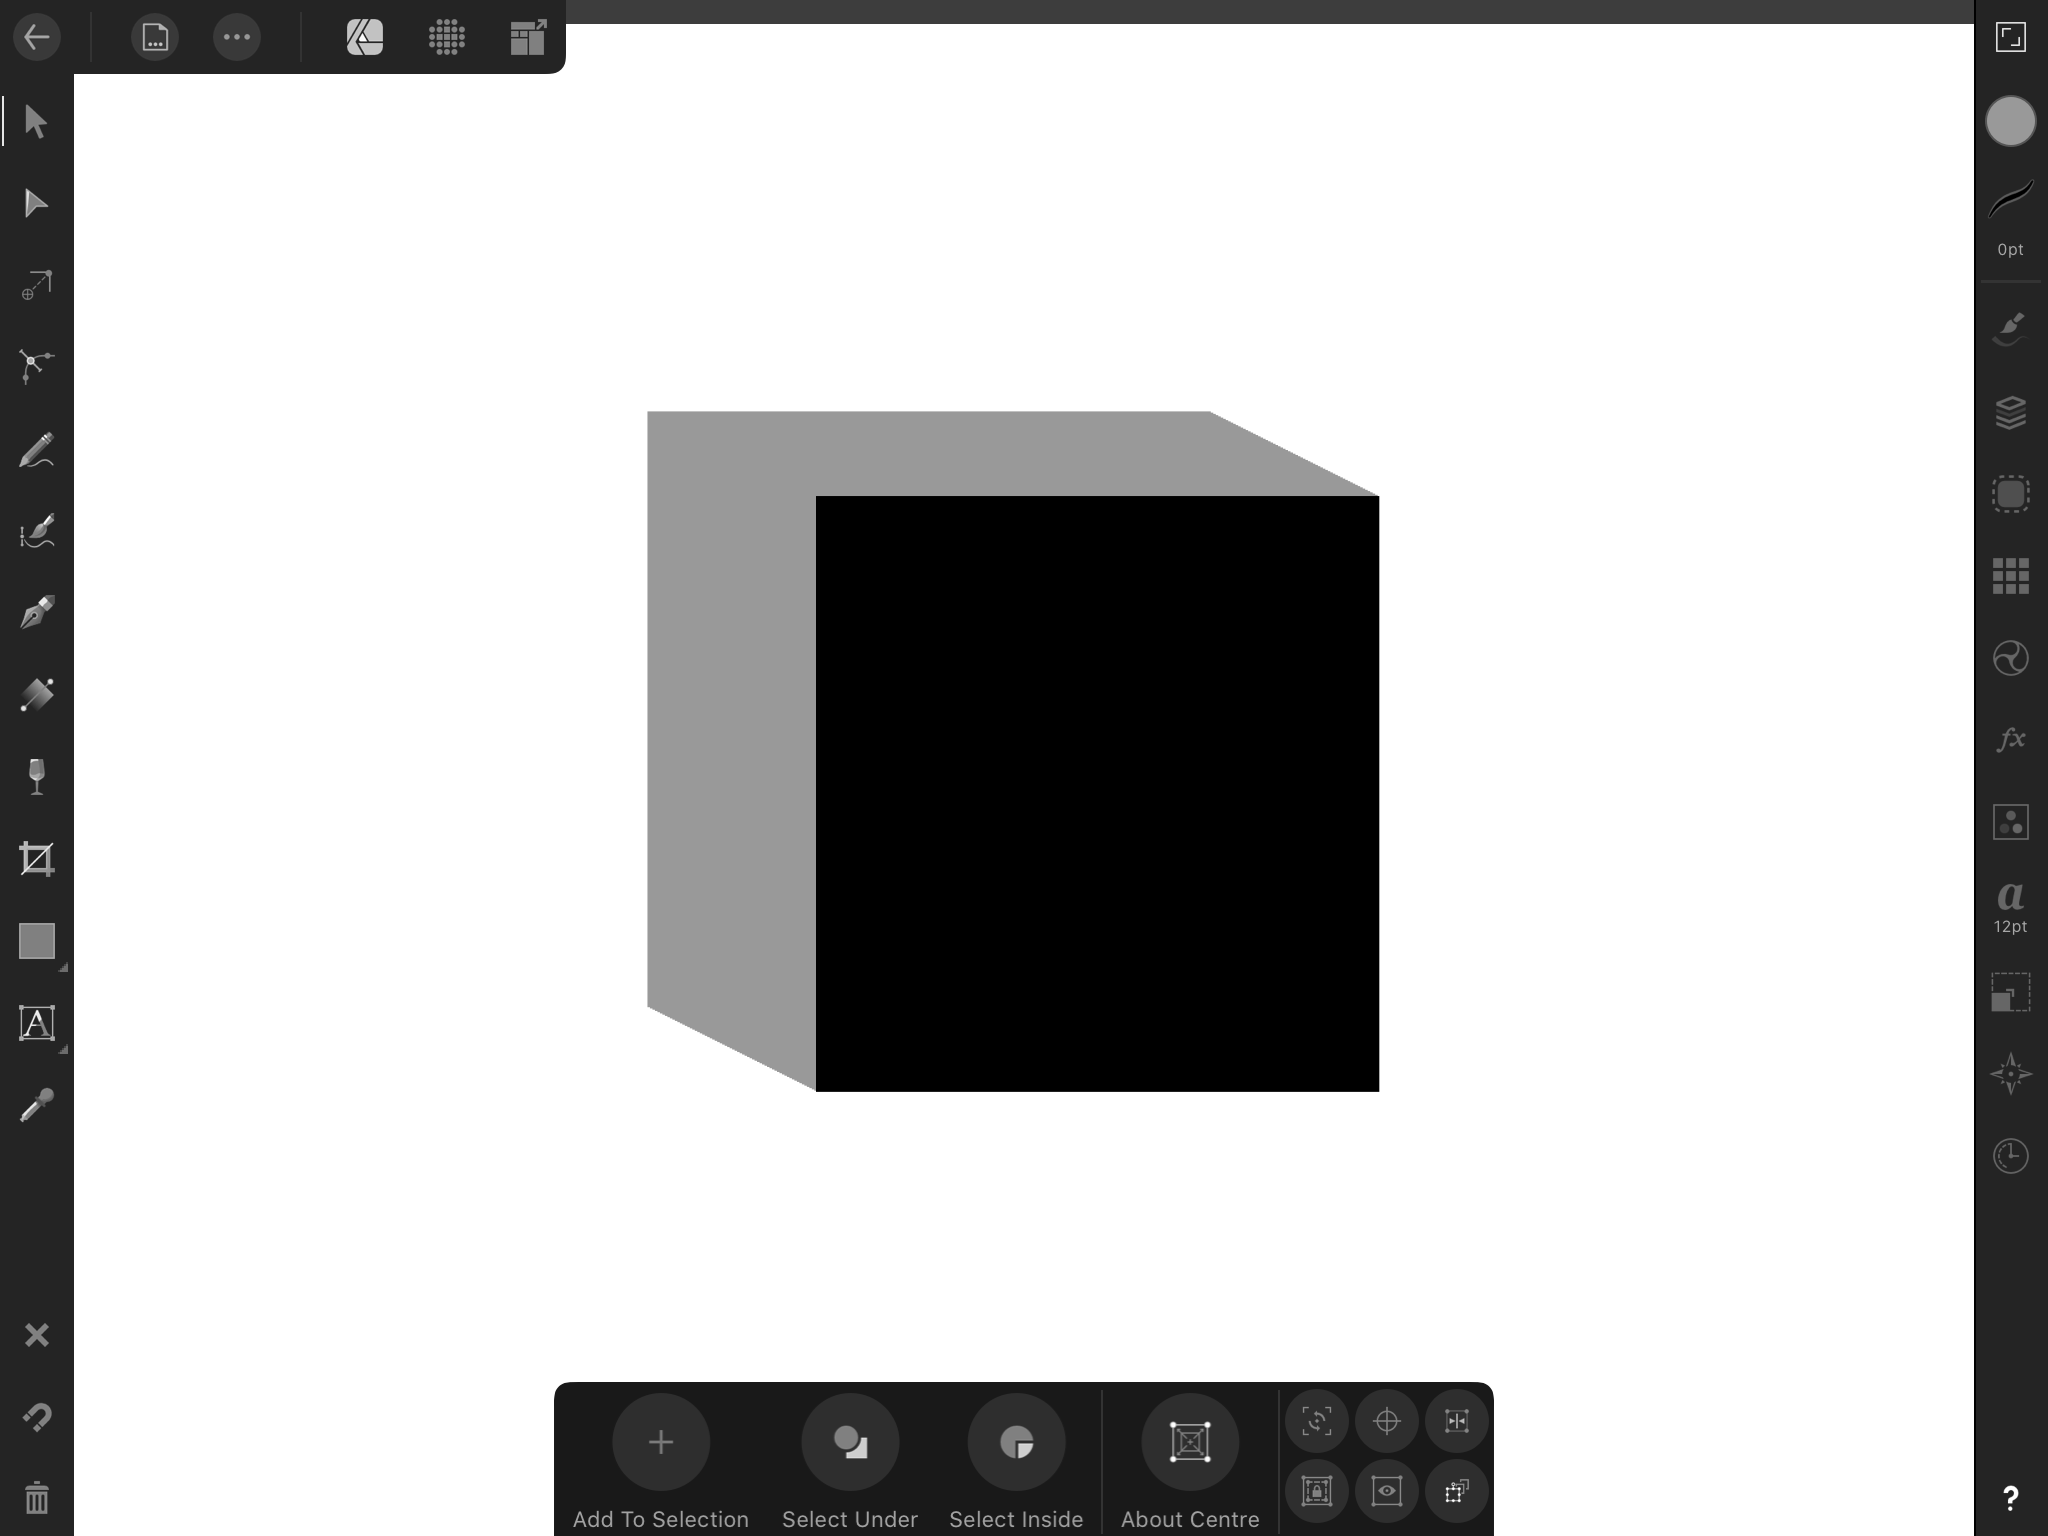
Hi, Here’s a tutorial for creating 3D text: Create 3D text in Affinity Photo Tutorial The outline on some of the figures looks like it has been painted in with a square brush or the objects have been cutout and resized onto a white background layer.
- 1 reply
-
- 1
-

-
LOOKING FOR AN VECTOR INK BRUSH
Sara72 replied to lorendraws's topic in Pre-V2 Archive of Affinity on iPad Questions
Or you could just make your own: Making an intensity brush in Affinity Designer for ipad and desktop -
I believe you can only edit gradients applied to vector objects not pixel layers like masks.
-
Vector Pencil Tilt
Sara72 replied to MaryAnne's topic in Pre-V2 Archive of Affinity on Desktop Questions (macOS and Windows)
Hi, You can export the brush strokes of the pixel brushes as transparent pngs and create new Textured image brushes in the Designer persona. -
Hi, The edit options are on the context toolbar when you have the Fill tool and Transparency tool selected, also the object that the fills been added too needs to be selected, click on the thumbnail with the gradient fill showing to get the edit options:
-
Try Filters>Sharpen>Unsharp Mask: