

Mr. K
-
Posts
536 -
Joined
-
Last visited
Posts posted by Mr. K
-
-
I can't move the layer, but all the tools work. So why is locked not locked?

-
6 hours ago, thomaso said:
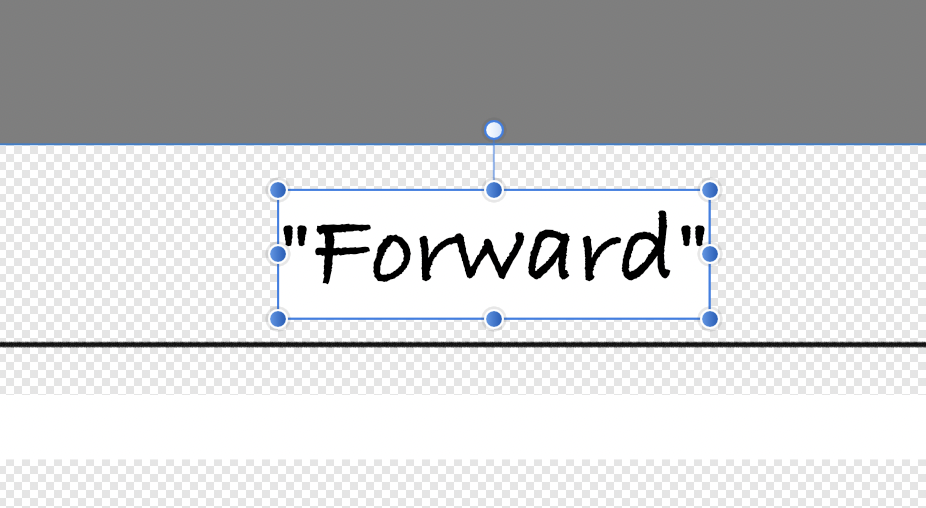
How did you get / create this text frame with a white fill? AD doesn't have a Text Frame panel to set frame properties, e.g. fill colour. Possibly it is a former APub object – or imported from IDML? The easiest would be to copy/paste this text frame to APub (or open this document in APub) and remove the fill color there.
BTW, how do you change this color in AD – or did you mean to apply an adjustment or effect?
I think I made it in Affinity Photo. I see what you are saying. If I make the text block in AD, then the background is blank or none. Thanks everyone. I think I have what I need now.
-
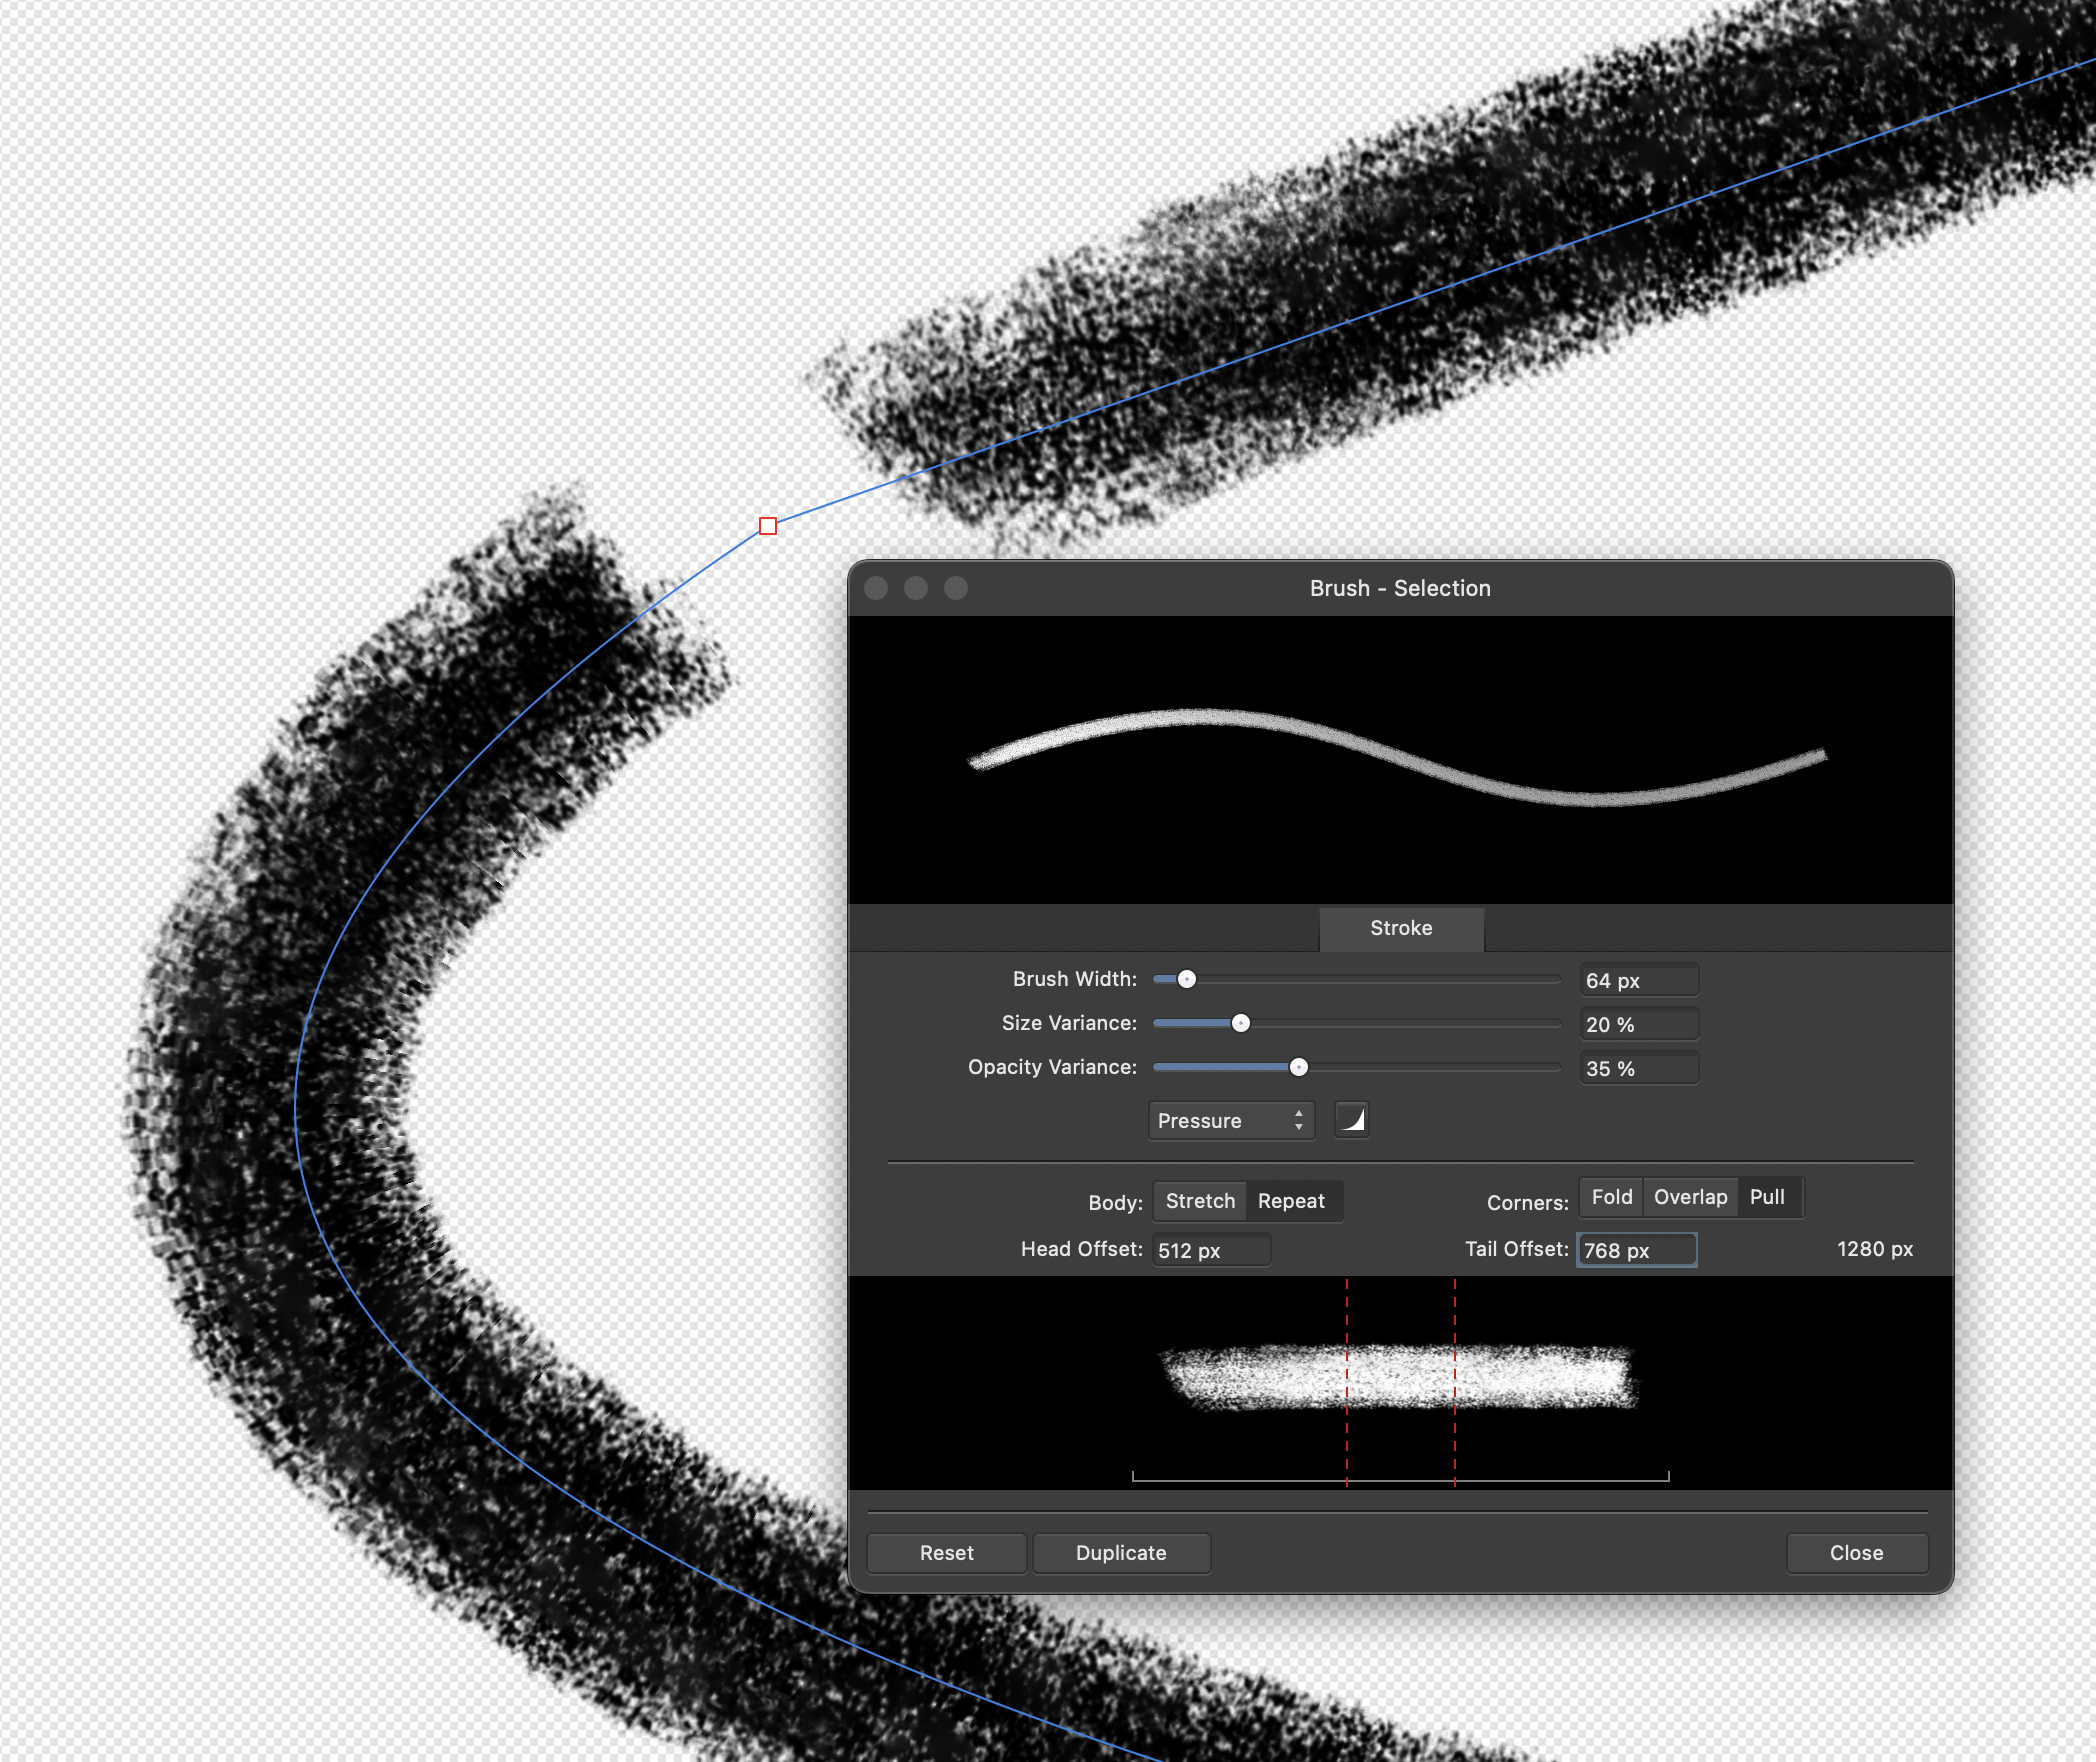
I cannot find the adjustment that changes the distance the brush starts and ends from the corner.
Looking at this further, maybe I will try to create my own brush. I don't think I can adjust the endpoints of the brush I'm using. I think that is locked into the brush when it was created.
-
11 hours ago, GarryP said:
Mr. K: Is there some reason why you are using a raster layer rather than an Artistic Text layer?
This would be easy to achieve with the right font, and the result would be more-easily-scalable.Yes, because I am learning how to use AD! I think I tried Artistic Text last night and I did get it to work. It was late, so I need to review my work again.
-
3 hours ago, NotMyFault said:
This brush could intentionally have lots of light colored head and tail. In this Case, you may need to break the curve, and create an overlapping between start and end node to get rid of the visual gap.
or copy the brush and modify the head/tail section to become a clean cut.
you try to play with the brush settings. It would help if you could upload the file.This appears to be the problem since all the curve actions do do fix the open ends. Is there a way to modify the brush?
-
How do I remove (or fill with none) the white color behind the text? I know how to change the color but I see no option for a transparent background.
-
How do I close this brush stroke in AD? I want the ends of the brush stroke to meet without the gap.
-
3 hours ago, R C-R said:
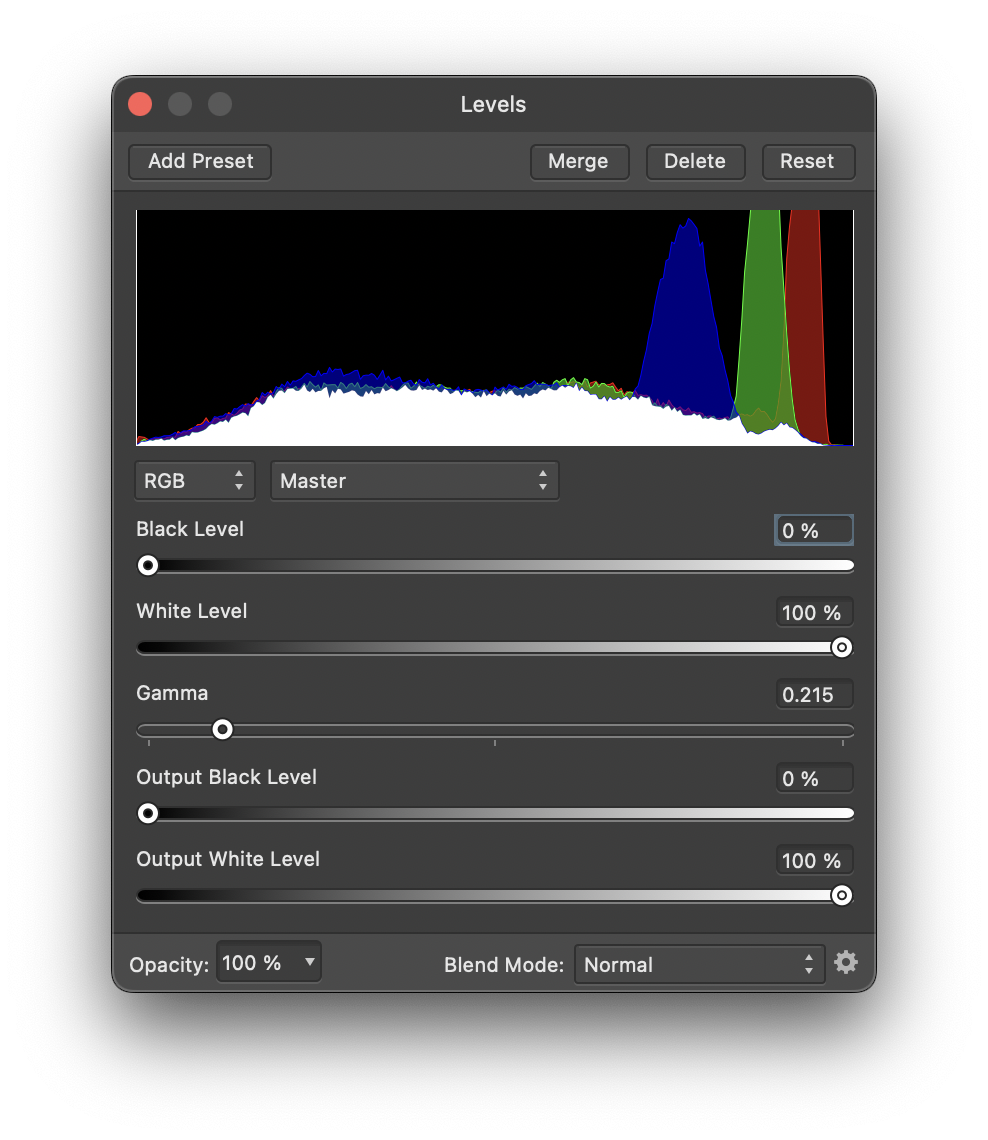
Neither would a "Cancel" button do what the OP wanted, which is to 'undo' a change already made to the adjustment layer.
Actually, a Cancel or Revert button IS what I want. I do want to see the adjustment layer changes live and then decide if I want to keep them or not.
-
Reset brings the adjustment back to its original neutral setting, so that is not helpful when all I want is to revert to the last saved state of the adjustment. Command Z (Undo) does work inside the dialog box, and for the moment that is the solution. Cancel is a fine word in my opinion. Cancel is consistent with other Mac dialogue boxes. Revert would be fine too. I do think it would be helpful to have the addition of a "Cancel" type button in these dialog boxes.
-
I make some changes in the level adjustment but I don't like the changes so how do I cancel the changes or revert to the last saved? I understand I can undo, but is there a way to do it in the levels adjustment window?
-
3 hours ago, NotMyFault said:
You need to subtract the rectangular shape of the lower part of the lower image
That is what I don't want to do. What I have in my example is what I want. Thank you Walt for showing me the way to change how the adjustment layer is configurable to where it adjusts.
-
I may have it figured out... I'm playing with it more, but it appears I need to add the "Adjustment" and then move the adjustment on top of the layer I want to adjust. That seems to work even though I can see all of my file is selected when I do the inversion.
-
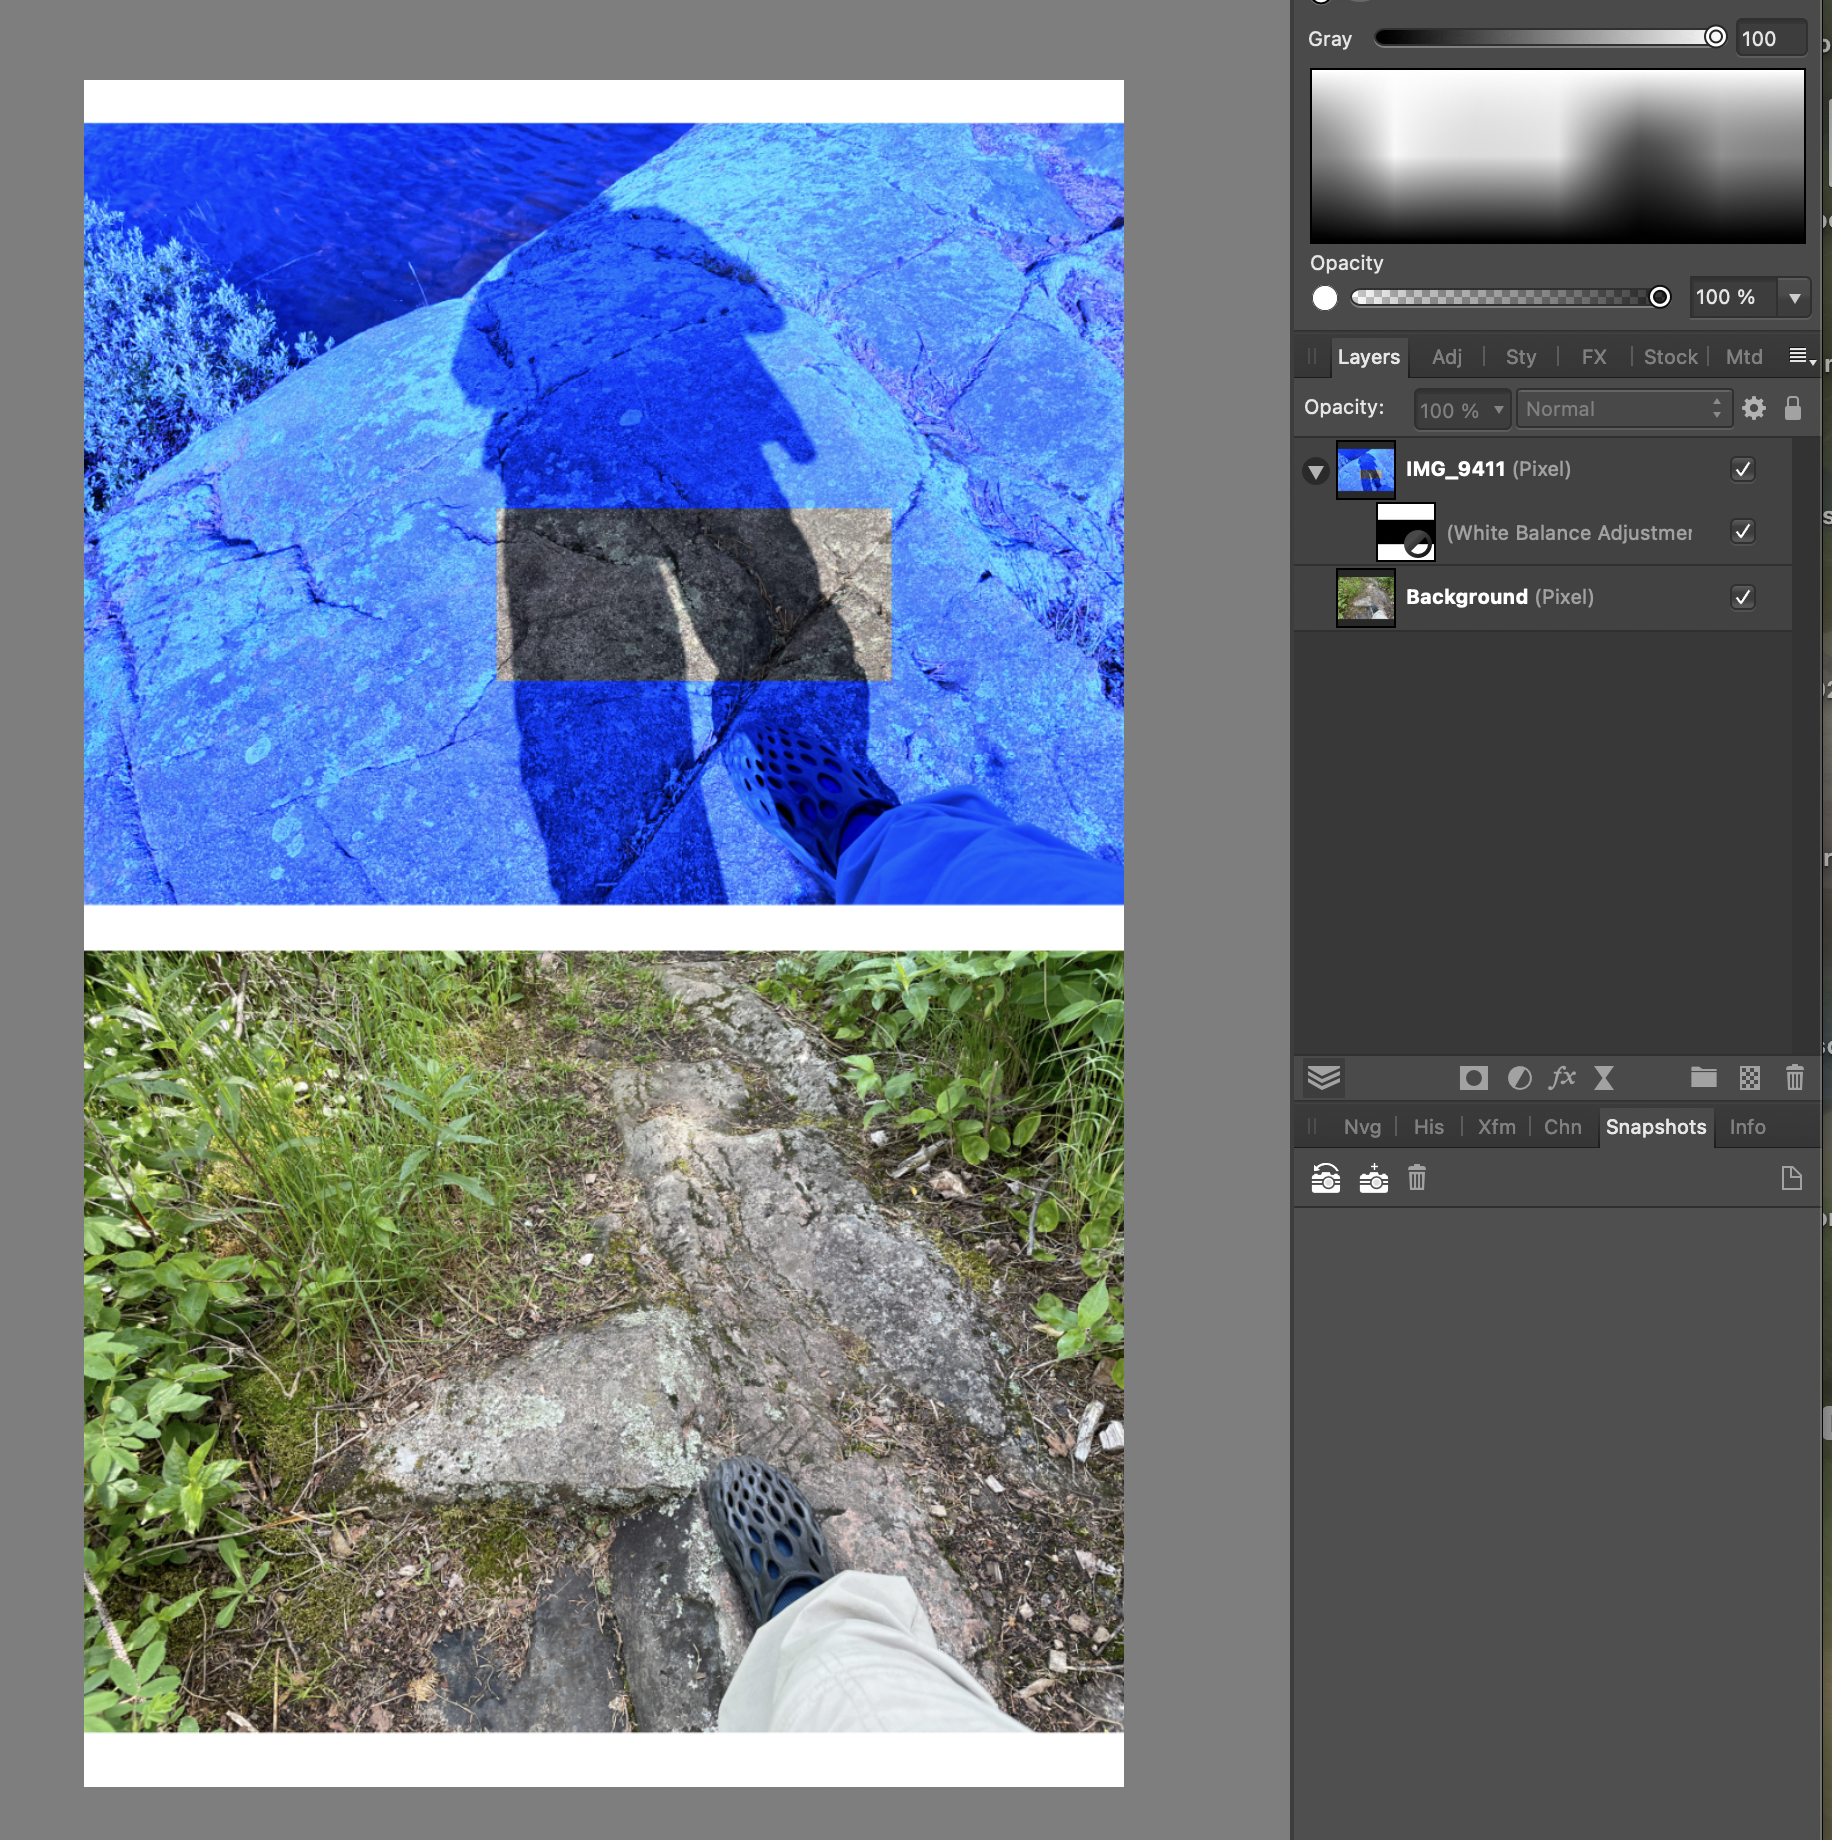
Here's a simple file with two layers. Please show me how to grab any part of the top image, invert that selection, and then add an adjustment to the inverted selection without affecting the lower image (named Background)?
-
1 minute ago, thomaso said:
Then just create your selection with any tool, apply invert and with the shoe image layer selected choose the adjustment. It will appear masked according to your selection.
I'll play around with that, but so far the inversion affects the entire file, not the single layer I want to adjust.
-
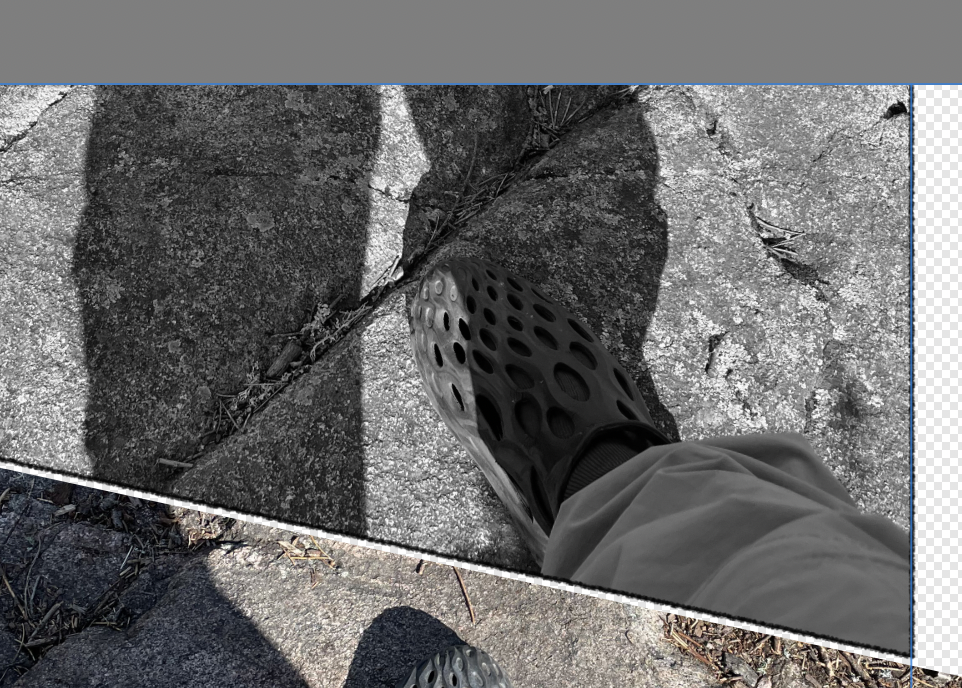
The flood select tool is not what I need. I want to select the foot, shoe and pant leg in this layer, invert that selection and then apply an adjustment to the inverted selection.
-
T
3 hours ago, thomaso said:This is how I understand @Mr. K's question "How do I invert a selection on just one layer?"
That is true. I am using Affinity Photo, not Publisher. Sorry I was not clear about that at the start. I don't see the "Current Layer" option in AP. I think the answer to my question is it cannot be done in AP, and I think the solution is to create a mask instead of inverting the selection. I will work on that next. Thanks to all who commented here.
-
I have multiple layers. How do I invert a select so it only selects the inverse on one layer?
-
I just did a test. I created a brush stroke path in Affinity Designer. I copied that and pasted it in Affinity Photo. It is editable in AP as a path. Odd that this works but it can't be done directly in AP.
-
I need this too.
-
Thanks. I was just working on "clipping" masks and that is the solution. I will look at the technique you mention.
-
I will explain in terms I hope are clearer. I want to be able to crop the individual layers and have the option to adjust the crops of the individual layers.
-
I want to join multiple images together to create one composite image. Each image will be a segment of the composite image. I've been trying to use masks, but that is a real mess for what I want to do. How might I non-destructively alter the visible part of the individual images so that I can make changes to increase or decrease the visible area of each image (layer) in the composite?
-
I'm experimenting with layers masks. I cannot figure out what the checkbox to the right does. I click it and nothing happens. I can show or hide the mask using the Quick Mask button (Q) in the top tool bar.
-
4 hours ago, walt.farrell said:
I'm not sure I understand the benefit of doing a batch conversion like that.
You'll still need to Open each file individually to see if the conversion was successful, as there are many things that could be in an AI file that won't be handled properly by Affinity. So why not just Open each, check it, fix it if needed, and Save?
The value is I want them all to be saved as Designer files instead of the .ai files they are now. An .ai file is useless to me. At least a Designer file will open in Designer. Affinity Phot has a batch convert and that saves A LOT of time.
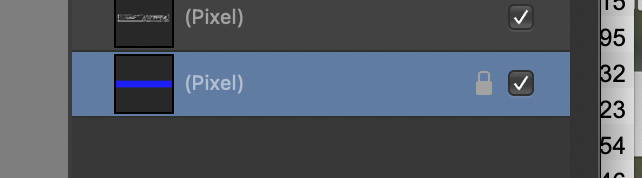


AP. My pixel layer is locked but I can still edit it?
in Pre-V2 Archive of Affinity on Desktop Questions (macOS and Windows)
Posted
OK, but can you think of any benefit only locking it from moving might have? I can't.