

tschotsch
-
Posts
20 -
Joined
-
Last visited
Posts posted by tschotsch
-
-
…and to take things a step further, you can actually make a contour from a dash line, too…

…
…or a pressure line…
…
-
…actually Ad has a much easier contour function than Ai does. No work around needed.
Here it goes, I hope this helps…
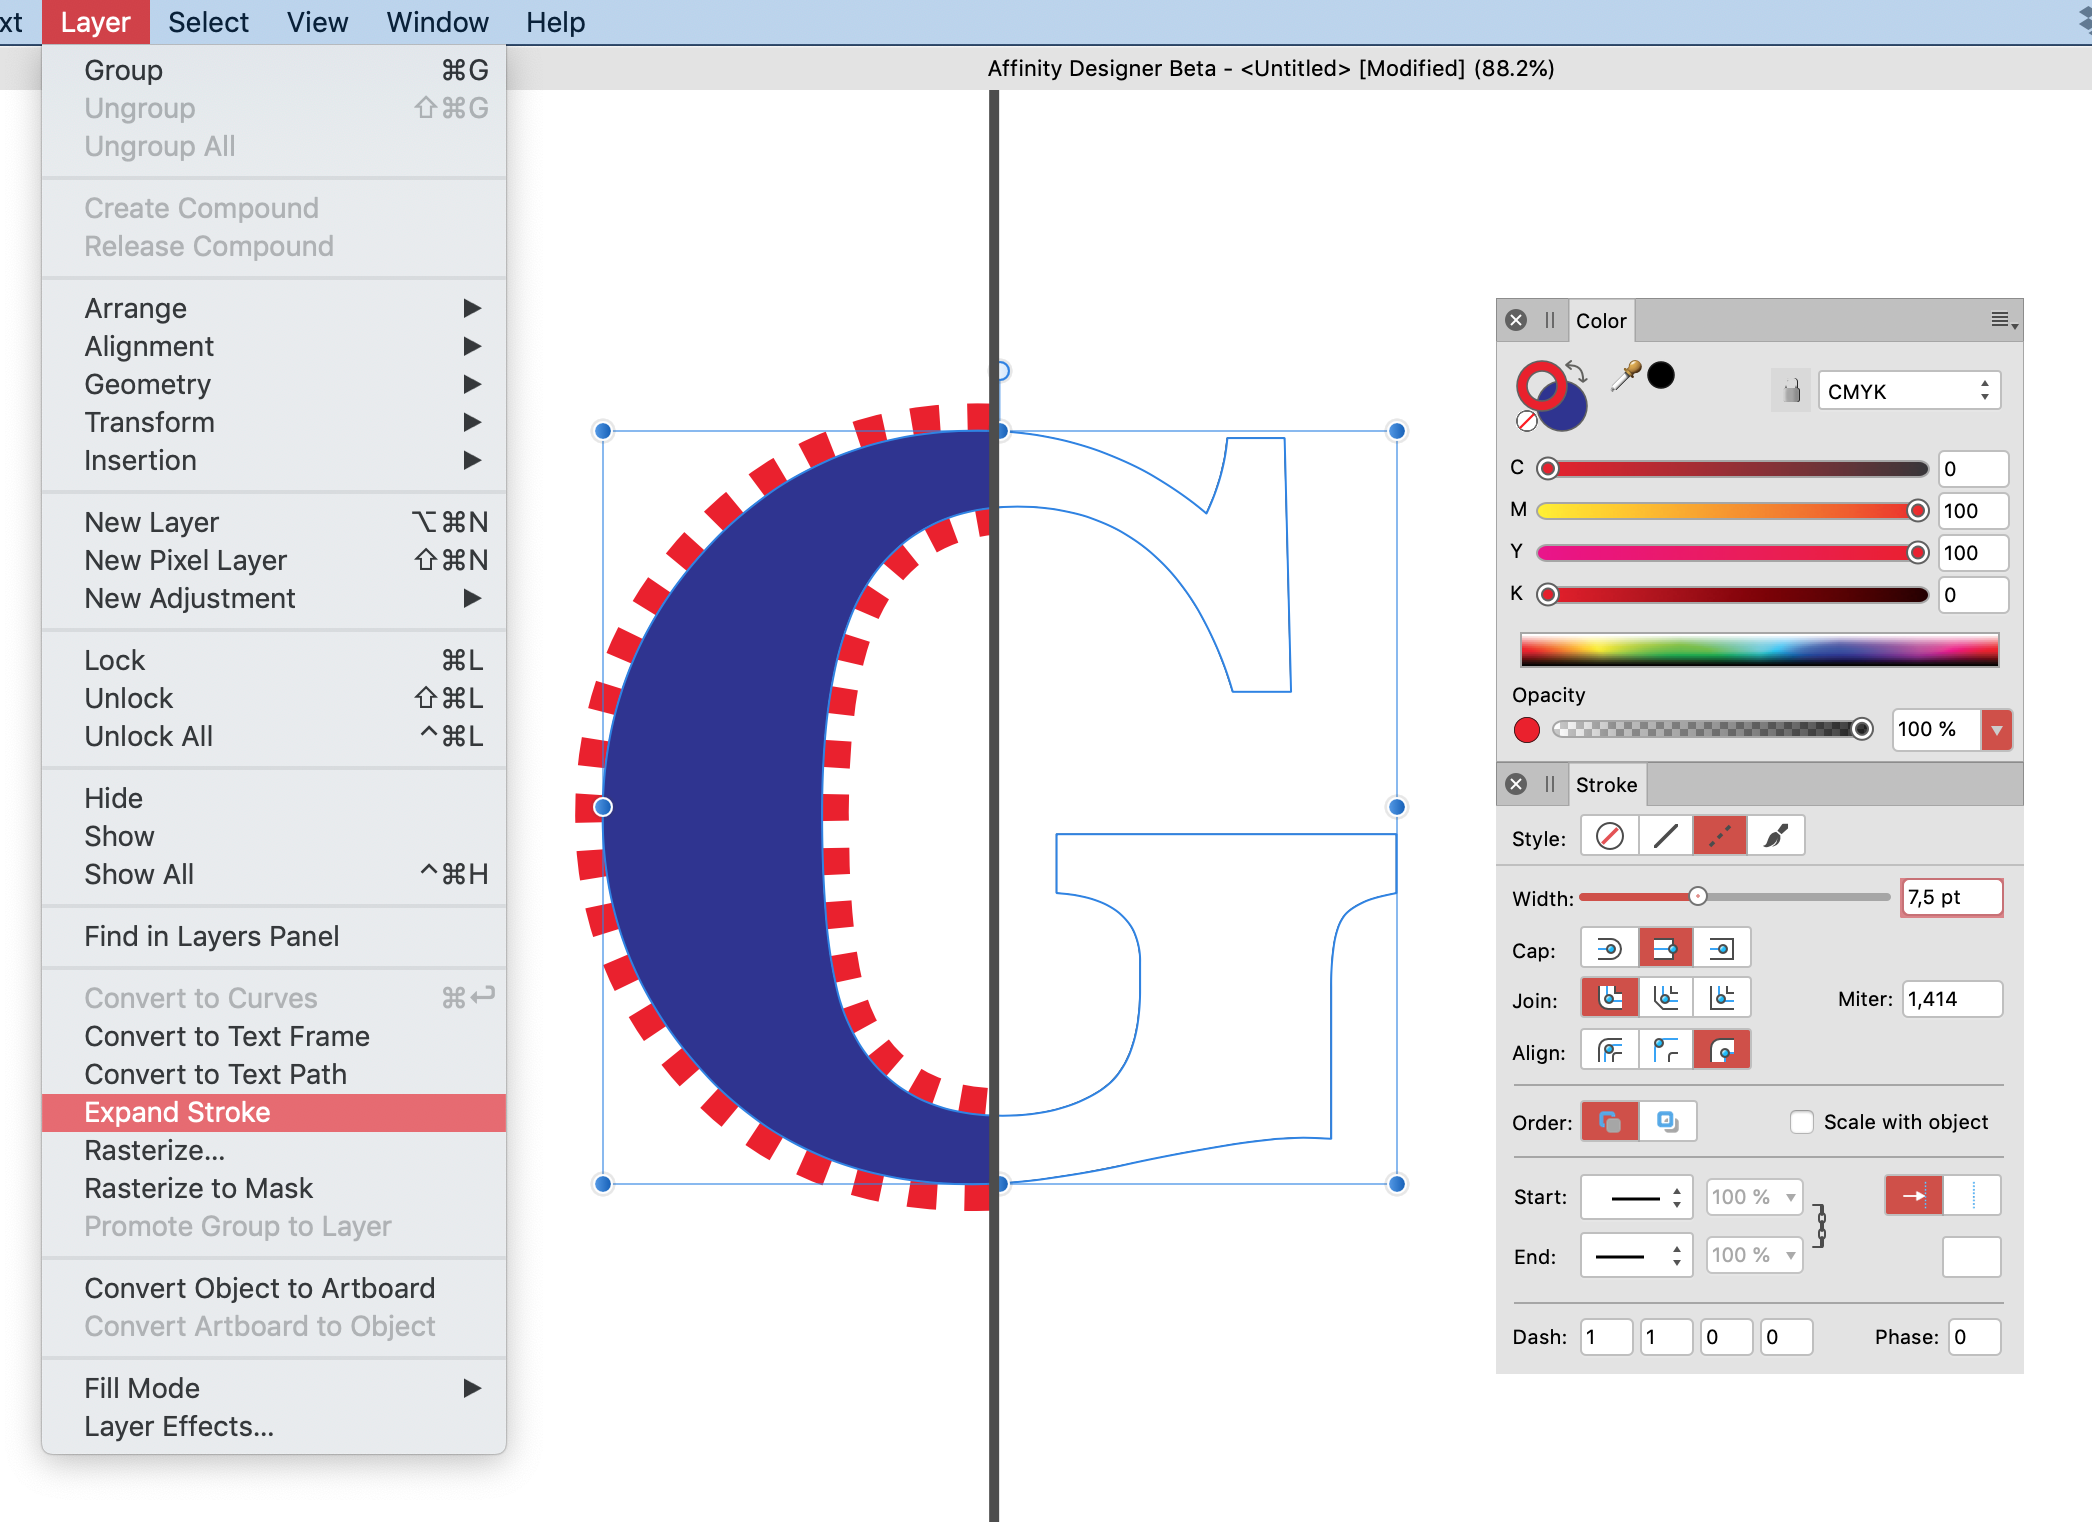
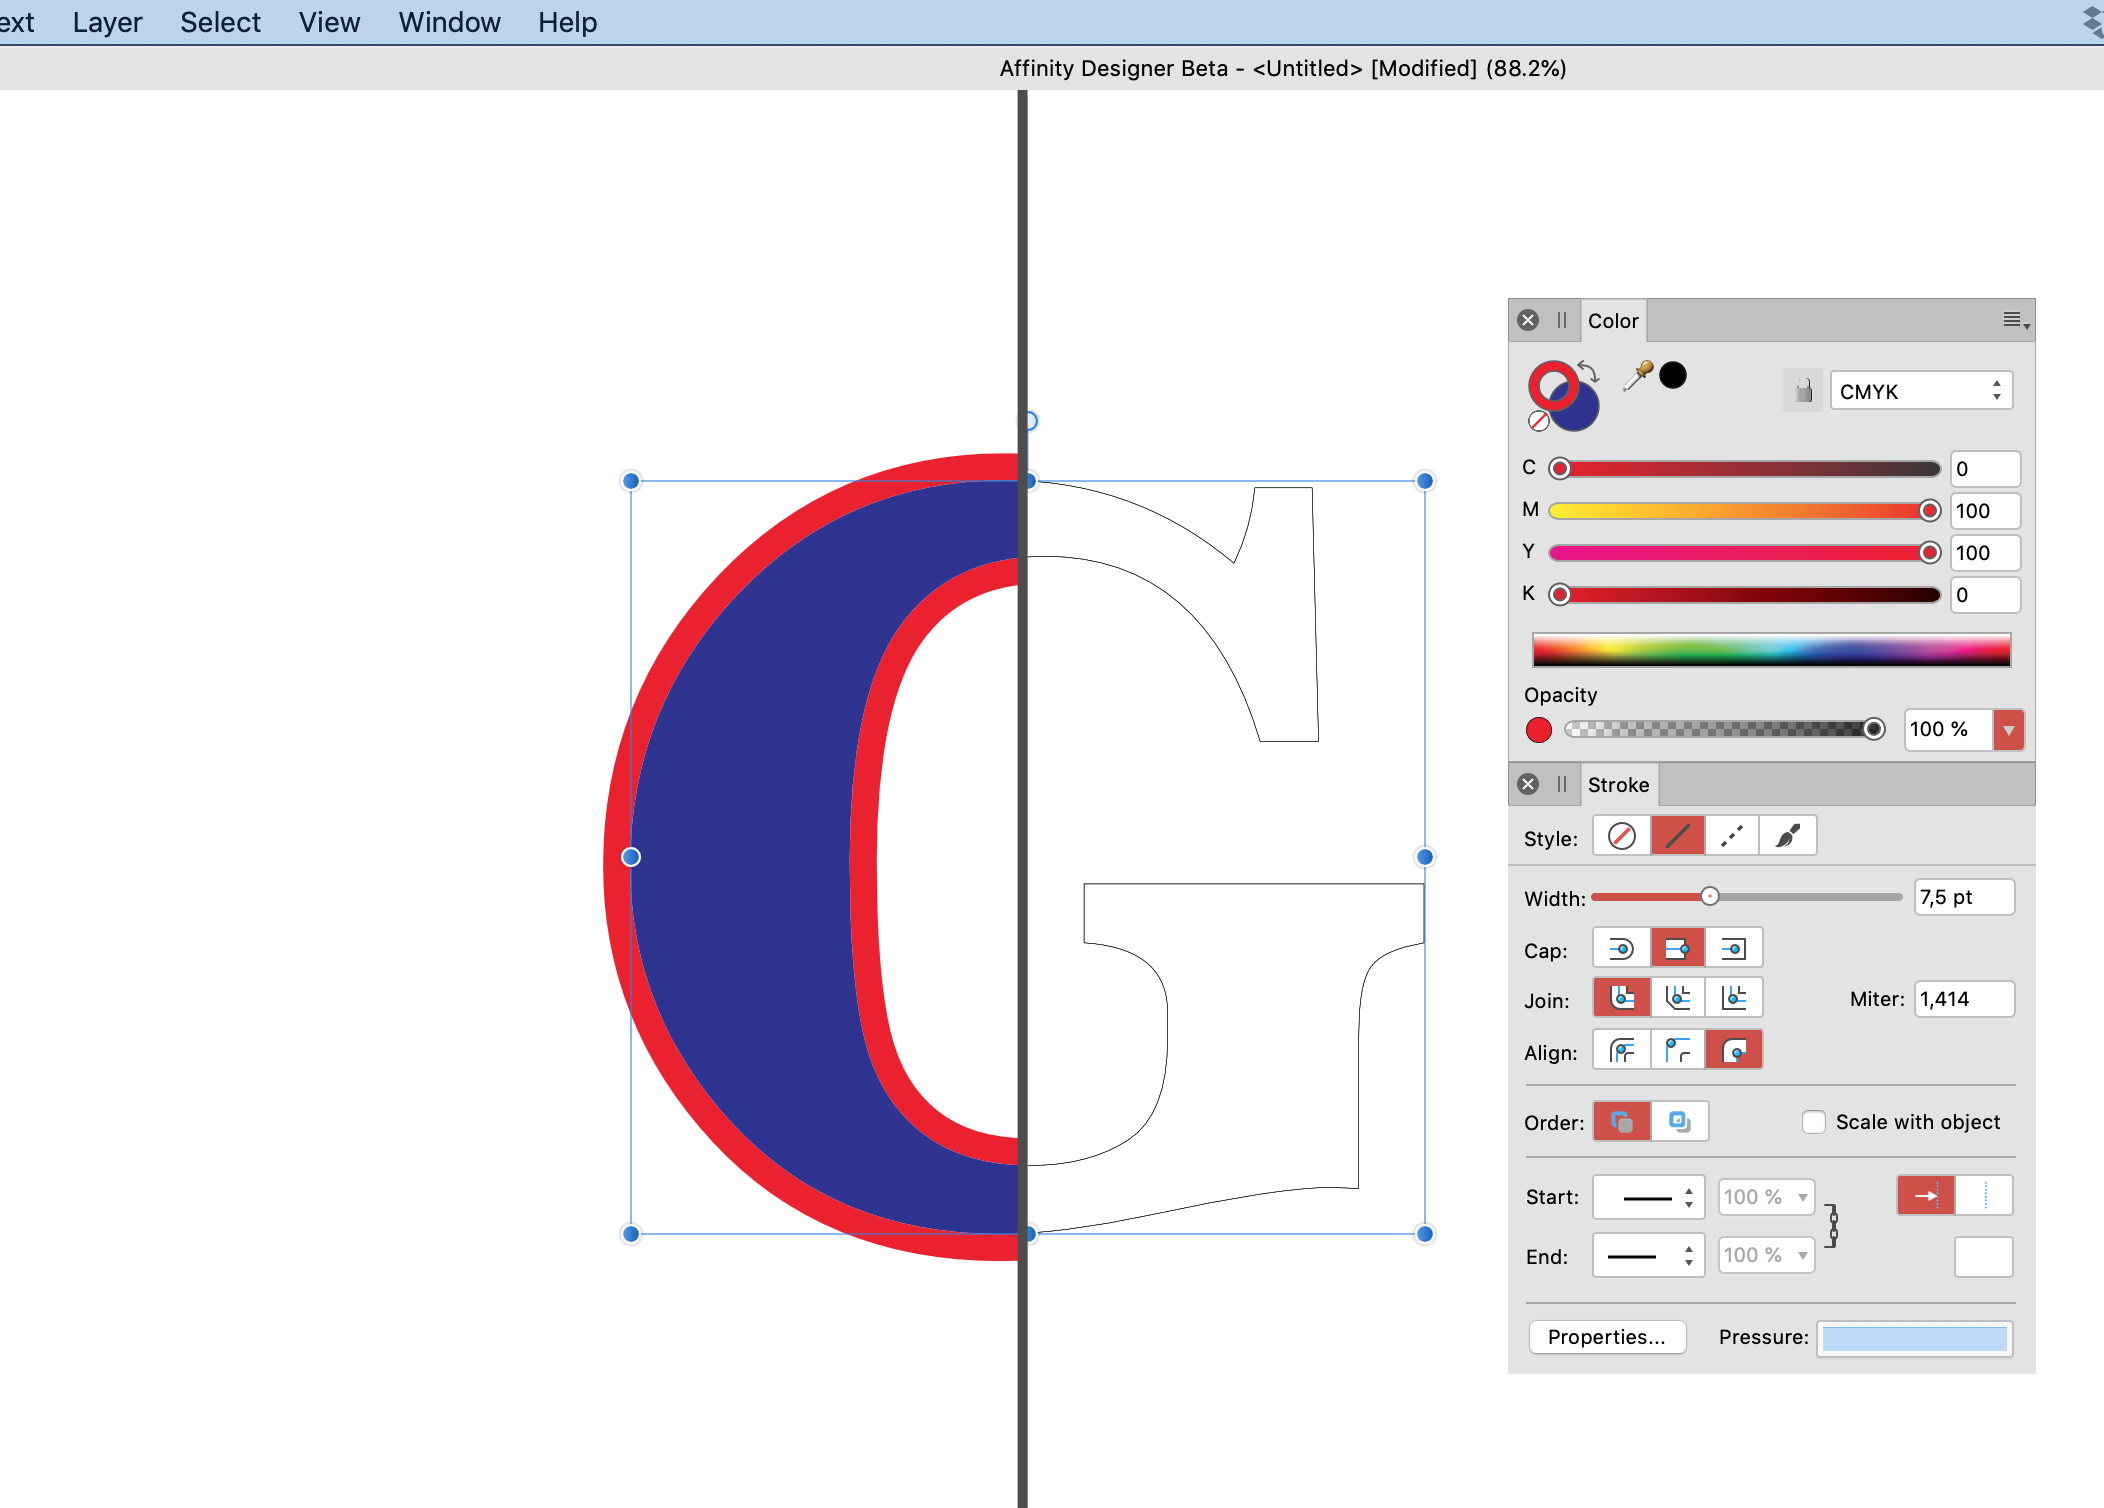
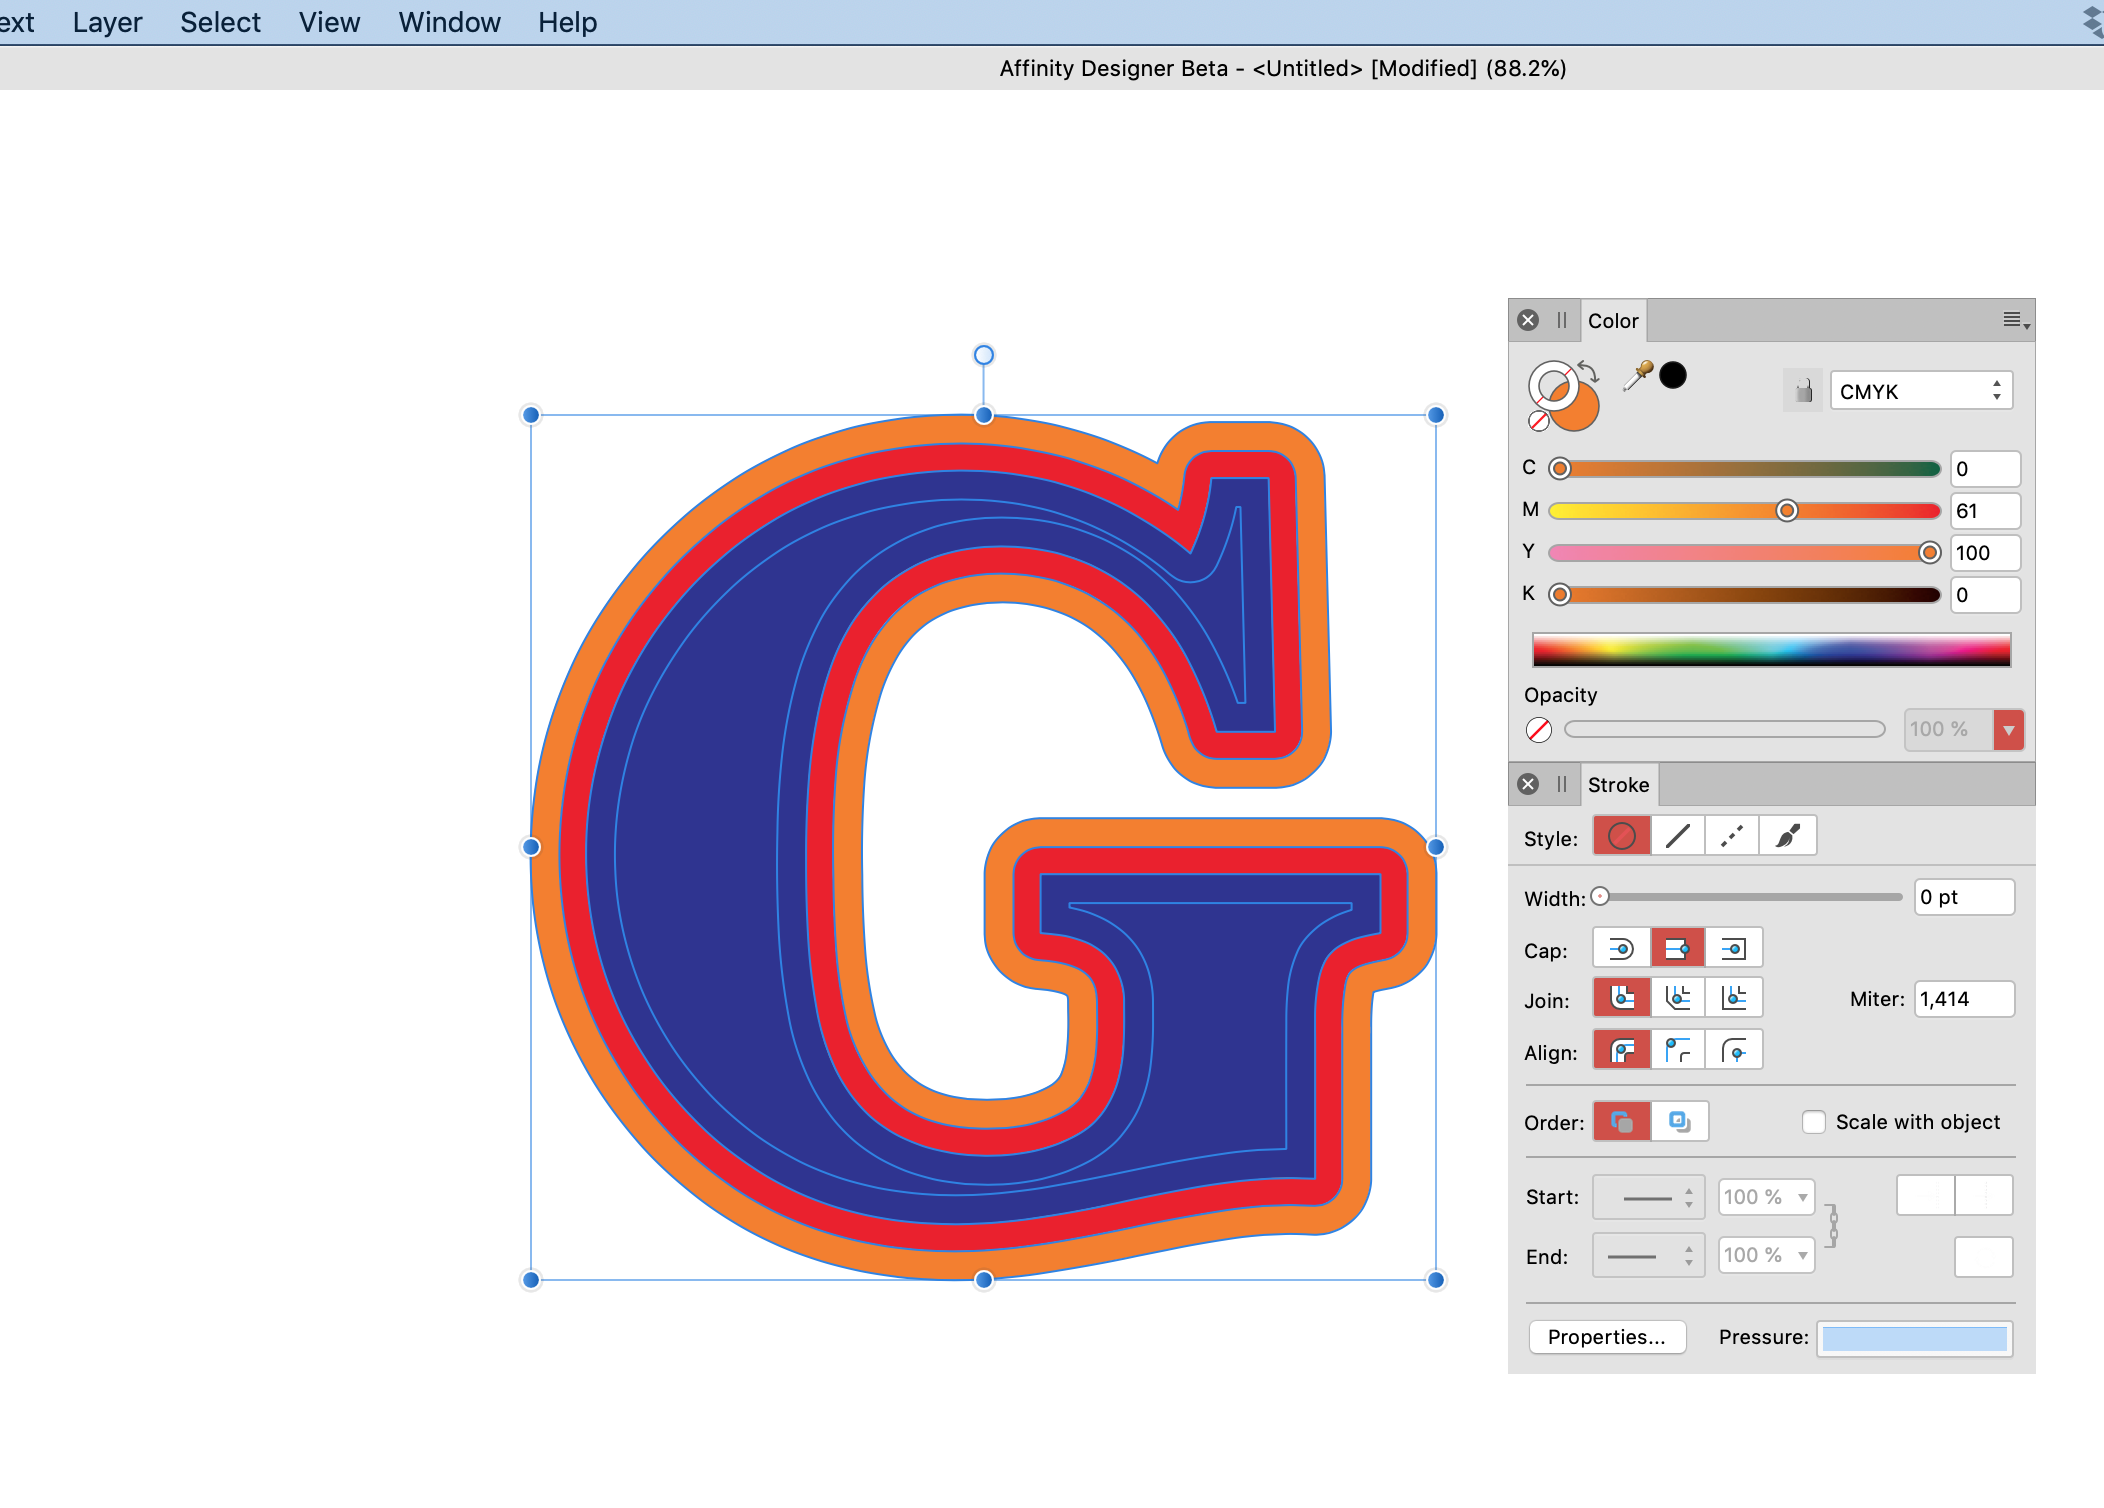
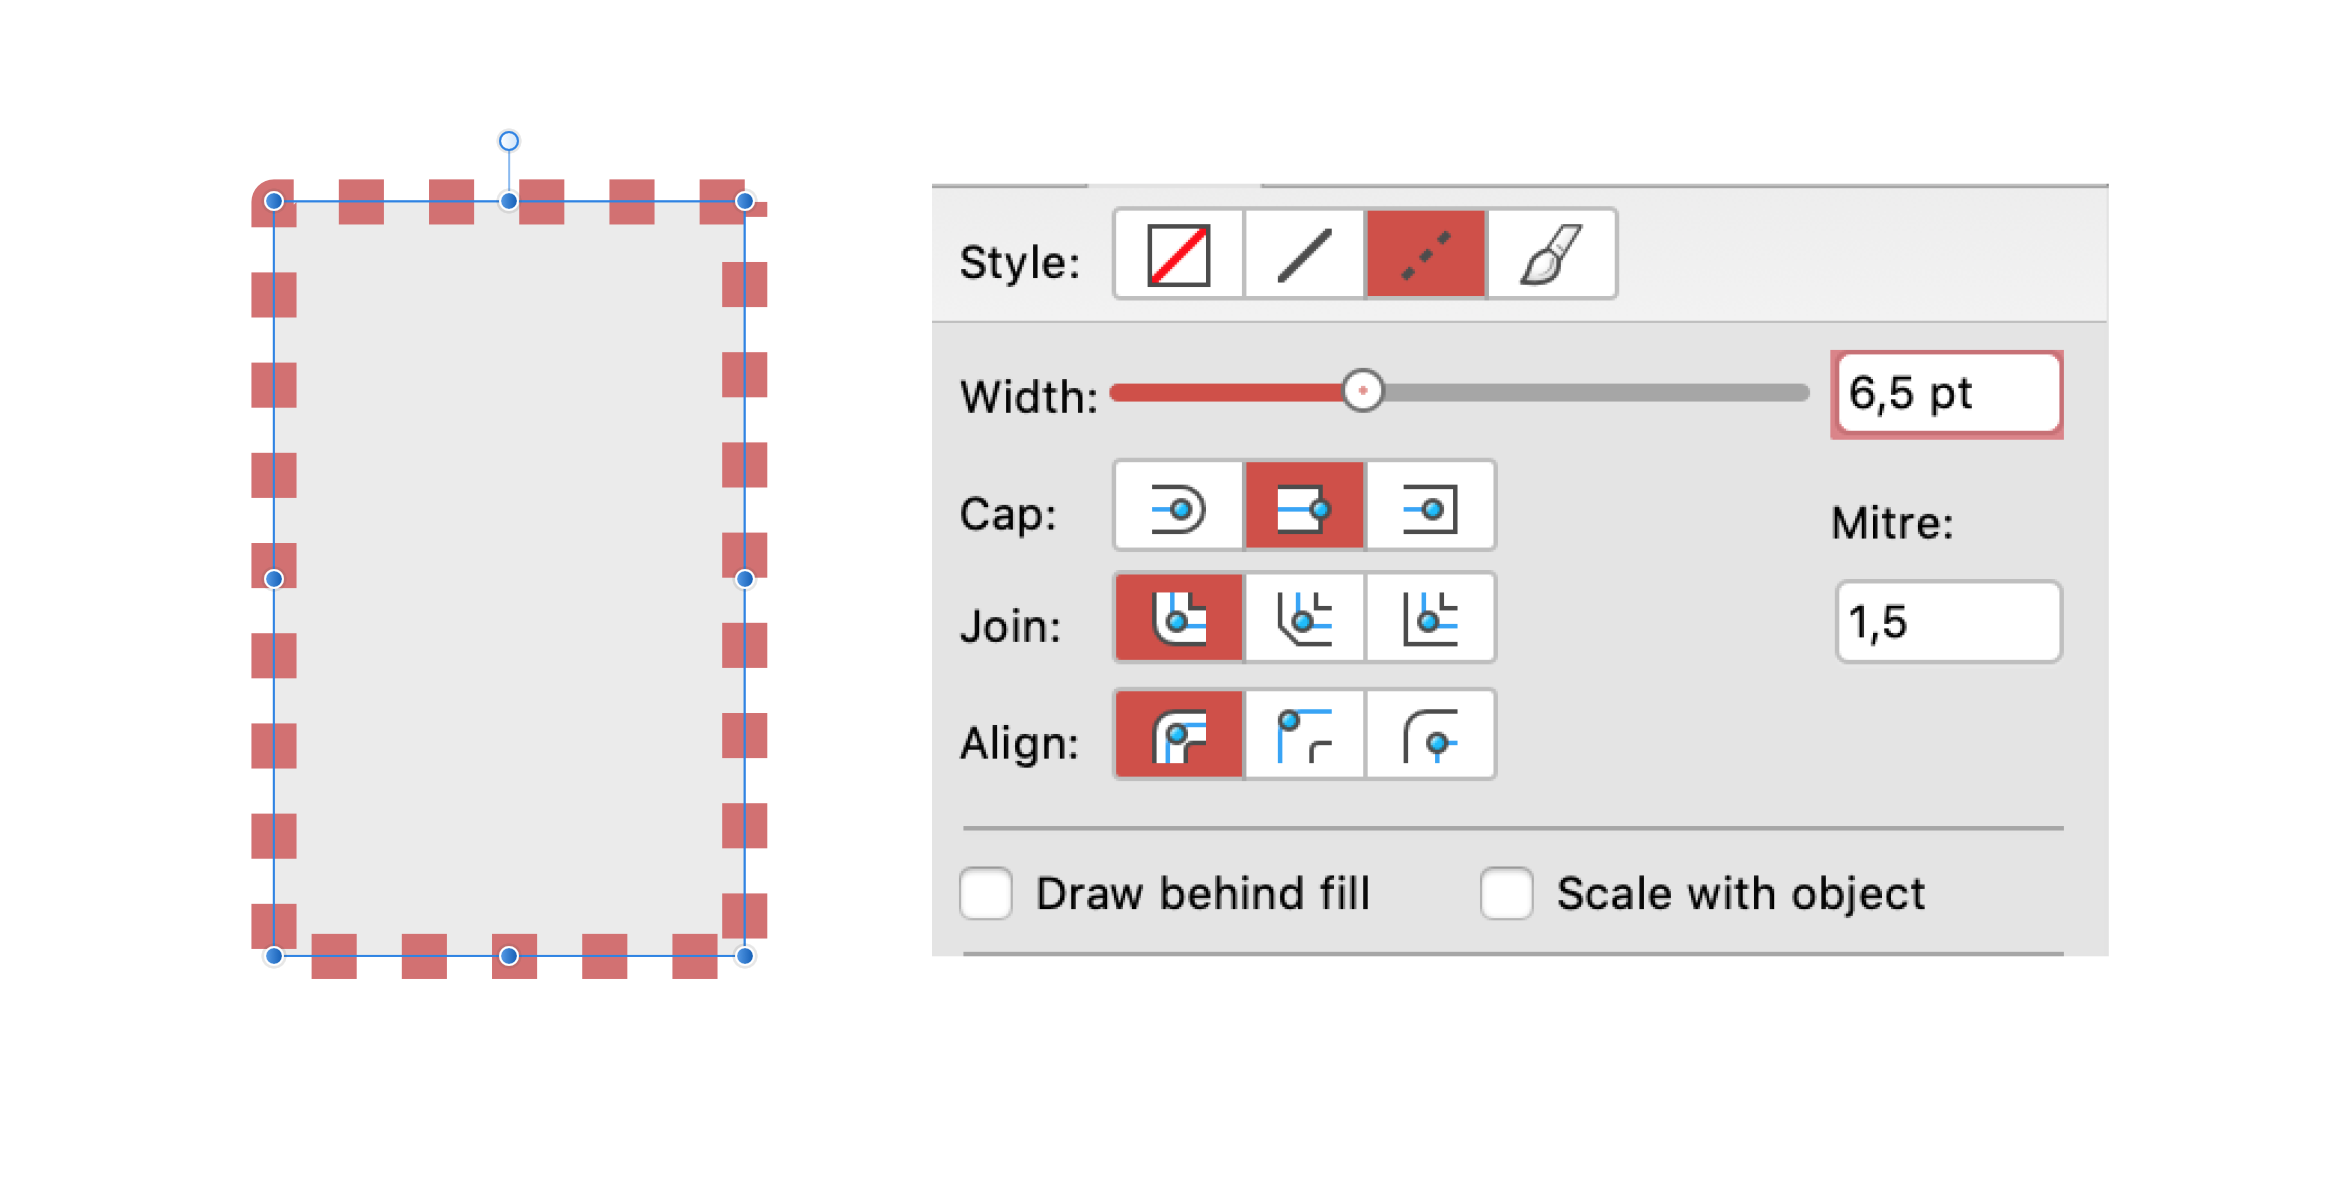
Step 1, take any object and apply a stroke to it. In this case the stroke is red, weight is 7,5 pt. You can use all attributes you would usually do when it comes to strokes, in this case round corners and stroke aligned to the outside of the object. Color panel shows a blue fill and a red stroke color.
Here in split view you can see that the stroke is indeed a stroke and not an object (yet).
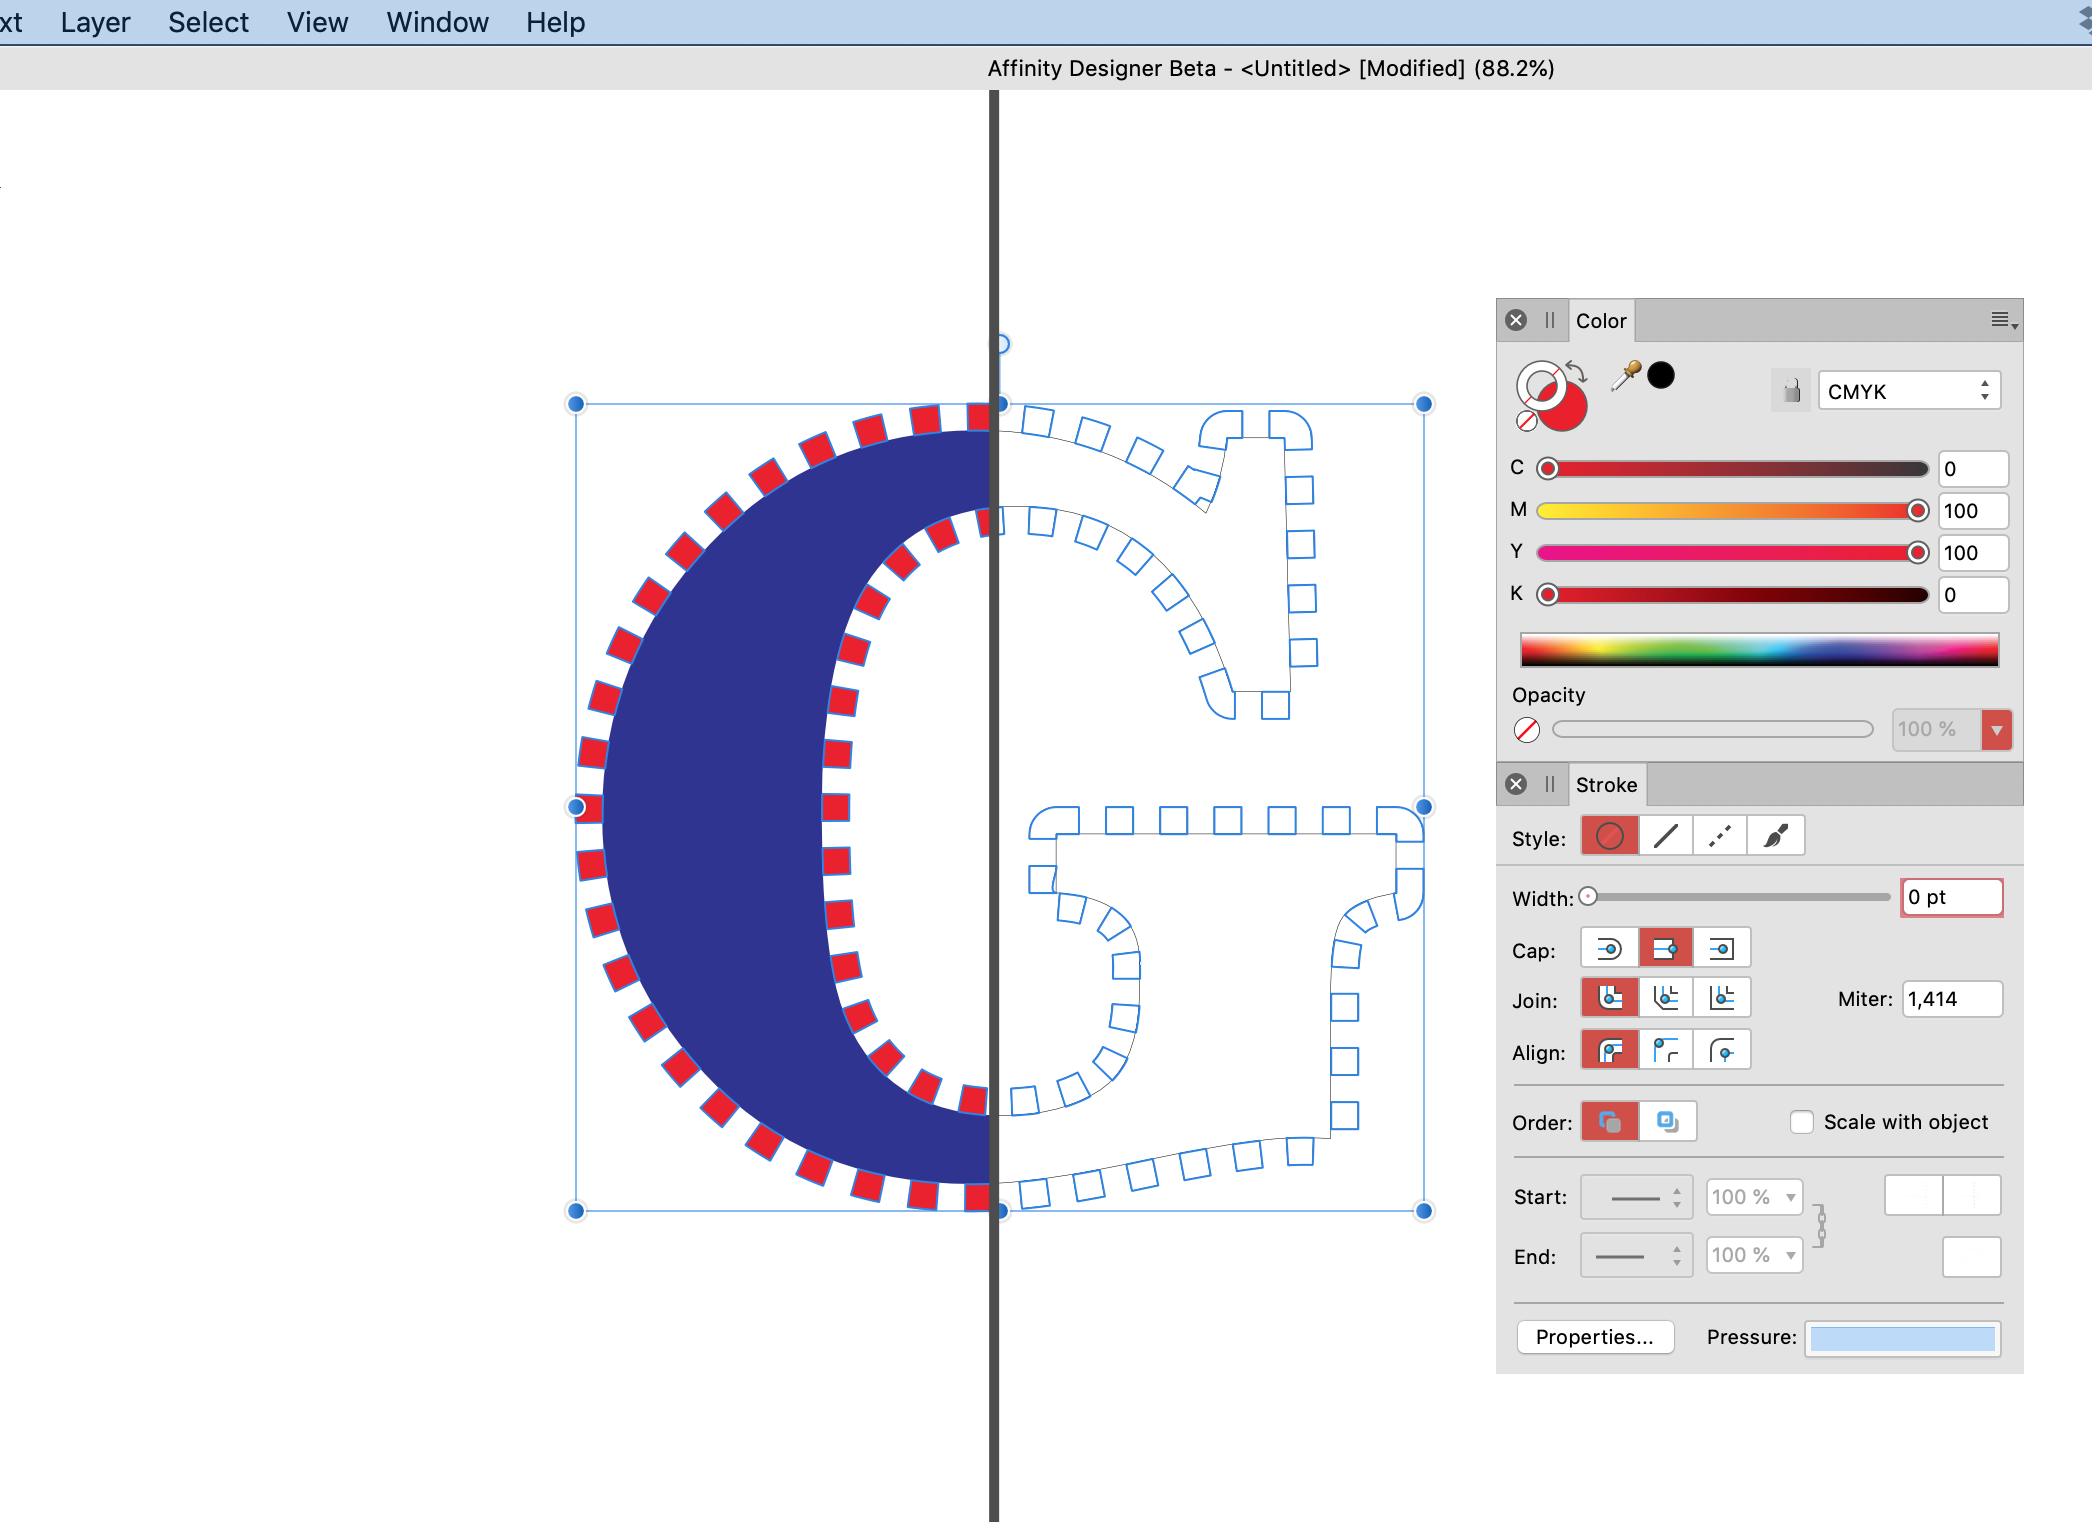
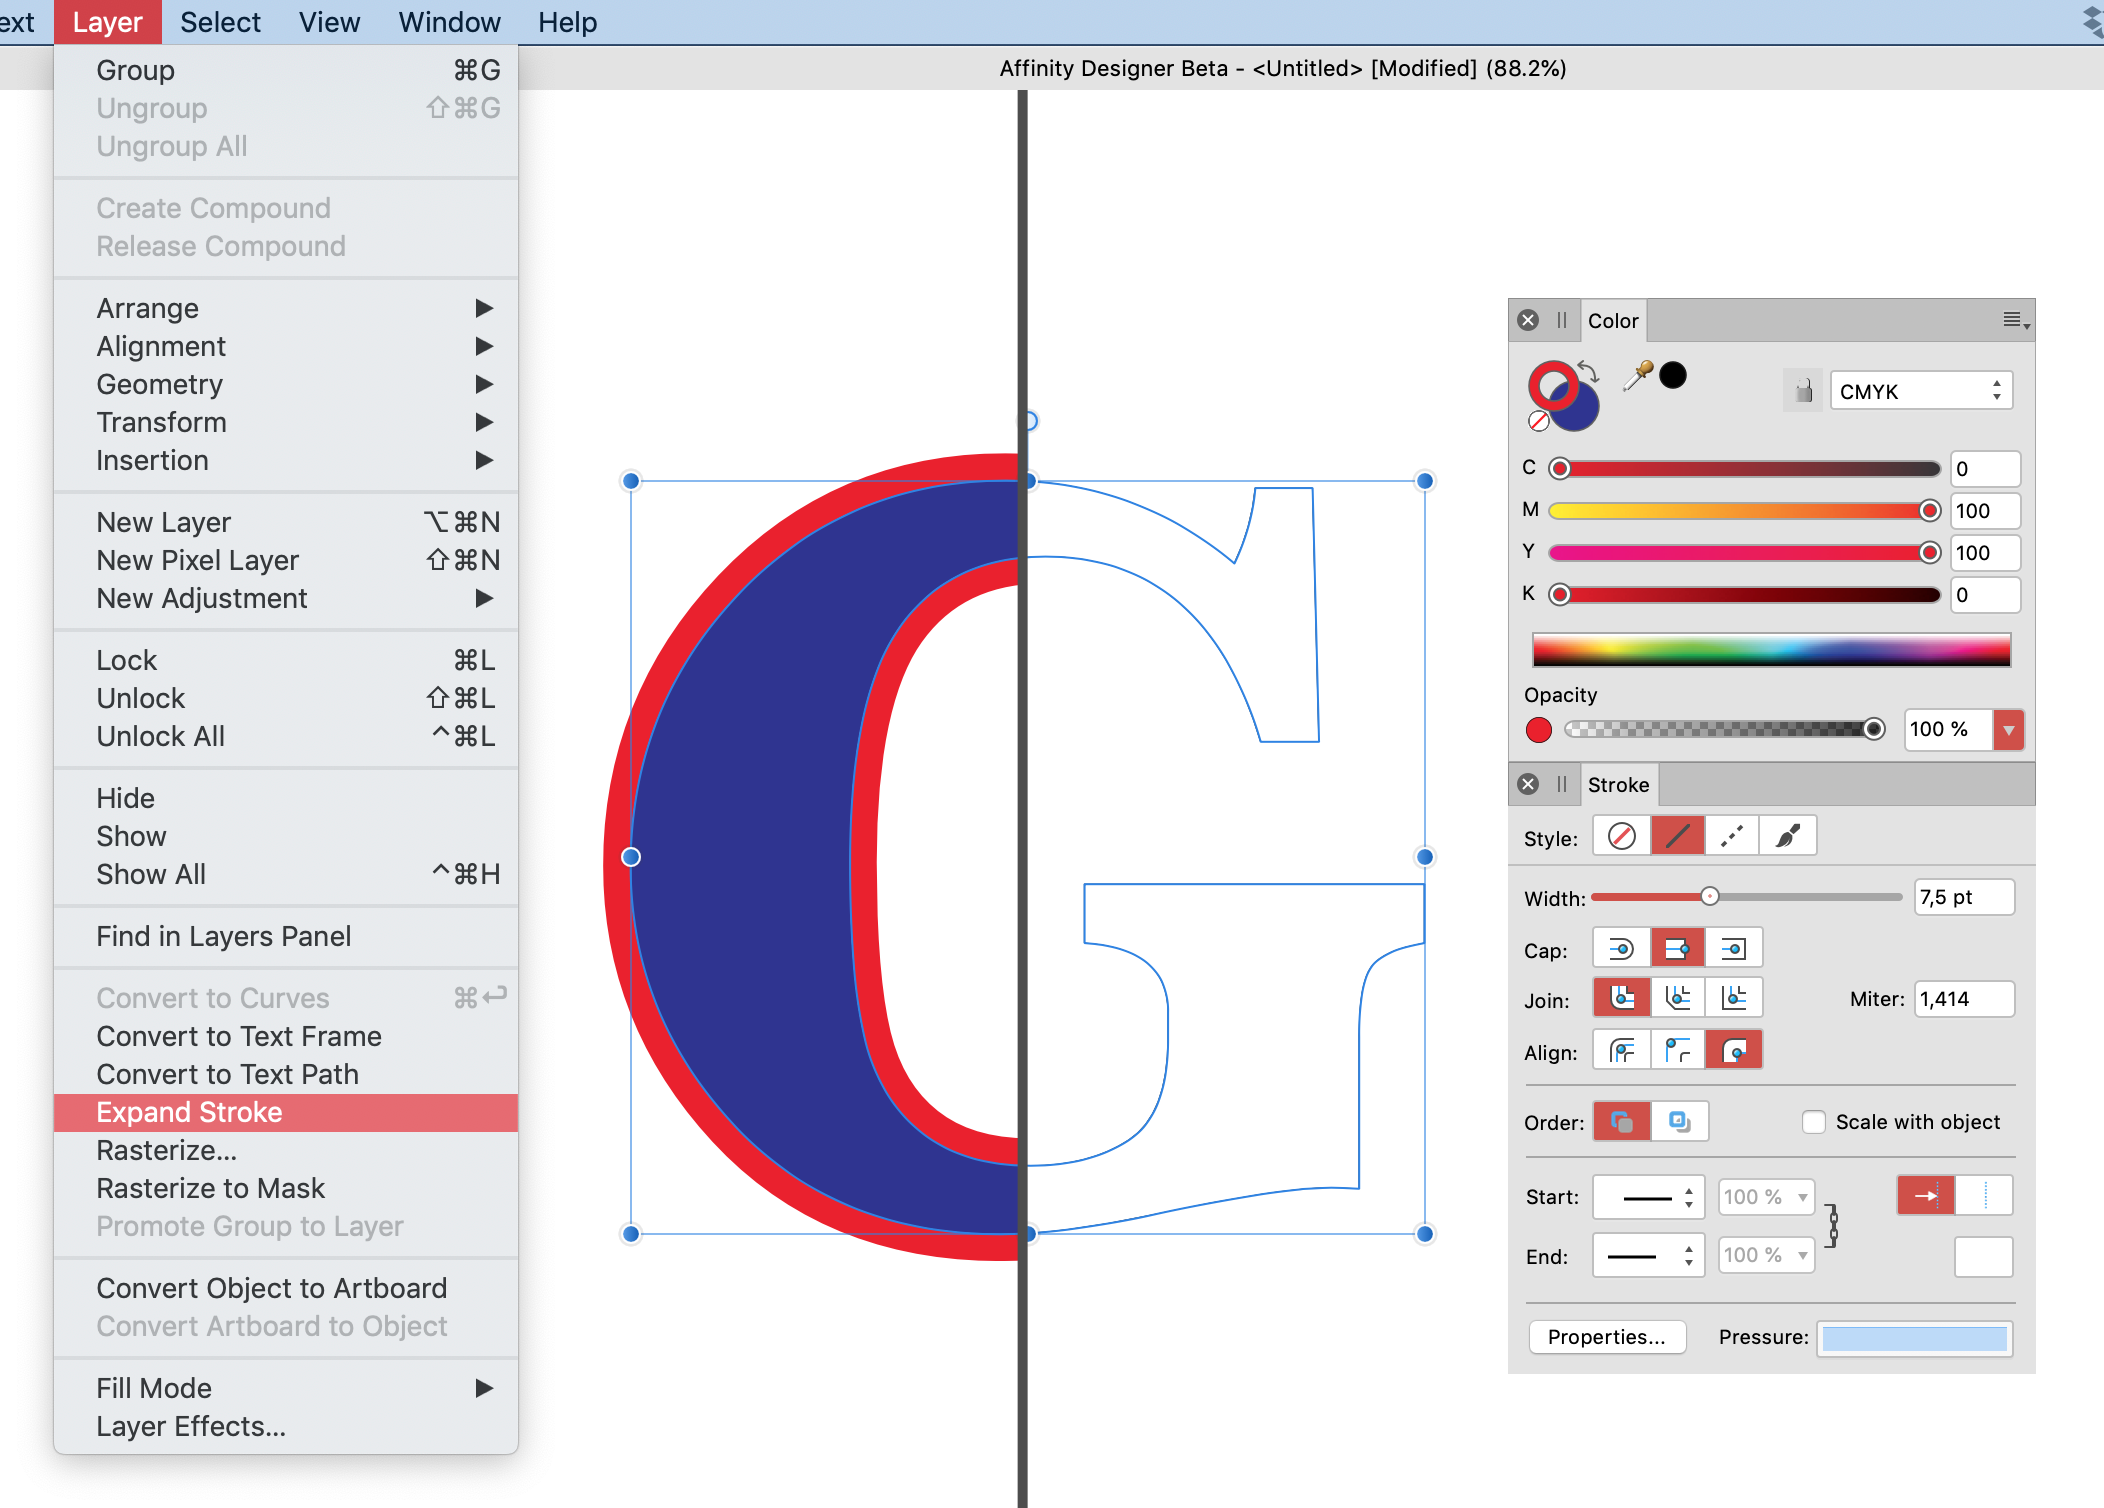
Step 2, convert object to curves in Layers menu.
Step 3, without deselecting the object, choose Expand Stroke again from the Layers menu.
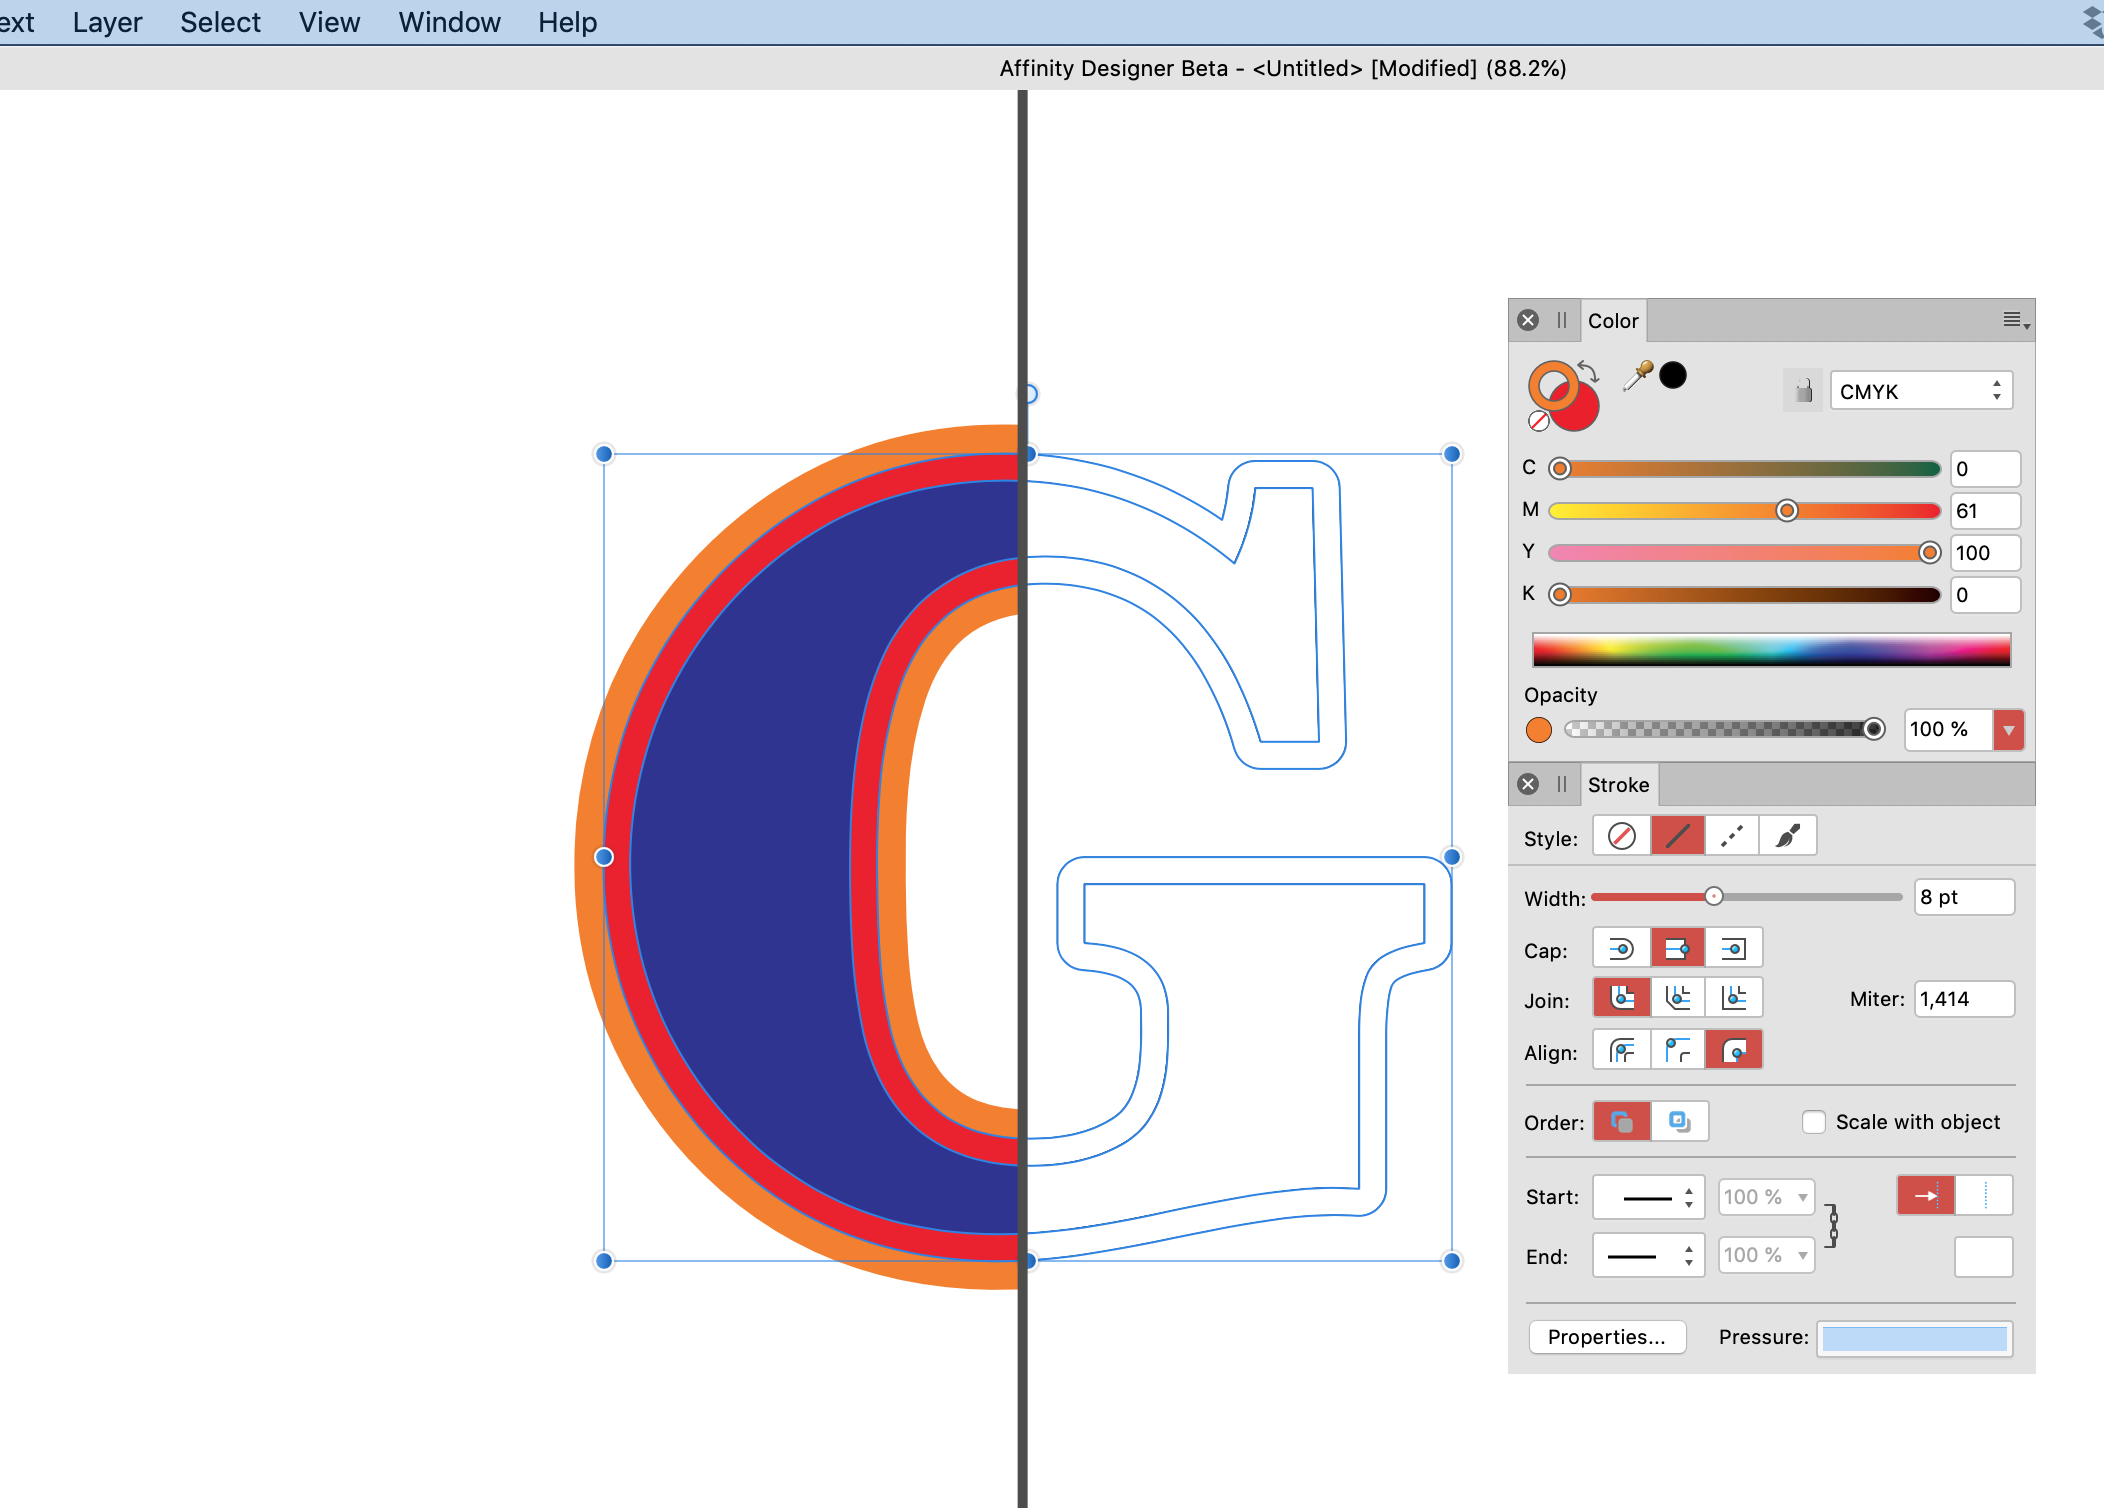
Now the stroke has become an object as is clearly visible in split view. Also, the color panel no longer displays a stroke color.
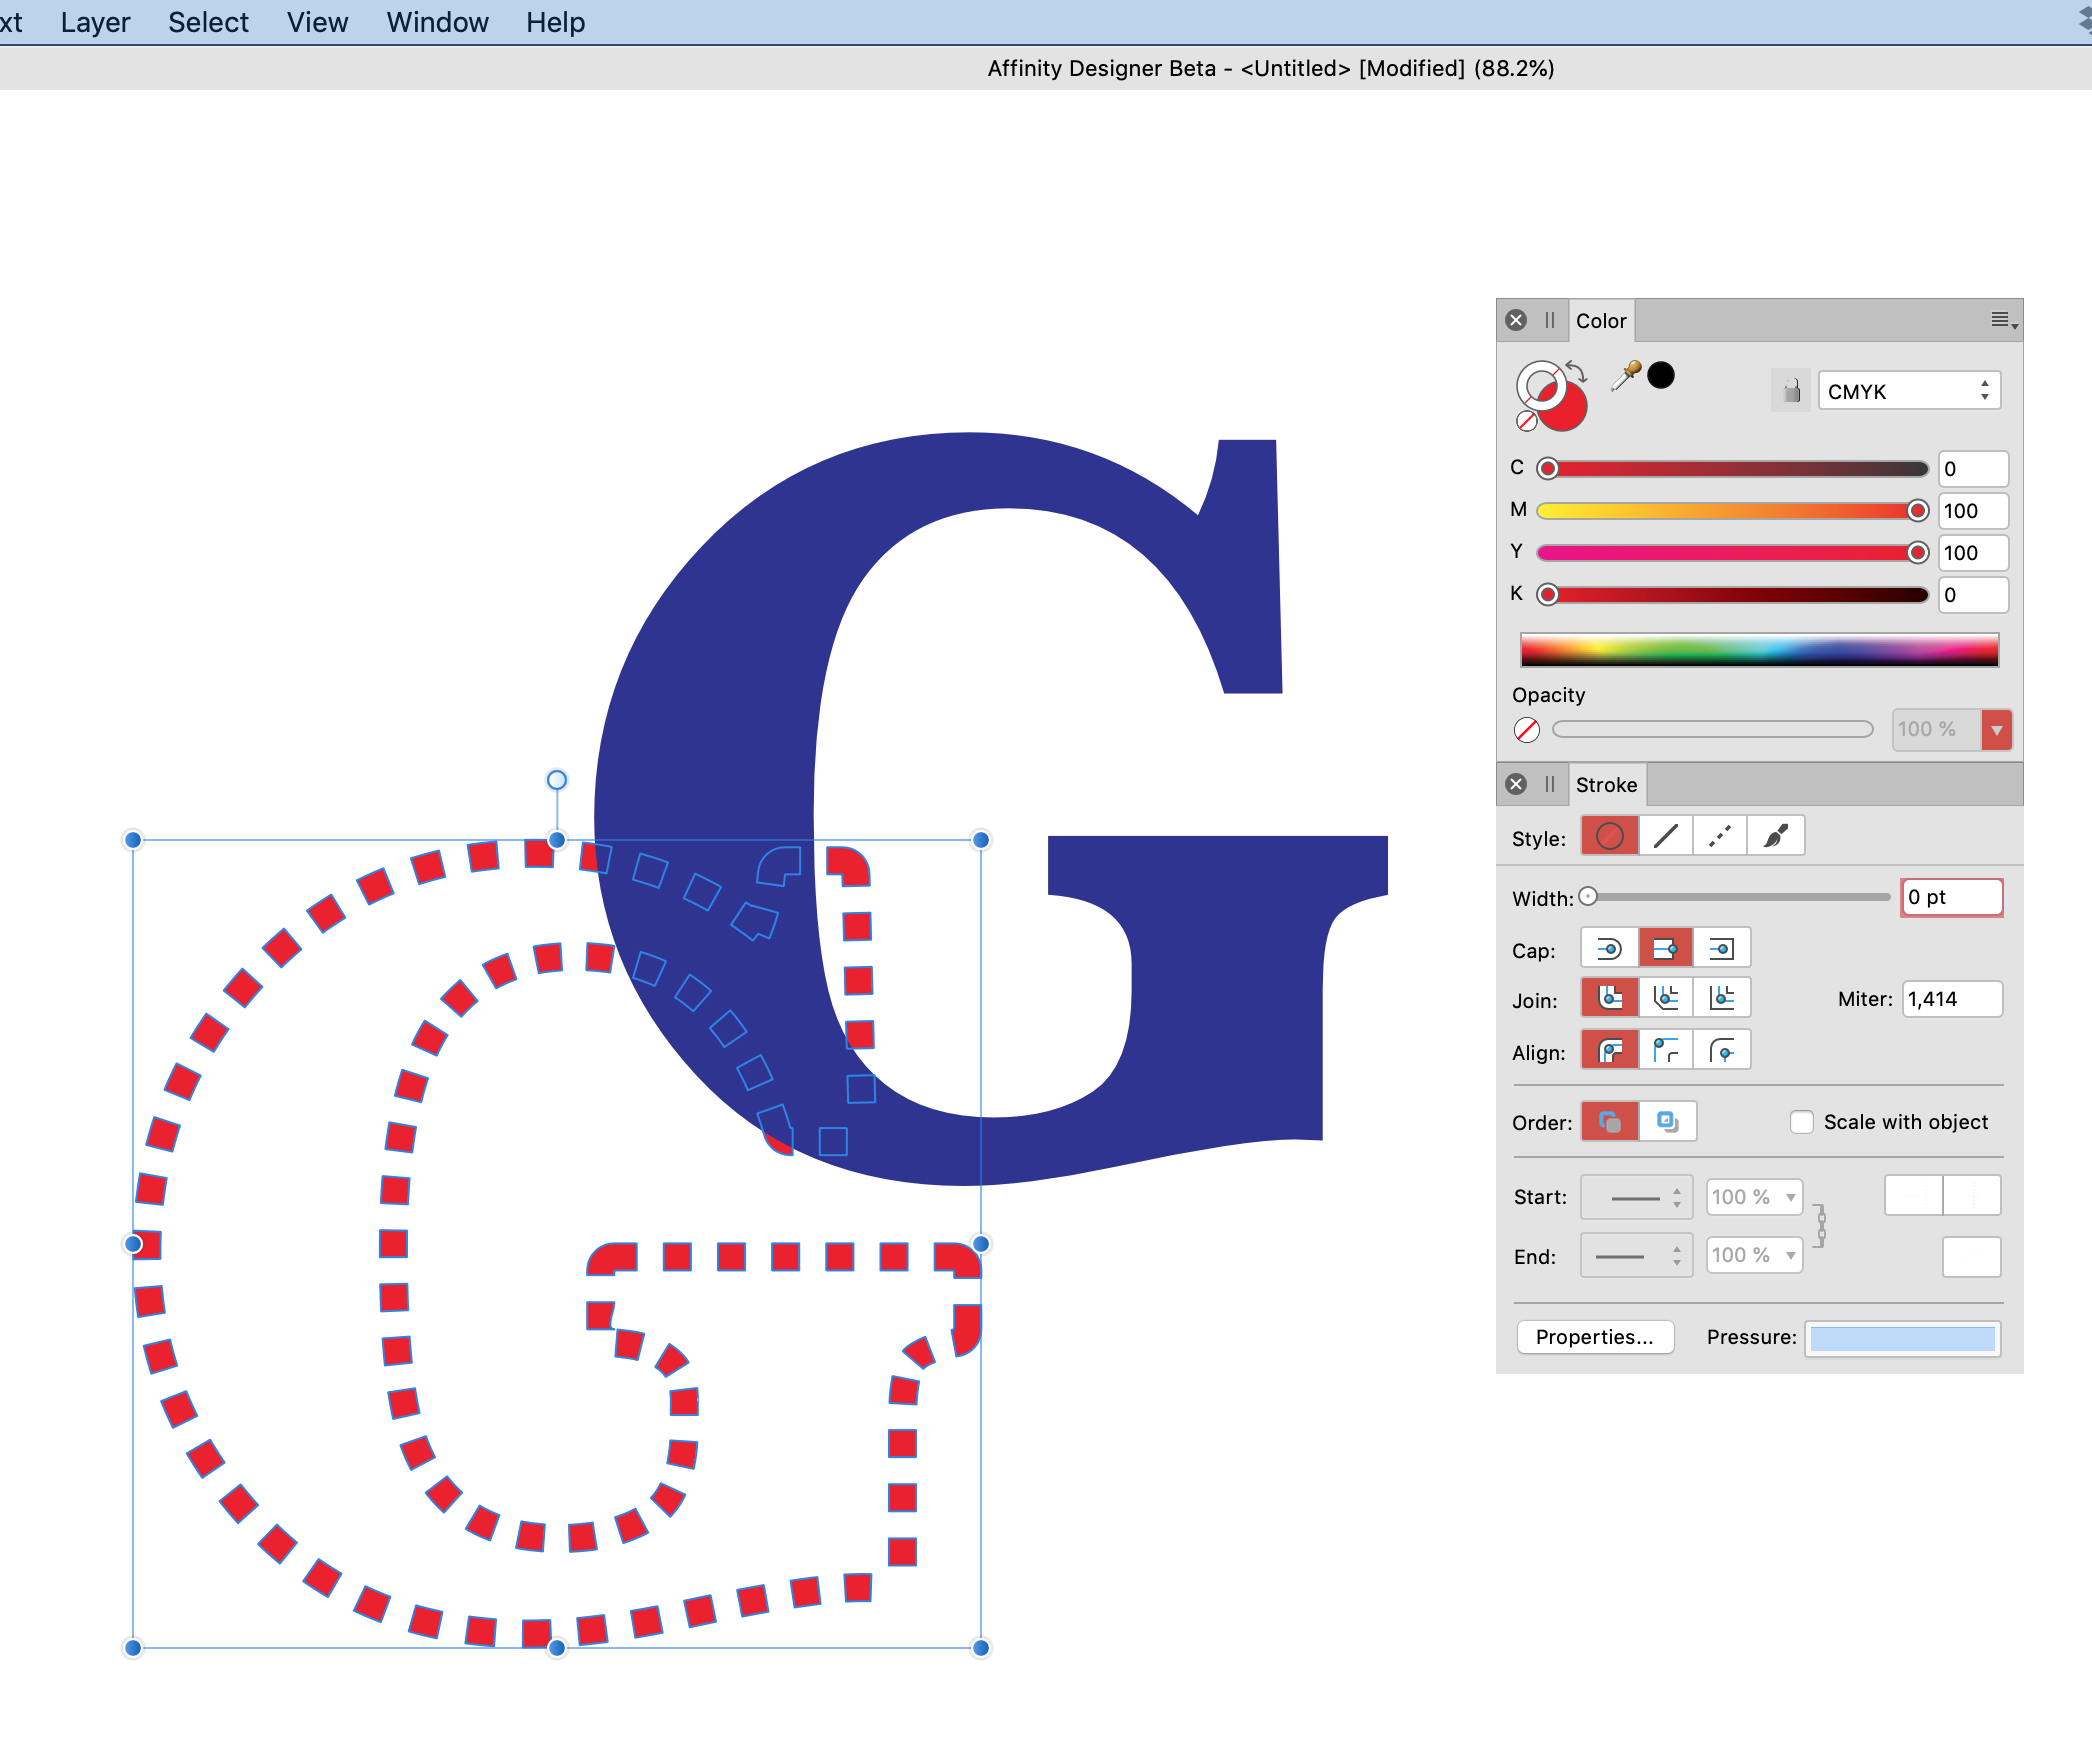
Step 4, now I can apply another stroke to the new (red) object, this time an orange color, weight is 8 pt.
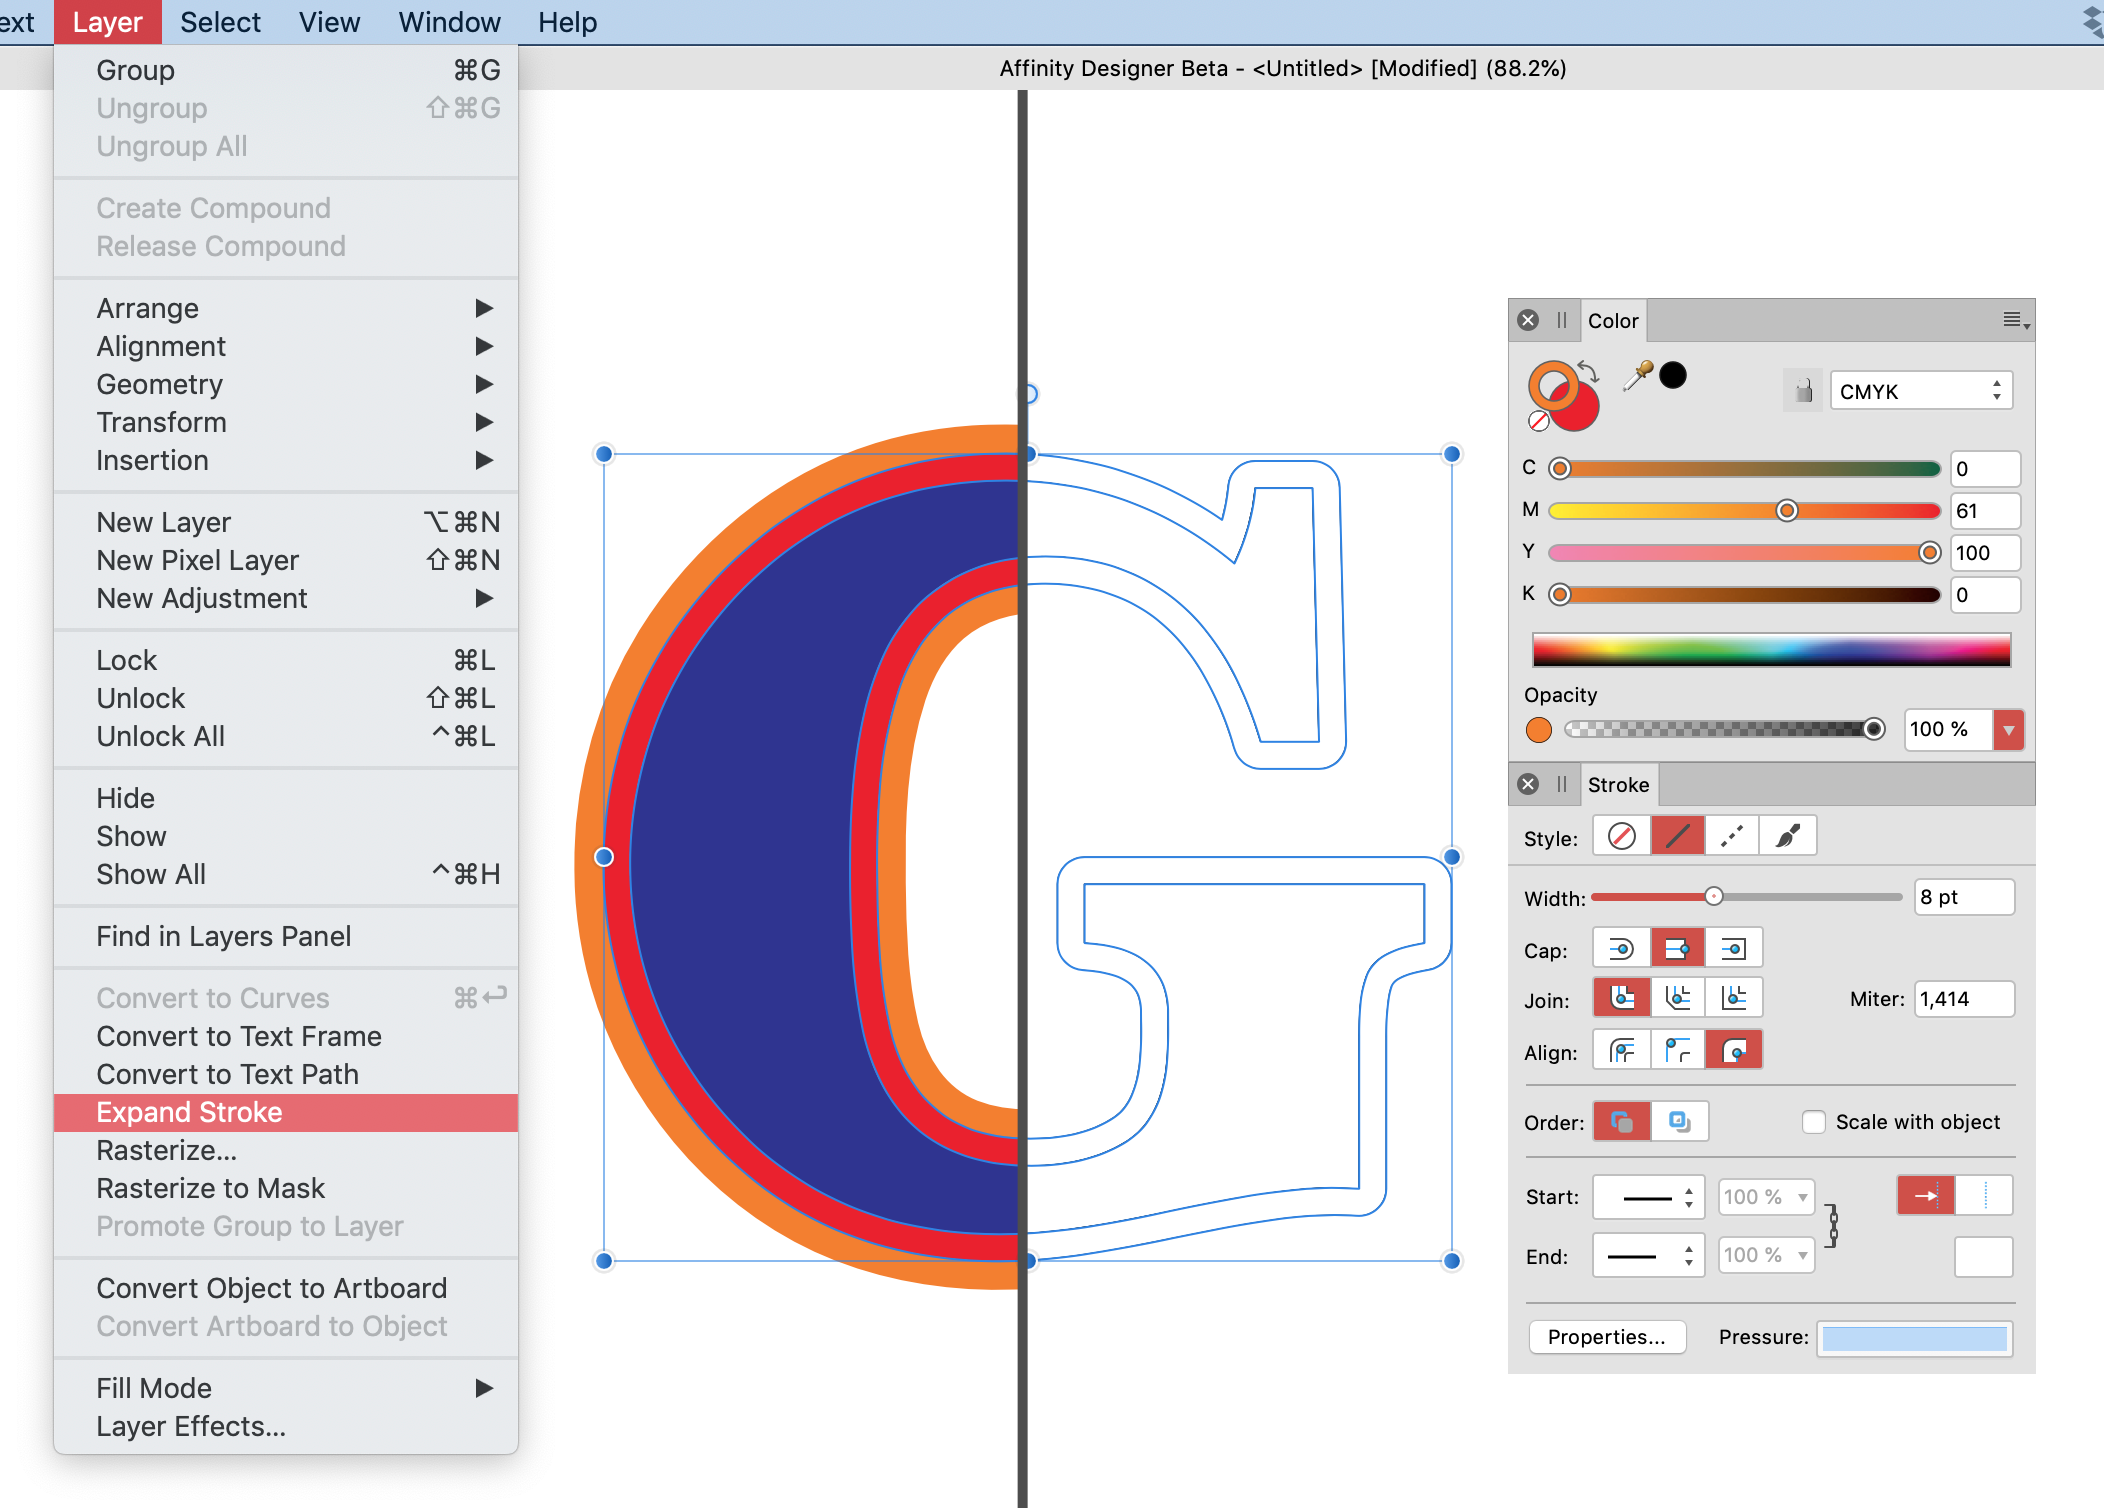
…and Expand Stroke again.
Here you can see that the orange stroke has become an object, too. Again, the color panel does not indicate a stroke color anymore.
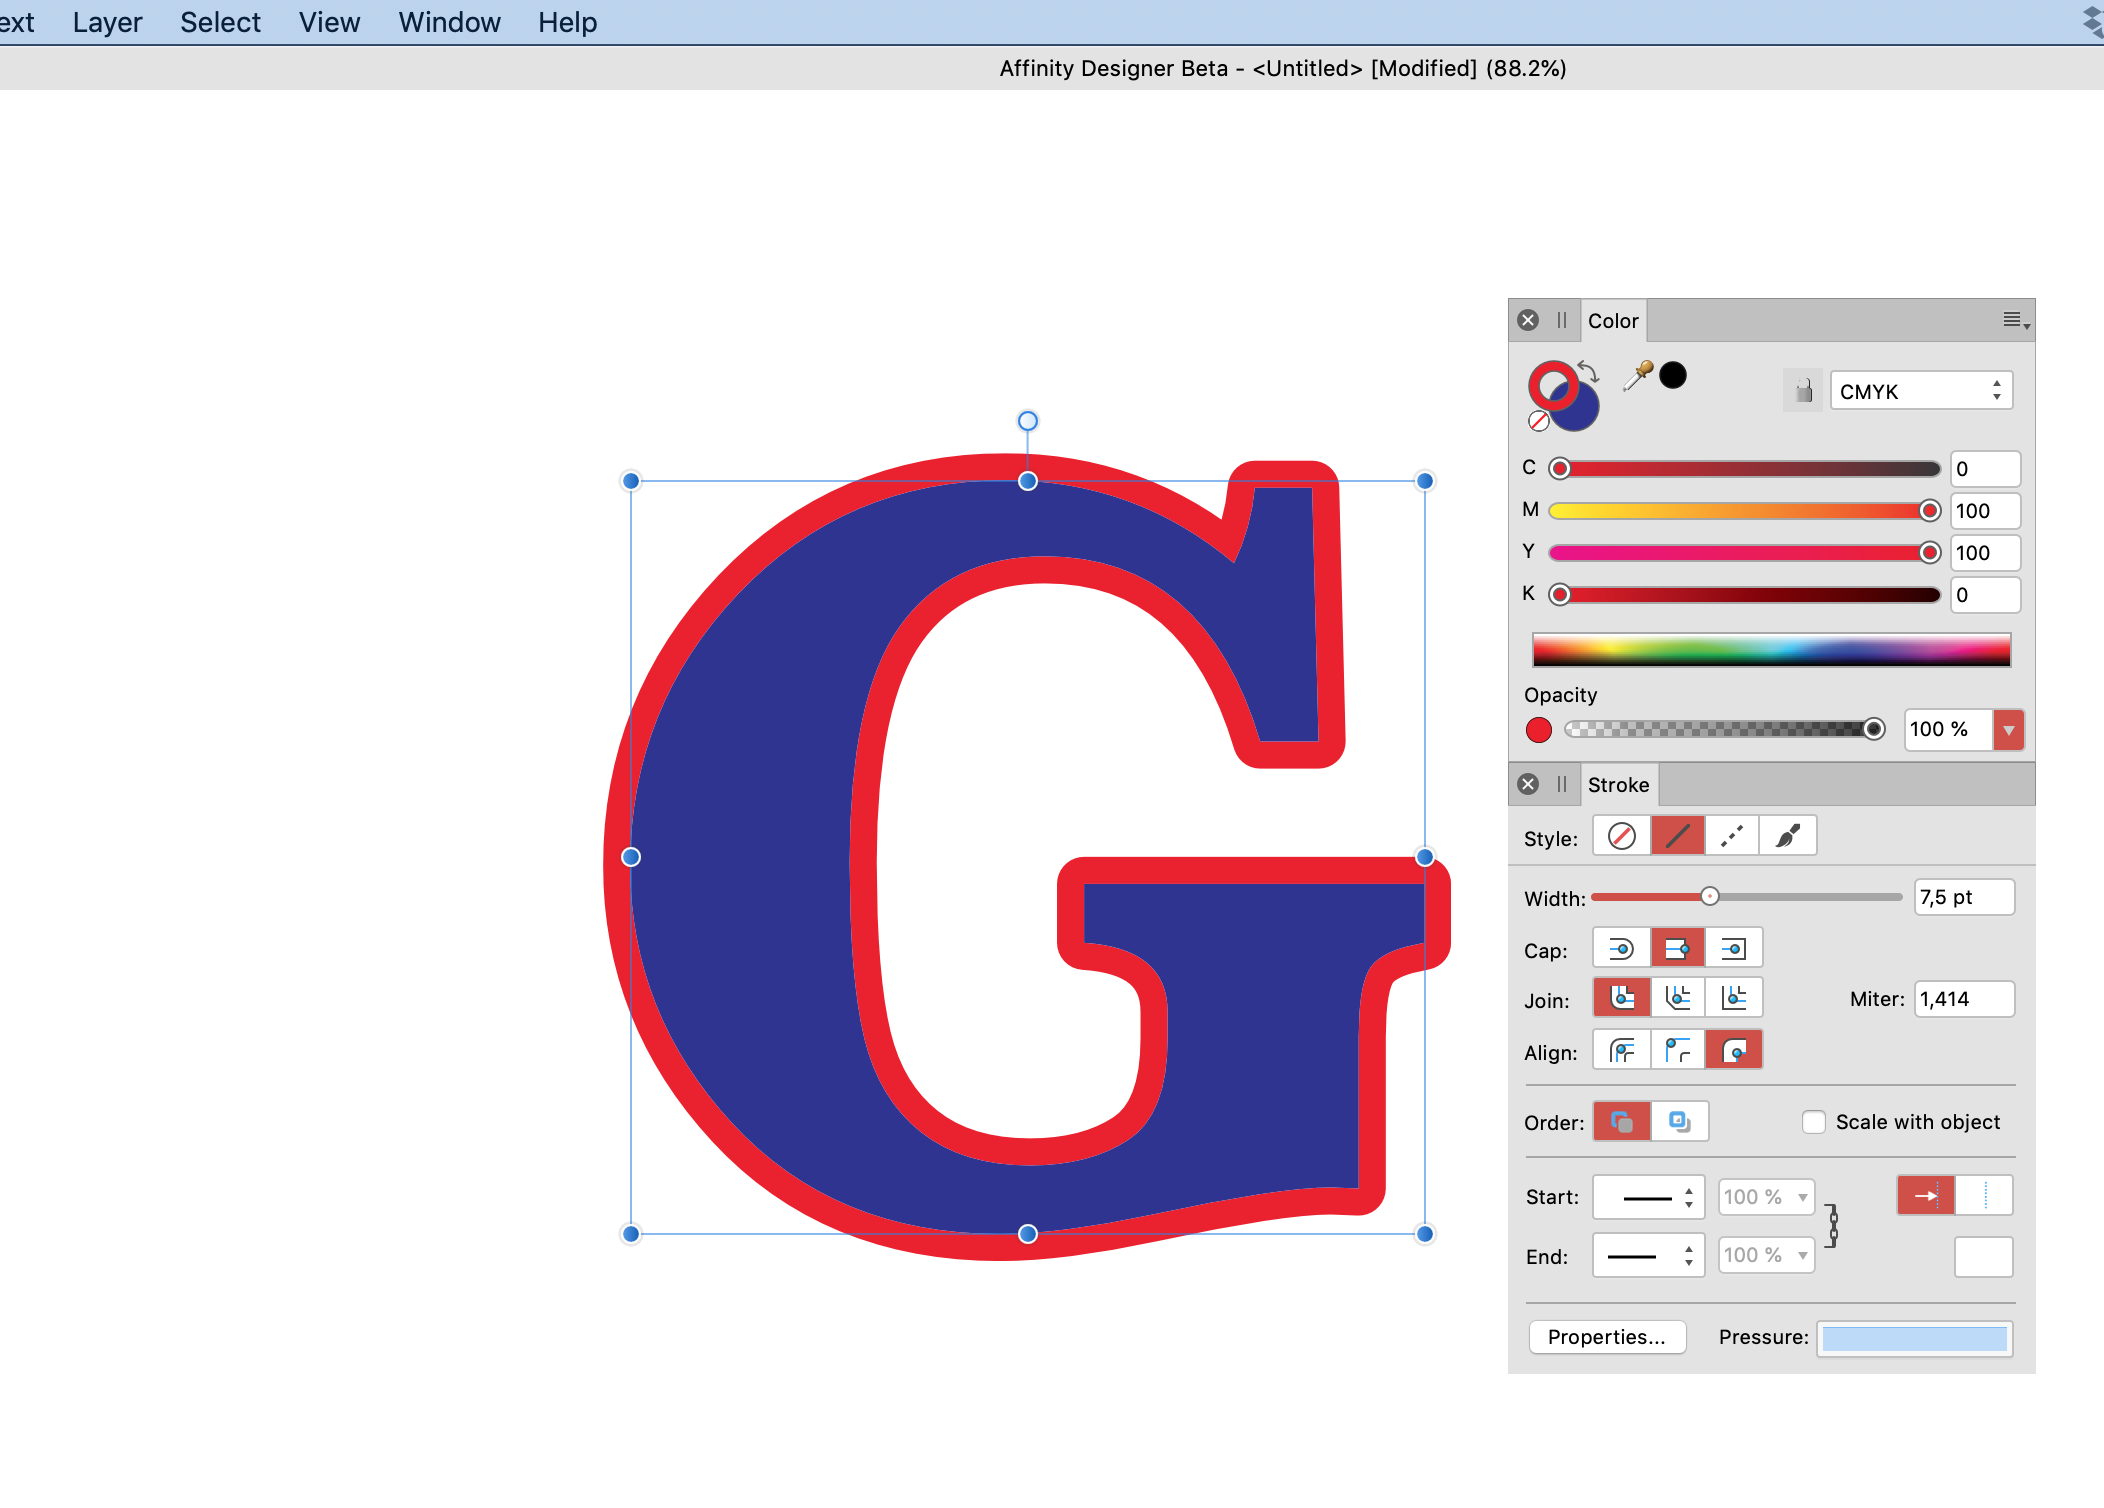
This is the result.
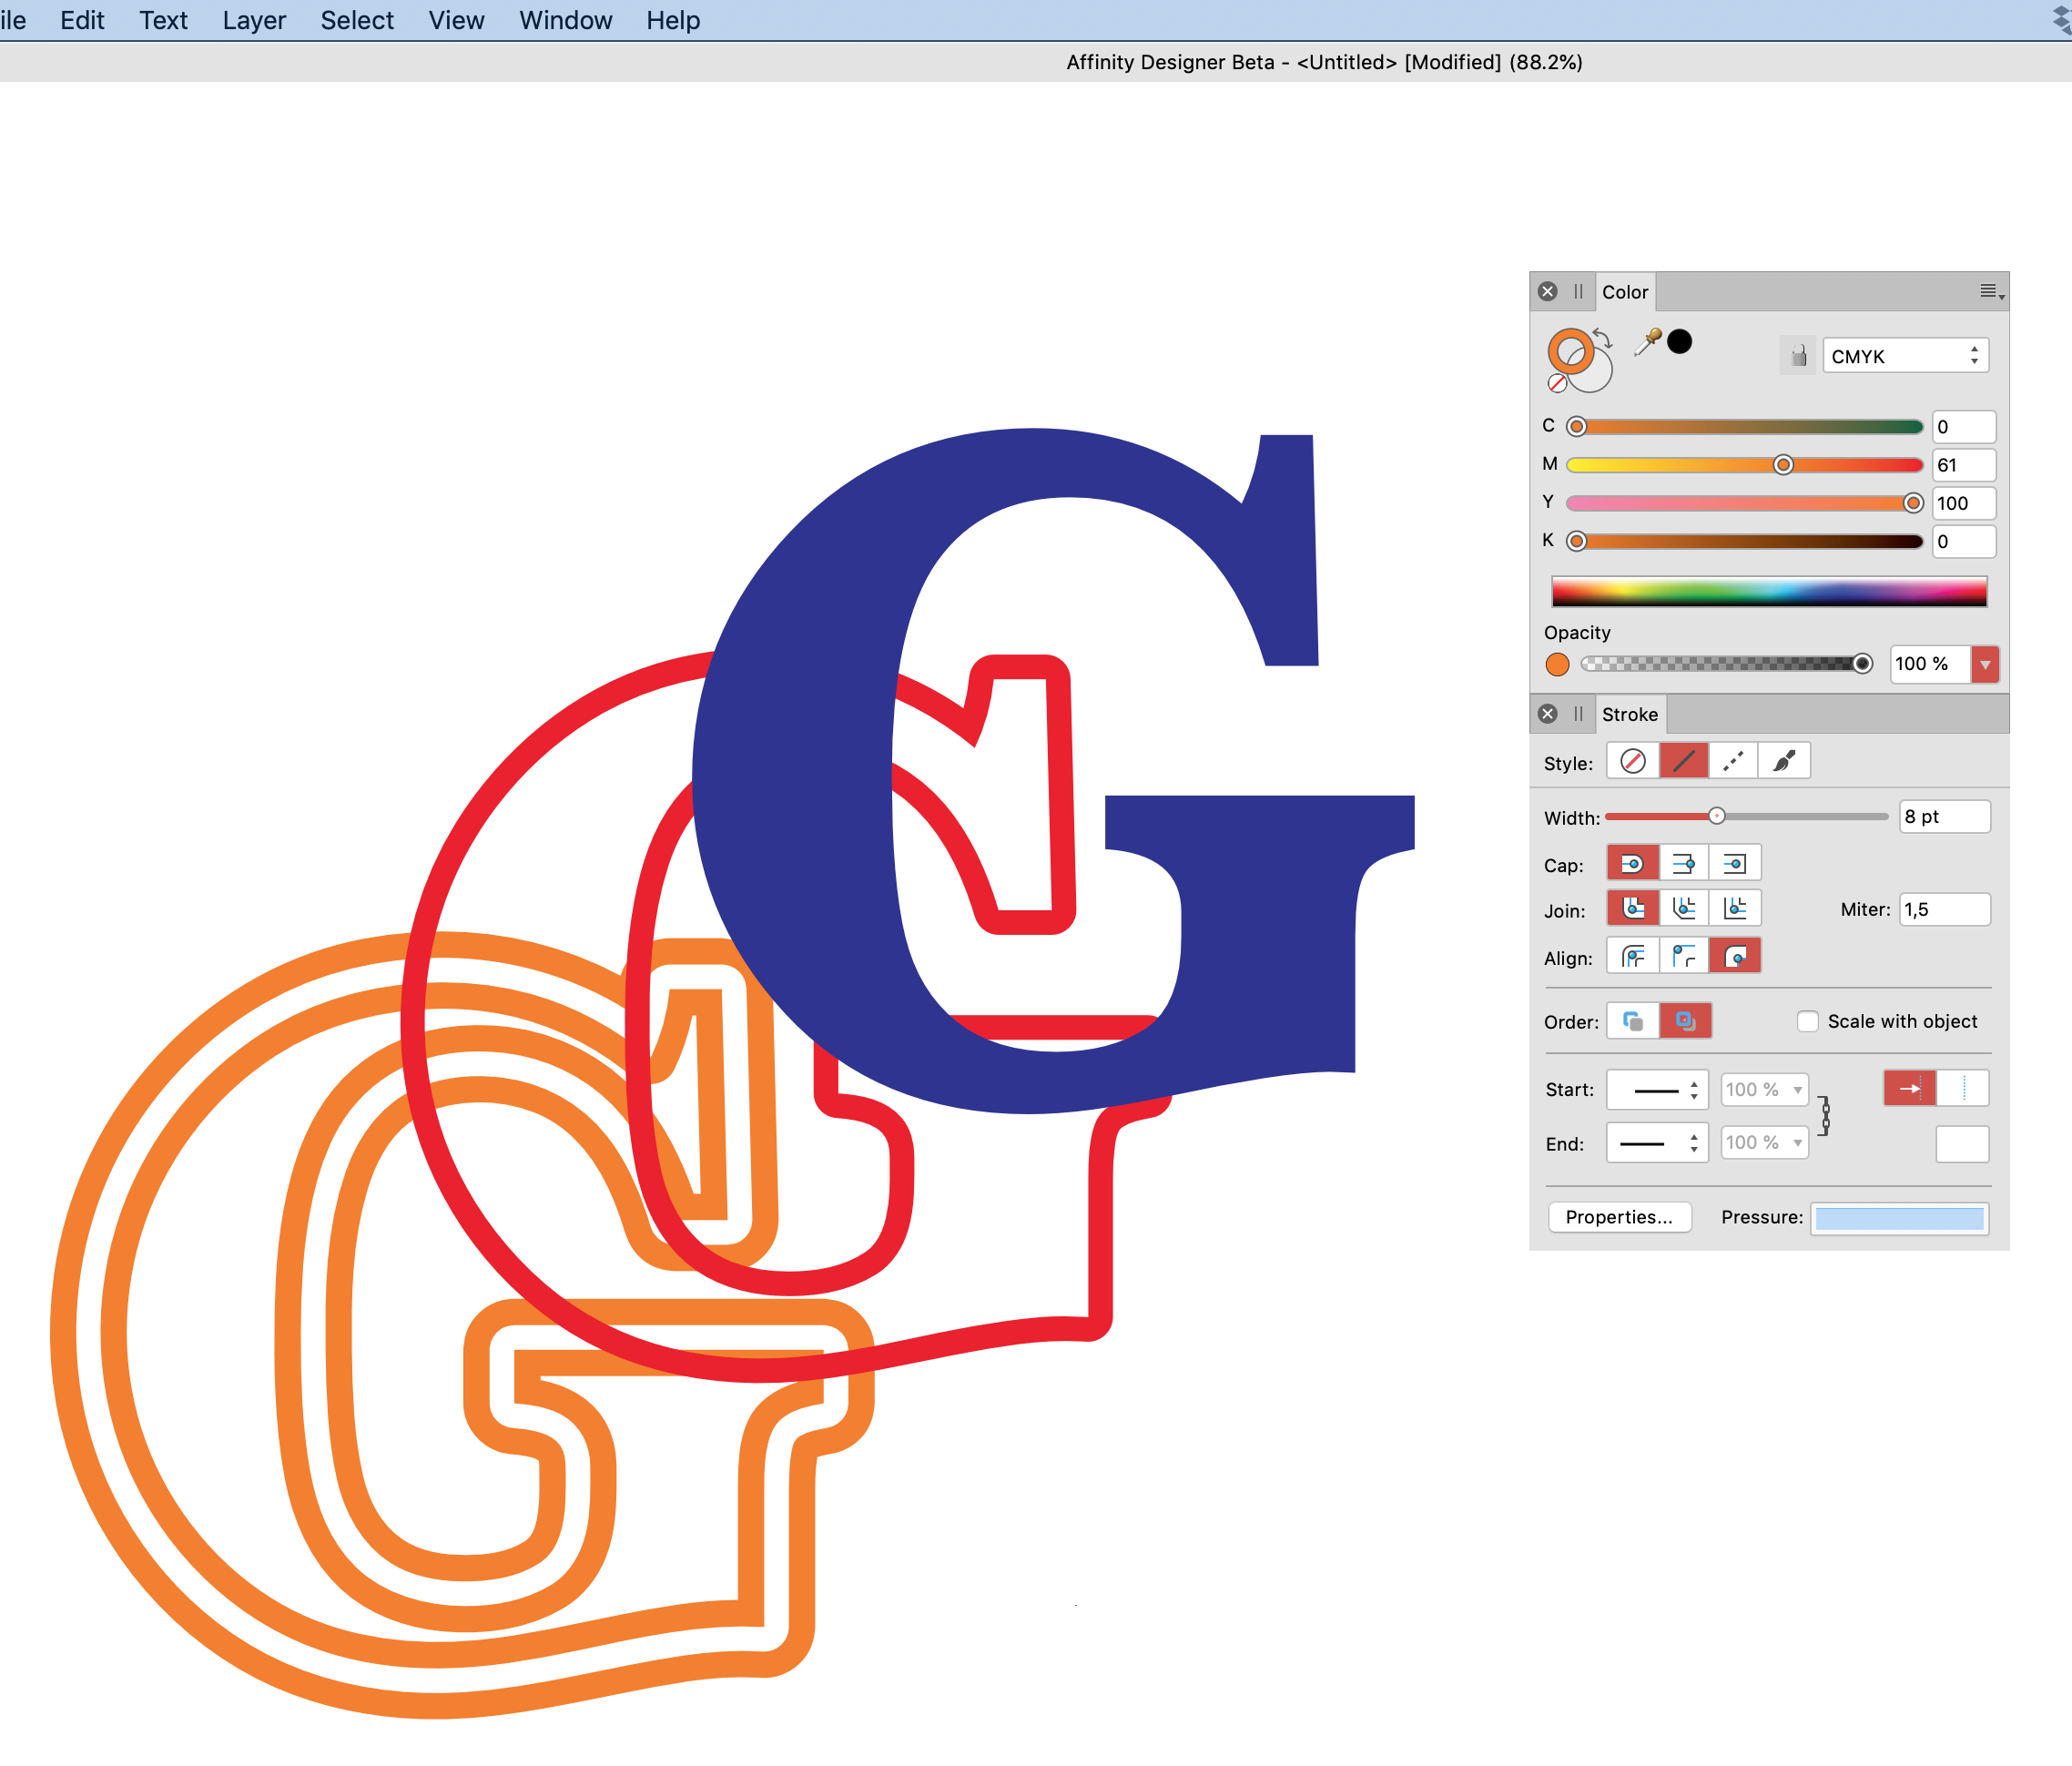
And these are the single parts dissected.
-
I was not aware of this being an issue for mac users. Thanks for the heads up, Carl.
-
It doesn't work that way on a Mac. At least not on my Mac.
-
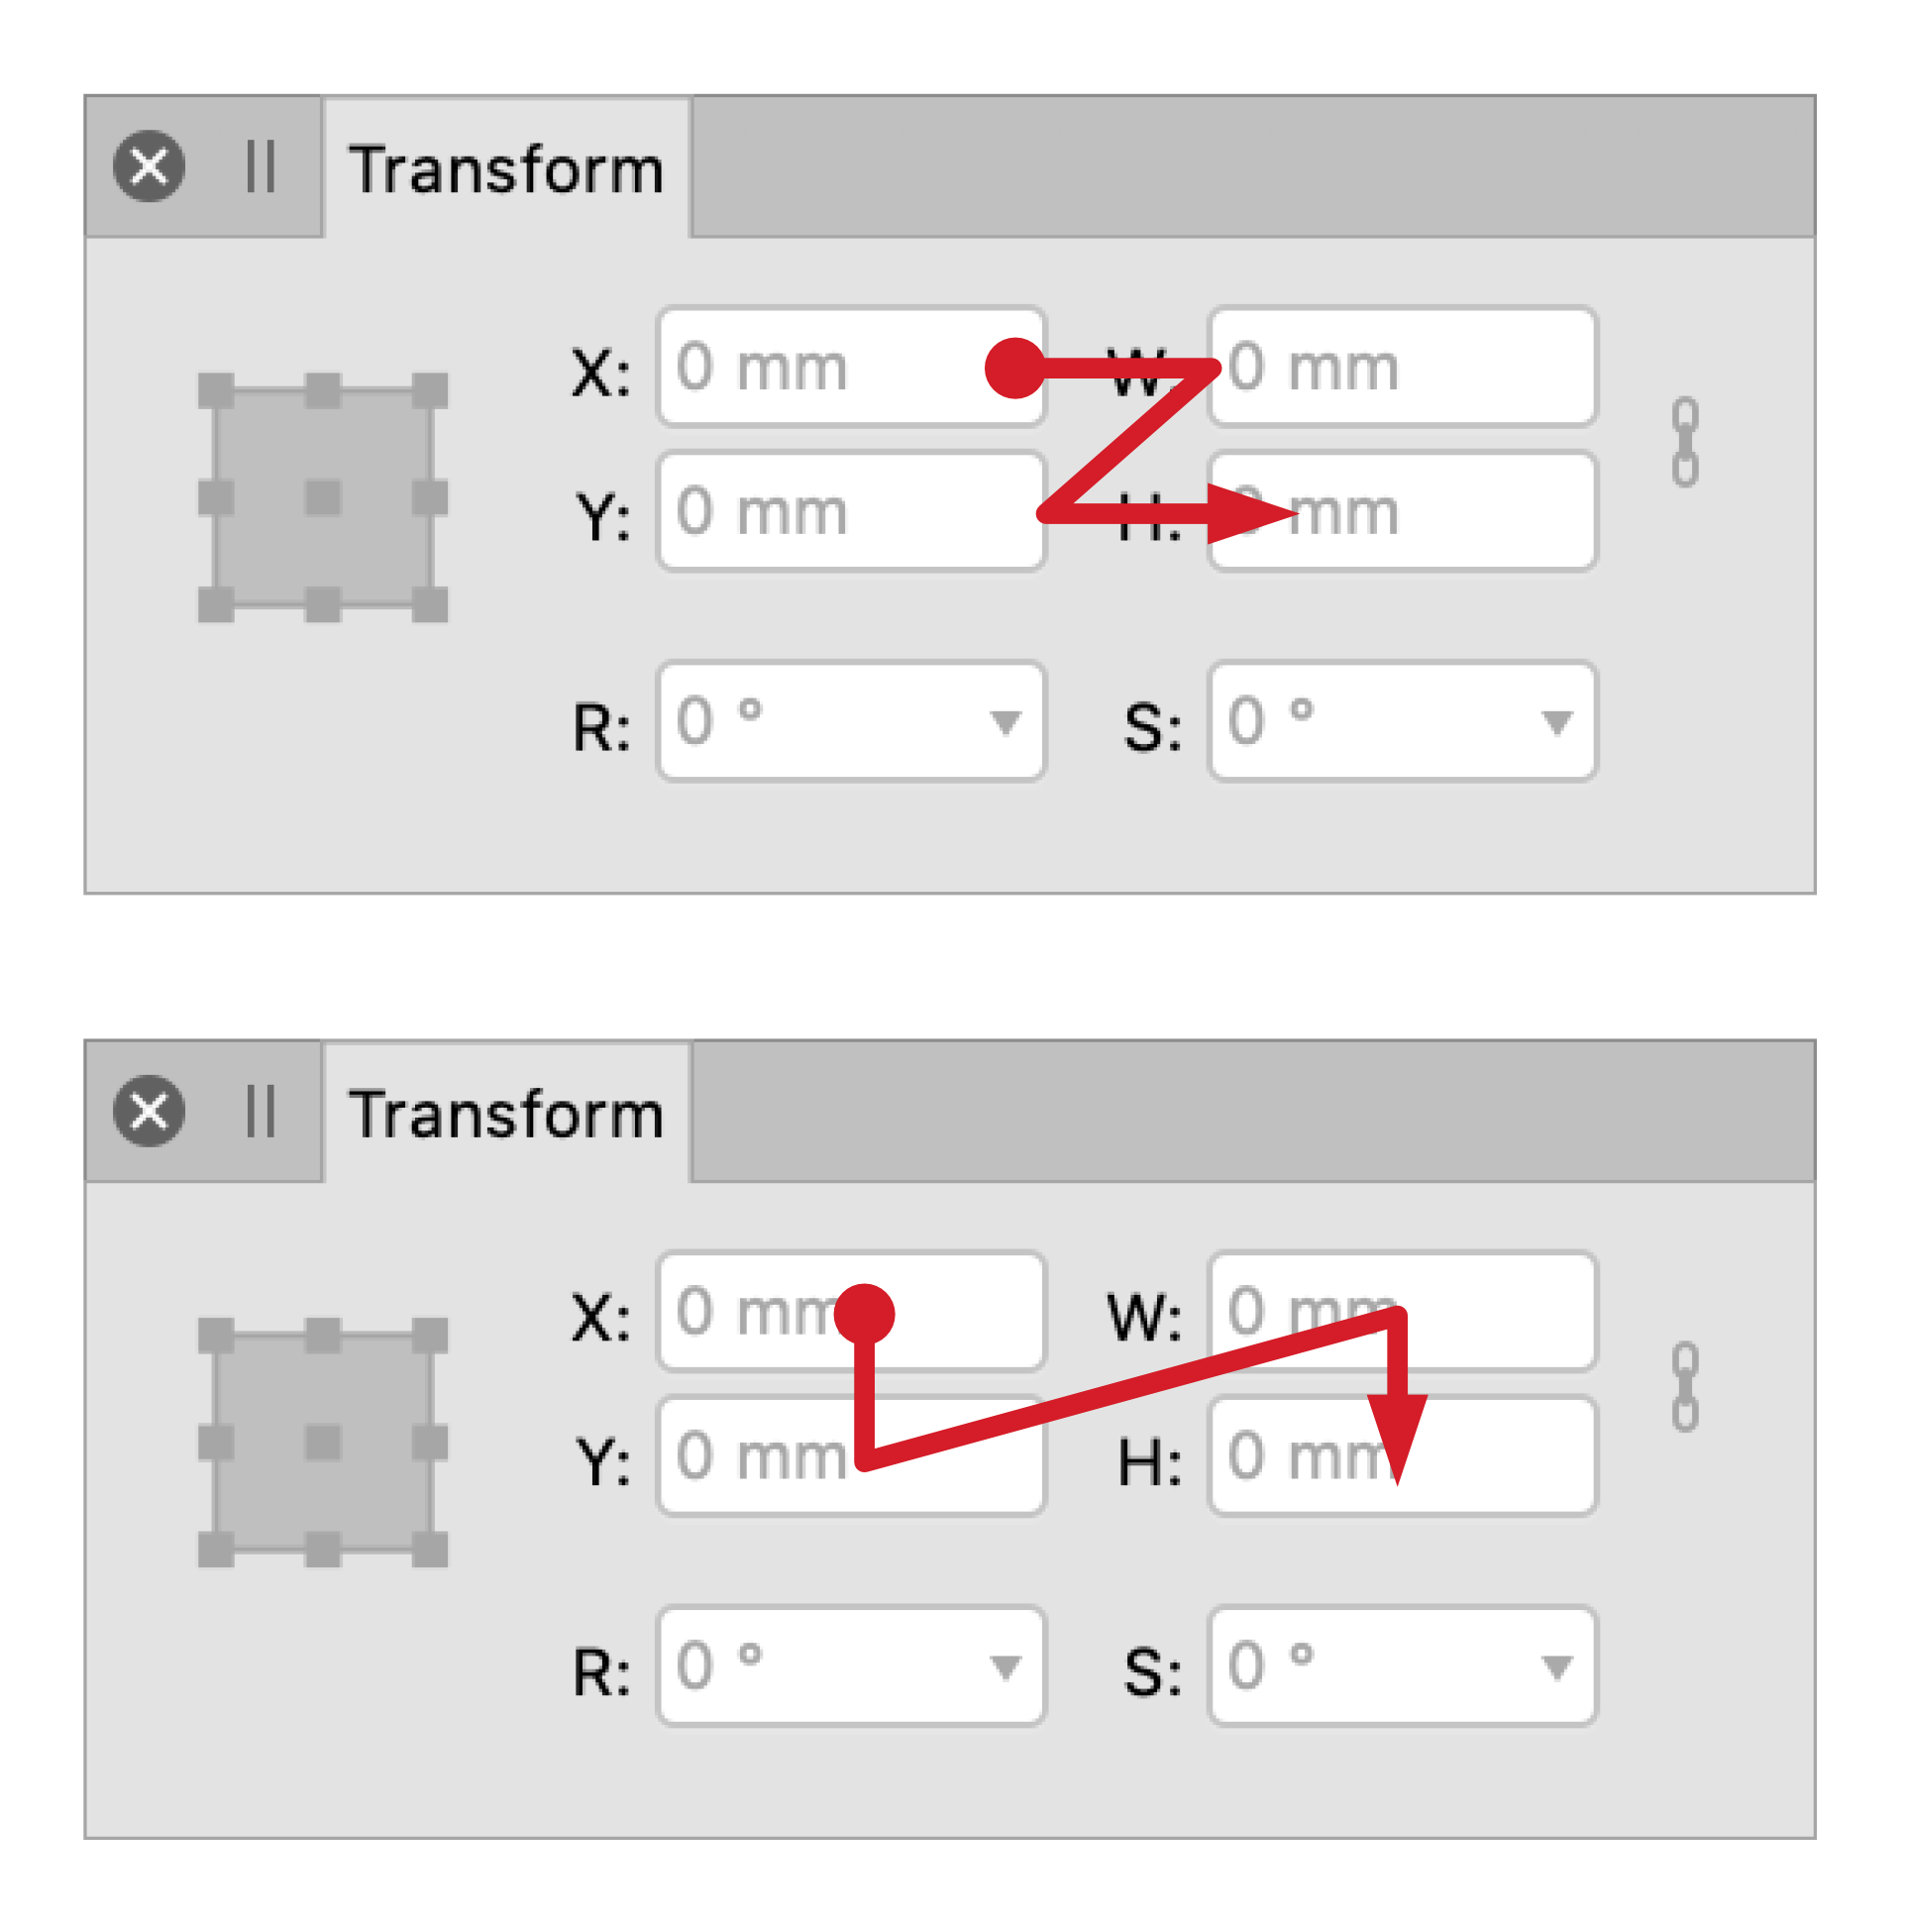
I would like to suggest changing the tab order in panels, from the current order in the top image to the order in the below image. I find this is a little refinement would improve the workflow for keyboard people.
Regards
George
-
Wonderful! Thanks a lot.
-
Hi all,
is there a way to apply a baseline grid to a textbox only rather than to the whole page/ spread?
-
You bet GerryP I appreciate your input.
-
Hey GarryP,
all good points but I just think that using the command key or as MikeW suggested above, the alt/option key, would be a simple hack to make ones life a little easier and I do believe way more intuitive.
-
No mouse with scroll wheel, not my forte.
-
Hi all,
I am not sure whether this topic has been brought up before…
a simple function from QuarkXpress which I missed over the years with Indesign and find worthy of implementation, especially when working with text, is to have hot key panning changed from using the spacebar to the command key. Or at least give the user the ability to change it themselves. this way one can pan while being zoomed in on text while it is highlighted.
Cheers!
-
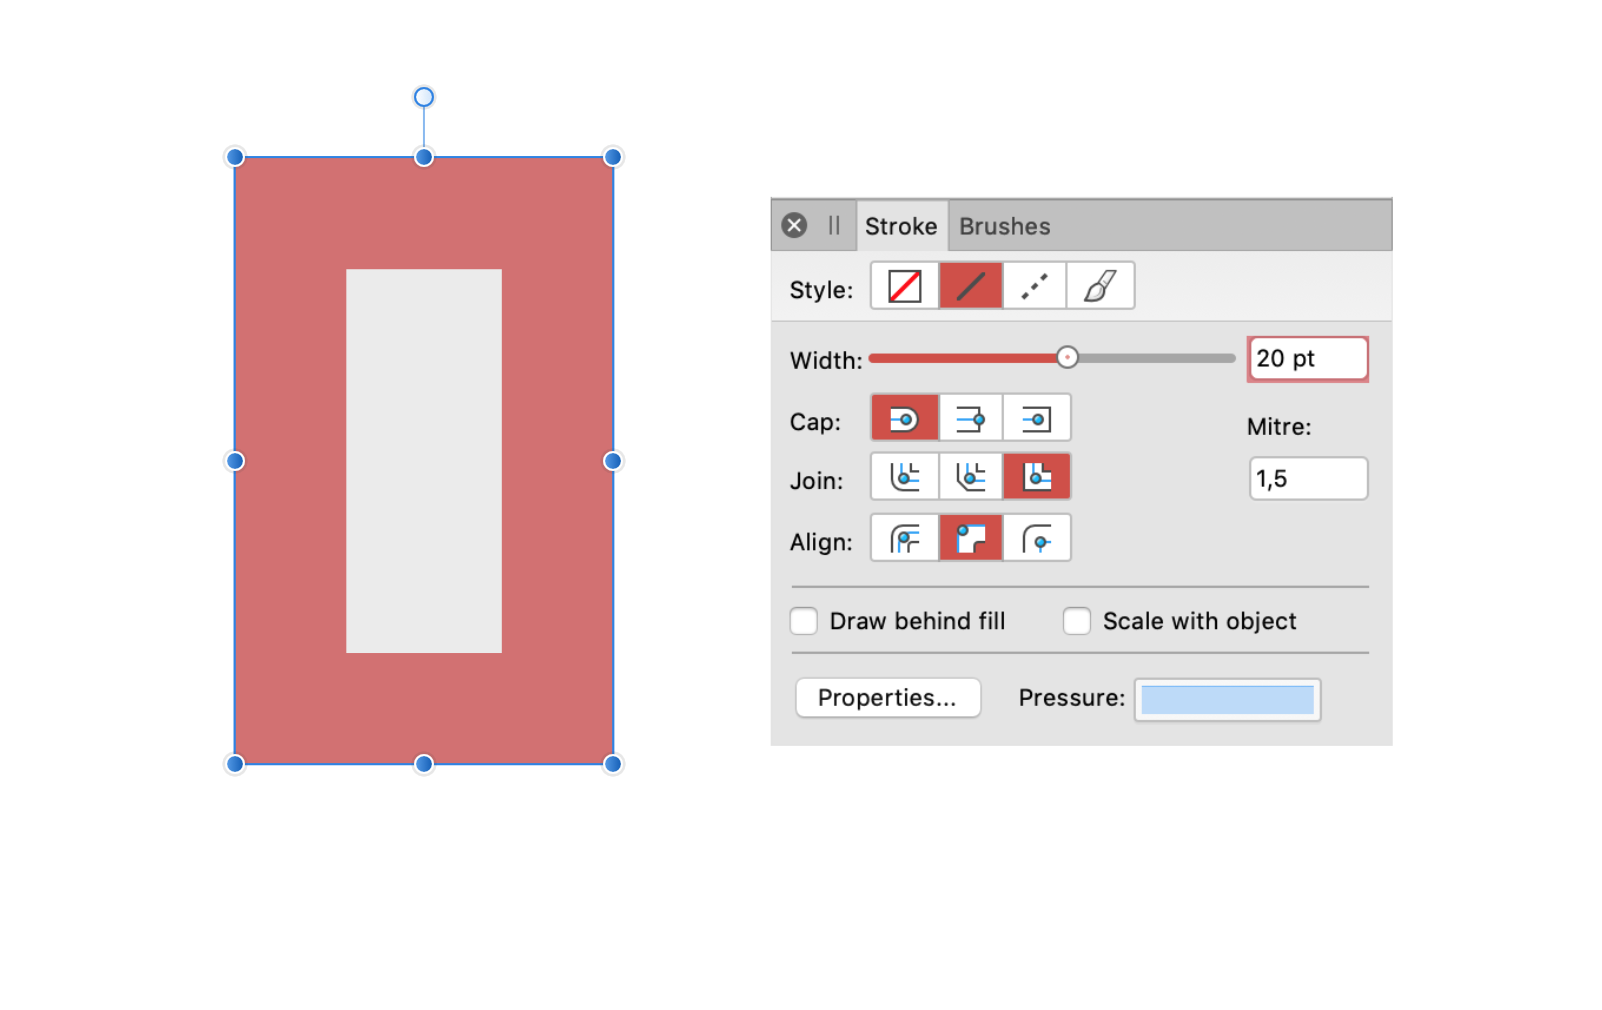
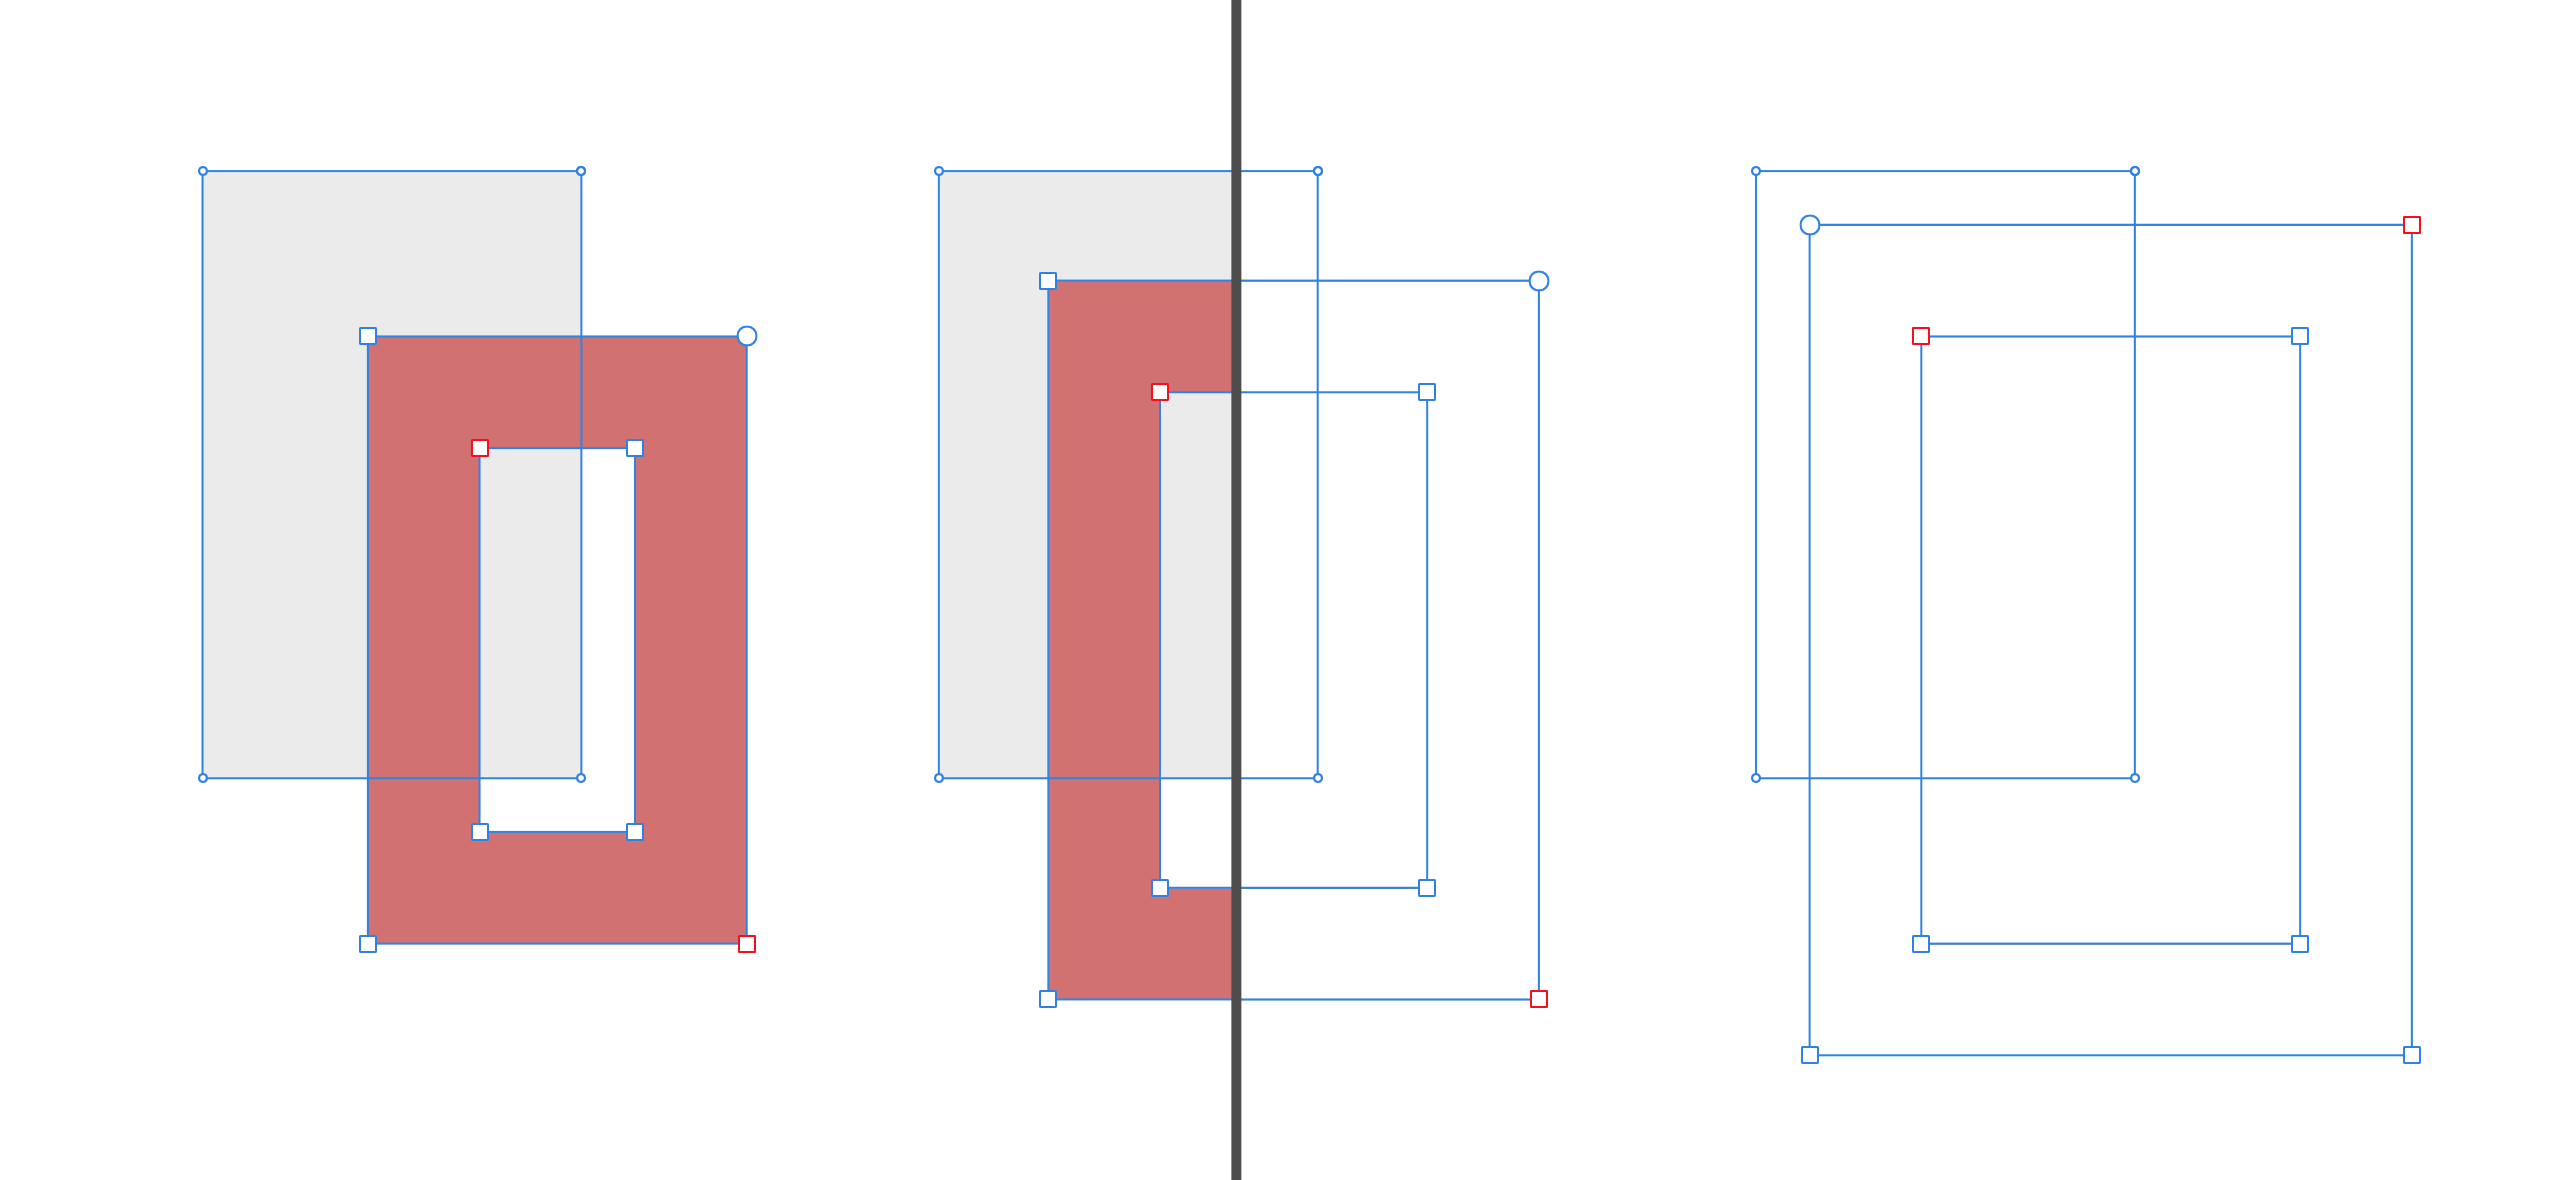
Hey there Linosia,
not sure I fully understand your problem… if you are talking about the menu/path/offset path command in Ai then there exists such a command also in Ad and in all honesty, the operation in Ad is pretty slick. I hope this will help you.
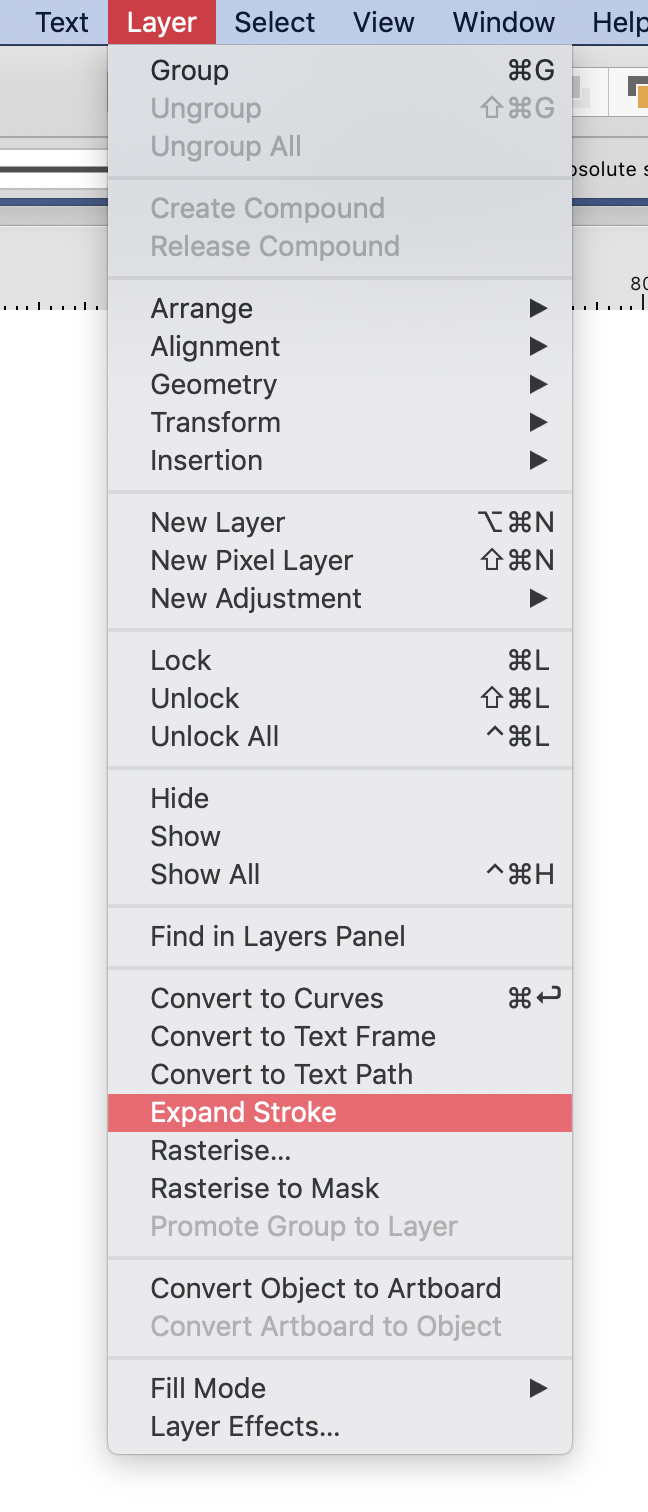
All you need to do is give your object a stroke and then use the command menu/layer/expand stroke.
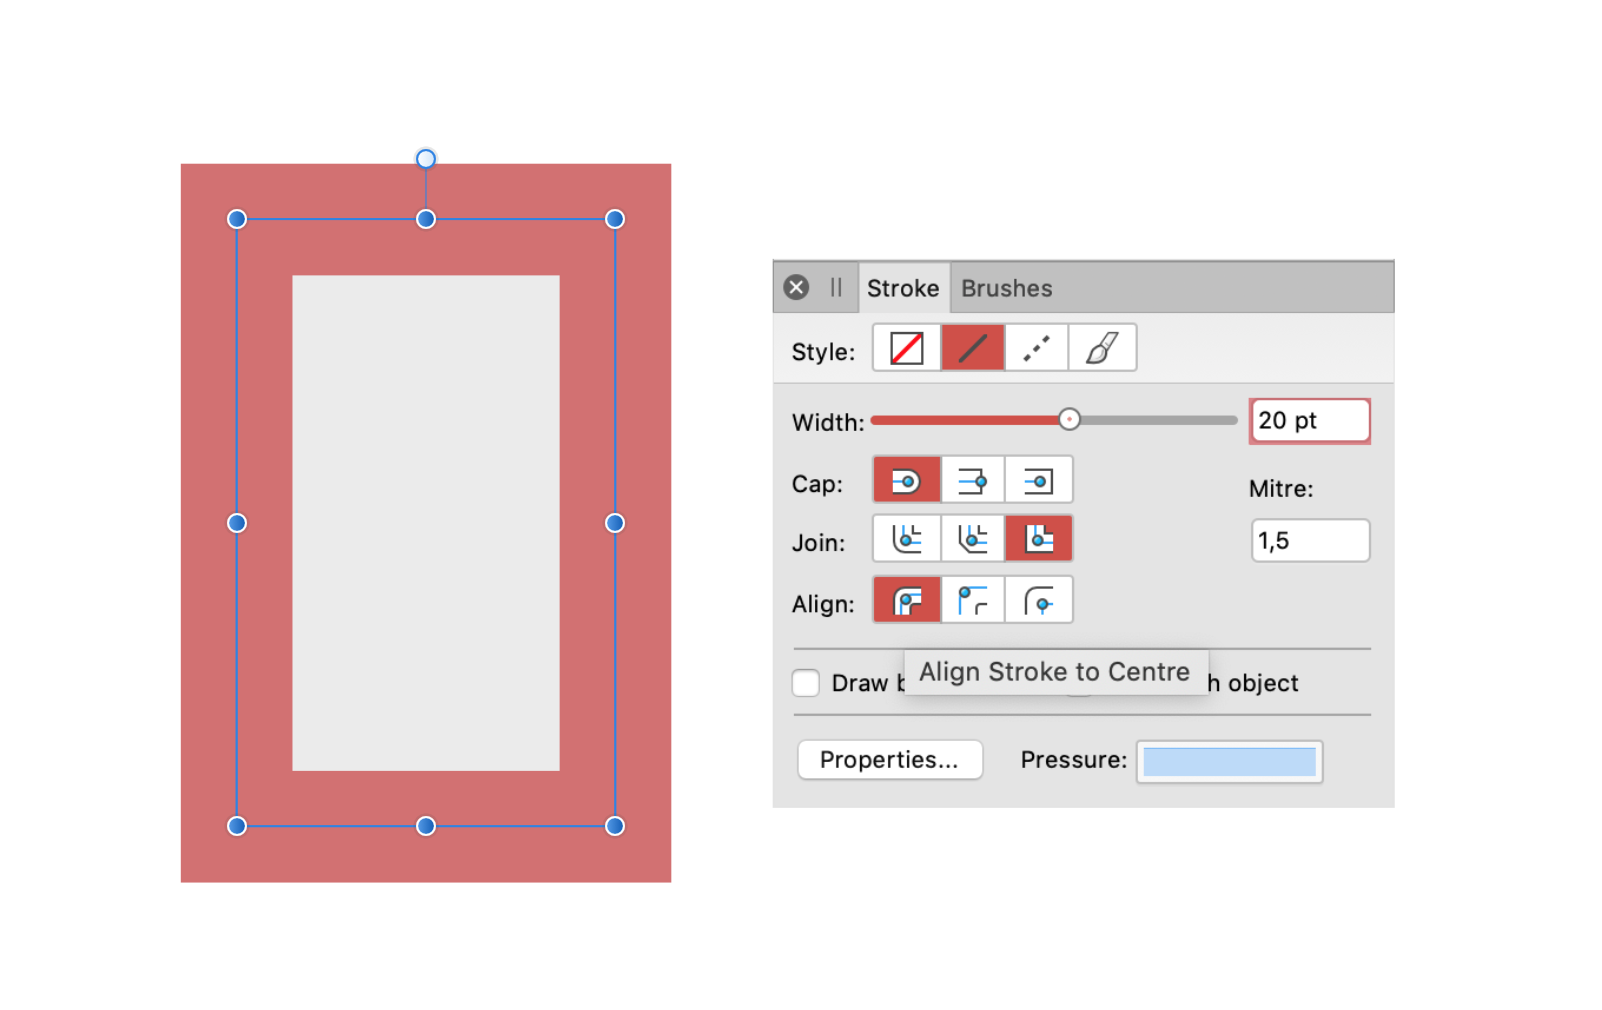
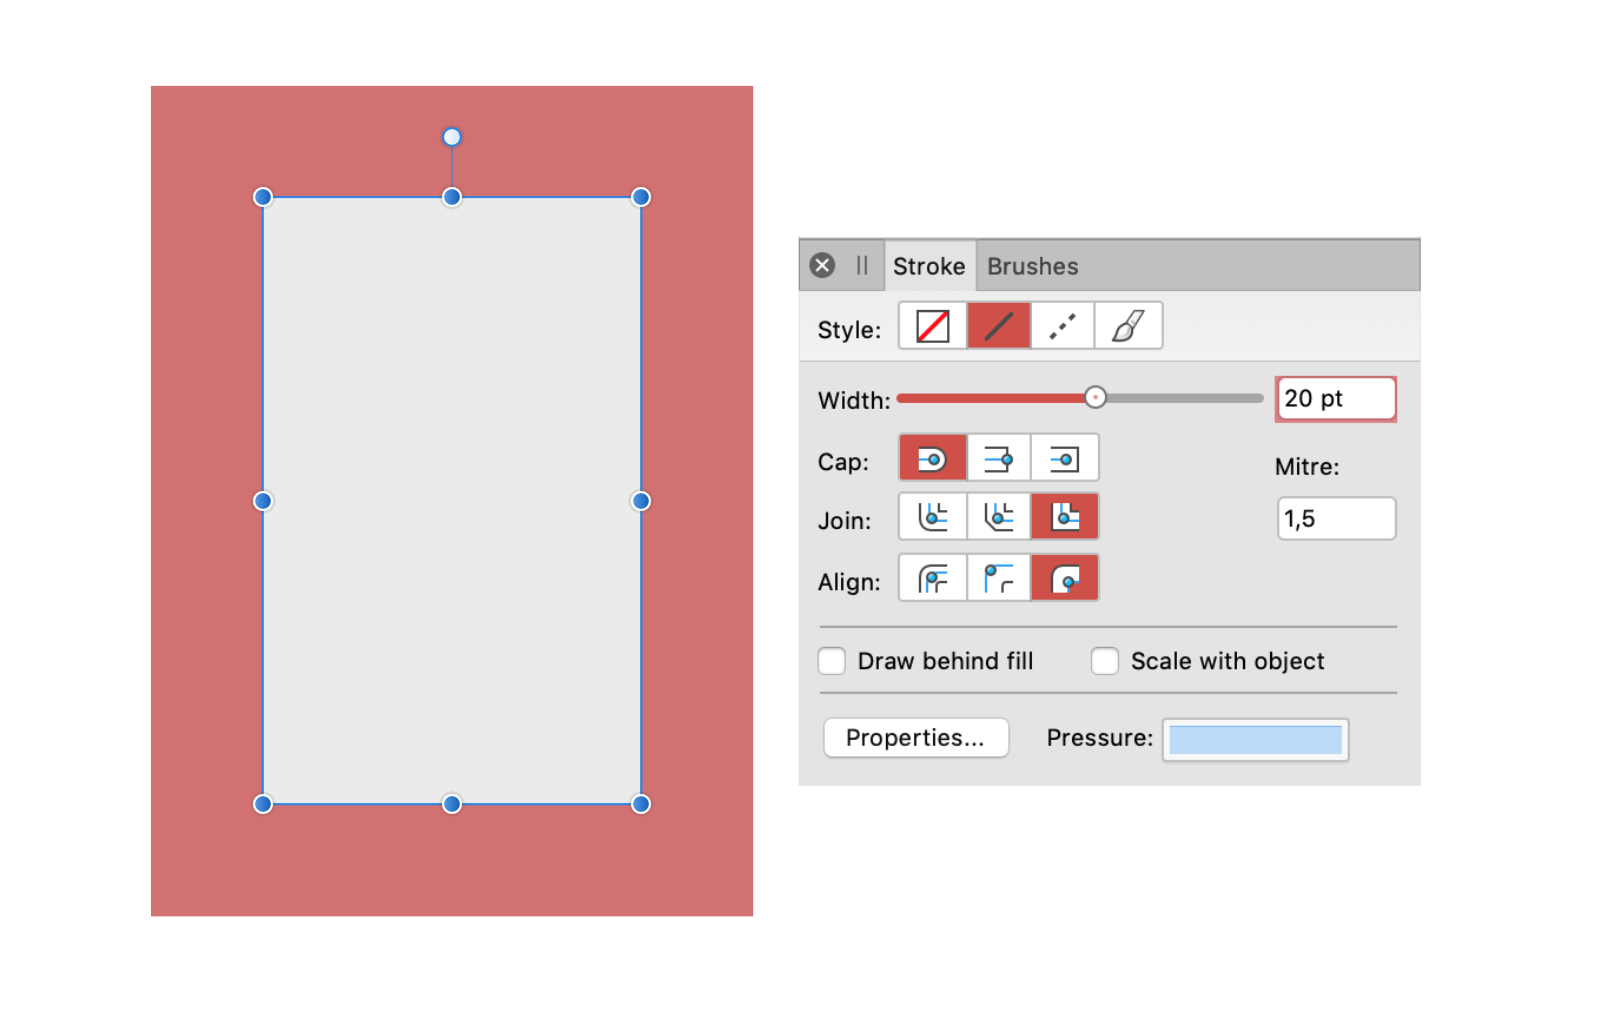
Choose what sort of offset path you need, the width of your offset path will be determined by the stroke weight you choose. Here it is 20 pt.
Grey box with red stroke as you can see below:
Align stroke to inside
Align stroke to the center:
Align stroke to outside:
Expand stroke in the Layer menu:
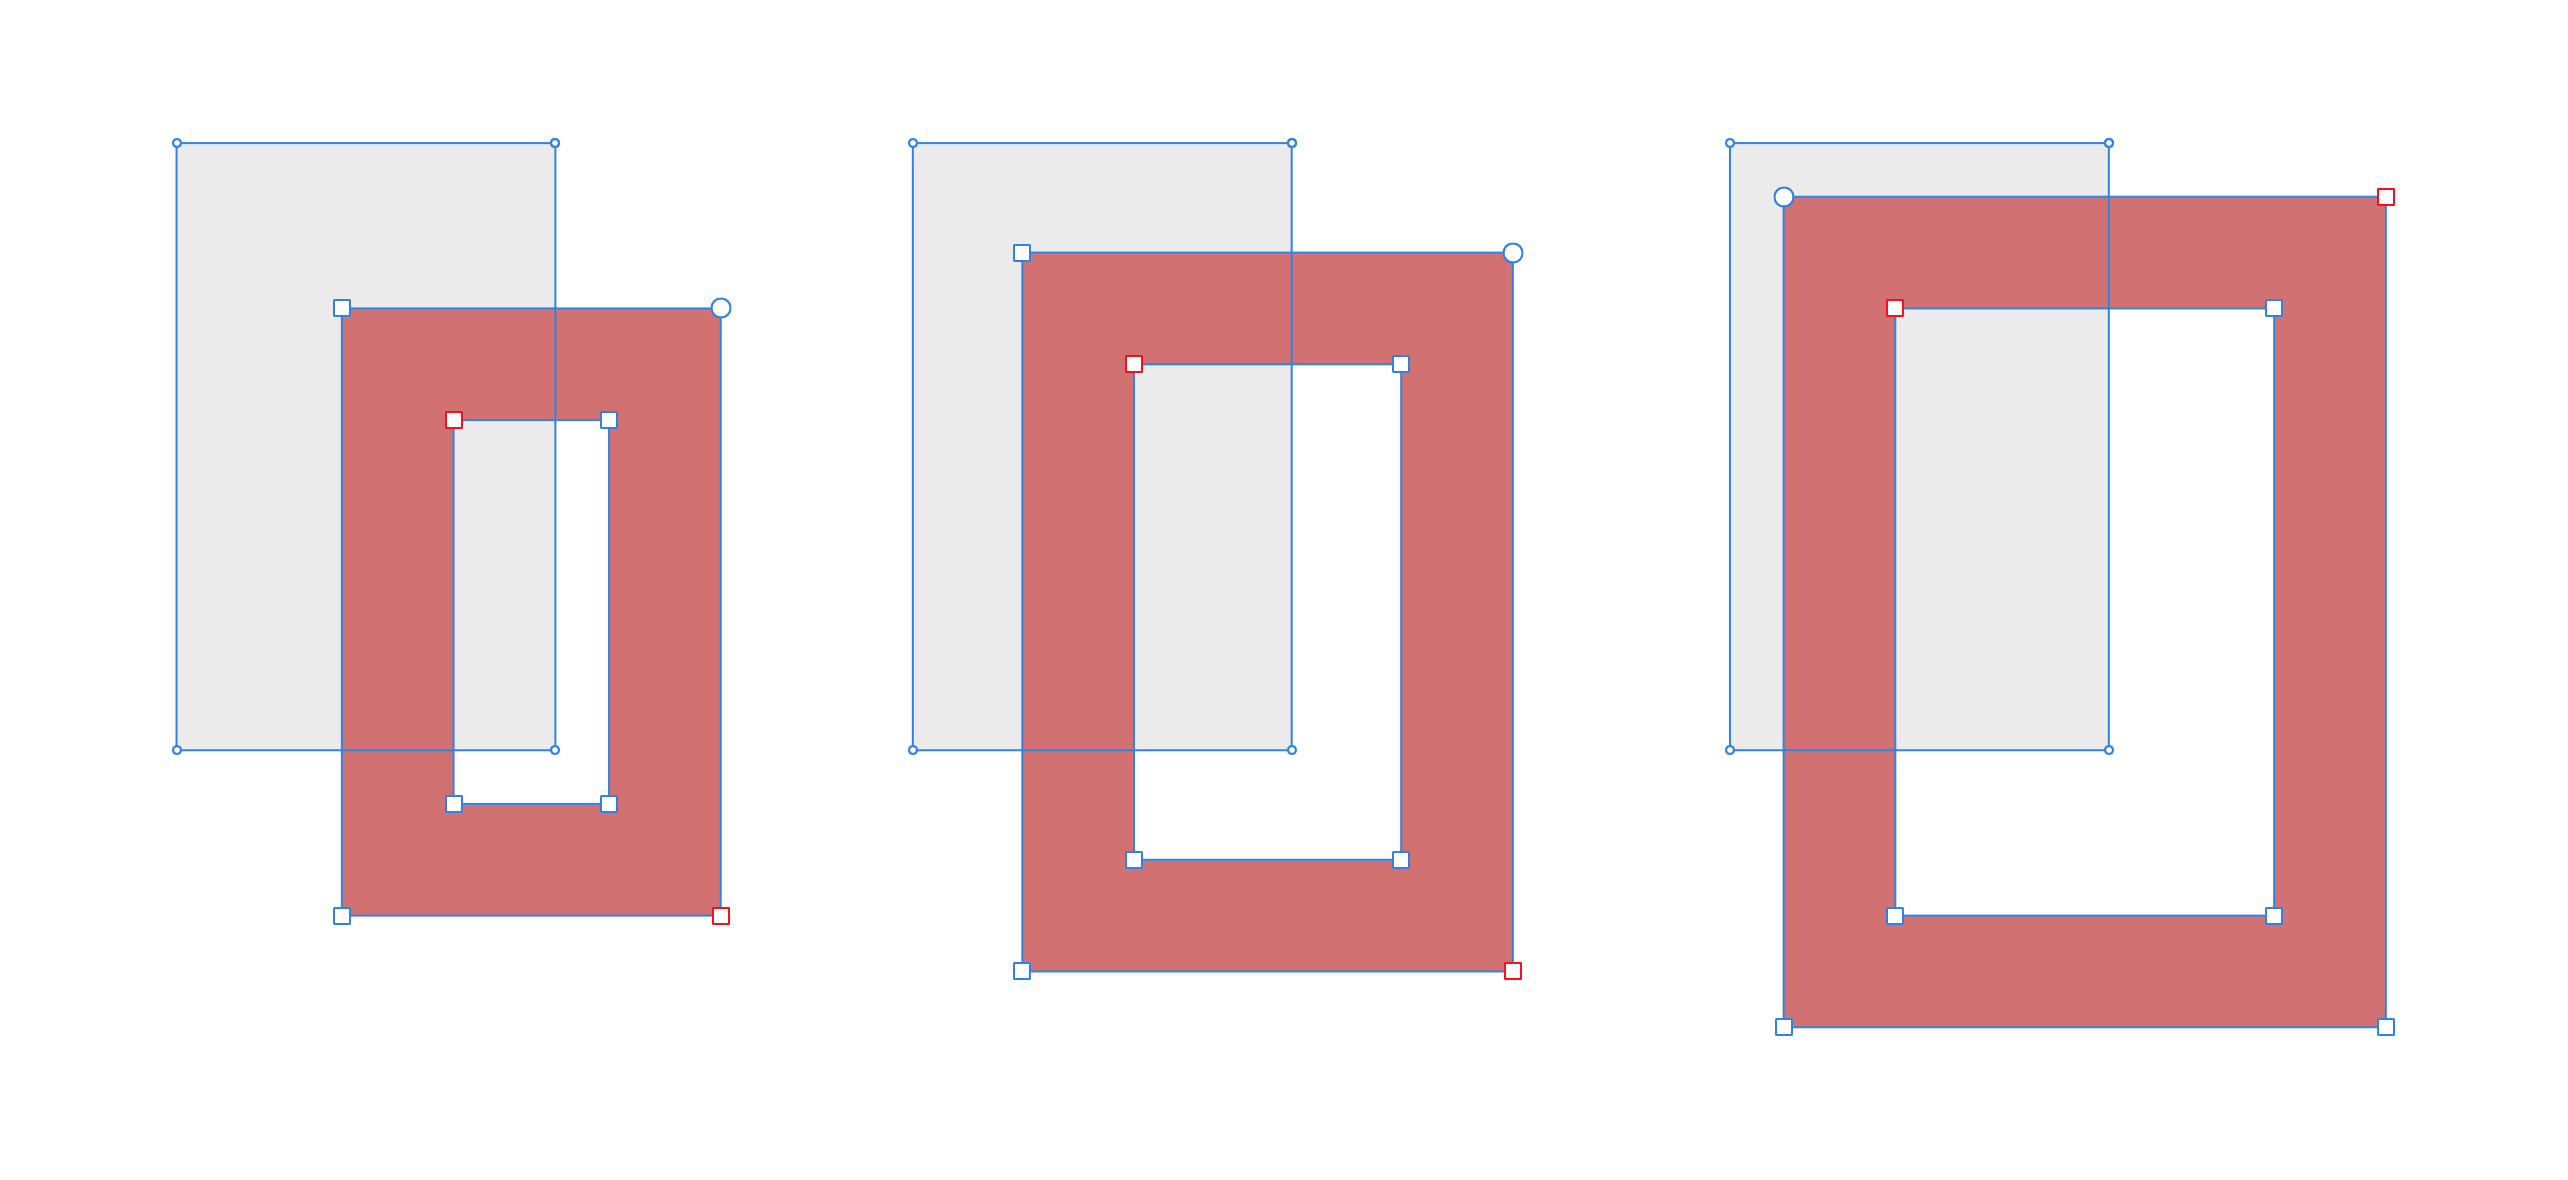
This is the result of the three examples above, offset path separated from the grey box for demonstration purpose. Now the the red frames are no longer strokes but objects.
Here in split view:
The really interesting part about this implementation is that you can combine all of the stroke styles available for creating offset paths.
As you can see, the stroke in this example is a dashed line:
Expand stroke…
Voila! Again, objects separated for demonstration purpose.
-
-
Hi all,
I was wondering whether there is a way, or if anybody already started a topic about how to make incremental steps in, say, text adjustments like baseline, tracking or kerning. In illustrator it would be cmd+click+up and down arrows of said palette. Also, In quarkxpress the alt-key serves as the view tool (H) when text is marked with the text tool. Is there an option for this in AD?
Replies greatly appreciated.
Cheers
George
-
HI,
I was wondering whether there is a way, or if anybody already started a topic about how to make incremental steps in, say, text adjustments like baseline, tracking or kerning. In illustrator it would be cmd+click+up and down arrows of said palette. Also, In quarkxpress the alt-key serves as the view tool (H) when text is marked with the text tool. Is there an option for this in AD?
Replies greatly appreciated.
Cheers
George
-
MEB, the empty part of the canvas is not always an option or too inconvenient… I wasn't aware of the ESC-key, though. That might work out.
Thank you, much appreciated.
-
MEB, thanx for the quick response, I was afraid that this was the case… perhaps one can hold out hope for a deselect function for vectors in the future, as well? This would be a rather helpful little functionality.
Other than that, thank you very much for Aff. Designer, the latest update (spot colors, text palette) has helped me spend less time in Illustrator. Looking forward to the day I leave Adobe behind.
Kind regards
George
-
Hello everyone,
I was wondering whether there was any other way (command) to deselect a selection in Aff.-Designer. I find it confusing that I can select all (cmd-A) but deselct (cmd-D) does nothing. The command in menue/ select/ deselect is fogged out, also. Is this a bug, a problem with my machine, or is the deselect command meant for pixels only? Has anybody else encountered this problem?
I would be grateful for an answer/ idea/ hint from anybody.
Cheers
George


Contour Function
in Feedback for Affinity Designer V1 on Desktop
Posted
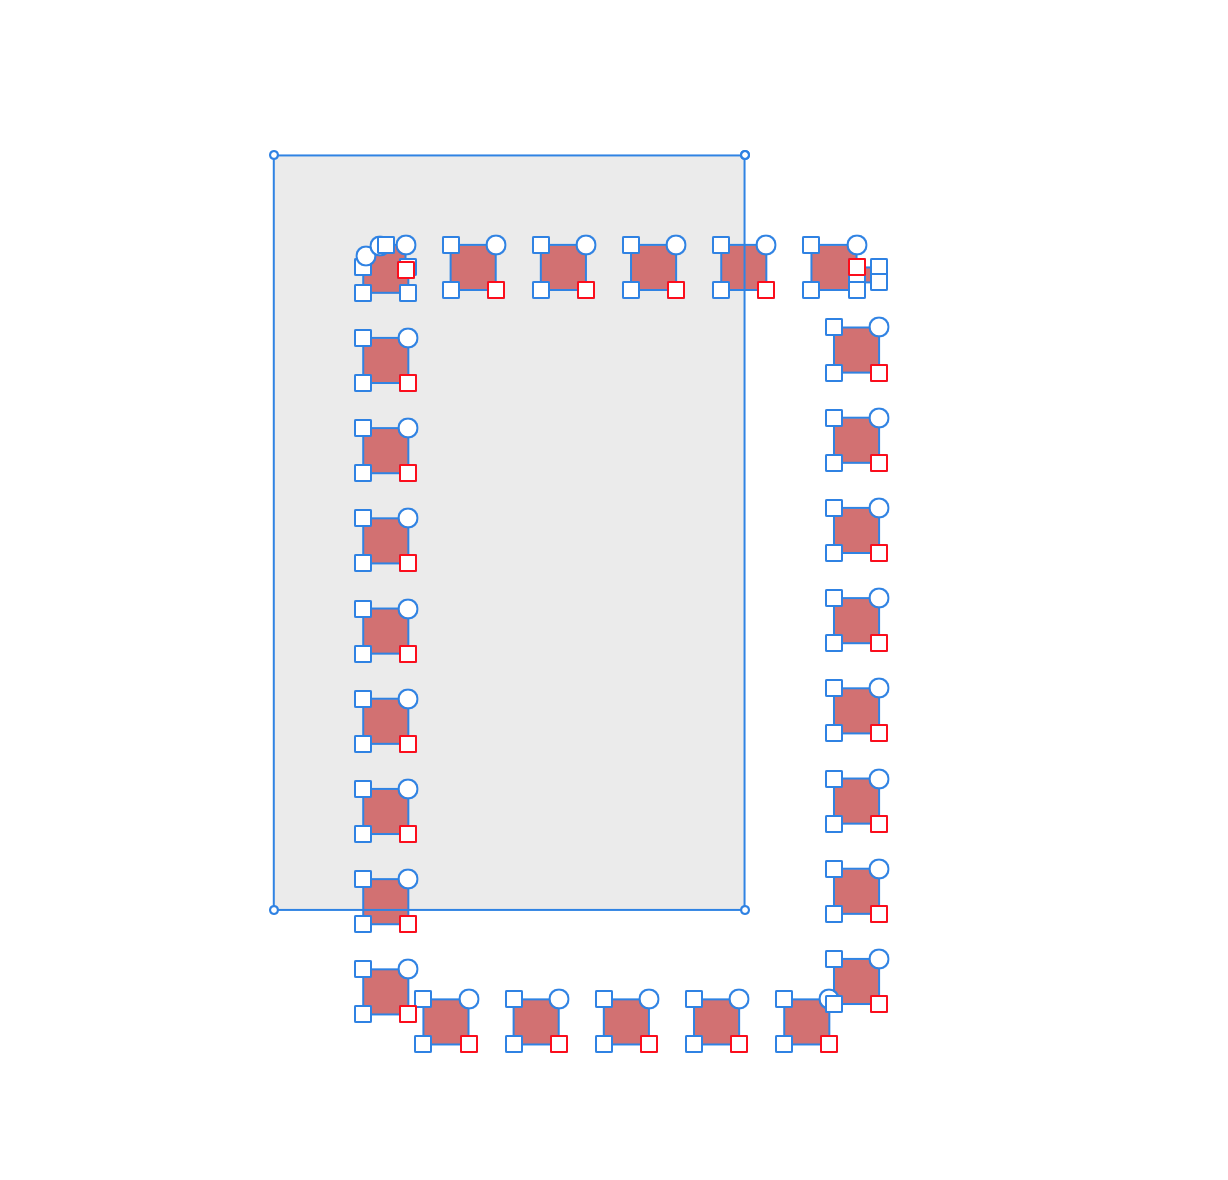
Actually AD has much more contour/stroke functions when you use the appearance panel. CD does a slick job and has its advantages but so does AD. I would suggest you search for "Multiple Strokes" in the Help menu located in the menu bar (Mac), not sure where to find it on windows. See the screen shot below. Cheers!