

adirusf
-
Posts
84 -
Joined
-
Last visited
Posts posted by adirusf
-
-
Maybe this can help you.
Cheershttps://forum.affinity.serif.com/index.php?/topic/30570-resize-image/
Hi wumpabill,
Resize image (menu Document ▸ Resize Document... )will resize the whole document (the canvas area + all layers will be resized).
Resize Canvas as the name implies (menu Document ▸ Resize Canvas...) , only resizes the canvas area, that is, the white (or transparent if you set it to transparent) area where the layers sit above when you start a new document. Although the canvas area is not "visible" when you open an image, it is still there below it. You can check this if you change to the Move Tool select the image in the layers panel (make sure it's not locked) and drag one of the corners - you will see the canvas area (transparent - represented by a checkerboard) behind it. You may want to use this to add more space around an image to add more elements/images to create a composition for example.
If you want to resize the whole image to make it smaller (or bigger) use the File ▸ Resize Document command. Just insert the dimensions you want and press the Resize button.
-
Yeah they are crazy putting such a low price for this incredible programs, very crazy people. Easy to say that something is wrong, without checking the forum first.
Your request is known by developers so is a work in progress.
Nobody want you to to buy twice the same license and is your right to receive a full refund.
Here people are very polite, helpful and patience for each of us, repeating the same solution for many of us, so be like them, please.
Cheers
-
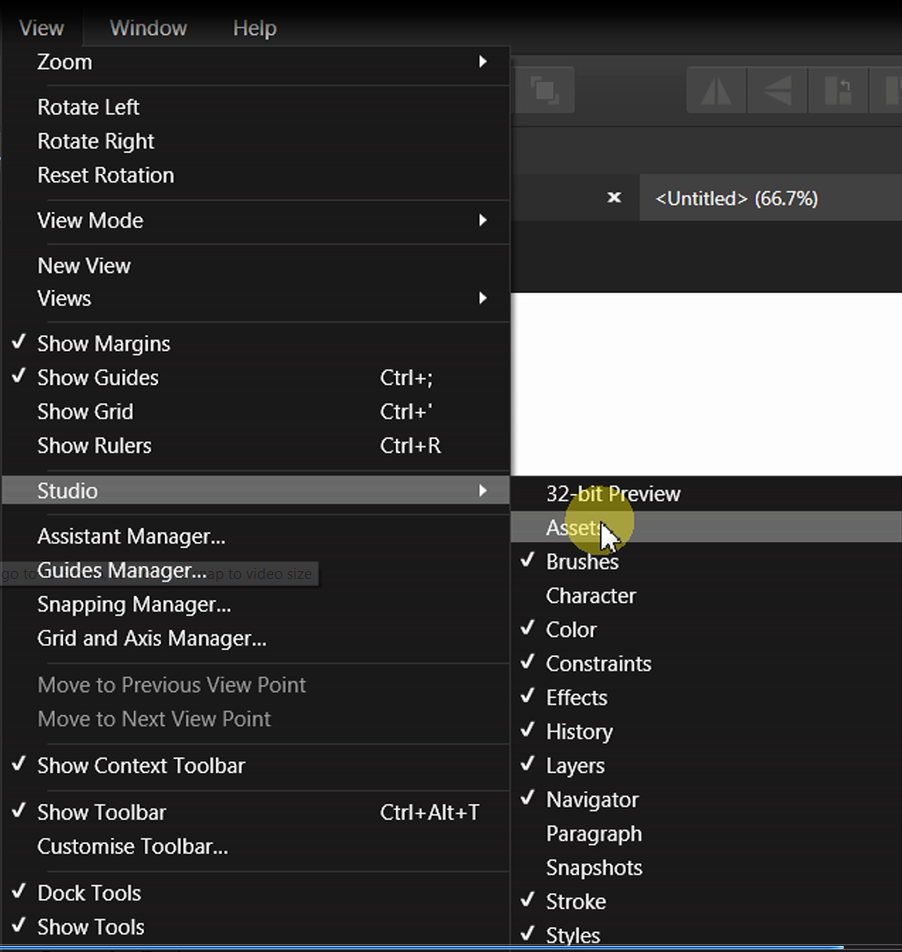
Yes it's possible, the feature is called ASSETS and you can enable by going on menu VIEW->STUDIO-> ASSETS
Have a look at the screenshot and then watch the official tutorial about ASSETS https://vimeo.com/182383667
And always read Help menu where you can find anything about Affinity Designer and watch all the tutorial from this page
https://forum.affinity.serif.com/index.php?/topic/10815-in-house-affinity-designer-video-tutorials/
Cheers

-
Impressive, thanks for sharing with us.
-
Hello to everyone, when I copy and paste a layer or a group, should move that object into position according to the cursor and not above the same object. Is interesting that when the copied object is not in frame, is pasted where the cursor is.
I attached a video https://www.dropbox.com/s/xcaz29l8slbf9i3/2016-12-01%20at%2018-03-13.mp4?dl=0Thanks
-
This happens to me in another version but as show in the video, when resize the layer panel the option to expand a group is hidden
https://www.dropbox.com/s/kniwn8nu1lyx6gb/layer%20panel.mp4?dl=0Now I cannot reproduce again, didn't do anything special not even reopen the document, simple copy paste a group to another group and the bug is gone.
-
Sean, I put that slash because I saw a tutorial, but now after I removed it everything is exported right. I have a powerful computer (I7-3370, 20GB, 120SSD) but I feel a delay of 2-3 seconds after click a slice till the selection of that slice, hope the video show what i mean.
-
I opened my working school project, I saw that i cannot export any slice i already created.
Please look at the screenshot.
Thanks
In version AD 28. is working as expected, I can export my slices without problems.
-
Indeed but hope soon will be a fix release.
-
1.create a new document
2. click on lasso tool icon
3. instant crash
Other tools are working ok
-
Look here https://forum.affinity.serif.com/index.php?/topic/2335-making-multiple-selections/
I asked about this too seems to be a bug in windows version of AD. -
I select a group (a boy from the document) went to constraints,tried to make some changes, AD crashes instantly
I attached a file
-
I start watching this tutorial
about assets, learn a lot! I followed the steps how to create assets, but In latest windows version of AD .23, tried to drag and drop a group or an object into the assets panel but without no result. "Add from selection" seems to work as expected. I just wanted to let you know guys. -
Sean, I understand now, thanks for explaining to me. Time to learn more from HELP.
Great day!
-
-
-
Tried to export a slice but AD memories the last preset and not the current preset selected.
STEPS>
1.Create Slice
2.select preset to .PNG
3.click export selected
4. the slice is export as .png -- OK
5.change preset to .jpeg6.click export selected (same slice)
7.export again as .png
Respect
-
I restart my computer, now is working for me too, sorry guys don`t want to confuse you. Next time i will check twice before open a topic.
Respect and thanks for AD. -
I can confirme that this option was working in the previous version of AD. (.17)
-
I tried to continue my work with AD today, I simple Copy and object and then COPY STYLE (CTRL+SHIFT+V) but no effect is apply. Can someone confirm this?
Thanks. -
What a great team, AD really help me at my school.
Thanks guys -
I followed the steps and is working my object is align vertically and horizontally!Obrigado!
-
Affinity Designer1.5.0.14 (windows version)
I can't figure out how to snap my selection in Pixel Persona, to the grid, I need that because I created an object and i want to center that object base on the selection, let say that I made a square with selection and I want horizontal and vertical center to inside the selection (square)
Thanks -
I can confirm too! After updating AD to 1.5.0.8, the program start slowly than others version.
SPECS:
I7 3770
SSD 120GB
HD 4000
Windows 10 Home Edition

Stroke Designer 0,1mm - 0,001mm
in Pre-V2 Archive of Affinity on Desktop Questions (macOS and Windows)
Posted
Hello, go to Edit --> Preferences --> User Interface and change millimeters from 1 to 3
Then you can change from 0,1 to 0,001, you can change also points, pixels..
Cheers