Peterkaosa
-
Posts
69 -
Joined
-
Last visited
Everything posted by Peterkaosa
-
 Hello, that is almost what I need. Except I miss exporting pathes to tif or psd instead of jpeg. How do I export to these formats WITH a path?
 -
Anyone knows the AiVpack plugin for Illustrator? I may need to create packages soon but would like to stick to Designer instead of Illustrator. But I guess this does not work. Opinions or experience anyone? http://erpa.de/loesungen/adober-illustratorr-plug-in/index.html
-
Support for Chromebooks planned?
Peterkaosa replied to Peterkaosa's topic in Older Feedback & Suggestion Posts
Sure they do, but spending 900 € vs spending 299€ makes a crackling difference… Anyway, thanks for your answer. Maybe I just do the artsy stuff at home? -
I am planning on a chromebook. But I would hate to lose the ability to work in my favorite graphic designer applications, both Photo an Designer do comfort me a lot. Do you plan on extending into the Chrome iOS world? For me it would be fine to have an app-only solution sort of "reduced-to-the-most-popular" functionalities. On the road I am not so much into creating completely new art work, but just a little fiddling around with what I have. And before one asks: yes, I have tried Vectr and this will NOT be a solution for me.
- 6 replies
-
- 1
-

-
- Chromebook
- support
- (and 2 more)
-
Thanks. You know this moment when you are fool blind? What I found was the possibility to mask the shaped area and then fill it – so I lost the shape itself. Next time I'll use your method…
-
I'm just at a similar point, alas I'm working in Photo not Designer: how do I fill my drawn shape with a fill color?
-
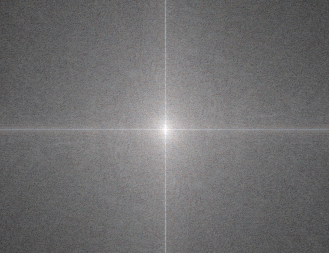
Hello, I have just watched a tutorial in this topic here: which is helpful, but doesn’t cover the whole story. 1st of all, if I press the alt key I cannot zoom out in the panel. I work on a "german" machine, is the key different? But what bothers me more is the fact that I do not understand the window that pops up after calling the filter. It displays some very confusing stuff (see attached example). Can you tell me how to read the greyscale image?

-
Chart/Graph Tool???
Peterkaosa replied to Paul Bunyar's topic in Feedback for the V1 Affinity Suite of Products
I totally agree with Paul, charts would be the killer feature for AD!!! You can guess the importance of my statement – I used three exclamation marks. Something I'd never do in normal life. -
You are one smart guy. Thx, problem solved. btw: is this a difficult issue from a programmer's point of view? One of my favorite features of OS X is the full screen and split screen option. It would be great if you could solve this problem.
-
Yes, I would like to use it in windowed Mode. But I have no choice, the collection launches both in windowed and full screen mode. And from here there is nothing to do for me.
-
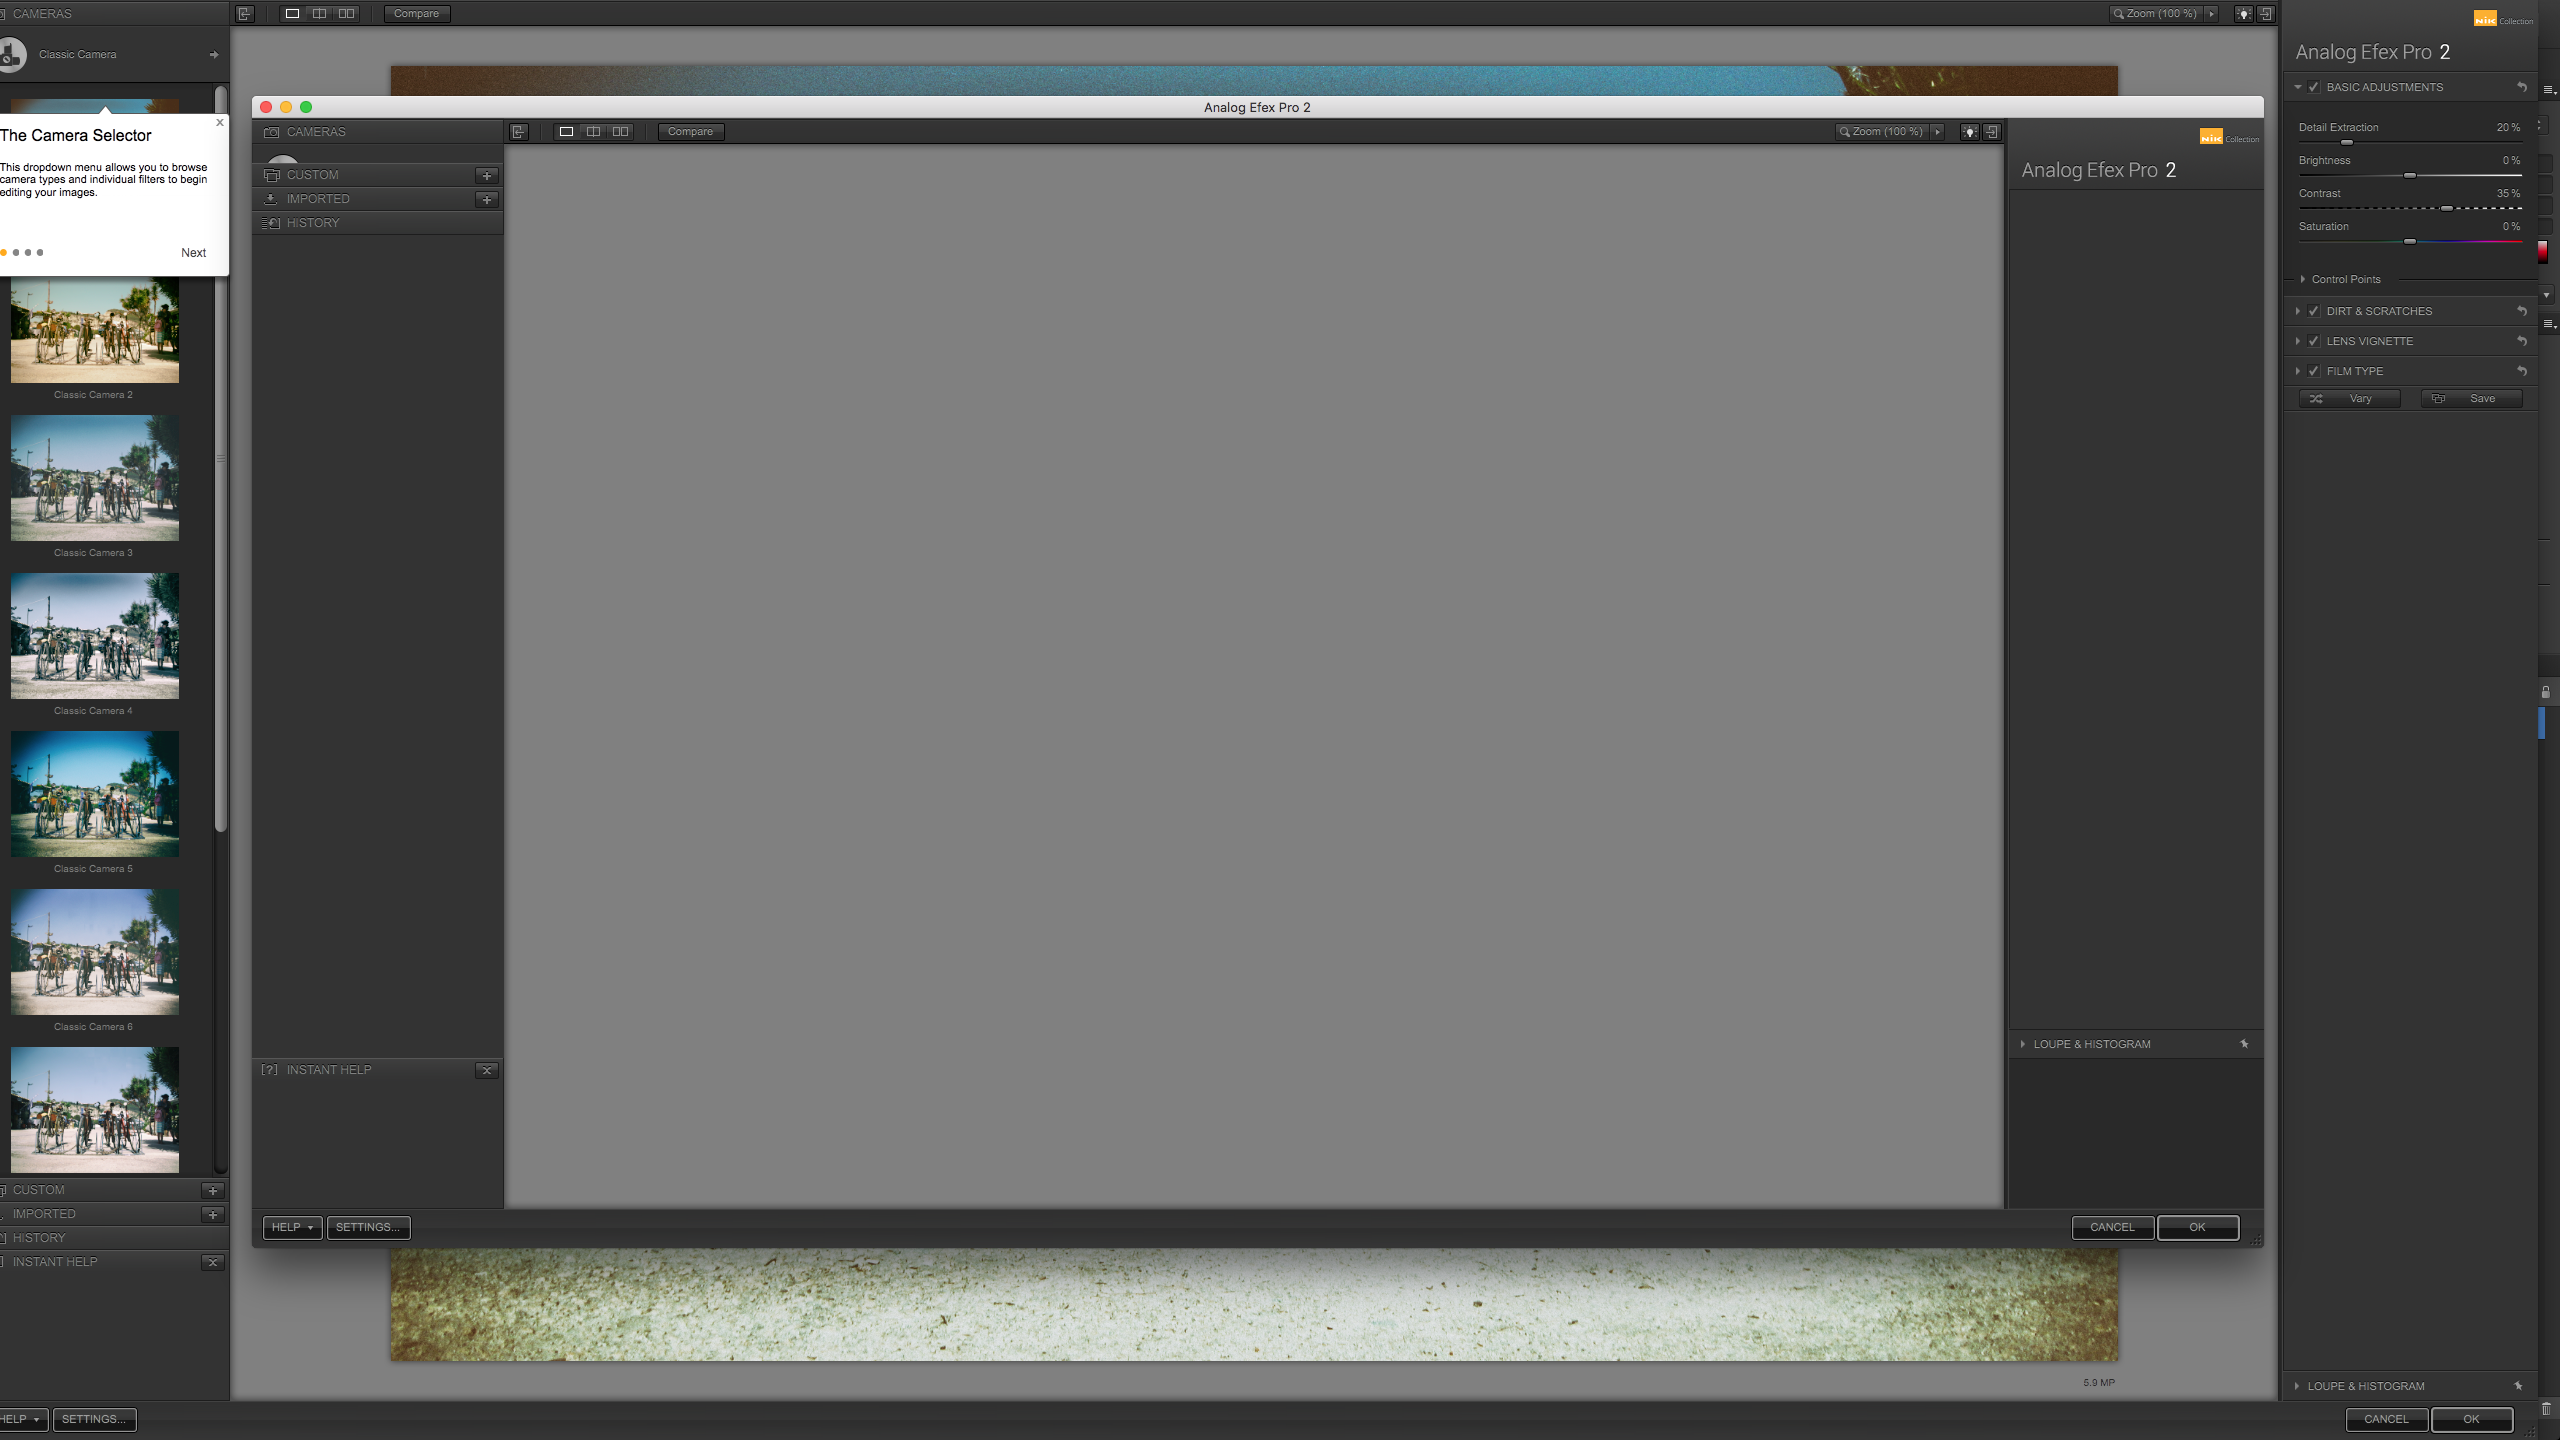
Hi, I am trying to use NIK collection as described in several posts. Installation runs and finishes properly, I can guide AP to the desired plugin folder, allow it the use of unknown plugins etc. Now comes the tricky part: I open an image and start filter -> plugins -> NIK Collection -> Analog Efex Pro 2. What happens now is best described this way: it seems the application NIK collection launches twice. First it launches in full screen mode and then in normal mode. I can see in the background that in full screen mode the image has been loaded, but not in the normal mode. And that is it. From here I cannot do anything but force-quit AP because no button will react on mouse clicks. Any hints?
-
Layer tab mess
Peterkaosa replied to RPJ's topic in Pre-V2 Archive of Affinity on Desktop Questions (macOS and Windows)
Nobody answering can indicate no-one understands the question. AFAIK: whaaat? Could you please post an example and hit what you want to do? -
go to Filter > Neigen?
-
Interesting question. Did not yet notice this filter, apparently it does really do nothing.
-
Just for having similar looking names? I am not too keen on this idea, sorry mate. Would it improve anything but your aesthetic mind?
-
Hello. I guess you will be lucky with the photo editing possibilities offered by Affinity Photo. But it is unlikely that it will help you organizing your files. So I recommend using either Mac's own Photos App for pretty easy access or Adobe Bridge for more professional support. If you get to know the features of a Mac better (like Terminal or the Automator) you will find out that on board apps can be very helpful as well. But it takes some time researching or a good book. And on to topic B: I do not know that App Store versions would be "less" by any means. As far as I know you find new features in the dev version, but most likely not everything runs as stable as the official release.
-
vectorized or pixels? Please show us your work
-
I doubt you do not have a hardware problem. I just took your tour, downloaded the image, made everything according to the video tutorial, and finished it. On an iMac from 2011. 8GB RAM. The usual suspects running: Safari, Thunderbird, Cyberduck, AffDesigner, Notes, Photoshop (uhh, I mean… NOTHING! I swear, that just popped up due to the autocorrect function) I must admit though it took about three decades or so. And the memory efficiency (shown in the info palette) showed values up to 11500%… which is impressing. And out of curiosity: why would you try the booked thing on such an impressive image that stands alone? Does not give anything to the image but takes a lot from it.
-
I'm not sure you can't do this with AD. I did not know step 10: "Make sure the fill of the object is set to the FXCUT Swatch and the outline is transparent." So what I sketched was only semi-correct. You should switch fill and stroke color of my template, so it appears filled with no stroke and then readjust the object as last in the layer (everything else should lie over this item). Then export as EPS and re-import into your printer's software. Good luck!
-
Considering me being the first to even read your post I suggest you simplify your question. At its best you show us an image of your goal.
-
Yes, I see: you didn't use a stroke size (commonly 0.3pt) with the FXCUT color. I'd put it like the attached file. Notice that I let the rectangle be filled completely gray whereas the cutting line has only stroke, no fill. This enables the printer to have enough printed image and still be able to cut along the desired circle. cuttingline example.afdesign
-
That is an easy one. Let me do it… Okay, I use the german version, but steps are similar. Create a color named FXCUT in the color palette. (Something italian like "global color"). In the lower part of the color window you notice 2 options, one is spot color, and one is overprint. Check both. And then attach the color FXCUT to your stroke. Basta.
-
Although this is not properly played out – I just played around with the shapes and node editing – I'd like to share this. Suggestions? Opinions? Onions, as autocorrect suggested?
-
Nice one. Could you upload the oroginal file?
-
R C-R I get your point, of course trouble shooting should be quick. And for not-native speakers (So wie ich es auch bin) it is not always easy to post understandable. On the other hand, this specific post is interesting for a vast majority (AFAIC). And as Affinity is british company I suppose the moderators would like to follow the more interesting posts in order to improve their software. At least that's what I hope for…