thomaso
-
Posts
11,608 -
Joined
-
Last visited
Everything posted by thomaso
-

Image Policy?
thomaso replied to Tony Pritchard's topic in Affinity on Desktop Questions (macOS and Windows)
I prefer the 'linked' policy and it is fully sufficient for layout + for creation of a print PDF with the wanted image resolution. I don't see an advantage in embedding images in the .afpub. As mentioned, neither embedded nor linked do "ensure the high resolution images in the PDF", instead their properties are a matter of your export settings for PDF creation. Once you speak to the printer also their required or preferred colour profile may be useful to know and to get used for your PDF export. Different to ID, colour values of vector objects (colour swatches) may change on export if your layout document and the PDF use different colour profiles. If your layout contains text with 100 K (no CMY) then you may change the document profile in the Document Properties before export and set it to the printer's profile with the "Assign" option selected in the Colour dialog. -
Image Policy?
thomaso replied to Tony Pritchard's topic in Affinity on Desktop Questions (macOS and Windows)
There is a misunderstanding, possibly caused by your unclear question "I assume if I link then the final output with be the quality of the scanned / photographed images?" The size / resolution of images in a PDF get defined by your settings for re-/downsampling, DPI and compression options in APub's export dialog – like in ID. Also like in ID a package contains copies of the layout document + fonts + images. If your layout (.afpub) has images embedded (or images converted to layers of type "Pixel") then those will not be part of the image folder of a package but still be embedded within the .afpub (means, they are not required in the mage folder). For the printer the PDF is sufficient, the printer doesn't need the package unless you want them to edit layout or images – like in ID. Thus a package is useful for the printer only if the printer has the Affinity app, too. -
Image Policy?
thomaso replied to Tony Pritchard's topic in Affinity on Desktop Questions (macOS and Windows)
... and you can choose + toggle the policy setting at any later time in the document properties, @Tony Pritchard. -
Publisher import exel file
thomaso replied to Štefan Szabó's topic in Affinity on Desktop Questions (macOS and Windows)
While this auto-row-height feature works with APub tables – regardless of whether text lengths, line or paragraph breaks require more line height and regardless of whether content is typed or pasted – the question "just" arises as to why it doesn't work when a table is used for Data Merge.
-
Using "views" inside a prompt
thomaso replied to Scratrat's topic in Affinity on Desktop Questions (macOS and Windows)
If you don't want any perspective view on the trees than pure top view you'll need more than 200 m distance for a forest area of your shown size. Try a search for satellite images instead, for instance https://duckduckgo.com/?t=ftsa&q=satelite+image+forest&atb=v373-1&iax=images&ia=images&iai=https%3A%2F%2Fwww.amazonteam.org%2Fwp-content%2Fuploads%2F2018%2F11%2FMaloca_WorldView-600x338.jpg
-
Another approach, without Data Merge but Macro: Create a layer (e.g. image) which contains 200 fields each with a wanted colour. Place this below the mask of the area to colourize. Use Macro to move this layer step by step to its next colour field. Save the current result … and repeat move + save.
-
Affinity Photo Catalogue
thomaso replied to barny's topic in Affinity on Desktop Questions (macOS and Windows)
It appears "simple" is a missing attribute of Apple's Photo's file management, not of forum or Serif guys … while the Photos Library.photoslibrary package as a proprietary file format is 'simply' and 'by design' not accessible for others than the Photo app.
-
If the image area to colourize is the same for each of the 200 wanted results and varies in the colour value only you might try APub's Data Merge to load the colour from a data source, possibly as image masked in APub by the wanted pixel selection. compare: https://excelkid.com/fill-cell-with-rgb-color/ and
-
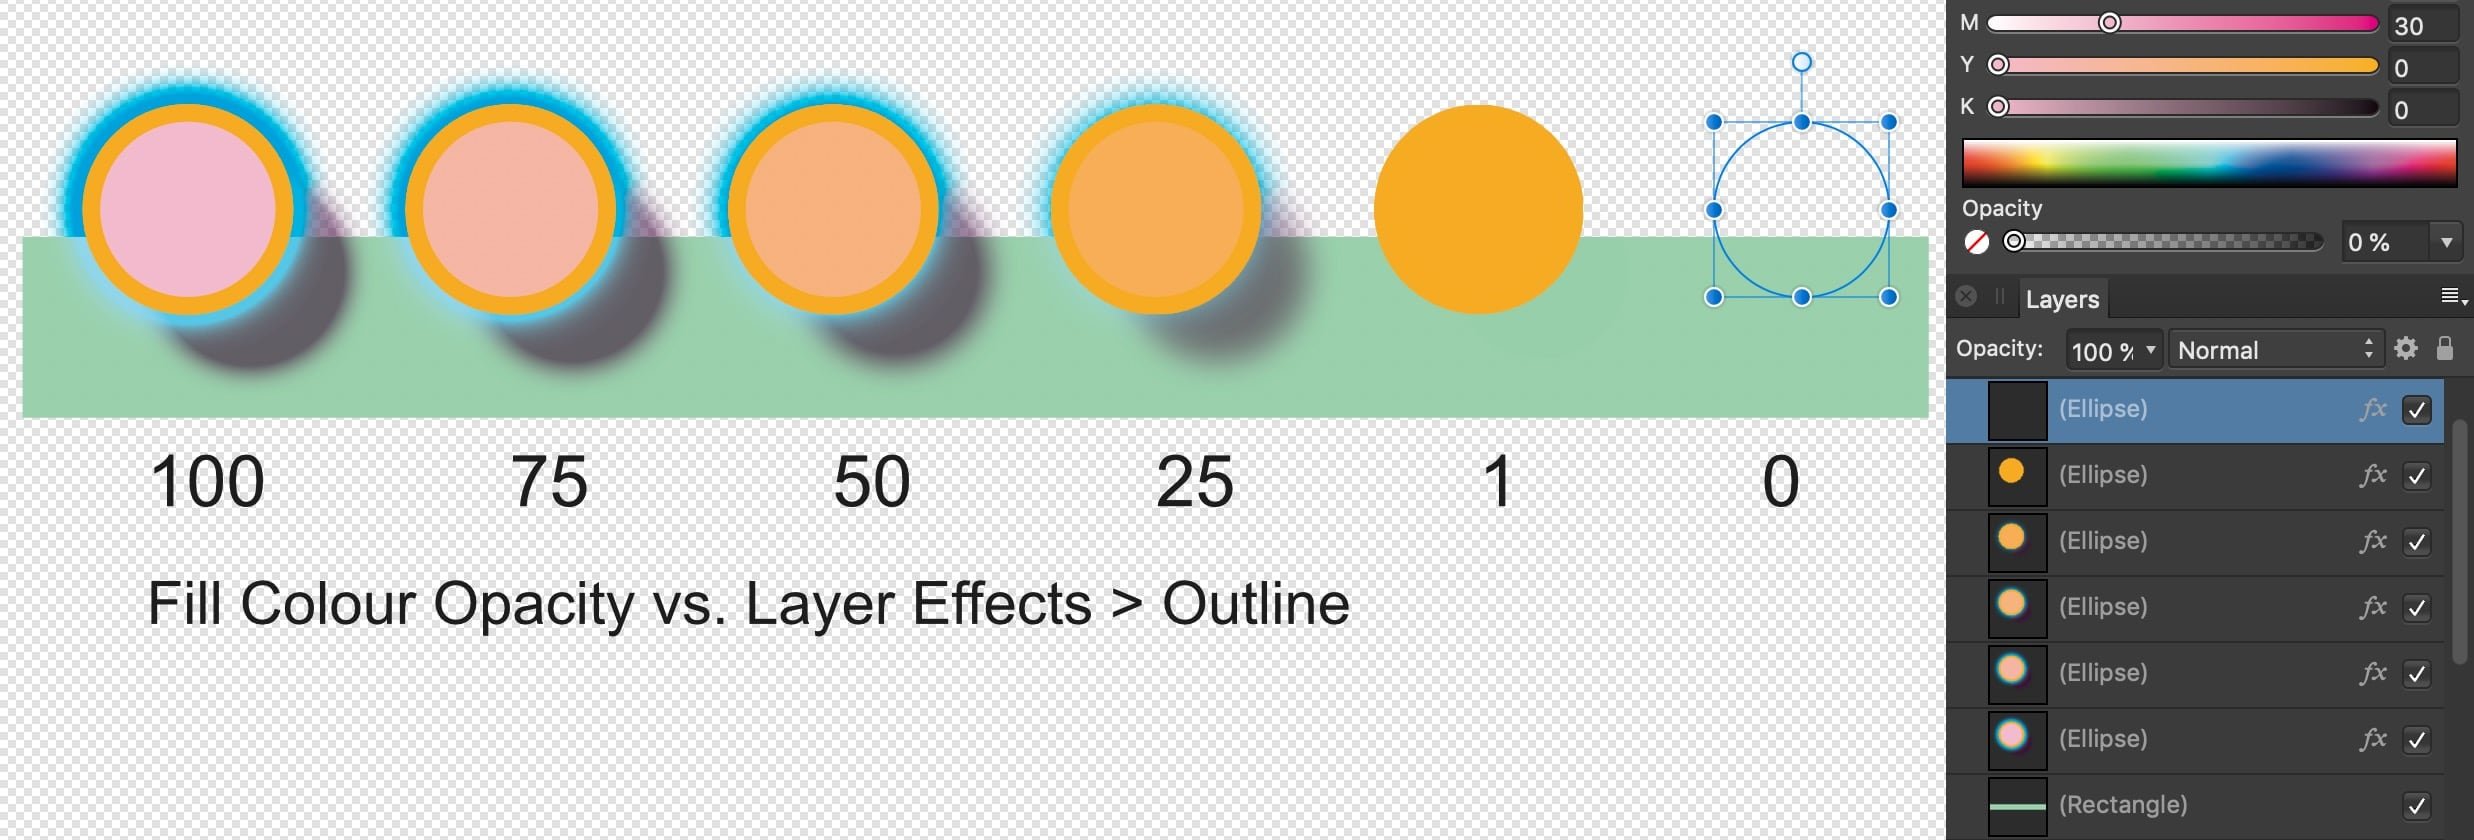
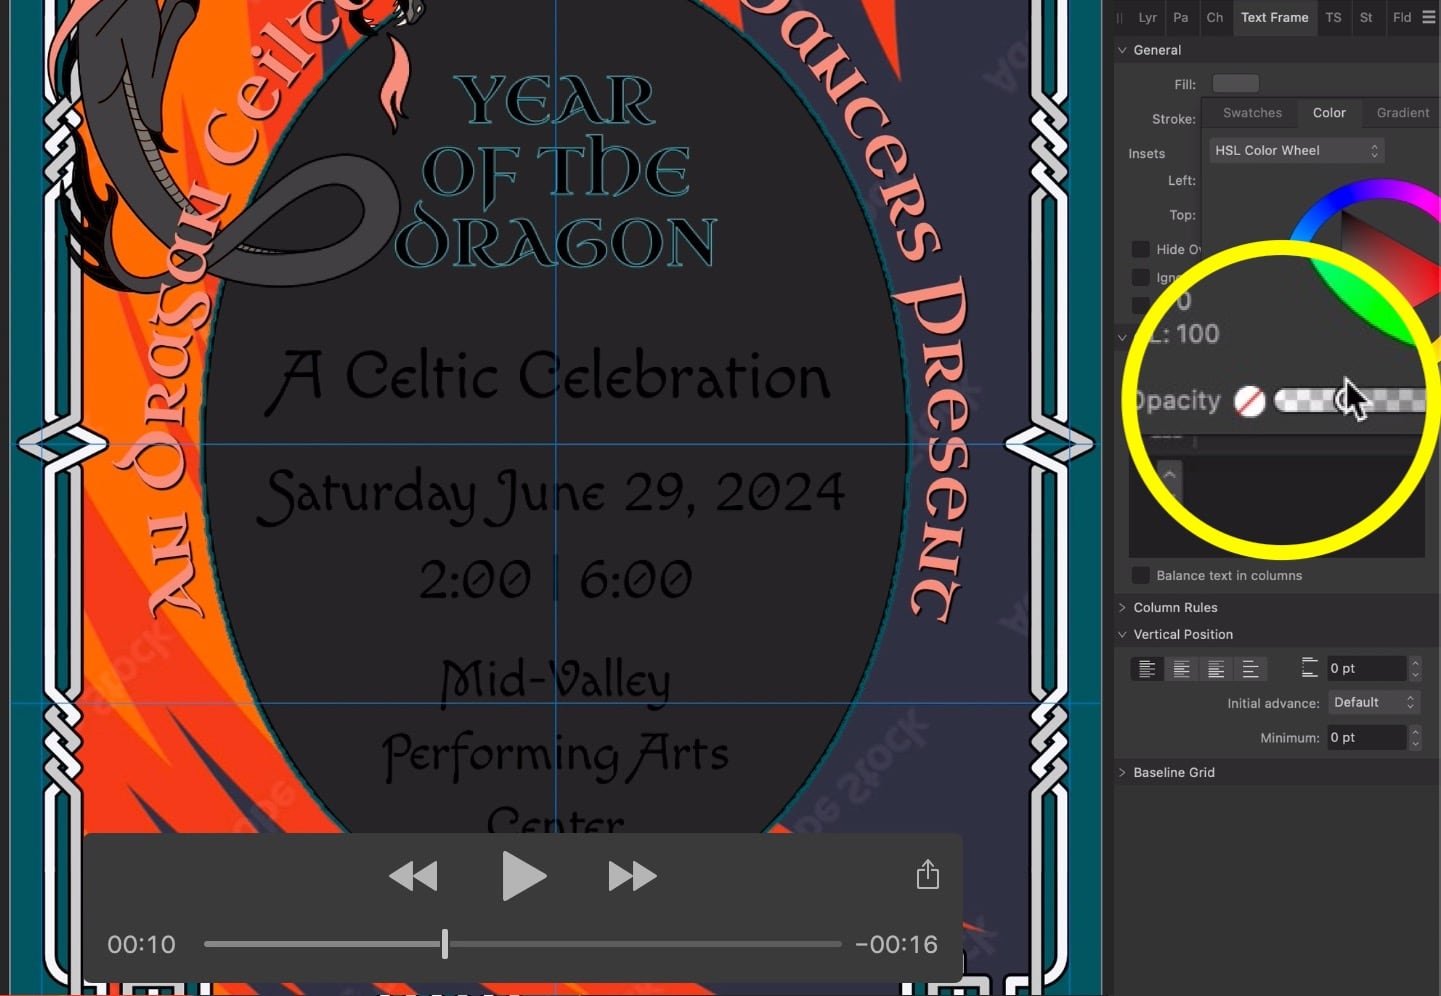
Indeed odd that the Outline Effect in particular is not affected by fill colour opacity while Shadow and Glow are. Also unexpected that the Outline Effect radius does not influence the Shadow Effect:
-
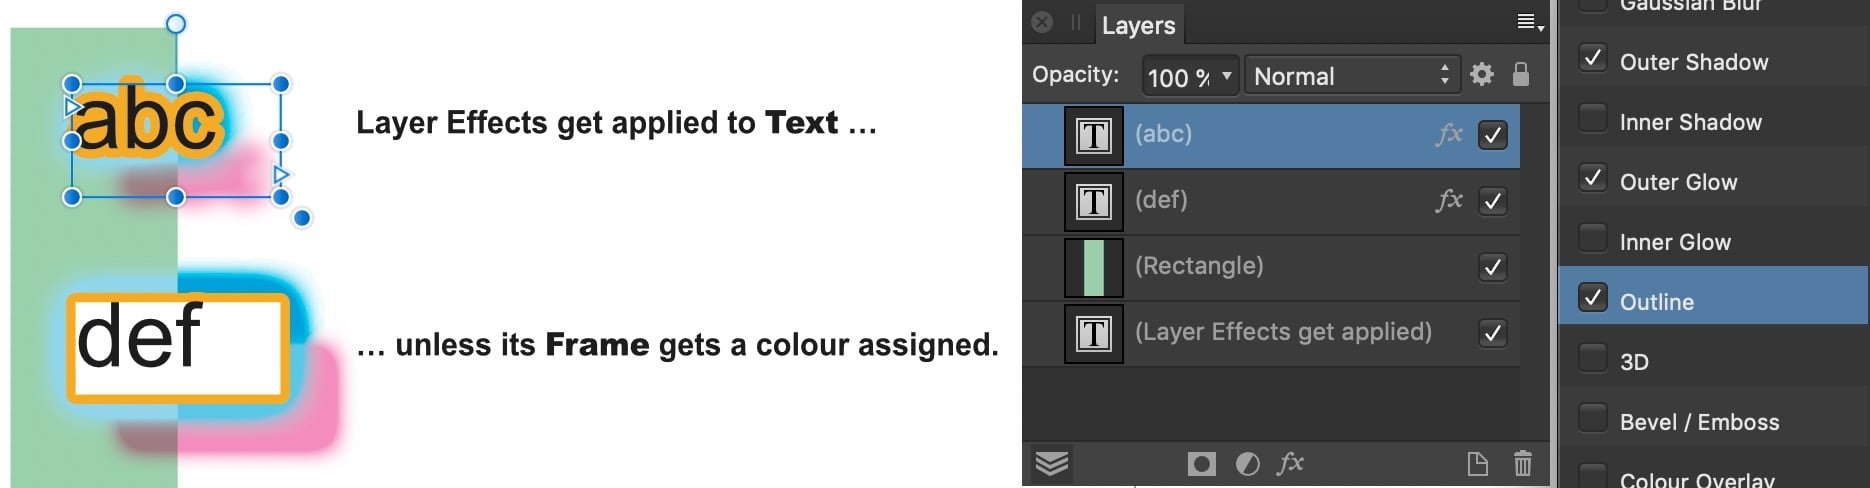
Isn't it rather due to the hybrid nature of "text" objects where a fill colour 'usually' affects the containing text (not the shape of its frame), and so do layer effects – unless the text frame gets a fill colour assigned?
-
Affinity Photo Catalogue
thomaso replied to barny's topic in Affinity on Desktop Questions (macOS and Windows)
Good point. If I understand right it would work as long the user doesn't modify a resource in this folder from Affinity? (honestly the proprietary, intransparent and partially redundant image file management of Apple's Photo app made me avoid this feature from its beginning) -
A very long shot...
thomaso replied to Phil_rose's topic in Affinity on Desktop Questions (macOS and Windows)
Is this the "long shot"? (ps: how about a horizontal signature, less long?) Possibly you can use Data Merge to place images together with text.
-
Indent using character width?
thomaso replied to Ross Burton's topic in Affinity on Desktop Questions (macOS and Windows)
Actually I would expect these typographical expressions to work for indent relative to font size, for instance "xheight * 200%" Unfortunately it doesn't and "relational expressions" seem to be limited "by design" to objects + Transform panel only. -
Affinity Photo Catalogue
thomaso replied to barny's topic in Affinity on Desktop Questions (macOS and Windows)
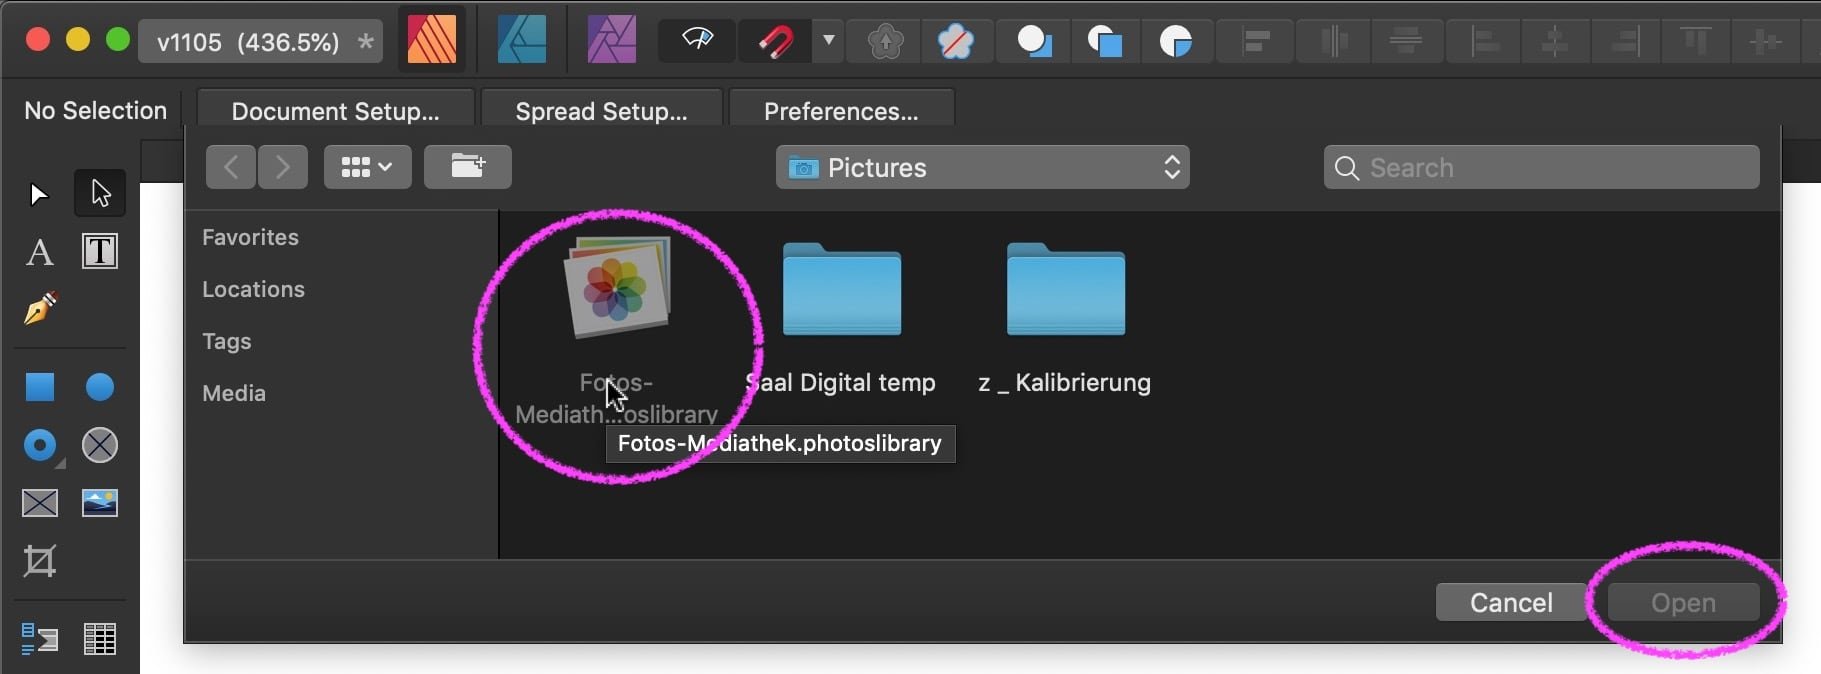
Your screenshot doesn't show a Finder window. If you drag the image resource indeed "from the storage location in the Finder" it will be placed in full size (according to the current Affinity document resolution). Possibly you need to 'ignore' Apple's Photos app's proprietary storage management and instead point in the Finder to the folder that contains the high-resolution images.
-
selection tool will not cut and copy
thomaso replied to jefferis's topic in Affinity on Desktop Questions (macOS and Windows)
Note that a pixel selection may be entirely independent from a certain layer type but may work rather similar to a colour picker tool. Below it is set to use "All layers" as source and thus it partially includes the vector rectangle layer in the resulting pixel selection. For this pixel selection the layer selection in the Layers panel does not matter, it selects the same green if another layer or if no layer is selected.
-
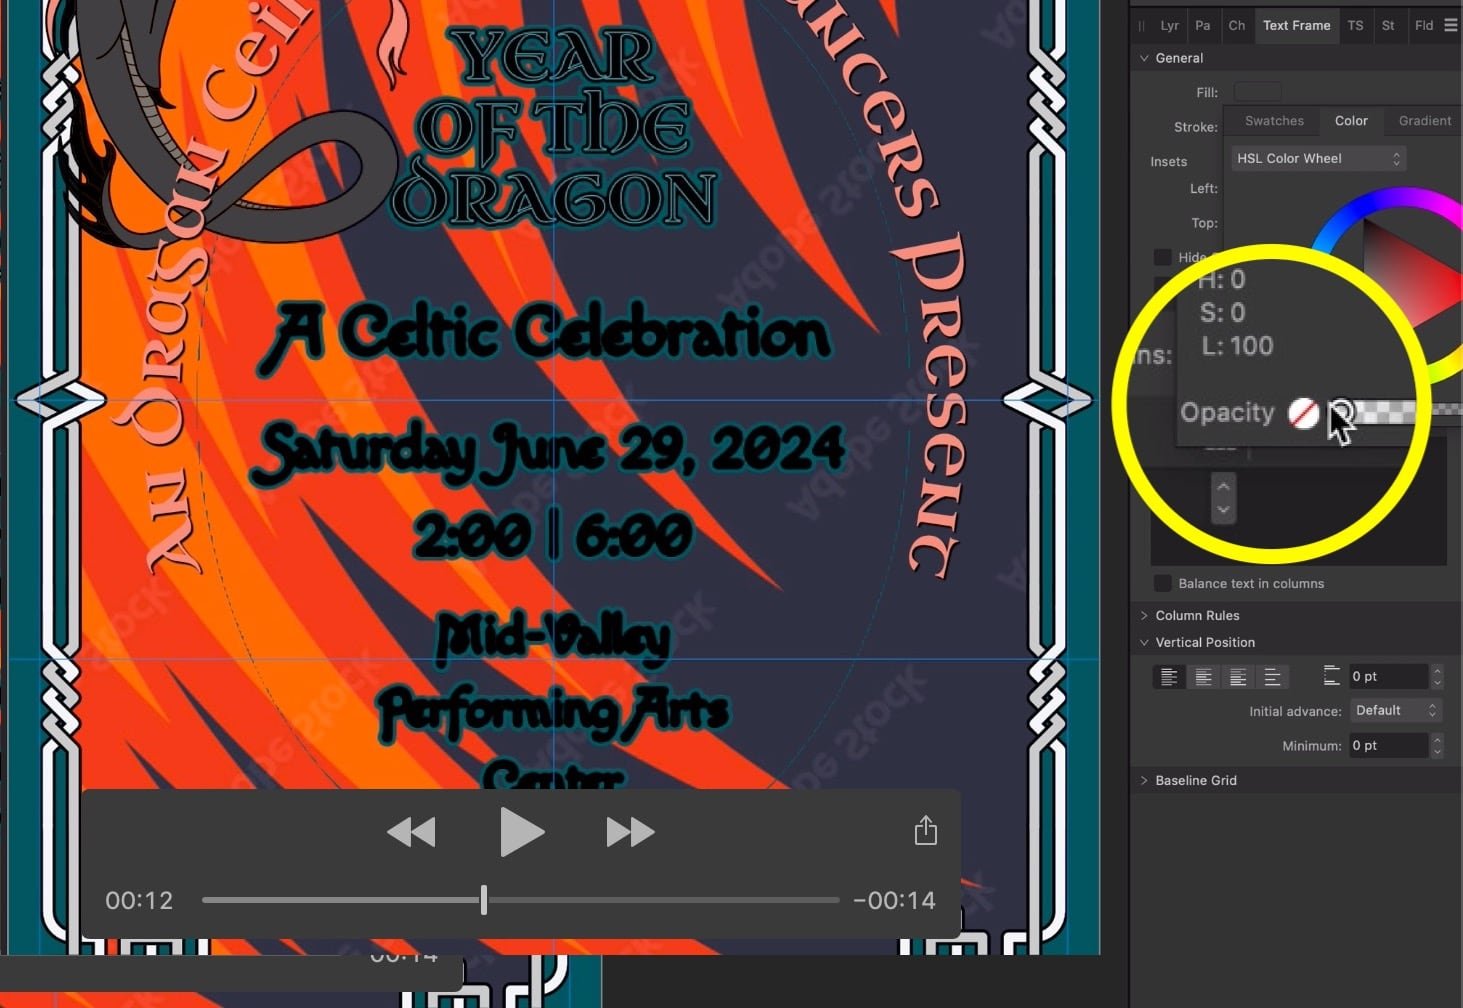
How is Designer related to this issue? Apparently the colour opacity doesn't work for values above 0% but reduces luminance instead of reducing opacity.
-
… and you wrote: … which appears confusing since a PDF Portfolio is neither "simple" nor just "one PDF" – unlike a Collection of multiple PDF files, which, furthermore, also may open as in your screenshot with bookmarks for each containing PDF.
-
Apparently they re-coded the layout & interactivity features when Flash was quit. Now you seem to confuse / mix "Portfolio" and "Collection". While the Portfolio shows an extra Start Page + Layout + Interface the Collection is just a bunch of several pages within a PDF and thus a "One simple PDF" + bookmarks. With Affinity you can create a "Collection" (-> bookmarks) but a "Portfolio" only with manual layout creation + limited options. (but possibly with more compatibility with PDF viewing apps other than Acrobat).
-
Good to know. – Did it work as expected in any previous app version?
-
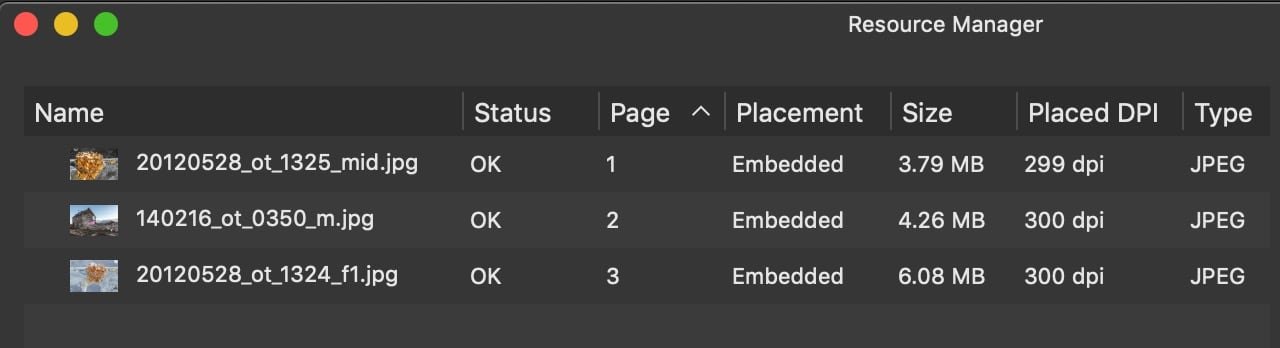
If you embed a resource you want it to get saved within this Affinity document, – of course entirely regardless of its current layer visibility and possible preview data. Apparently Affinity doesn't save an embedded resource with the initial compression of the related file on disk but obviously less compressed, probably for performance reasons when reopening / rendering large documents with many resources. If I create a new document, place 3 jpgs, set each to invisible and "Save", then set to visible and "Save As…", I get quite different results for file size compared to the same process with embedded images: then the layer visibility / previews seem to double the file size: If embedded it appears the placed image size (placed dpi) within the layout matters a lot. If I reduce their frame size and "Save As…" the documet size gets reduced, if I undo the rescaling + do "Save As…" the file size increases again:
-
adjust the character spacing
thomaso replied to JKSeiner's topic in Affinity on Desktop Questions (macOS and Windows)
Also with an Artistic Text Frame there may be no need for manual tracking / individual character justification when the paragraph option "Justify All" gets set with 1 click … while it matches both your conditions "A + B". (regardless of frame or art text)
-
Have you tried the V2 options "Fill Holes" | "Remove Inner Curves" • To fill holes in a shape: From the Layer menu, select Geometry>Fill Holes. • To remove inner curves within an open curve (or closed curve): From the Layer menu, select Geometry>Remove Inner Curves. Layer>Fill Mode>Winding (Non-Zero) must be enabled. This operates on a per layer basis. I never understand the use of the Affinity "Smooth Curve" feature … >> Smooth Curve modifies a line or shape, by adding and removing nodes, to create a rounder and softer curve effect. << … and I wonder what algorithm is working in curves like this … … where it appears to fix an issue but also adds rather useless nodes with its goal 'to create a rounder and softer curve':
-
adjust the character spacing
thomaso replied to JKSeiner's topic in Affinity on Desktop Questions (macOS and Windows)
If it is meant to fill the width of the text frame then the Paragraph justification options may be simpler than the Character tracking option for selected words.
-
That's why I called it workaround when you asked for something similar. – I assume their "Portfolio" feature gets created via HTML inside a parent PDF. That type of code for layout and navigation is not available / compatible in Affinity except for "Anchor", "Bookmark" and "Hyperlink". Note, in earlier versions they seemed to be using "Flash" + requiring "Flash Player" for creation or display on the reader's side: This websites might shed more light on the wanted feature and possible usage: https://documentservices.adobe.com/view-sdk-demo/index.html#/view/LIGHT_BOX/Bodea Brochure.pdf https://practicalpdf.com/pages/embed-api-expertise.html
-
This will not be able with APub but you may achieve click-navigation to certain pages with a workaround by using bookmarks or hyperlinks. If you use bookmarks you need to activate their symbol in the "Anchor" panel to make them appear for the readers in the bookmarks sidebar of their PDF viewer app. Workaround with hyperlinks: 1. Load all PDF files via menu Document > "Add Pages From File…". 2. Create an extra page as page 1. 3. Create for each PDF an icon/thumbnail (e.g. a screenshot of their title page) 4. Arrange these PDF thumbnails on the first page. 5. In the "Hyperlink" panel create a new hyperlink of type "Page" for each of this thumbnails and let its jump to the page number where this PDF starts in your document. 6. Optional: add a blank page after each PDF and place a symbol + hyperlink back to page 1.