

Jim Monson
-
Posts
437 -
Joined
-
Last visited
Posts posted by Jim Monson
-
-
I have beautiful pixel relief maps on which I place animated vector arrows, etc. Does Affinity have any feature that allows me to animate vector objects on layers that are above an image or pixel layer? I now use Apple's Keynote or Pages apps to achieve this animation, using great vector objects created in Affinity. If such Apple animation features were built into Affinity and one could export it, it would become an amazing feature. Affinity's features such as pinning are great for printing projects but having the animation of Keynote would be terrific. However, this might cause some tension with Apple and their products, but perhaps not. They seem to love Affinity.
-
(Working in aPub v1 since my group is still there.) There has been much discussion about this on the forum but I have yet to find some explanation for the symbols below on the top layer in aPub. lt must have to do with this question. I have placed many objects within a bounding box on the top layer. Great! But if I want to change the area of the bounding box the object remain "destroyed," i.e., the effect of the original bounding box remain (objects remain clipped as they were before). I realize that they are still there and have found that the only way to see the original unclipped object is to create a new top layer and move all of the object into that new top layer. Thus it appears that the original clipping is preserved in this original top layer.
I see the symbols (attached snap) in this original top layer. These no doubt are related to the above. However, I have yet to find some aPub video that explains these layer symbols. Does one exist? BTW, by "symbol" I simply mean those which appear in the snap below (click to see full snap. NOTE that the == is part of my panel name. My question is about the symbols to the left of the ==. Nothing to do with creating "symbols" in aPub.

-
Your response is much appreciated, Walt, as always. Actually, in preparing the doc for you I found the problem deep down in a layer that I had turned off - but had not deleted. Problem (due to my mistake) now solved thanks to your quick response on a Saturday afternoon!
-
I'm working in Publisher Ver 1 on a doc in which pictures with text wrap had been placed. After deleting the pictures and the text wrap, and checking that 1) there was no text wrap object remaining (via Designer persona outline view, 2) there were no text wrap settings were cleared, and 3) creating a new page and copying my work into that page, the text wrap continues to push text outside my previous box. It remains in the same location as I move the text in the frame text box. around on the screen. Thus there must be a residue text wrap of some kind in my work. Must I rebuild my work in a new doc to get rid of this invisible text wrap or is there some solution?
-
Thanks to all. I have used gradients before ... but forgot this time and created a layer effect (fx)in which zero opacity on both ends reveals the underlying color. Using the color wheel opacity in fx appears to impact the entire rectangle and not each node of the fx. I easily achieved the fade with the gradient tool. Again many thanks.
-
I want to create a gradient overlay with a color in the middle and fading on both sides to no color so that what lies behind the overlay slowly appears on both sides of the middle color. I have not found an option in this overlay for no color. If I bring the opacity down on either side, either black or white appears covering up the picture behind the overlay. I understand that black and white are used to create the gradient and thus appear when I bring the opacity down. Is there any way to avoid this so that the middle color simply fade into the picture behind?
-
Thanks to you both. Both solutions worked. I must have mistakenly done something to change those setting. Much appreciated!
-
Why does my text in a frame text only allow a single column of text? It only started doing this a week ago and only in one doc on which I am working . New docs are okay. I have checked every preference and dialogue box multiple times, including Text Frame. I must have clicked some thing unknown to me. Below is a simple doc with one frame text.
I can create a text frame text in a ew aPub doc and copy that text frame into my problem doc and it remains as I created it. Thus it seems that the problem is isolated to making a new text frame in my problem doc. My problem doc has some 15 spreads so I con't want to cut/paste all that into a new doc unless that is my only choice.
-
I believe what is needed is a chart of the basic differences between transitioning from the desktop version of Affinity and the iPad versions. These are functions such as, creating a new doc, cutting and pasting, saving and deleting docs, importing an image, etc. I have found that once this is known then using the tools, context menu, are relatively easy, much the same. Searching tutorials (although they are good) for basic functions such as these is much more difficult than actually using the tools and other panels.
Does such a basic introduction in the basic differences between the desktop and iPad versions exist? E.g., the iPad panels are not seen until one brings up a doc to edit, a non-intuitive feature that once known, is obvious. Things like this are not covered in the tutorials as far as I know. This would be very helpful for those transitioning from desktop to iPad.
PS: Knowing how to do the above without a keyboard is essential for the beginner.
-
I have three Mac spaces on my iMac. My default is to have AffPub come up on Space Two. I bring my main AffPub doc up on Space Two. I then bring another AffPub doc up and it comes up on Space Two but then I move it to Space Three so that I can toggle back on forth from Spaces Two and Three quickly with my shortcut. This works find until I change something in AffPub’s Preferences or Hide Studio or try to uncheck Hide Studio. AffPub does this on Space Two even though I am working on the doc in Space Three … and then the spinning color wheel begins and never stops.
I realize that I can not have my default on Space Two, or that I can keep both docs under one head on Space Two - but I like the system outlined above. Am I missing something in my work flow above or is this possible to avoid or fix in AffPub?
-
Can I copy guides from on master page to another in Affinity Publisher? It appears that I cannot select more than one guide setting (number) in Guide Manager to copy/paste my guides from one master page to another. It would be great if one could select the all to copy/paste or use the CMD key (Mac) to select from the guide numbers.
-
I believe Affinity should consider this problem and create an option for non-resizing the text when resizing the text frame. Yes, I know easier said than done but at least it should be considered for the future. I have headings of one word but different sizes of words. As of now I must create the word, then create via "Text Frame" the size, color and margins around the word for the heading, and finally cut/paste the heading in the text frame. If I want to edit the margins I have to cut the heading and try again (and perhaps again) until it is correct. I realize that I could simply place a rectangle with the color and then place the heading over that rectangle, but that is a rather inefficient method Thanks, Affinity for at least considering this.
-
I believe a solution might to be able to cut and paste actual guide numbers via the Guides Manager, This would allow one to pick and choose which guides to copy from and to various pages, master or not. Sounds easy, but this is probably and programming challenge. I find that often I do not know the guides I will be using until I am creating the doc, and then I can put them on a master page ... but then I have to taken them off the non-master page, and it gets complicated.
-
Thanks, Largato! That solved it. Using "Normal" is sort of counter-intuitive, however, since I would think that "Passthrough" applied in this case. Much appreciated!
Also, a great idea, NotMyFault! Why didn't I think of that? Works well, also. Thanks!
-
Thanks, MEB. Here are three docs I'm attaching.
1_Doc to MEB = Parts of my present AffPub doc related to the problem. I would like to have red in the center and no color (zero opacity) on either end. In this doc note that going into the effects and clicking on the "Gradient" box shows that I should be getting this effect.
2_What I see onscreen = A screen snap of doc as I see it on my screen
3_Doc to MED_ from 220102b = Note the effect I created in this doc from a few weeks ago. When I move the "4000 Chart" layer *above* the "Timeline" layer, I lose the effect. Also, when I cut and paste this correct effect into a totally new AffPub doc, I also lose effect since it is a top layer. It appears that something is going on in the layers and sublayers.
Could you also comment on the procedure for creating this effect from scratch? I believe that one should first assign a color to the rectangle and then add the effect. If not, I cannot get a color to appear in the effect. Does Affinity has the black/white come up at first in order to get the effect desired, and then one can alter the colors in the effect. I cannot find an answer to this online.
Much appreciated, MEB!

-
Five snaps for my earlier post. I hope their names come through so you can connect them to my text above.
-
In case the mess above is confusing, I here paste the text alone for easier reading. I'll paste the examples in a separate post that follows.
- - -
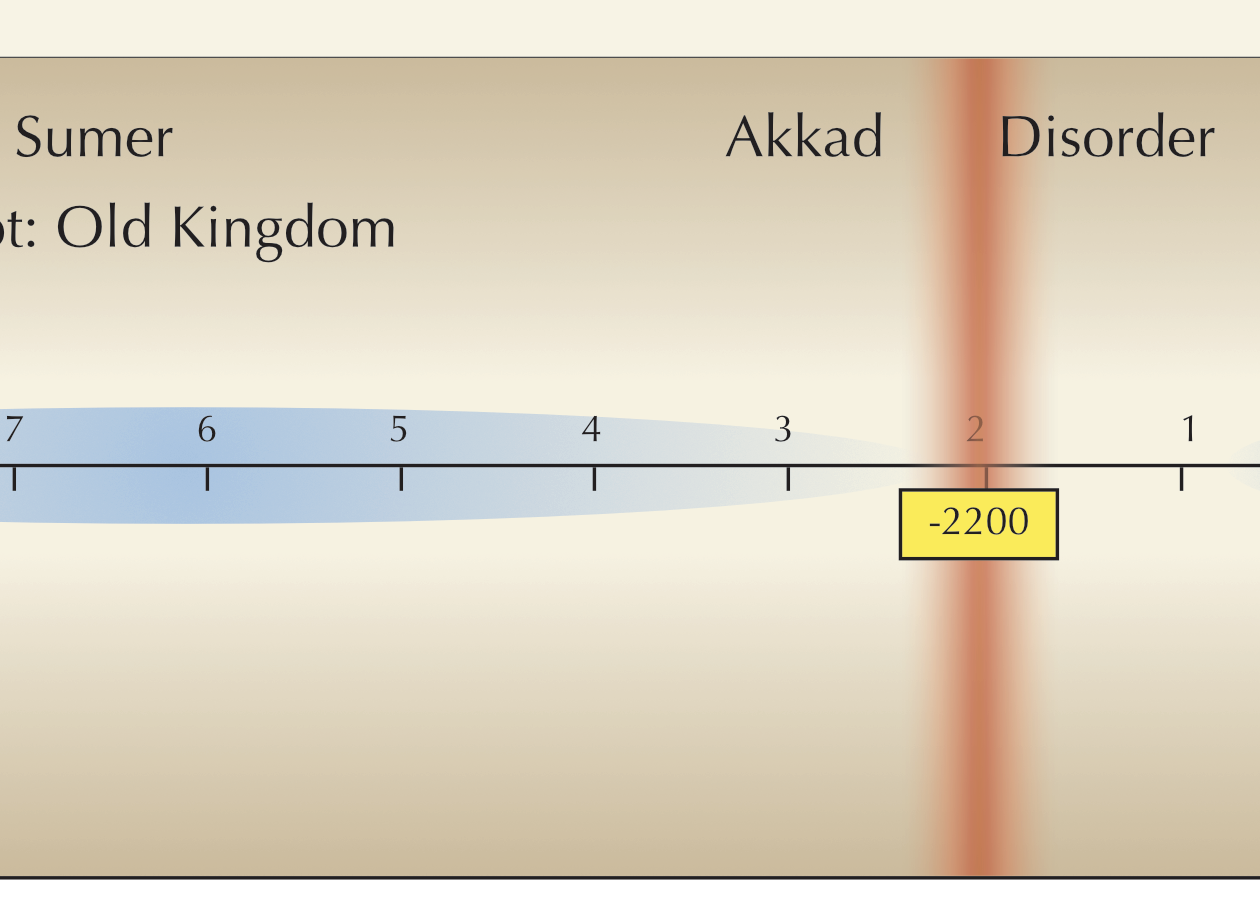
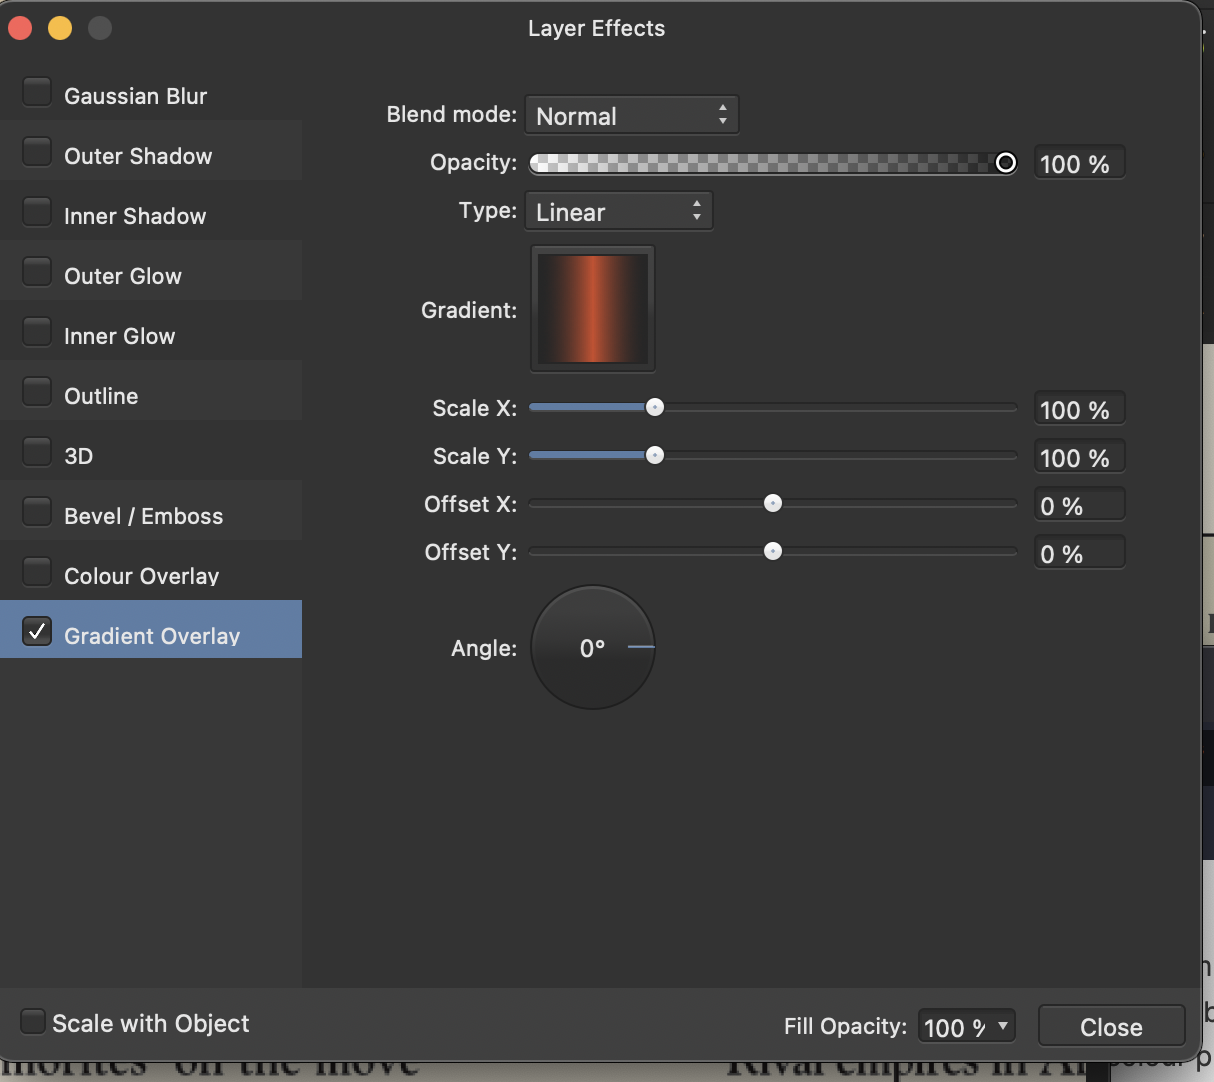
I have been creating gradient overlays for years with no problem at all. As recent as three weeks ago I made example 1 below with various gradient overlay effects (ovals, long rounded rectangles and vertical red rectangles. The red vertical rectangle in example 1 below has zero opacity on both sides of the center red which allows the red to fade beautifully into the underlaying background colors which is also an underlying gradient overlay. My settings are seen in examples 2 and 3. Note that 3 shows black on both sides in the top preview but no color in the lower spread since both sides are zero opacity.
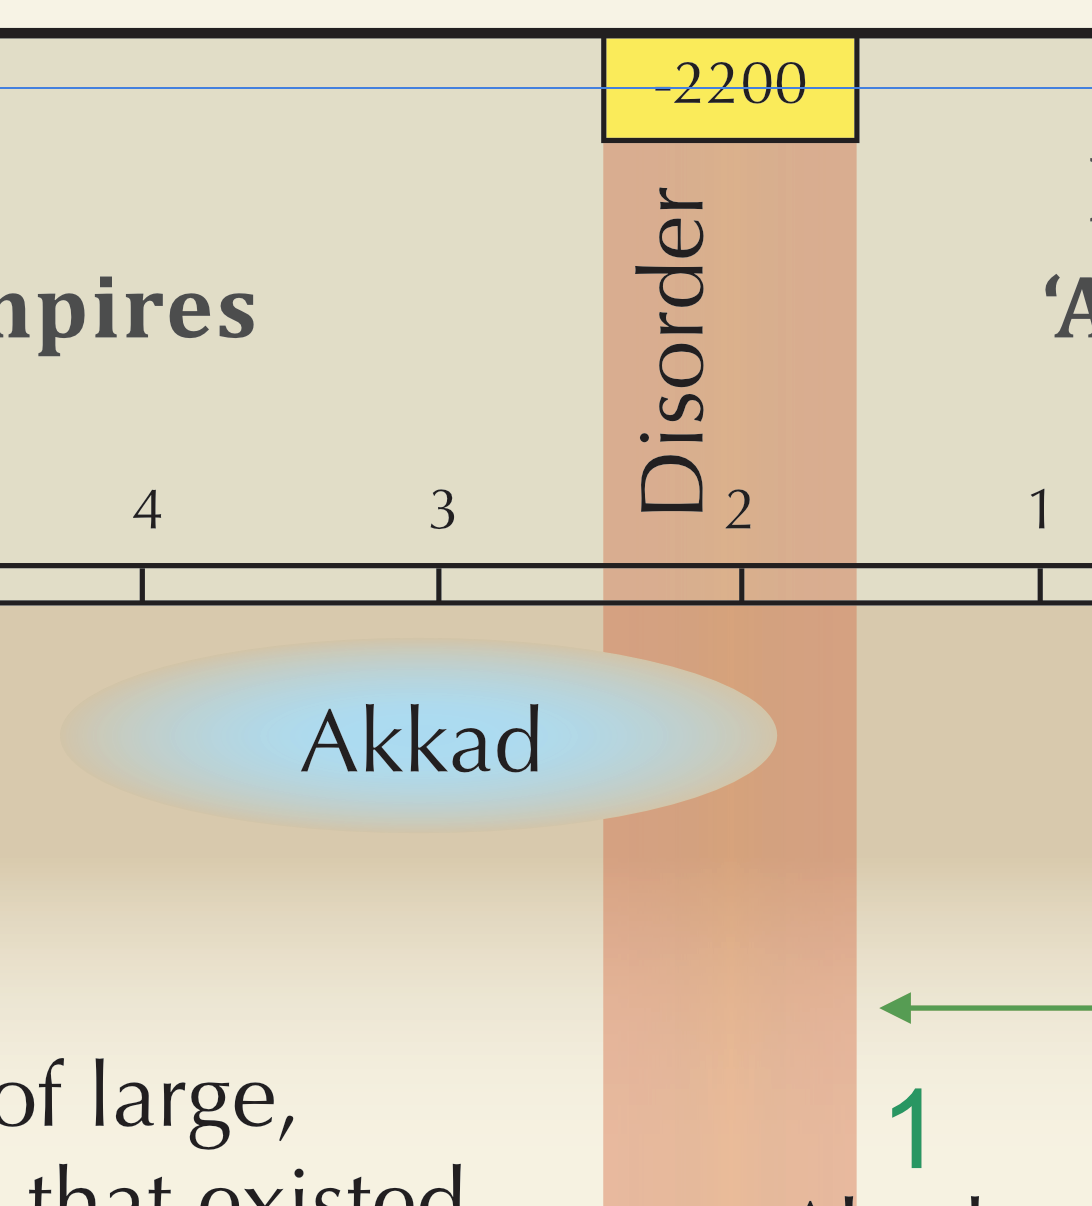
In a recent iteration of the same document my overlays continue to appear as they should, but last week the red vertical overlay rectangle has become solid (example 4). None of the gradient overlays had been edited. Thinking it might be a layer issue (which I did not find), I moved the red rectangle layer to a completely new layer. The problem persisted, even when I copied the good red rectangle from my earlier doc and pasted it in this later version of the same doc. Example 4, a closer snap, but the same exact rectangle size in my doc. I also made a completely separate rectangle document but could not replicate the zero opacity on both sides of the center red.
Thinking that the problem might be that this red rectangle is an overlay gradient on two other gradient overlays, I deleted the blue oval, but nothing changed. Example 5 shows the setting for this solid red rectangle = zero opacity on both sides of the center red, the same as example 3 above!
Why would the gradient overlay work fine throughout my current doc, and this red vertical rectangle not maintain its opacity on both sides? I Has something changed in Publisher and Designer?
To double check my procedure I've searched for a specific Affinity video on creating a gradient overlay effect but as yet have not found one.
-
I placed all five snaps correctly in the "Drag Files..." box but they come up dispersed throughout the text. Sorry about that. Not sure what happened.
-
I have been creating gradient overlays for years with no problem at all. As recent as three weeks ago I made example1 below with various gradient overlay effects (ovals, long rounded rectangles and vertical red rectangles. The red vertical rectangle in example 1 below has zero opacity on both sides of the center red which allows the red to fade beautifully into the underlaying background colors which is also an underlying gradient overlay. My settings are seen in examples 2 and 3. Note that 3 shows black on both sides in the top preview but no color in the lower spread since both sides are zero opacity.
In a recent iteration of the same document my overlays continue to appear as they should, but last week the red vertical overlay rectangle has become solid (example 4). None of the gradient overlays had been edited. Thinking it might be a layer issue (which I did not find), I moved the red rectangle layer to a completely new layer. The problem persisted, even when I copied the good red rectangle from my earlier doc and pasted it in this later version of the same doc. Example 4, a closer snap, but the same exact rectangle size in my doc
. I also made a completely separate rectangle document but could not replicate the zero opacity on both sides of the center red.
Thinking that the problem might be that this red rectangle is an overlay gradient on two other gradient overlays, I deleted the blue oval, but nothing changed. Example 5 shows the setting for this solid red rectangle = zero opacity on both sides of the center red, the same as example 3 above!
Why would the gradient overlay work fine throughout my current doc, and this red vertical rectangle not maintain its opacity on both sides? I Has something changed in Publisher and Designer?
To double check my procedure I've searched for a specific Affinity video on creating a gradient overlay effect but as yet have not found one.
-
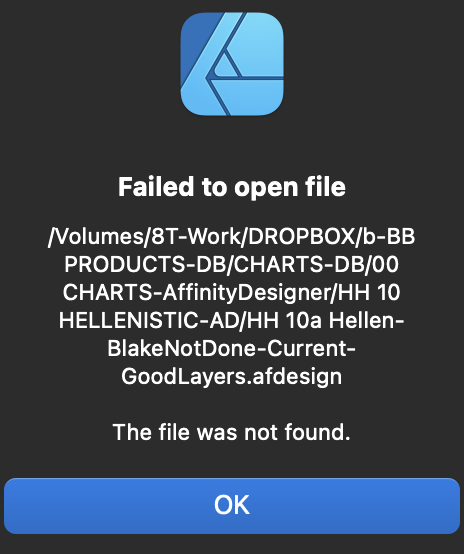
Thanks to all above for comments and your time. I have all of these docs on my ssd internal drives, both on my iMac and iMac Pro. Sorry that I happened to snap the path from my Dropbox, always kept totally synced.
The error message came up when trying to open them on my iMac, but in writing this the thought came that I should try opening them on the iMac Pro - and bingo, they came up fine. They are exactly the same docs on both Macs so not sure what's happening, but they are now up, so if it works, don't fix it. Many thanks, as usual!
PS added later: I saved them on my iMac Pro as aPub docs, brought them over to my iMac Pro and they come up fine. Strange.
-
In 2016 I converted many of my vector docs from Illustrator to AffDesigner and sorted out all of the layers, a lot of work. These 2016 AffDesigner docs always came up well but I did not save them since then. Now they will not come up on the latest Designer and Publisher programs. Below is the message I get and the name and date of one of these docs. I have also tried to shorten the name without any extra keyboard strokes. Is this a common problem and if so how do I bring them up to date? A lot of my detail work in 2016 is at stake. Thanks.
-
For what it is worth, Lagarto has very much helped me in a related post. Toward the end I summarized the process and Lagarto further clarified it. This might be useful to some of you out there.
.
-
I am slowly understanding the bits and pieces of achieving this from your words kindly posted above, Lagarto, and from other links in which you have written, e.g., https://forum.affinity.serif.com/index.php?/topic/134136-k-only-button-in-ad-desktop-missing/. Thanks for bearing with me as I sort out the procedure (below)
1. Via APhoto I checked that my original tif was in generic grey scale format and I exported as a tif.
2. I created a new AD doc. In Document Setup I checked to be sure the document settings were were CYMK/8 color format and a U.S. Sheetfed Uncoated v2 color profile. The color profile was what we use and not necessarily required as such.
3. I placed this tif in the above AD doc so that AD would recognized it as an image and not a pixel layer. AD states (in light grey) that it is an image. This Affinity video was very helpful. https://www.youtube.com/watch?v=IVlhZYcPZ_E
4. In AD the “K Only” button appeared (hurrah!) in the context toolbar and I activated it.
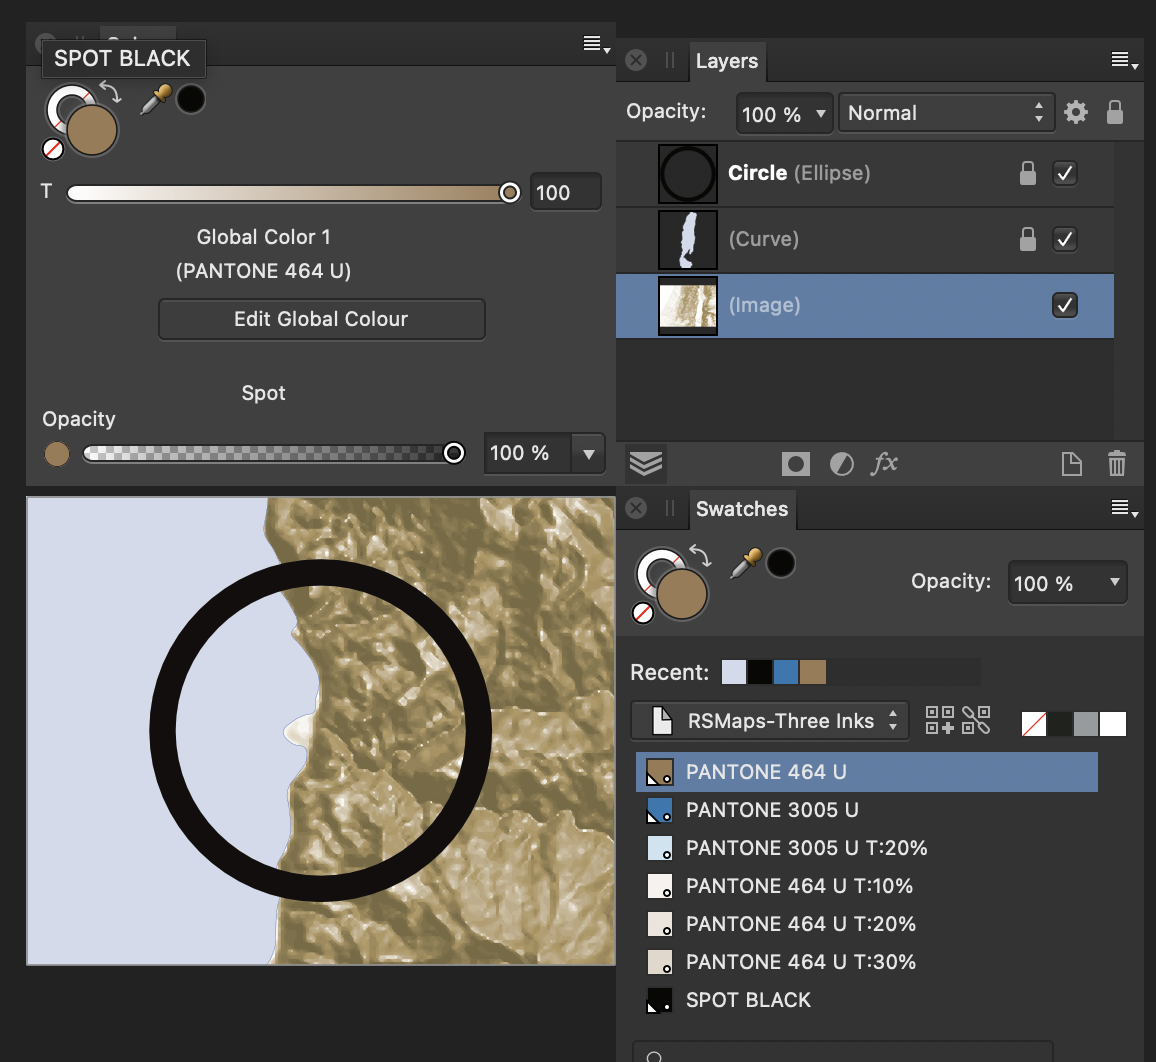
5. This allowed me to assign spot PMS 464 to the tif, as you see in the doc attached.
6. I then added a vector circle with a PMS 3005 fill in order to have both colors appear Adobe’s Outline Preview as spot colors. Without the second color the tif will appear as black in Adobe’s Outline Preview although it is 464. Beware, folks!
7. To be sure the tiff was embedded I opened the above AD doc in APub and embedded the tif via APub's Document/Resource Manager. I am attaching this APub doc for your review.
8. I rejoiced that Adobe’s Outline Preview at last showed both 464 as a spot color on my map relief, together with the blue 3005 circle. For anyone listening, as I've said, be sure to have at least two colors in your doc in order to see both colors in Adobe’s Outline Preview.
Your patience and help are much appreciated, Lagarto. I wish there had been a specific Affinity video detailing this procedure. It would have saved me ten days of frustration. Perhaps you should ask Affinity if you could do a video for them on this, especially since in this post above, much is assumed and not made specific with the entire procedure. Jim
PS: I have taken note of your note on exporting if one had transparent parts of a map =
Please note too that if you have transparent parts in the map, you need to export using PDF version 1.6 or later (e.g. PDF/X-4 when using PDF/X based presets).
-
Again, thanks, Lagarto,
Here is the problem in a nutshell.
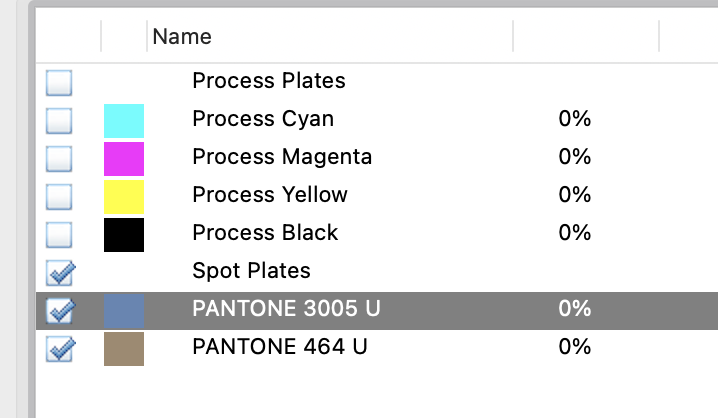
1. Attached is a snap of the readings in my APub doc. The relief is an image with the spot color PMS 464 as you can see. The relief is part of a larger map, thus the fact that it does not appear to be selected.. This should be what is required as per your instructions above. The Spot 3005 (blue) for the drawn sea is 100% shore and 20% fill. Both of these 3005 come out fine in the PDF Outline Preview below.
2. From this APub doc I exported a PDF, being sure that "Honor Spot Colors" was checked in the "More" export panel.
As you see by opening this PDF in Acrobat's Output Preview, the 464 does not appear and the relief has been shifted to CYMK. Any idea what cold have caused this?


Globally change CYMK Black to k-100 Black
in Affinity on Desktop Questions (macOS and Windows)
Posted
In afPub v1 is there any way globally to change all text, fill and text from CYMK Black to k-100 Black? I do not find this option in the Find menu. Perhaps it appears in afPub v2. If not, this would be very useful. In sending a PDF for my printer I could use Adobe Acrobat's Ink Manager to do this, but I would rather have it done in afPub.