h_d
-
Posts
1,472 -
Joined
-
Last visited
Everything posted by h_d
-

Zoom Tool - context toolbar doesn't change
h_d replied to Nero's topic in [ARCHIVE] Photo beta on macOS threads
And the one in the Status indicator - but only with short filenames
-
Levels Histogram
h_d replied to PhotoCat's topic in Pre-V2 Archive of Affinity on Desktop Questions (macOS and Windows)
Nor moo 🦘 -
panel vs studio
h_d replied to dCip's topic in Pre-V2 Archive of Affinity on Desktop Questions (macOS and Windows)
Or Affinity Suite? -
Hi @dchristman I really hope I'm not stating the obvious, but after you've clicked one of these tools, do you then draw out a shape? They don't work "instantaneously" like the Place Picture tool, and sometimes when using the dark interface option it can be a bit hard to detect that they've been clicked. Screen Recording 2020-02-22 at 08.23.37.mov Again, sorry if you've already tried this.
-
Affinity Publisher has no concept of 'chapters'. The nearest concept is Sections, which can be accessed from the Section Manager in the Pages panel. I'll stick my neck out here and say that if I were creating a full-sized book, I would break up the text into chapter-sized chunks in my writing program (word processor, Scrivener, whatever),before importing them separately into Publisher, possibly matching the chapters to the sections. That would give me chapter breaks based on page numbers, and if for any reason I wanted to delete a chapter of more from the Publisher document, I could select and delete the relevant pages en bloc from the Pages panel. The thought of managing a full-sized book as one continuous text flow gives me the absolute whim-whams.
-
That's bad news. I don't know what to suggest - maybe Apple Support?
-
FFT Denoise filter crashes Beta 1.8.0.163
h_d replied to h_d's topic in [ARCHIVE] Photo beta on macOS threads
Confirmed @MEB, looks to be working fine in 1.8.0.166. Best, H -
Yup, that works with quite a few of Apple's own apps - including Pages, Numbers and Keynote - via the Insert menu. Cat in a spreadsheet:
-
Nice one @markw, I take back my grrrrrr. (You can also import images into Designer and Publisher this way, even though they don't have an Acquire Image menu item.)
-
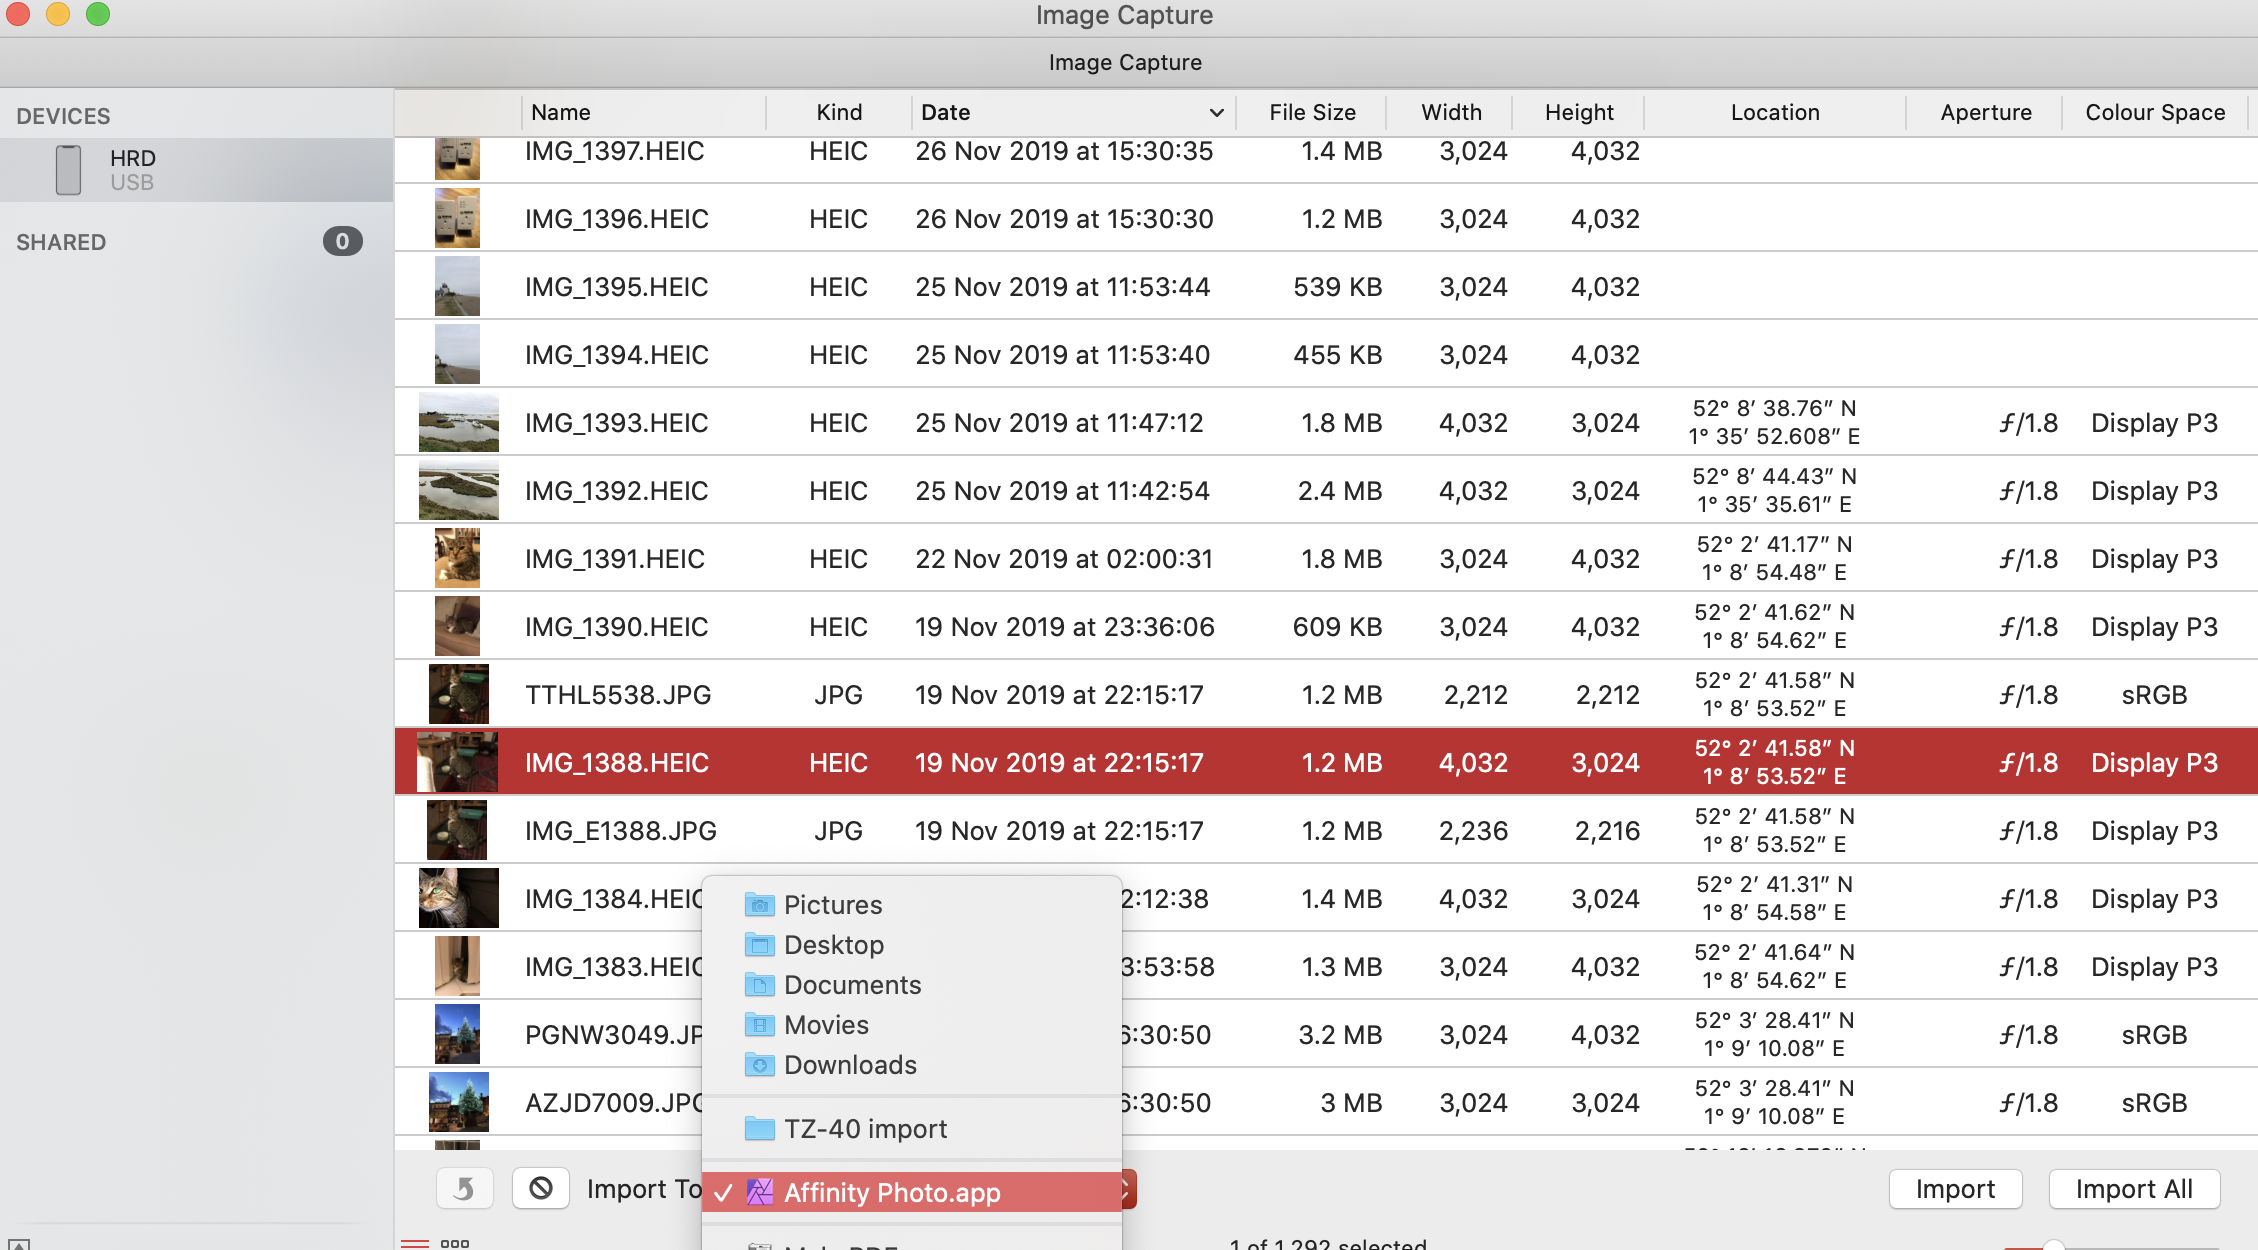
It does work after a fashion, @Dan C and @Cartoonjosh The iPhone has to be physically connected to the computer via USB (not wifi or Bluetooth) - and then you run the standalone Image Capture utility. It's in your Applications - Utilities folder. You may need to go through security, and then you'll get a display of the images on your phone. At the bottom of the Image Capture window, change the Import To pull-down to Affinity Photo, then click the Import button. The image will open in Affinity Photo. It's a bit of kludge I suppose and it would be fab if it worked through Affinity Photo's menu as well. (It would also be fab if the images displayed in Image Capture were slightly greater than microscopic in size grrrrrrrr.) Cheers, H
-
It's perfectly possible. You get a "Choose folder" dialog after you've confirmed your export settings, and you can save them wherever you like. Cheers, H
-
To use a Designer artboard as a pasteboard, you'll need to create an additional artboard at the same shape as your document on which to continue your design. You can do this when you create a new document, or you can draw your first artboard to the shape of your document and then create your 'pasteboard' as a second artboard. Screen Recording 2020-02-20 at 10.42.22.mov Search the Help files for "Artboards" and follow the links from the main page for lots of info.
-
Separated mode
h_d replied to IsabelAracama's topic in Pre-V2 Archive of Affinity on Desktop Questions (macOS and Windows)
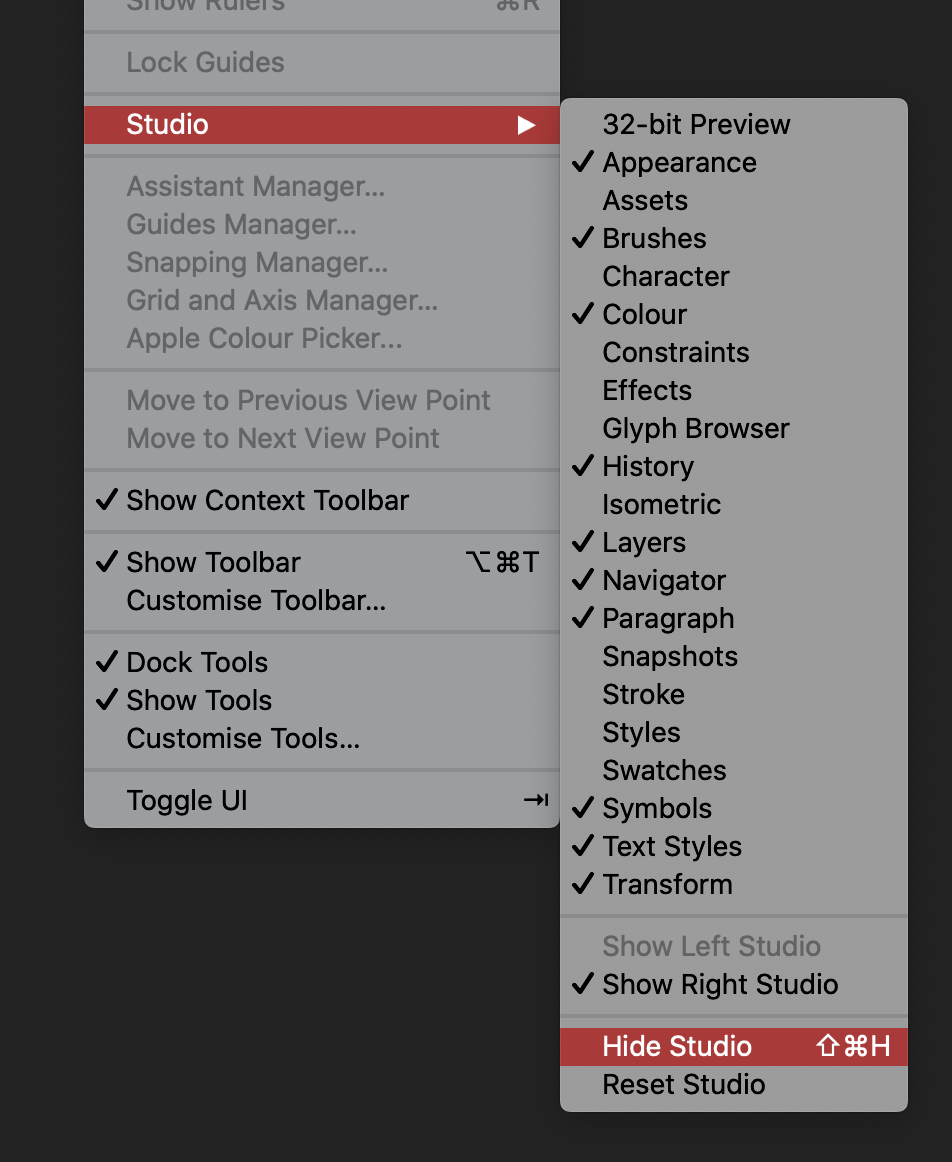
Have you tried Reset Studio? If that doesn't work, I'm out of ideas beyond temporarily disconnecting second monitors and graphics pads. -
I believe the Acquire Image command works with scanners, not phones. Here's mine: (I think it's Mac-only too.)
-
Separated mode
h_d replied to IsabelAracama's topic in Pre-V2 Archive of Affinity on Desktop Questions (macOS and Windows)
Loving the music 😁 I think you've hidden your Studio: Indeed...
-
Just for fun, here's a version that does it with just a single text frame. Screen Recording 2020-02-20 at 09.55.38.mov The frame has a blue background, the text has a white background, and there are four decorations: two for the red bars, two for the white areas that extend beyond them. I haven't got the spacing perfect by a long way... Extended header.afpub
- 11 replies
-
- 1
-

-
- affinity publisher
- affinity designer
- (and 1 more)
-
My blue rectangle is a separate shape below the text frame.
- 11 replies
-
- 1
-
-
- affinity publisher
- affinity designer
- (and 1 more)
-
Hi @hujikoda! Is this what you want: Screen Recording 2020-02-20 at 08.42.54.mov If so, I've attached a Publisher document. The font is Arial Black. Text is right-aligned with a white background. The small red rectangles are letter I in the same font, in the same text frame. The text frame stretches across the full width of the blue bar but the white area only extends to the width of the text. Hope this helps! H Stretching header.afpub
- 11 replies
-
- 1
-
-
- affinity publisher
- affinity designer
- (and 1 more)
-
Hi @Robin Rpwland and welcome to the forums! 😀 You'll need to use a right indent from the Paragraph panel: (Personally that's the way I would do the indent on the left folio as well, to match them perfectly by numbers. Using spaces isn't as accurate.
-
Adjusting perspective
h_d replied to Roddie's topic in Pre-V2 Archive of Affinity on Desktop Questions (macOS and Windows)
I think it may be this one. A few months back Serif introduced a new collection of tutorial videos and removed their links to the old ones. It is possible to find the legacy videos, though, through this page of links curated by Miguel Boto. -
Rotate text in Publisher
h_d replied to DJP's topic in Pre-V2 Archive of Affinity on Desktop Questions (macOS and Windows)
Goops -
That's good - I haven't tried it in the Beta, only the release version.
-
1.8.xx - MacBook Pro Touch Bar request
h_d replied to h_d's topic in Feedback for Affinity Photo V1 on Desktop
As per my original post: There's no physical Escape button on the keyboard. -
It would be really fab, in Develop persona, to have a Cancel button in the MacBook Pro Touch Bar as well as a Develop button. This is the screen: And this is the Touch Bar: with a big gap where a Cancel button would fit nicely. (The esc button in the Touch Bar doesn't function as a Cancel button.) Thanks! H