h_d
-
Posts
1,472 -
Joined
-
Last visited
Everything posted by h_d
-
 Ah I misunderstood. What I posted is for layout grids.
 -
Hi @Devin the Developer and welcome! There is indeed a grid tool in Designer (and Photo and Publisher): There's currently a 90-day free trial if you want to take it for a spin.

-
Masking Effect...
h_d replied to Gort's topic in Pre-V2 Archive of Affinity on Desktop Questions (macOS and Windows)
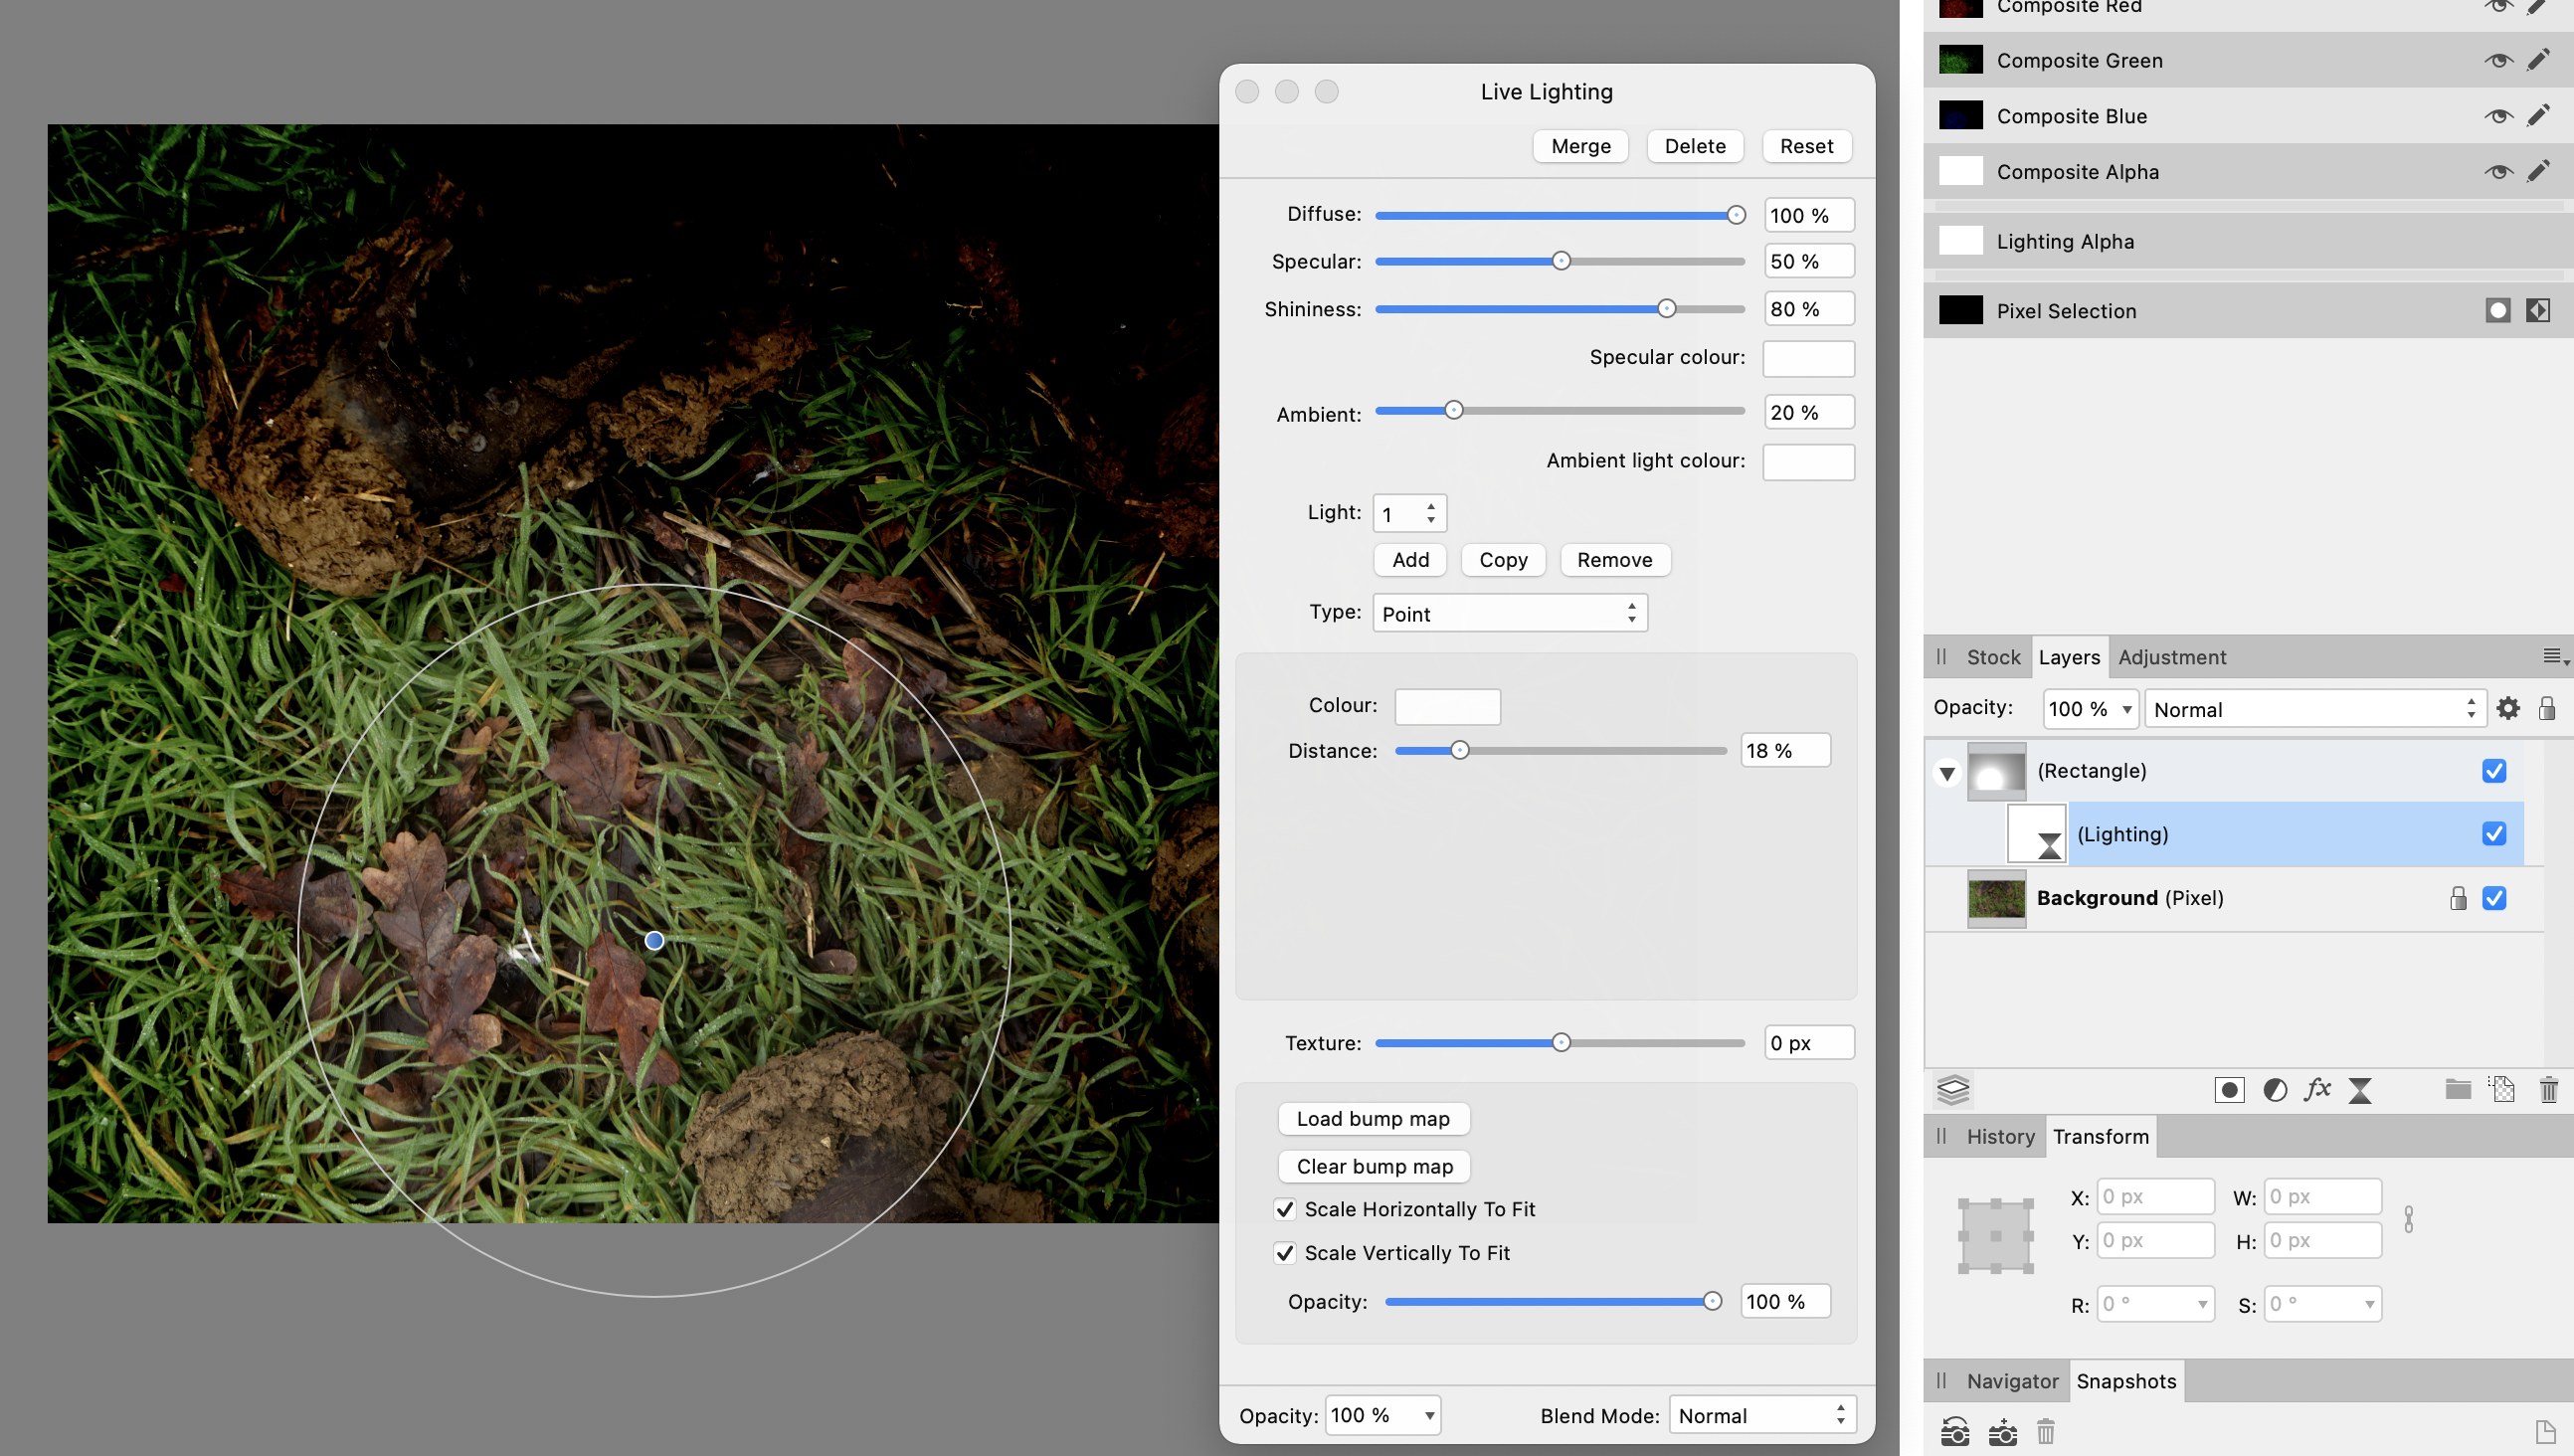
Another possibility: Create a white rectangle that covers the entire document, above the image, and set the blend mode to Colour Burn. Apply a live Lighting filter to the rectangle and play with the settings and effects until happy. Drag the white rectangle (along with its live Lighting filter) into your assets. Rinse and repeat...
-
I think with a bit of experimentation you could achieve similar results to those in the video with Affinity Photo, but as @GarryP says it may not necessarily be easy. Depends on how much time (as opposed to cash) you're prepared to invest in learning the ins and outs. If you simply want an out-of-the-box solution for creating cartoon-like images, then one of the Jixipix products may be more up your street.
-
To use the images as assets you will first need to open them one by one and create assets from them manually. As per the Help file:
-
In that section of the video they're using Designer's Pixel Persona, which is more akin to Affinity Photo and uses raster brushes, not vector brushes: I haven't watched the whole video so I don't know if they switch between personas at any point. I don't think the developers have removed the feature. It's just that it's available in Pixel Persona but not in Designer Persona.
-
One way is to draw a straight path with the Pen tool and then apply a brush setting to the stroke:
-
On a Mac, if you start it up with the ^ control key held down you'll get this dialog: You can reset as much or as little as you like, but you should be aware it will remove any custom brushes/macros/whatevs that you may have previously installed. There's also a more limited reset dialog available in Preferences - Miscellaneous: Cheers, H
-
It's in all the four Formula Guide Solid and Color Bridge groups of Pantone swatches in the panel. 287 U is solid (or spot) uncoated, 287 C is is solid (or spot) coated. As I understand it, the PU and PC versions are approximations of how the solids would look if printed with a CMYK mix - Process Uncoated and Process Coated.
-
Click in the search field at the bottom of the swatches panel, type 287, then press Enter/Return:
-
Update Notices
h_d replied to Donnie Bob's topic in Pre-V2 Archive of Affinity on Desktop Questions (macOS and Windows)
You don't say which OS or which Affinity app, or where you originally bought them from. But in Publisher, for MacOS, bought from the Affinity store, I get this: There's no equivalent in my versions of Photo or Designer, which I purchased from the Apple App Store. In my case, the App Store handles updates for these two.
-
Clicking the Use Current Location button in Develop Persona - Studio - Location Panel has no effect. I can set geolocations using the Address search. Maps.app and Affinity Photo.app are both enabled in System Preferences - Security & Privacy - Privacy - Location Services.
-
Vickie82
h_d replied to Vickie82's topic in Pre-V2 Archive of Affinity on Desktop Questions (macOS and Windows)
Also go to View-Studio and make sure that. Show Right Studio is checked and that Hide Studio is unchecked. -
And with Big Sur running 1.9.2.1009.
-
Presets not displayed in New Document dialog
h_d replied to h_d's topic in [ARCHIVE] Publisher beta on macOS threads
ok no probs -
Presets not displayed in New Document dialog
h_d replied to h_d's topic in [ARCHIVE] Publisher beta on macOS threads
Hi @Pauls, not sure about the fields panel thing (see other thread - I think it was a one-off). I'm still getting the Print Presets issue in the release version of 1.9.1 (I don't think there's a later beta?). Seems to occur if I create a new document then close it, with or without saving. When you say a new user profile do you mean a new user on the Mac? Cheers, H -
Sorry @Pauls, it's long gone. As I said at the time it seems to have been a one-off.
-
It may be connected to the way the last node of the curve is drawn: Screen Recording 2021-03-04 at 20.24.31.mov Try switching to the Node tool and then changing that last node to Smooth.
-
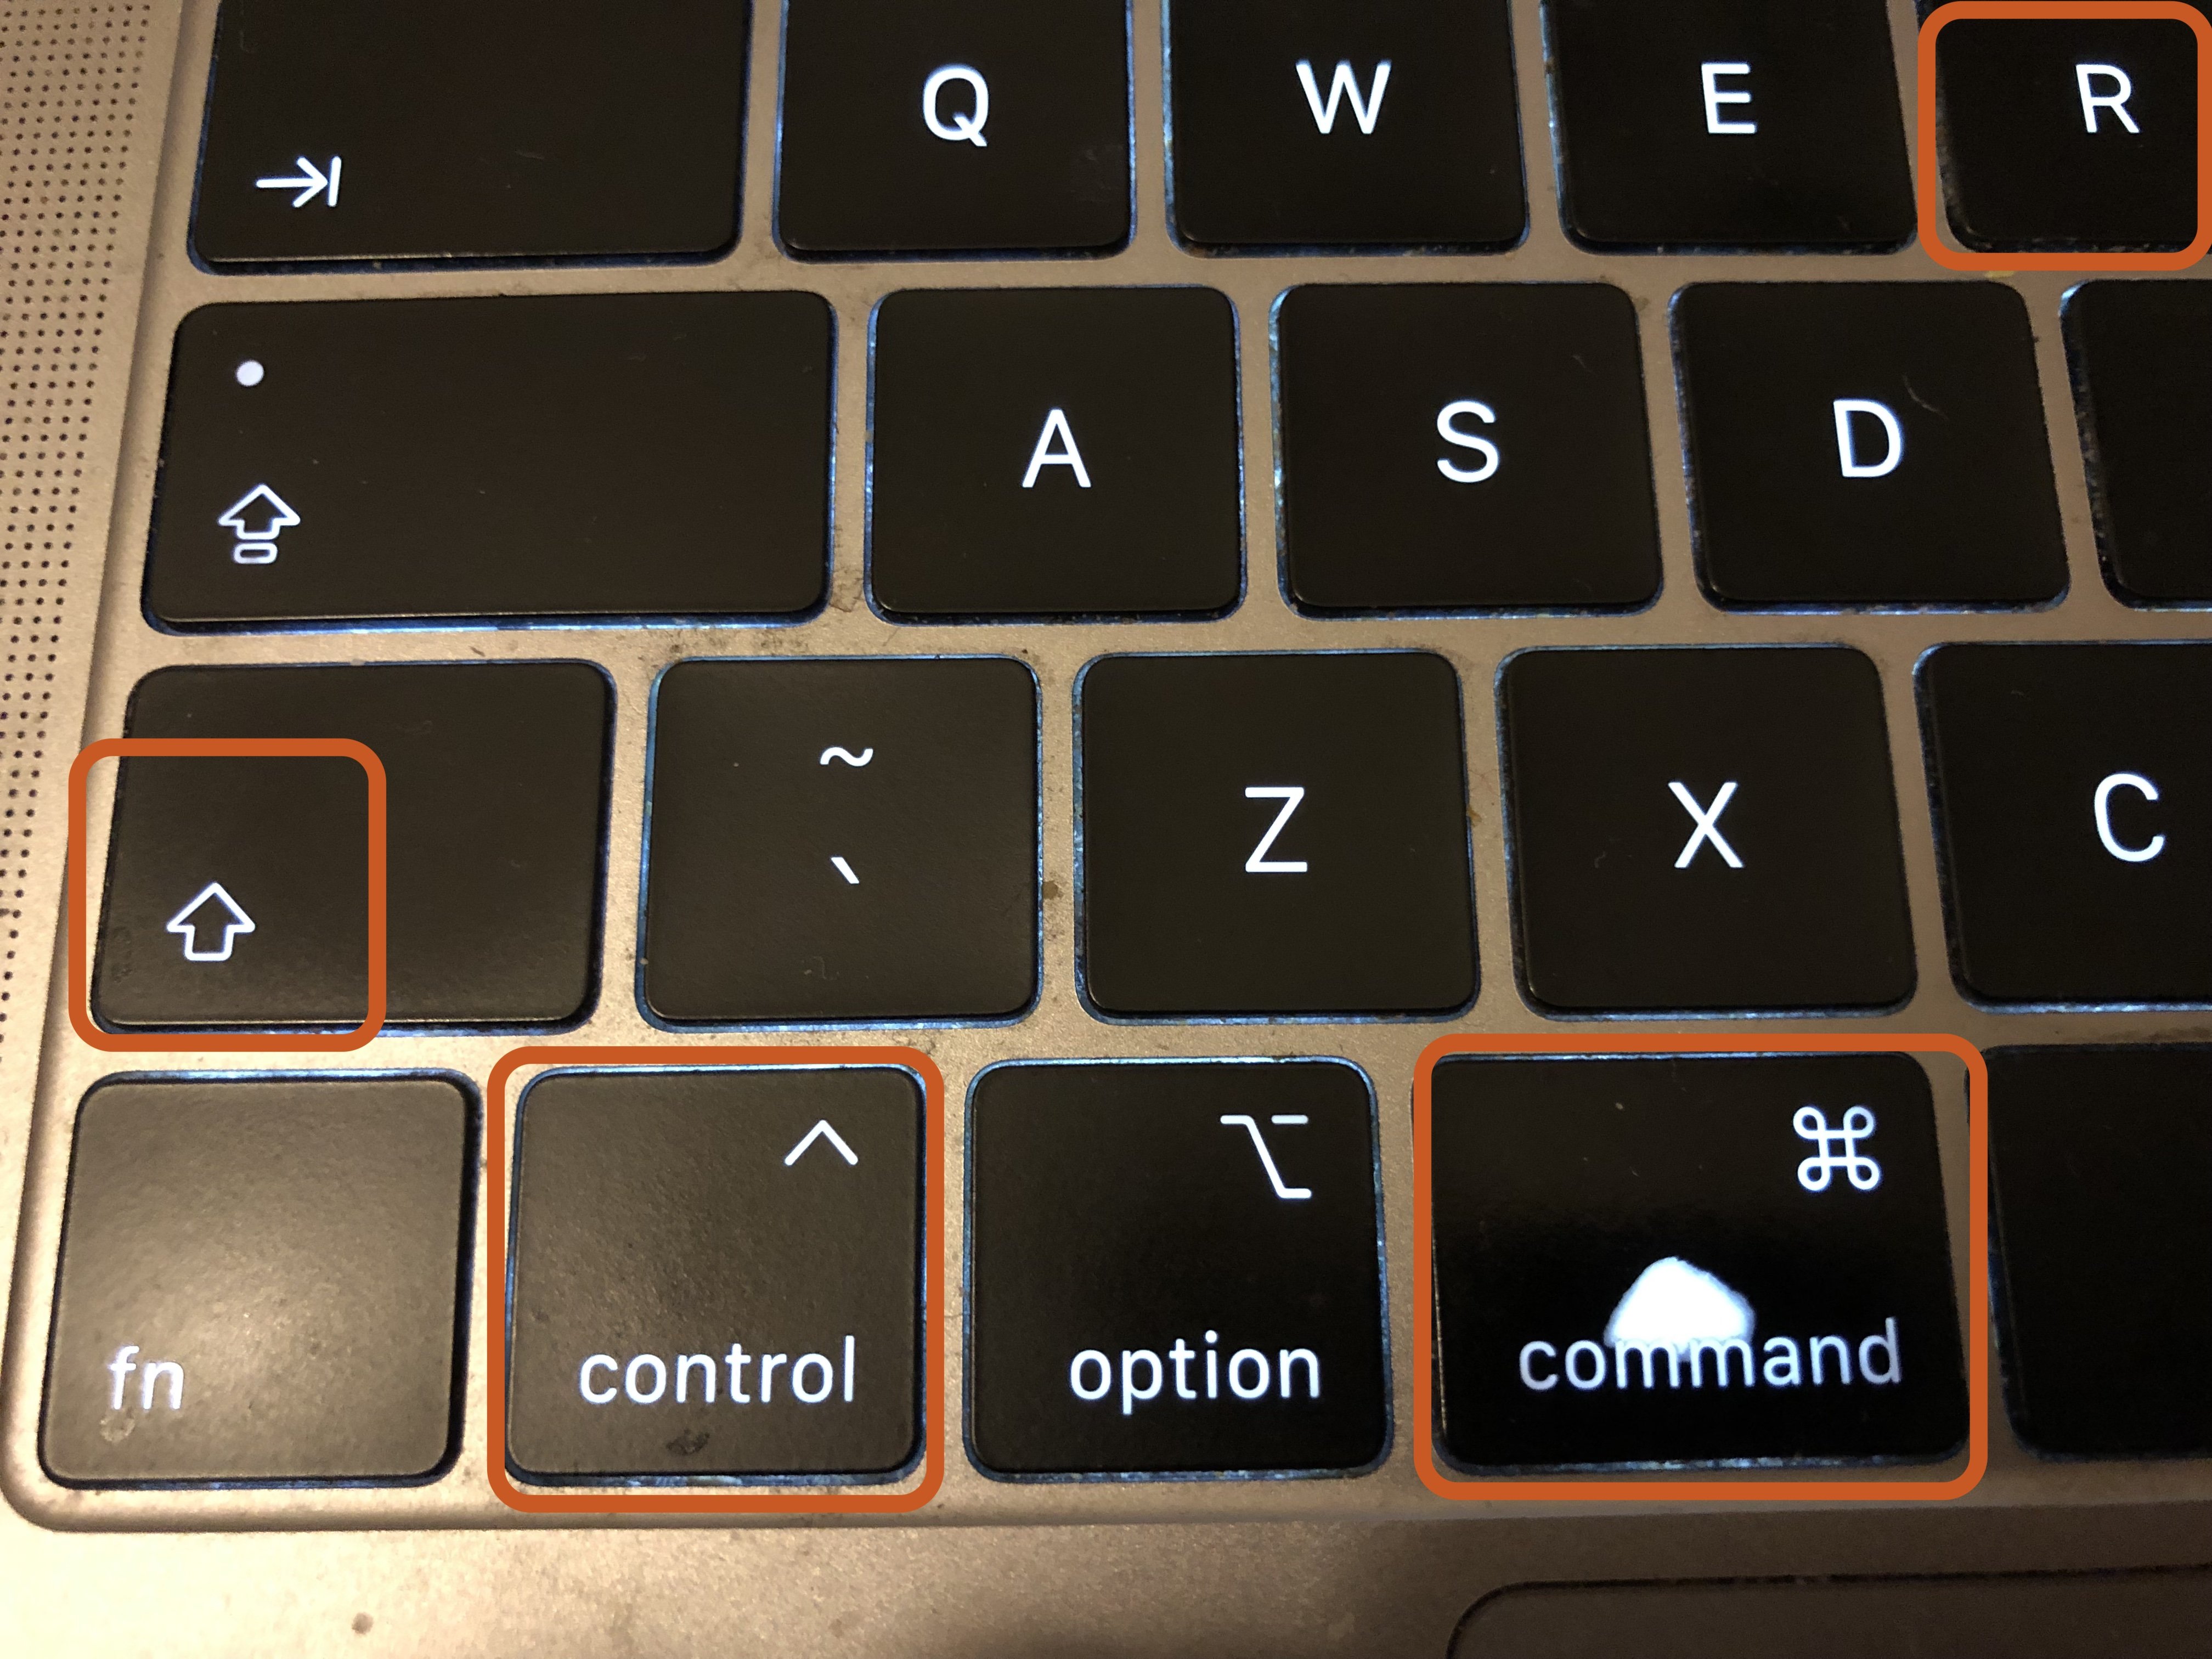
True that. Mine's a UK 2018 MacBook Pro. My wife's UK 2012 Air doesn't have a symbol for control, and has 'alt' instead of 'option'. I've also got an incredibly ancient iPad dock+keyboard which doesn't even have an fn key. Worth more as an antique than as a piece of technology... (Haven't we had this discussion before?)
-
Some but not all Apple keyboards need a damn good clean...
-
You say you created the templates with "AF". Is that AFfinity Photo, AFfinity Designer or AFfinity Publisher? You then say you changed the "Open with Affinity Publisher" to "Open with Affinity Photo". Yet your third screenshot shows an Affinity Designer document icon, and Affinity Designer as the default app. So it's all a bit confusing. But if I create a template with Affinity Designer, change the default app and then try to open it by double-clicking I get the same dialog as you. I think you'd be better off creating separate templates for each application, and going through the standard File - New Document - Templates route rather than trying to change default apps.
-
Not quite sure if this is what you mean, but... In Photo Persona, if you choose Unconstrained or Resample as the cropping mode you'll get a fine crosshair which can be used to re-draw the cropping area like this: Screen Recording 2021-03-04 at 12.08.00.mov Once you've re-drawn that cropping rectangle and released the mouse/trackpad, you'll get a thicker crosshair cursor which you can use to move or resize the cropping rectangle, but not to re-draw it. If you need to re-draw the cropping rectangle a second time before committing, then clicking the Reset button in the contextual toolbar: will bring the cropping rectangle back out to the dimensions of the image and let you repeat the process with the fine crosshair. If you're in Custom Ratio or Original Ratio mode, clicking Reset switches you into Unconstrained mode, which may not be ideal. Cheers, H
-
Like this? Screen Recording 2021-03-04 at 10.00.01.mov
-
Check out the answers in this thread which may help! Cheers, H
-
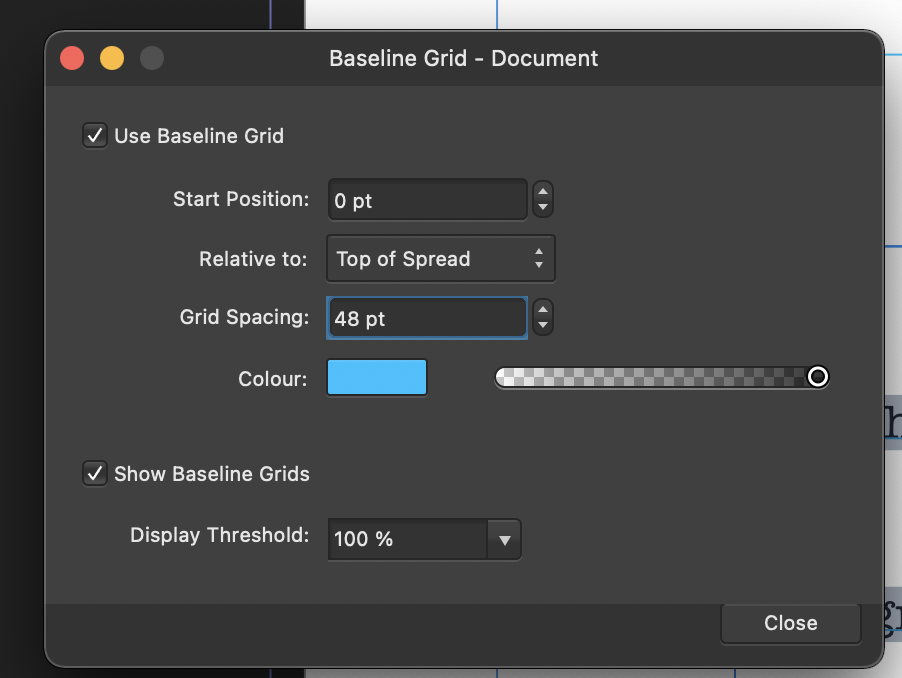
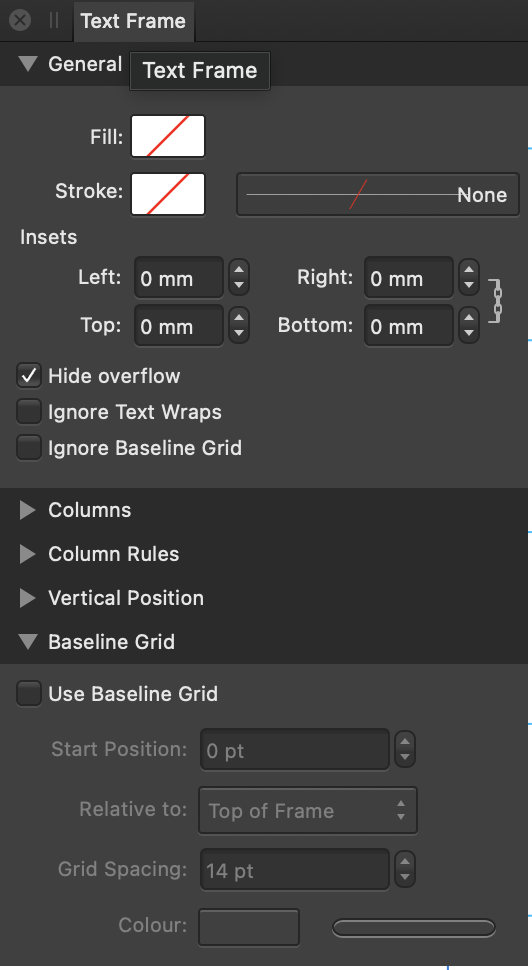
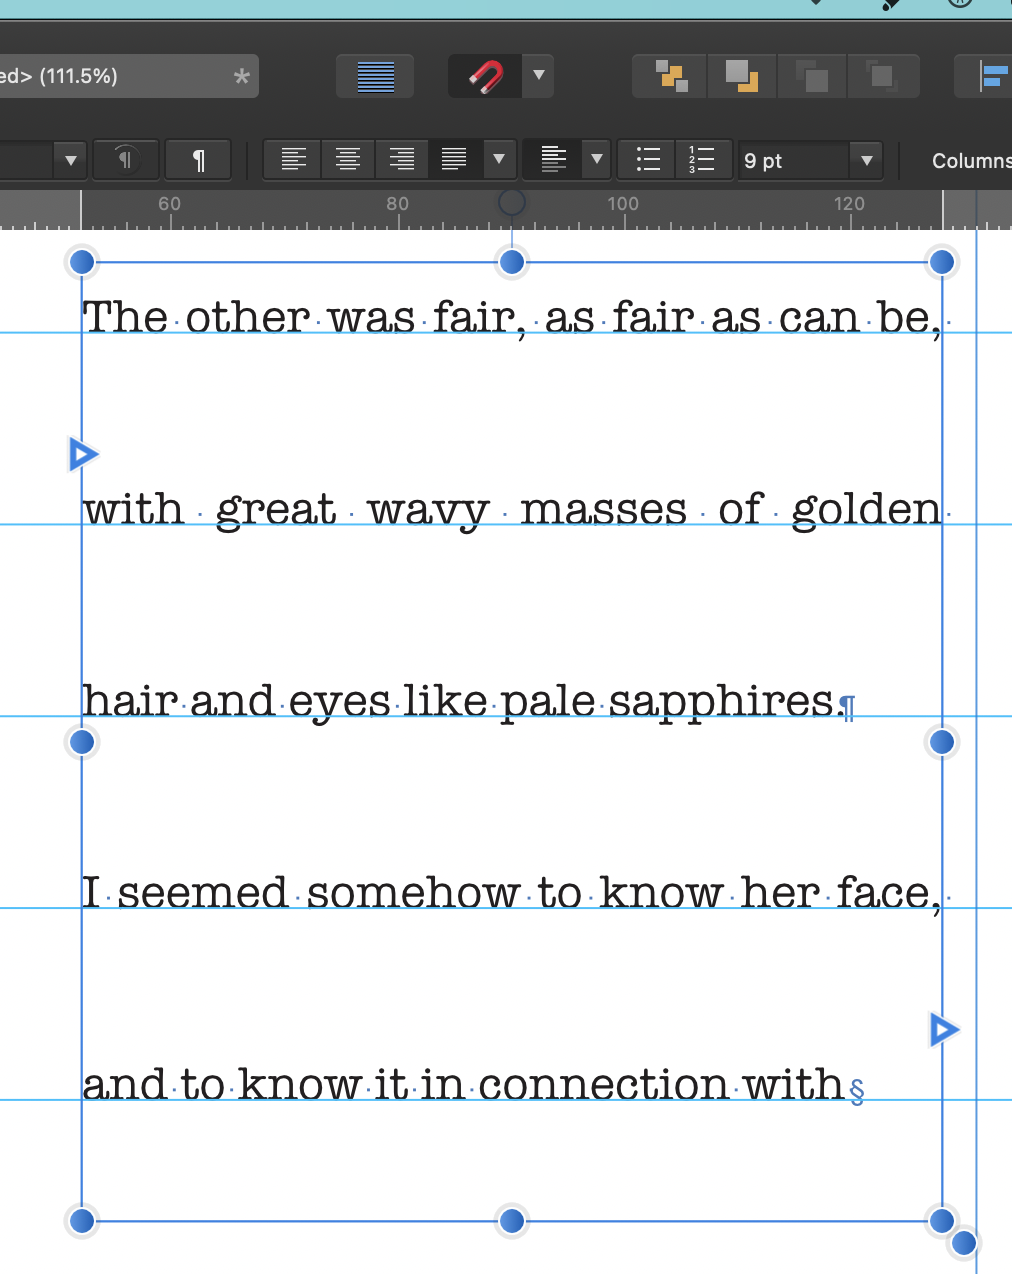
Also check your Baseline Grid settings for your document. These are in View - Baseline Grid Manager - . and also for the individual text frame in View - Studio - Text Frame: If the original text frame was not set to lock to Ignore Baseline Grid, and your document or text frame has a baseline grid (showing or not) then changing the leading may not necessarily change the line spacing. This is 9pt leading with a 48pt Baseline Grid: Cheers, H