h_d
-
Posts
1,472 -
Joined
-
Last visited
Everything posted by h_d
-
 Why not take advantage of the free 30-day trial?
 -
I think after the conversion to greyscale and the adjustment of the output levels, a Halftone Filter may get you close to where you want: (Screen: Monochrome; Dot: Round; Screen Angle: 0º. Cell size to suit your requirements.)

-
Just to add, the Affinity applications run on desktops (macOS and Windows) and iPads, but not on mobile phones. Serif offer free 30-day unrestricted trials for all their apps. For Affinity Photo, which I too think would be more suitable to the workflow you've described, scroll to the bottom of the page I've linked.
-
Hi @SWomack and welcome! Would you be able to upload a screen grab of your Layers panel (Version 2) after applying the Subtract geometry?
-
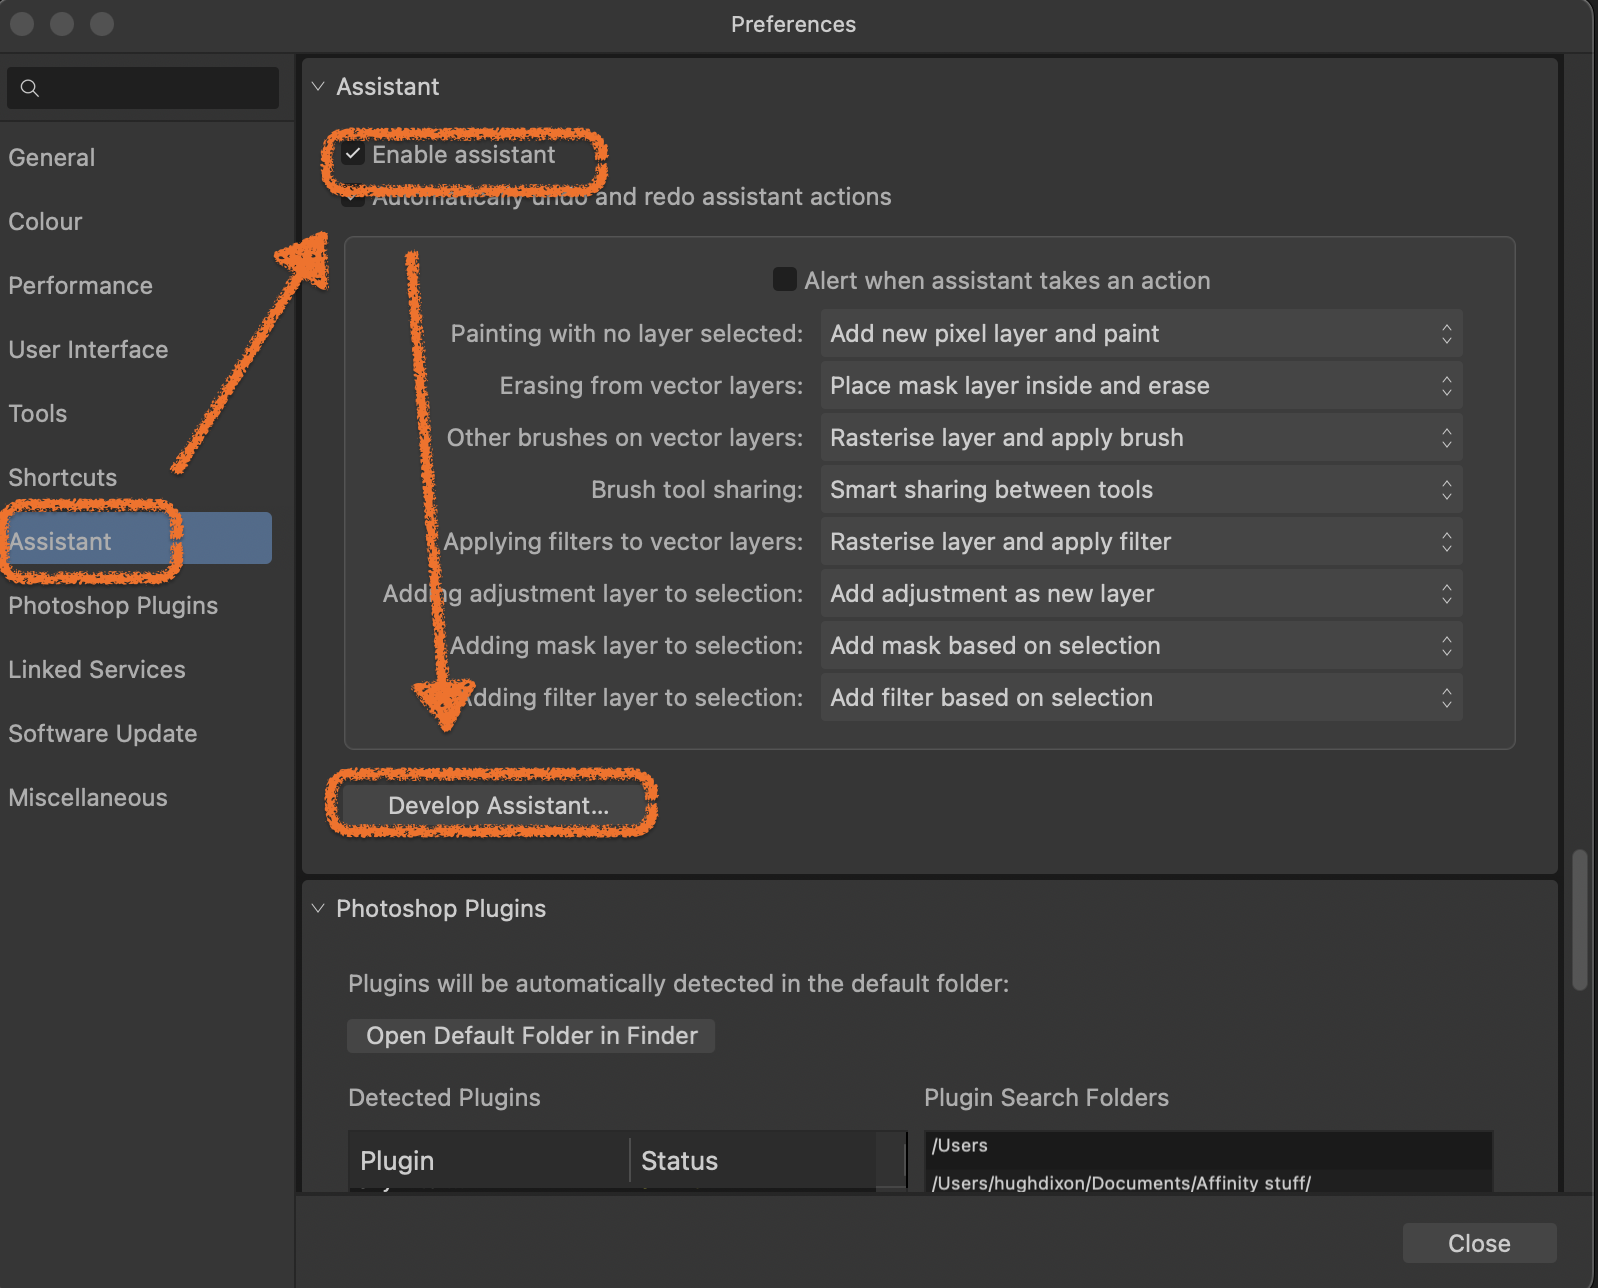
Just to fill in some of the blanks (I'm using macOS Ventura and Affinity Photo 2, other combinations of OS and APh should be very similar). Pull down the Affinity Photo menu and choose Settings. This takes you to the Preferences dialog (why it's not called Settings is anyone's guess 🤪). Click Assistant in the left-hand column, make sure that Enable assistant is checked, then click Develop Assistant...: You can also click the Assistant button while editing in Develop Persona. Here's the assistant: All is explained in the Help: : And the note at the end is worth reflecting on if you want 'absolute control in how the image is processed.'
-
Wikipedia article on ISO standard 216. Most of the presets in Publisher are 'starting points': even if I were setting up a standard A4 publication I'd almost immediately want to manually check, and probably modify, settings like margins, bleed dimensions and colour format - before importing any text.
-
I certainly wouldn't buy a book that contained that sort of wording.
-
Again, I'm using the trial version so I can't save, but nothing I have seen would induce me to part with cash for it. If I load a .jpg image... and then switch to the Brush tool I get this. and the Brush and Eraser tools don't seem to have any effect. I may not be using it correctly but it seems to be badly broken, at least under Ventura.
-
Maybe make a suggestion in the Feedback and Suggestions section?
-
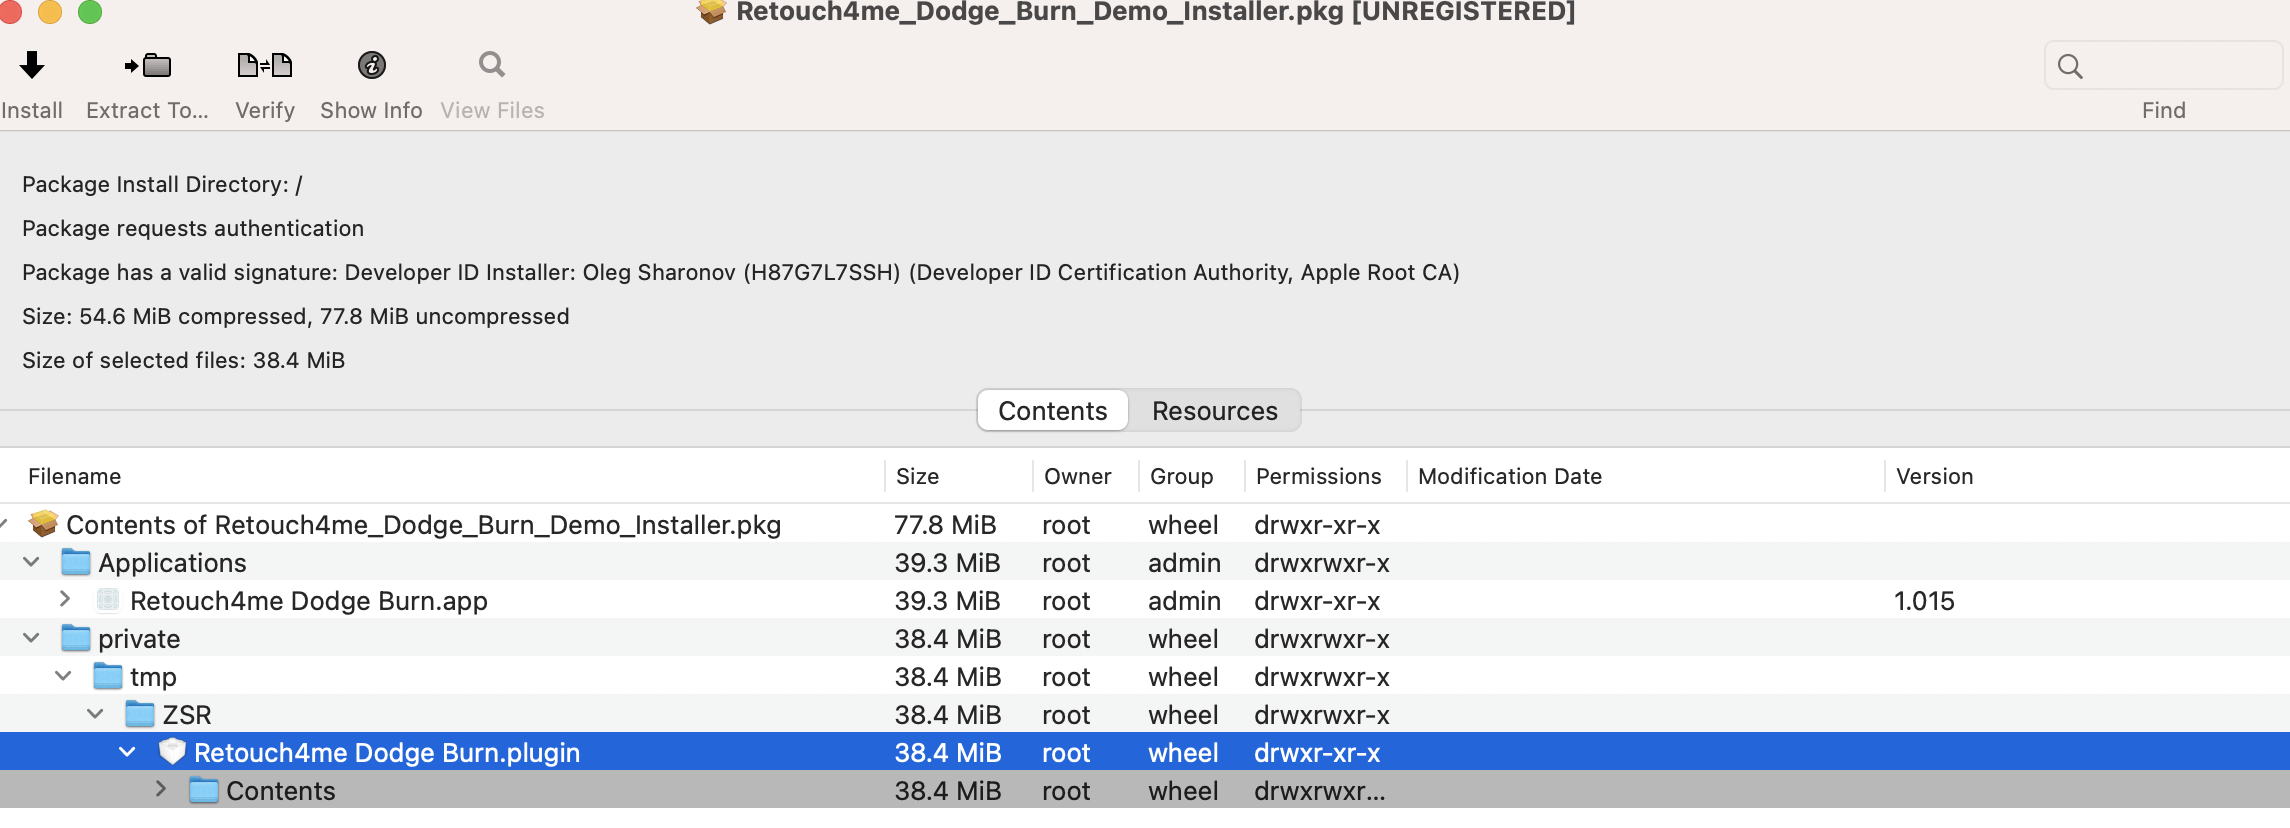
This is my experience with macOS 13 Ventura, Affinity Photo 2. I suspect that the Retouch4Me installer doesn't actually install the plugin (at least for me when I downloaded and installed the trial version of Dodge&Burn). I had to use a package manager (Pacifist) to locate the plugin in the downloaded package: I extracted it to my desktop, then used Finder to move it into one of my recognised plugin folders. After that I was able to access it through the Filters menu; But performance is very very dodgy. It takes a minute or so to load the image, then it sort of works, although I've had application hangs and slow-downs which have required me to force restart Affinity Photo, especially if I switch between apps while the plugin window is open. Ultimately I can't confirm whether it works or not, because the trial version of the plugin doesn't save any changes. But it strikes me that it needs a lot more work from the developer to get it to (a) install correctly; and (b) work properly as a plugin.
-
As far as I can see, you can either display the absolute page numbers or the section page numbers, but not both. Checking Continue page numbering in Section Manager displays absolute page numbers: But that unchecks Restart page numbering at, so you couldn't display the section page numbers at the same time.
-
Process RAW at 300 dpi
h_d replied to Tadd's topic in Affinity on Desktop Questions (macOS and Windows)
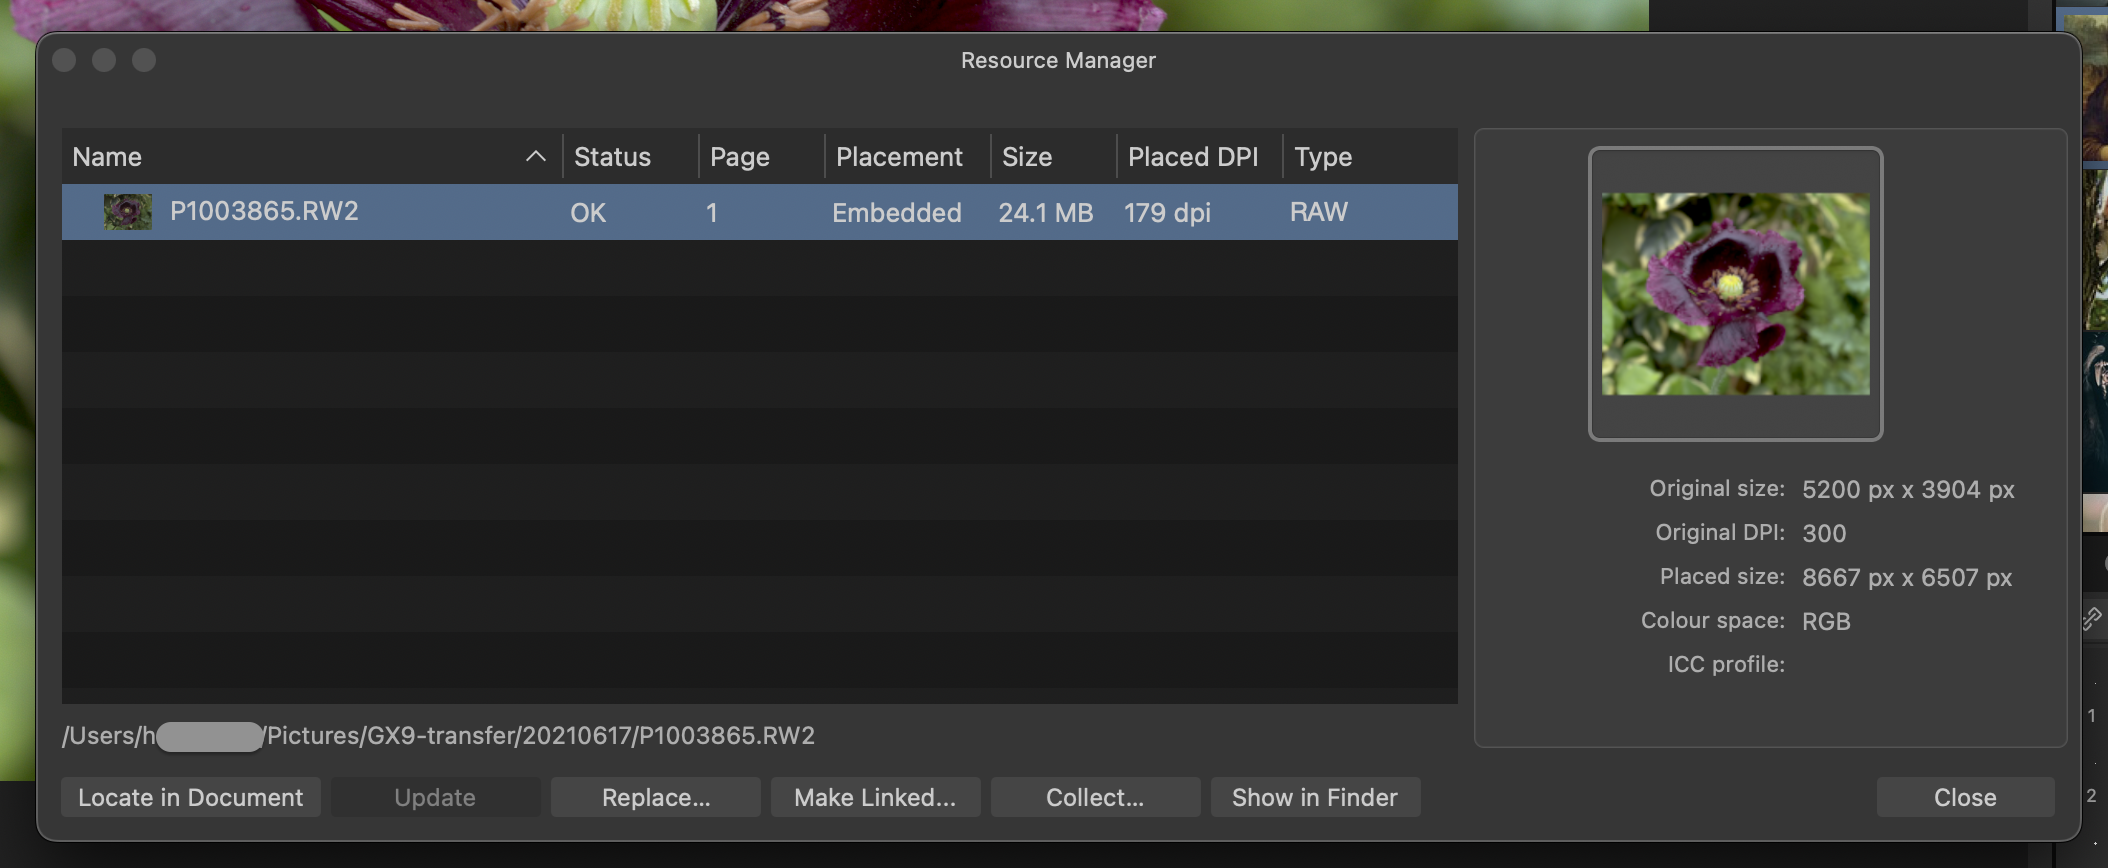
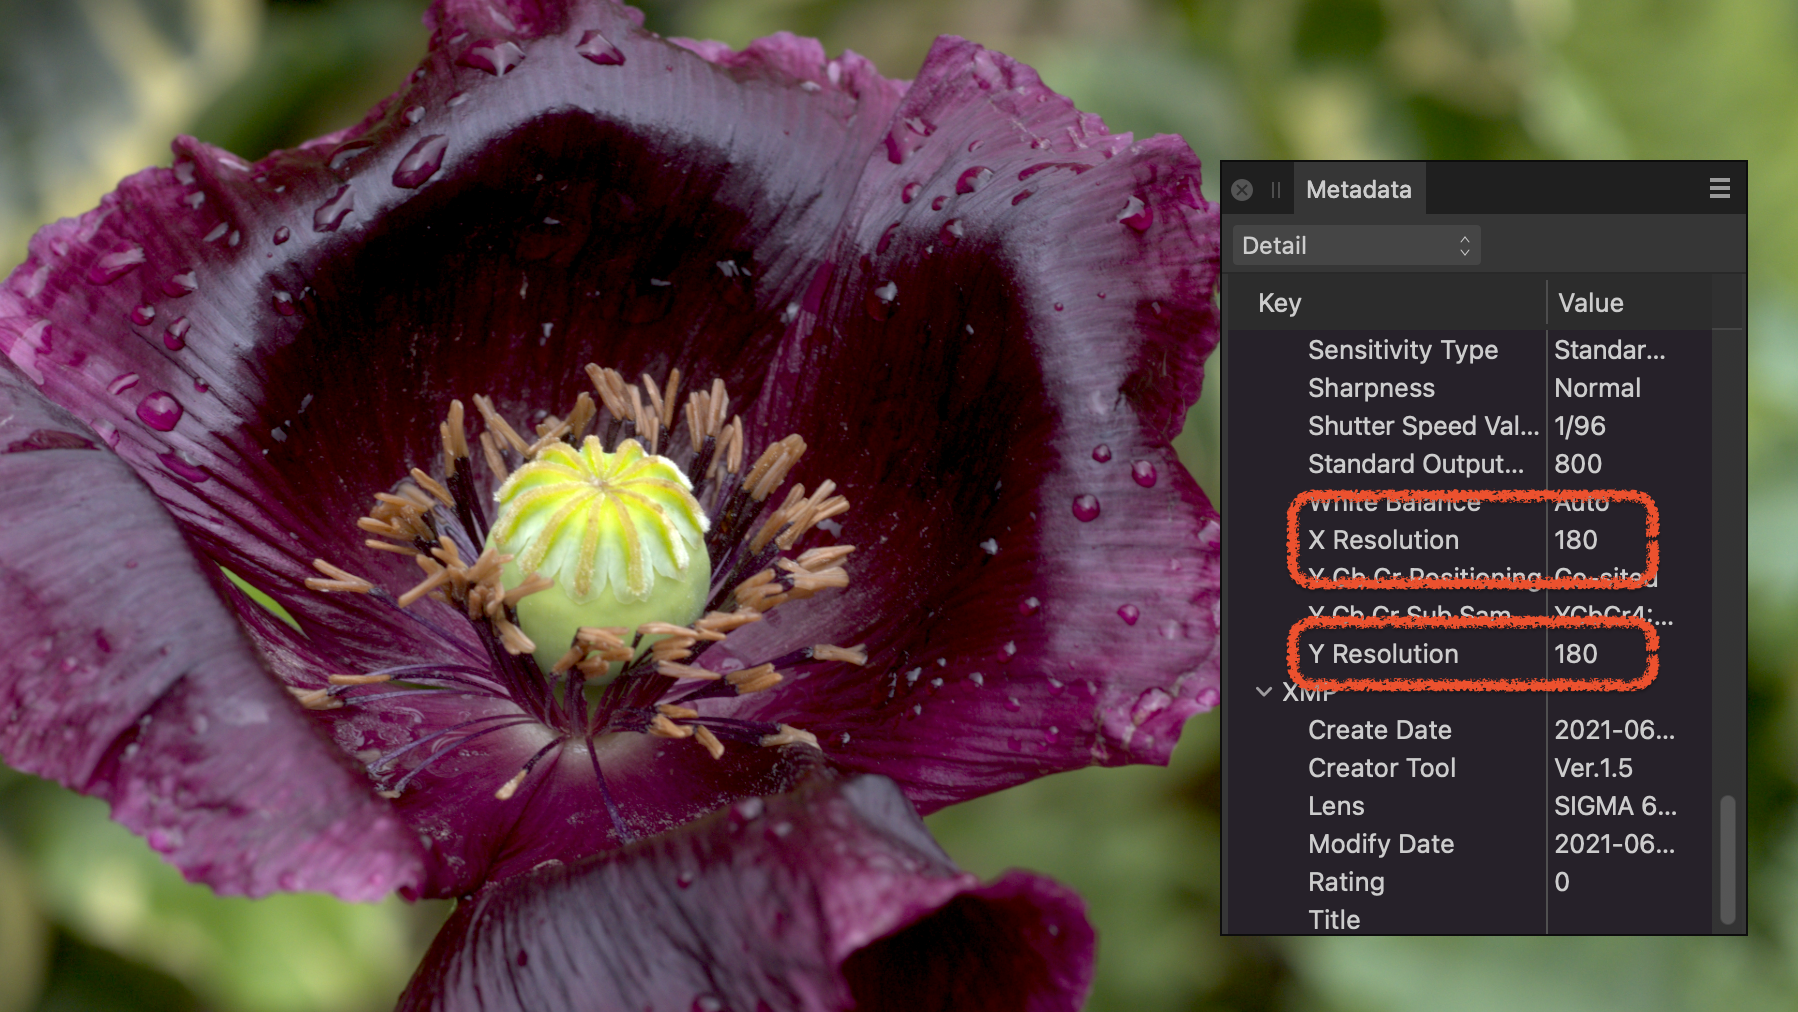
I've tried again with the same image and a couple of other .rw2's and I can't replicate it. Every developed file now shows as 180 resolution in Resource Manager ¯\_(ツ)_/¯ -
Process RAW at 300 dpi
h_d replied to Tadd's topic in Affinity on Desktop Questions (macOS and Windows)
179 is presumably a rounding error for 180. Looks like. -
Process RAW at 300 dpi
h_d replied to Tadd's topic in Affinity on Desktop Questions (macOS and Windows)
Here you go... 179? 🤪
-
Process RAW at 300 dpi
h_d replied to Tadd's topic in Affinity on Desktop Questions (macOS and Windows)
I think so too: my Panasonic camera writes .RW2 raw files at a resolution of 180 and that is how the placed images are displayed when developed in Photo.
-
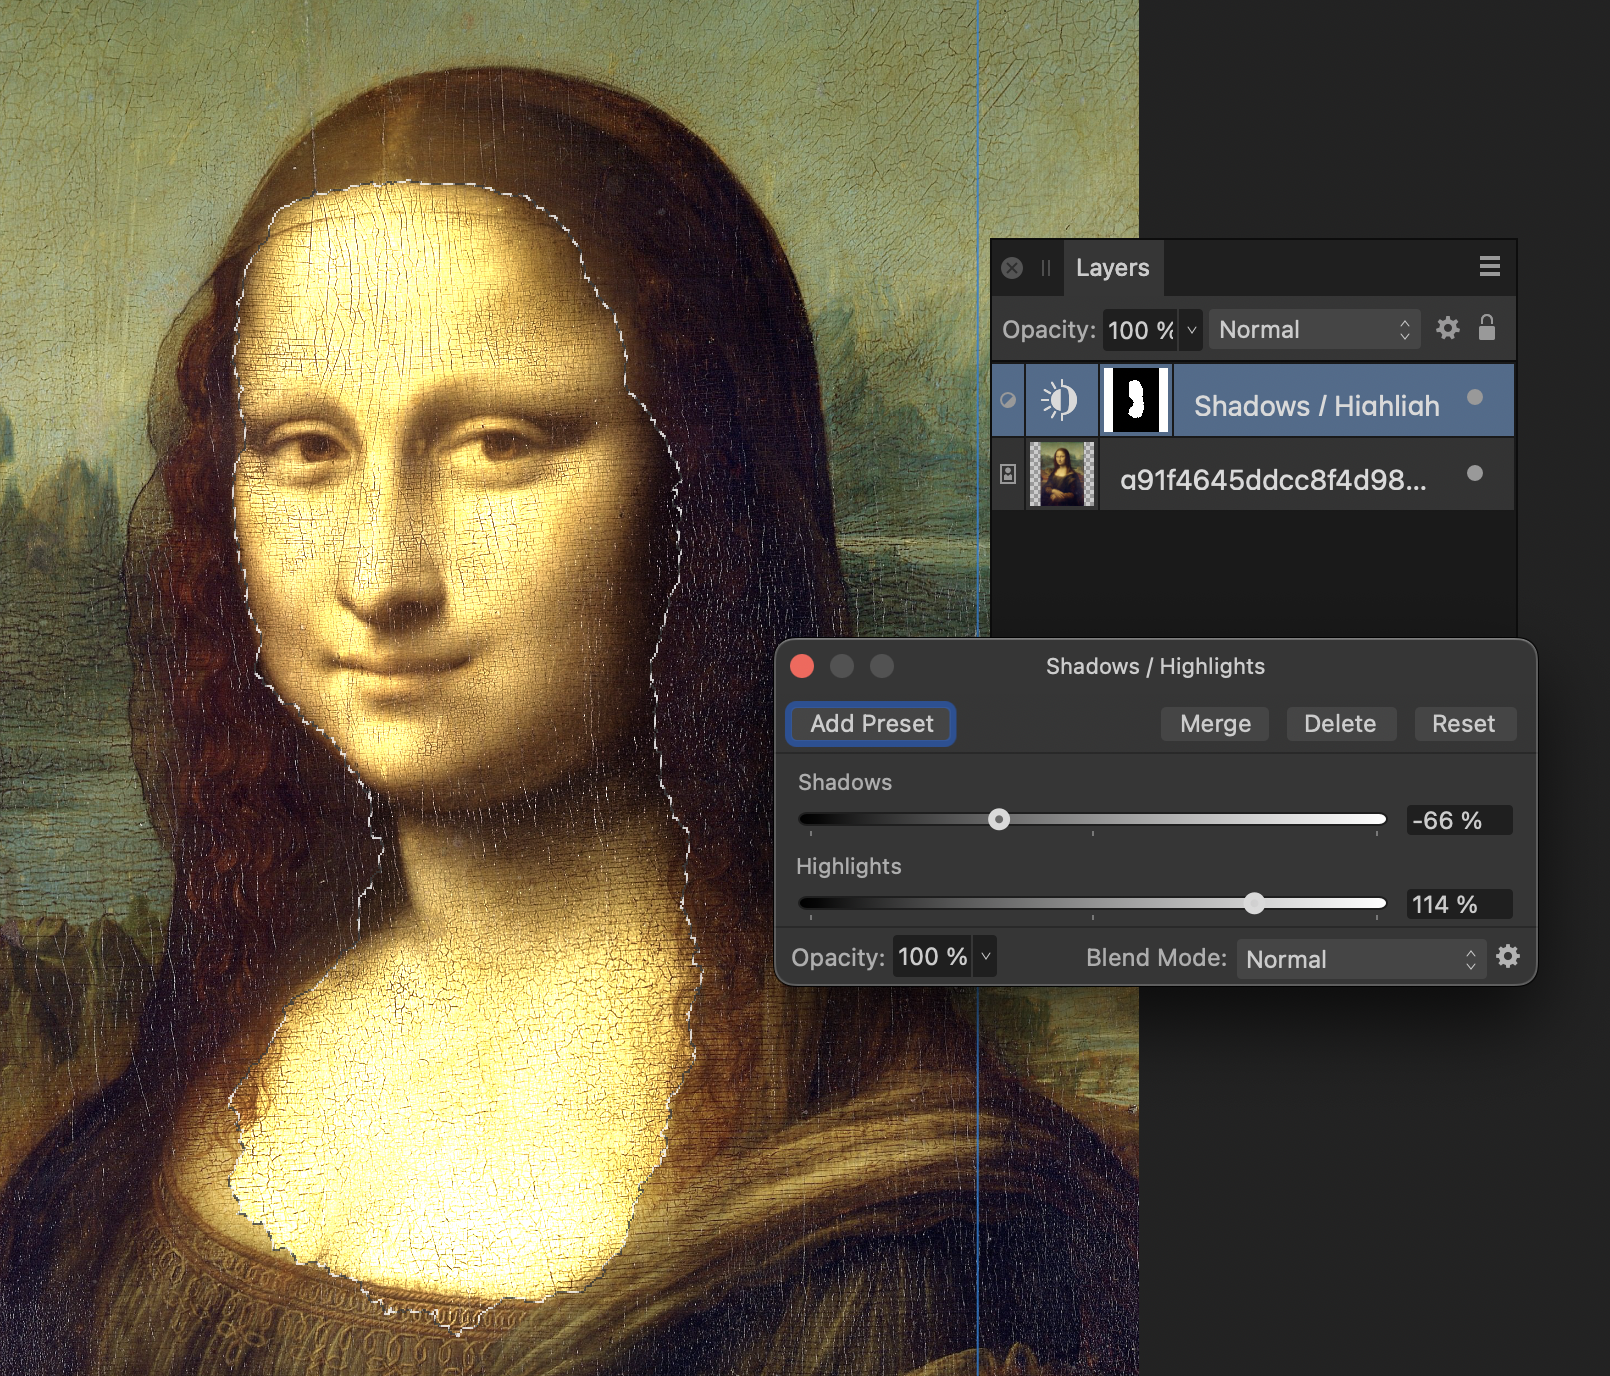
You could try the Shadows and Highlights adjustment... But it's a bit of a blunt instrument - blend ranges are probably more subtle.
-
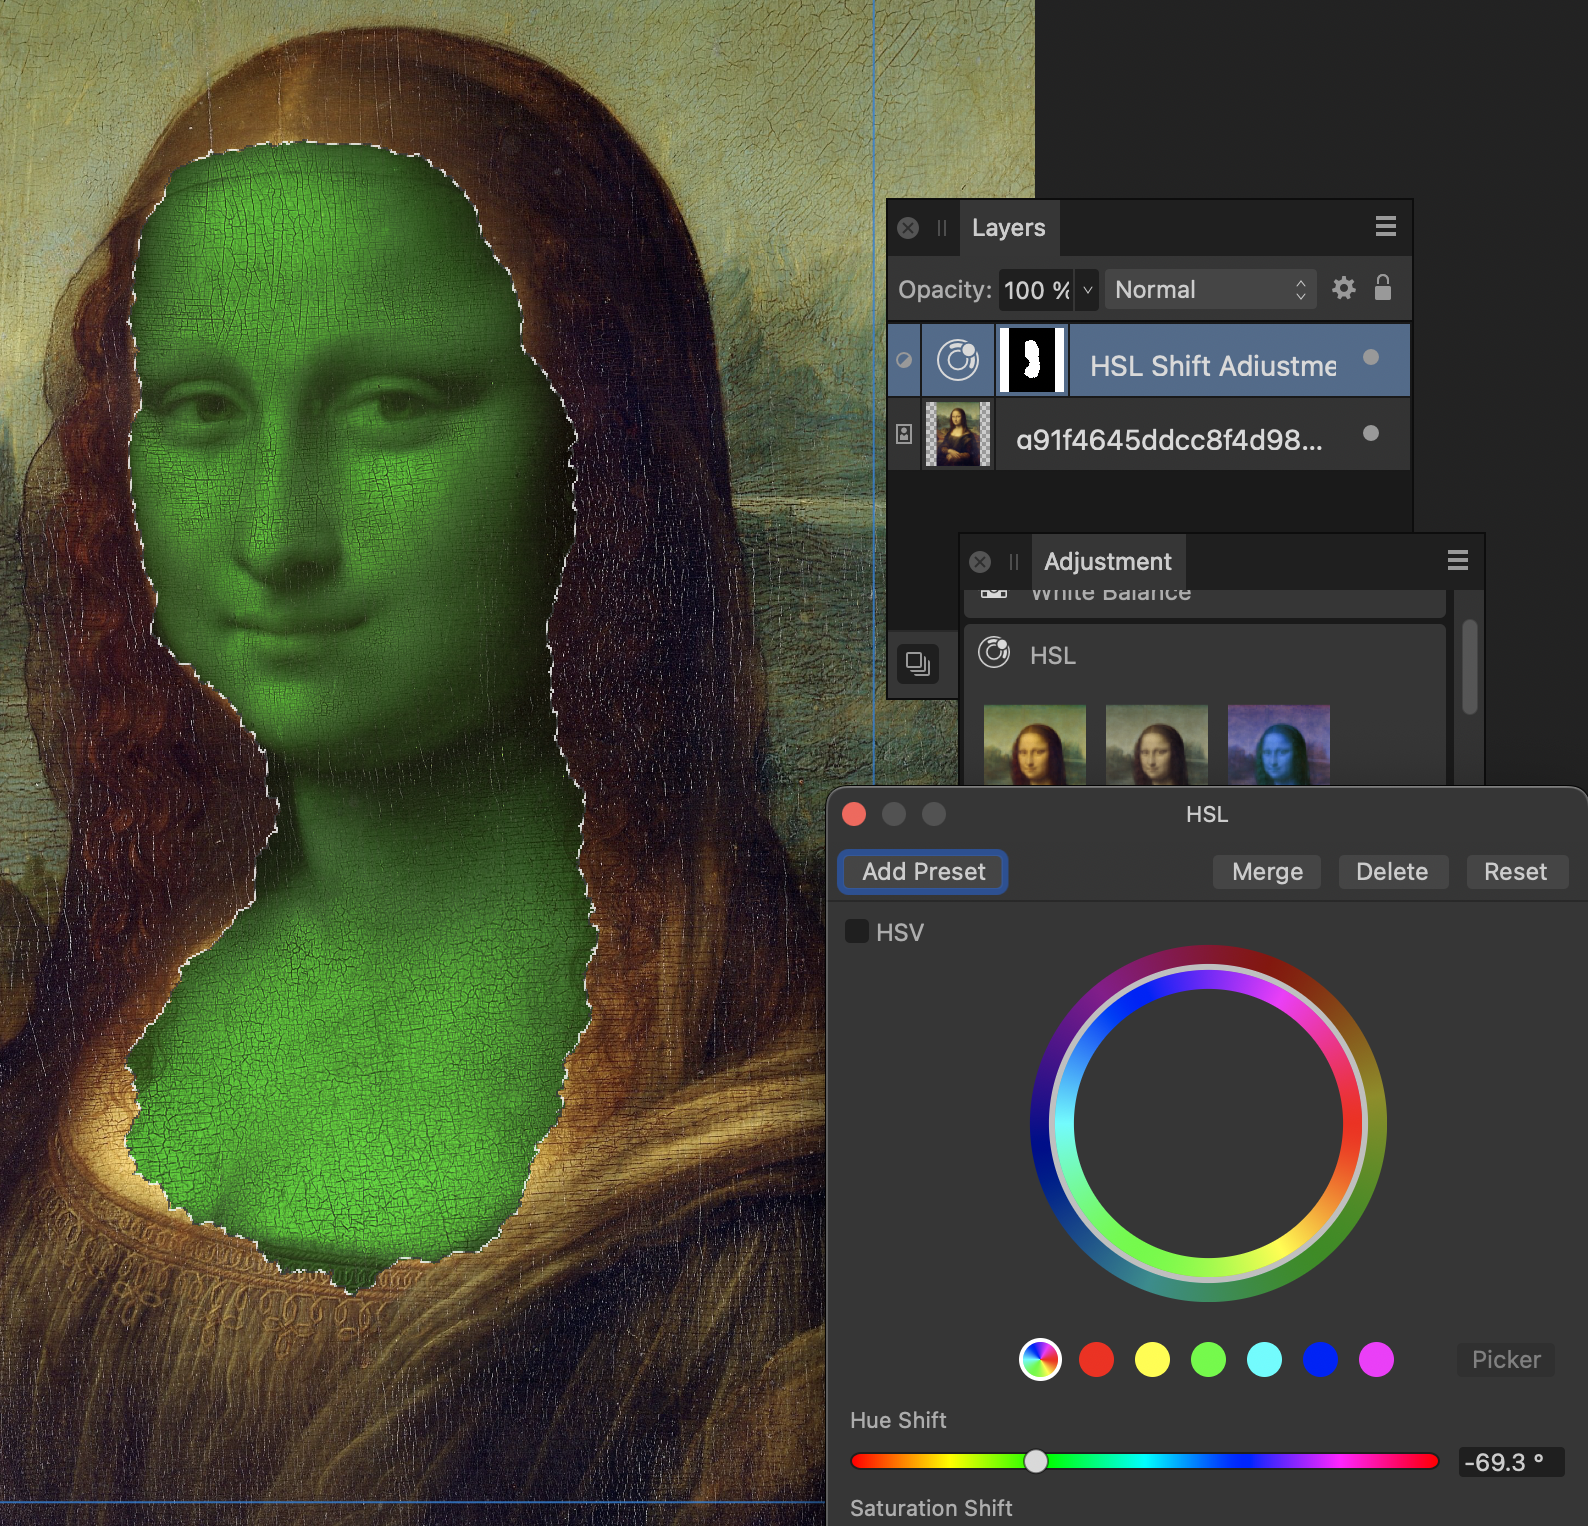
You can use the manual selection tools in Affinity Photo 1 or 2 (for example the Selection Brush tool) and then apply adjustments to the selection. The selection automatically becomes a mask when you apply the adjustment.
-
If you're also asking about automatic subject detection, which I believe is available in Pixelmator Pro (not sure about Pixelmator Photo, the iOS app), then as far as I'm aware there's no equivalent in Affinity Photo.
-
2.0.3 updates not showing
h_d replied to DGee's topic in Affinity on Desktop Questions (macOS and Windows)
2.0.3 for Photo and Publisher for macOS are now available (I bought direct from Affinity: the Apple App Store may be a bit behind.) Edit - just noticed that the version of Publisher appears from the Software Update dialog to be "2 1688". Yet the splash screen for the installed version reads "2.0.3". There's never a dull moment with Affinity...
-
2.0.3 updates not showing
h_d replied to DGee's topic in Affinity on Desktop Questions (macOS and Windows)
The 'inadvertent' 2.0.3 releases referred to by @debraspicher and @Pšenda were I believe for Windows. I've just installed Designer 2.0.3 for macOS: (Unless they released this one by mistake too...)
-
2.0.3 updates not showing
h_d replied to DGee's topic in Affinity on Desktop Questions (macOS and Windows)
I'm downloading the macOS version of Designer 2.0.3 now. Photo and Publisher don't seem to be available yet.
-
Cannot understand Alpha
h_d replied to SusB's topic in Affinity on Desktop Questions (macOS and Windows)
With a brush selected, it's here: On a small screen it may be hidden: to access it, click the double arrow on the right-hand side of the context toolbar. When it's turned on, you can't paint on empty areas of the layer.
-
Verifying application each time
h_d replied to Helsco's topic in Affinity on Desktop Questions (macOS and Windows)
Did you buy Photo direct from Serif or from the Apple App Store? If the latter, this was most definitely an issue with v1 (app icon bouncing in the Dock up to 40 or 50 times on first launch after a restart or logout). There were regular complaints on this forum about it. The issue did not occur with apps bought from Serif. Serif blamed Apple, but it didn't seem to happen with any other third-party apps. If you bought from Apple, it sounds like it continues to be an issue in v2. -
The 'stroke' of a drawn rectangle
h_d replied to Nightowl's topic in Affinity on Desktop Questions (macOS and Windows)
It's up to you: there's a setting in the Stroke dialog that lets you align to middle, inside or outside: I reckon you'd want 'Inside' to maintain the dimensions of the rectangle. The default is Centre. I suspect only the devs could answer that...