BlauerClaus
-
Posts
69 -
Joined
-
Last visited
Everything posted by BlauerClaus
-
affinity photo Changing Eye color in Affinity Photo
BlauerClaus replied to will1960's topic in Share your work
I have watched this tutorial two times. To be honest: the idea is good, the topic is of interest, but the way you do it makes it the worst tutorial among all the others. Look at Andies tutorials: he guides the user though his ideas. You don't. How to improve: - Some of the menus you open and use are visible for 1/10th of a second. Maybe 2/10th of a second to not be unfair. Even when I manually stop the video, I have a low chance to see the details of what you do. Even when I know what you do. Please slow down. You dont need to make it in 60 seconds, 180 seconds are fine. Give your idea time to enfold. Speed is not a quality for itself. - Some of the menus you use (e.g. in the bottom of the video) are very much on the bottom border of the video. When I stop the video to see what you do, then the youtube menu overlays your Affinity Photo menu. Hence, I have no chance to see it. You see, most of the things are just craftmanship you can easily introduce. I encourage you to publish an improved version. - speed up on things that take time (as selecting the shape to make it conform to the eyes) - slow down on moments you do the significant actions - if you prefer to not speak, blend some overlay text that summarizes your ideas. I'm curious to see an improved version. Best regars BlauerClaus -
Well, here some answers: 1. If you want to open files from your iPhoto library, you have two options. Either you open the menu "view/media browser", or you open the menu "File/open" and then you navigate in the left bar to the item "Photos", here you have access to your photo software. 2. If you want to export files from iPhoto, you can drag and drop them from iPhoto to somewhere. When you use the "export" function, you can select the folder of your choice, and you are not limited to the desktop. If you have no other choice than the Desktop, click the little arrow on the right hand side of the file name. This opens the complete file dialog. 3. If you want to save the resulting pictures form Affinity Photo, you should select "file/export". This results in picture files of your choice. The Affinity icon you get when you save the Affinity project file. This is similar to the psd file you get from Photoshop. Did this help you? Best regards BlauerClaus
-
Topaz Denoise is one of the good examples of how PhotoShop Plugins can work in Affinity Photo. Please make it a "known" plugin. Until 1.4.1, it is remarked as "unknown". Best regards BlauerClaus
-
Copy / Paste of EXIF headers
BlauerClaus replied to BlauerClaus's topic in Older Feedback & Suggestion Posts
In 1.4.1, this is still open. Please don't forget this. Best regards BlauerClaus -
[Photo] EXIF data with image stack import
BlauerClaus replied to mikehaui's topic in Older Feedback & Suggestion Posts
In 1.4.1, this is still open. Please don't forget this. Best regards BlauerClaus -
[Photo] EXIF data with image stack import
BlauerClaus replied to mikehaui's topic in Older Feedback & Suggestion Posts
Please don't forget this. Best regards BlauerClaus -
Affinity Photo Customer Beta (1.4.1 - Beta 2)
BlauerClaus replied to MattP's topic in [ARCHIVE] Photo beta on macOS threads
The Topaz Denoise plugin is still marked as unknown plugin. -
Affinity Photo Customer Beta (1.4.1 - Beta 2)
BlauerClaus replied to MattP's topic in [ARCHIVE] Photo beta on macOS threads
The 1.4 beta 2 description is somehow related to the Affinity Designer. You write "Requirements: purchased Affinity Designer". I guess it should be "Requirements: purchased Affinity Photo". You write "Fix for logic relating to copy/paste of layers and Artboards". Isn't this an Affinity Designer feature? Best regards BlauerClaus -
There are many ways. My favorite: 1. Open your picture and perform a frequency separation. The low frequency picture should be slightly more blurry than before, the high frequency only shows edges. 2. Select the high frequency, right click and then select "Duplicate". Voila! Best regard BlauerClaus
-
And what compression is actually used while sharing to Photos? - default 85% - or the value I have predefined in the export dialogue? The latter one would be my favorite and would really support the workflow even of advanced users. Best regards BlauerClaus
-
Exporting a project ends up in a dialog which allows me to configure the file format and compression and finally the folder. But "File"/"Sharing" (in German "Teilen") allows to send the picture to e.g. "Fotos". Question: what file format and what compression AP uses then? Is there any setting to configure this? I still do not understand the sense of this compared to Export. Best regards BlauerClaus
-
Topaz Plugins
BlauerClaus replied to Alan9940's topic in Pre-V2 Archive of Affinity on Desktop Questions (macOS and Windows)
My Topaz Denoise 5 runs as expected. Here is what you could do: - Add a second path to the plugin search folders: "/". - To do this, press "Add" and then select the "Macintosh HD" hard disk root. Then press ok. - This adds a second path "/". - Then restart Affinity Photos and try it out. Best regards BlauerClaus -
In Affinity Photo 1.4, there is only a single noise reduction slider. I would wish that you have at least 3: - for highlights - for mid tone - for shadows The idea is to minimize unwanted noise reduction. Even better would be to set the treshhold between highlights, mid tone and shadows interactively. I'm sure Affinity Photo can already make it with some masks, but I could not figure out how. This would be a nice tutorial. However, having this condensed in the noise reduction dialog would significantly improve the noise reduction filter. Best regards BlauerClaus
-
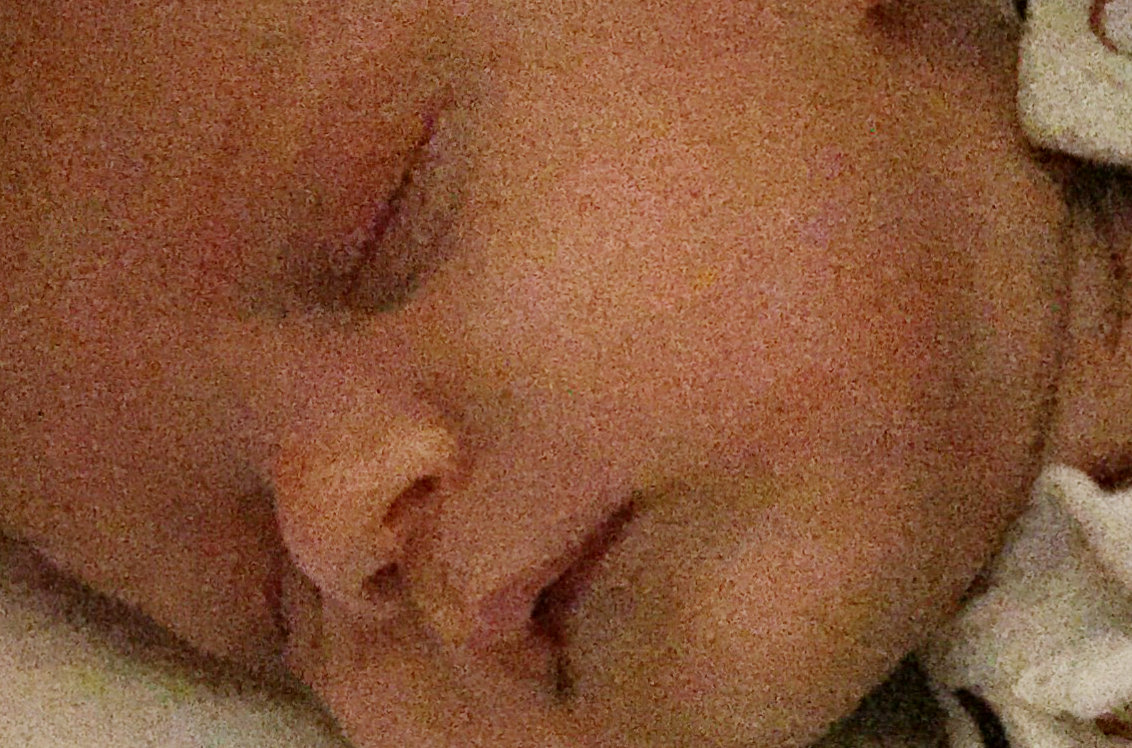
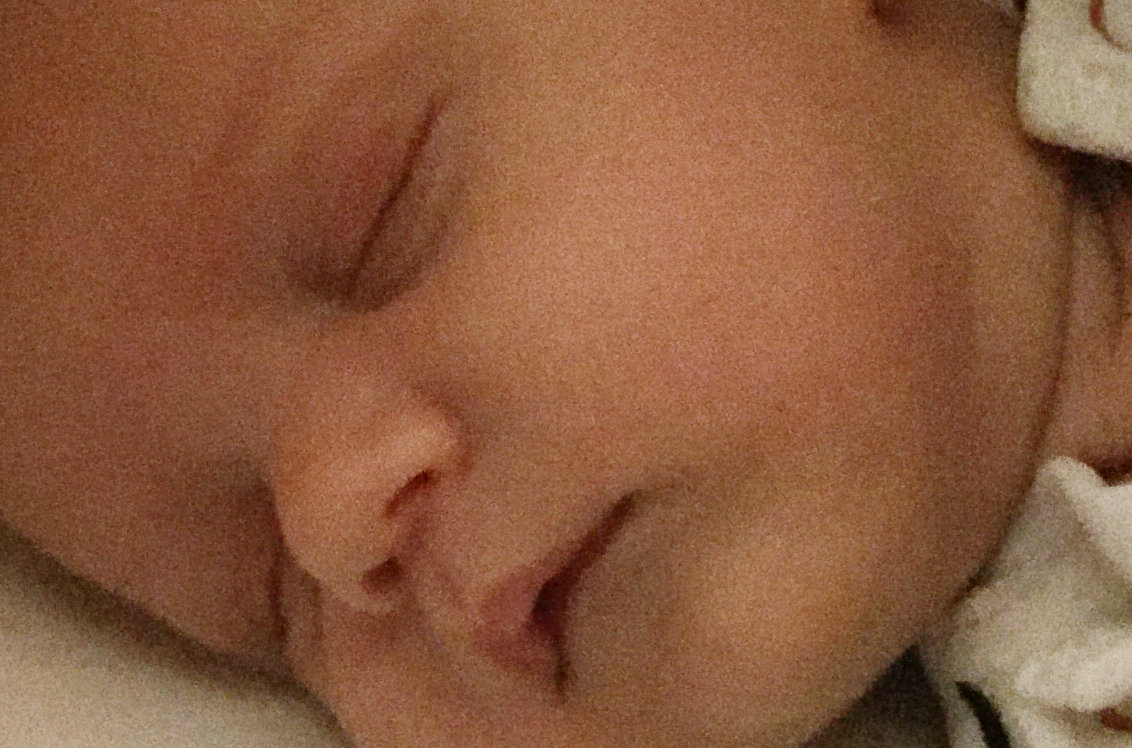
Conrad2k, your question caused me to experiment a while. A very general answer is: there is no optimum. An optimum assumes that there is a number of photos from which on the result gets worse. This is not the case. Every additional photo improves the noise reduction. But the contribution per photo gets smaller and smaller, and the calculation time gets higher and higher. While adding pictures to the stack, my observations are (observed with 100%zoom): - the first 4 pictures significantly contribute to the noise reduction improvement, wow! - the 5.-8. picture can be considered as polishment, they raise the noise reduction of the picture to 90% of the overall result. - the 9. and 10. picture only slightly contribute to improvements, i guess it is now about 98% of what you can reach. - the 11. and 12. picture brings quite invisible improvements, its more the light than the noise that changes slightly - the 13. and 14. picture are the last pictures where I remark any visible changes at all at 100% zoom For more pictures, I have to zoom in: - the 15.-18. picture bring, visible with 170% zoom, still slight improvements on pixel level Finally it is a trade of between quality, computational power, hard disk space and time. If you want maximum quality and you have a zoom of 150%, you see still noticeable noise reduction improvements between 14 and 18 pictures. Another perspective: - at the zoom level "overall picture" (cmd 0): the 11.-18. pictures do not bring remarkable improvements - at the zoom level "100%": the 14.-18. pictures do not bring remarkable improvements As you see, - 10 pictures provide super results for the overall picture zoom, - 14 pictures provides super results even for 100% zoom, and - 18 pictures are for purists. Here the examples for 1, 4, 10, 14 and 18 pictures. Click on them to see them full size (each ca. 220kb) In any case, thanks to the Affinity Photo development team for this powerful feature. The noise reduction is impressive. Best regards BlauerClaus

-
When I do burst mode photo with my iPhone, this is visible as stack of pictures in Apple Photos. Could you implement an extension that allows using this Apple Photo stack directly with the Affinity Stacking feature? All stacking features would then be perfectly usable via Affinity Photo Extension. Best regards BlauerClaus
-
Unfortunately, this is a double submission. Please remove it, I did not find a way to remove my posting. Best regards BlauerClaus
-
When I load 14 jpeg files into a stack, each about 2.5 MB size, and save this, the overall .aphoto file has a size of about 500 MB. Please implement to not enfold each picture internally, but just link the original files and re-enfold them with loading the files again. This may take more time, but significantly reduces file size. 500MB for a project is too big, especially in combination with iCloud and iPad. Best regards BlauerClaus
-
Copy / Paste of EXIF headers
BlauerClaus replied to BlauerClaus's topic in Older Feedback & Suggestion Posts
This feature request is related to this bug description: https://forum.affinity.serif.com/index.php?/topic/16086-no-exif-with-export-persona/?hl=past&p=73094 Best regards BlauerClaus -
[Photo] EXIF data with image stack import
BlauerClaus replied to mikehaui's topic in Older Feedback & Suggestion Posts
Yes please. +1 The stacking noise reduction is really great, a killer feature for low light situation, way better than any noise reduction plugin. All tutorials for the stacking feature are dealing with photos made in burst mode, same time, same geolocation, same camera etc. But a picture without EXIF is like a house without address. Homeless. The discussion about this feature requisition is discussed here: (translate "Staple" with "stack", it is just german) https://forum.affinity.serif.com/index.php?/topic/15887-no-exif-data-with-staple/ BlauerClaus -
Please implement a "Copy EXIF" and "Paste EXIF" feature, so that the user can manually transfer EXIF header information from one picture to another. Use case 1: noise reduction via stacking. The user makes multiple photos of the same situation and loads them as a stack into Affinity Photo. Affinity Photos does the noise reduction. But after exporting the result, the final jpg has no EXIF information. The use can hence decide from which of the pictures he want to re-use the EXIF information and can paste it into the result. Use case 2: Export Persona: you may export multiple parts of the same image. However, they are all made at the same day, time, camera etc. In both use cases, the resulting pictures have no EXIF information. This feature universally helps to close this gap. Best regards BlauerClaus
-
You need a photo of the empty room, and the other photos with yourself in different positions. 1. Start Affinity Photo. 2. Drag and drop all pictures from the finder into Affinity Photo. You get each one layer per photo. 3. Position the photo with the empty room at the bottom. This should be the background. 4. Position the other photos layer by layer so that they are exactly above one another. Now you only see the most top photo, don't you? 5. In the most top photo, select your body with the selection tools and then select "Mask layer" (in german: Neue Maskierungsebene). Immediately everything disappears except you. You can refine the selection to make it perfect. 6. Go to the second top photo and repeat this. 7. Step by step, go through all photos. In the end, you have a room and your body placed in different locations. Best regards BlauerClaus
-
To be honest, I tend to agree.
-
Media Browser Improvements?
BlauerClaus replied to Mediafuel's topic in Older Feedback & Suggestion Posts
The MediaBrowser cannot open another Photo library than the system library. Even when I open the second one with Apple Photos, the MediaBrowser still shows the standard one, not way to change it. :-( -
Affinity Photo is wonderful, and the Photo extensions are the best in the market. Thank you very much for this wonderful update. - The Photo extensions raise the value of Apple Photos a lot by adding lots of missing functionality. - I would love it when Photo would accept the Affinity file format natively with all the layers and non-distructive elements. Thank you! Best regards BlauerClaus