PhotoNewbie
-
Posts
176 -
Joined
-
Last visited
Everything posted by PhotoNewbie
-
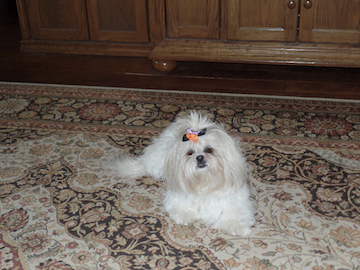
 Success, that did it. The original document under Resize Document said 72" x 48" 432px 288 px and 72 DPI. I changed it to 6 x 4, didn't change anything else, checked resample, clicked resize. Then I was able to bring it into my new document at a size I could use the move tool on to get it to fill the document. It did pixelate (I think that is right) the dog but I will try to improve that with some editing. So with the lowering of the quality (unless I can improve with editing) I still don't know if I am not wasting my time. But thanks so much to all of you.
 -
I appreciate all the patient help you guys are being. I have gotten a little farther but still nowhere. In other words, I was able to bring some of the original photo into the New Document other than the corner I was getting. I now have a portion of the WHOLE dog that was in the original photo. Attached is a screen shot showing what I mean. I used the move tool to get that portion of the photo to show up rather than the corner I started out with but I just can't figure out how to shrink the entire image to fit within the New Document. I kept trying with this little move points and got nowhere. Clearly I don't know what I am doing and should just give up but I think there is just some little something I am not doing correctly.

-
I will try the Paste without Format. But am I just wasting my time? And just need to accept the printed photo as I am currently getting? They are not too bad, I am just trying to end up with the best I can print. I have my Canon t5i camera set to take highest resolution but in jpeg not Raw, I have not ventured there yet. I have played around a little on another photo with trying to Resize Document to end up with the best print resolution and did not end up with a good screen image much less better print so I thought by trying to follow the steps in the Understanding DPI tutorial I was on the right path. ETA: Paste without Format has the same result as Paste.
-
Some more basic help please. I was looking at one of the new tutorials you have as of 1/28, specifically the one called "Understanding DPI". My final goal is to get a high quality print. I am doing something wrong in trying to follow setting up a new document to print in a 6 x 4 size with 300 DPI. I open the photo in Affinity Photo I want to print after I have it all setup correctly. I then: 1. Click on New document>choose Photo>4R 6"x4">Document Unit is set to Inches>300 DPI>click OK 2. Go back to Original Photo that I opened>click Select All>Cmd C 3. Go back to New Document>CMD V And all I get is a corner of the original photo filling the screen of the New document, that is all that is fitting, the rest of the photo seems to be gigantic and so won't fit. As usual, I'm sure it is a small step that I am missing in trying to follow a tutorial where a small step is performed but not talked about and I can't see it from my small screen. El Capitan 10.11.3 Affinity Photo 1.4.1
-
I am a very inexperienced user of AP at this point and have not used icc profiles. If I am goint to print, all I do is I make the edits in Resize Document and on the File>Print screen and so far this has done well enough to have printed some lovely photos.
-
What does "fine art" mean to you? In my case, I have a Mac running OSX 10.11.3 and AP 1.4.1 and take photos of my two dogs, edit them in Affinity Photo (still a newbie) and print them out with a cheap HP inkjet printer. Very happy with my printed photos!
-
Worked Perfectly!!!!!! Thank you so much! Also, part of the above is incorrect (in case anyone else needs this help) The layer Mask is showing up in the left hand layer panel.
-
I am trying to follow the tutorial video on Adding Bokeh and I cannot figure out what I am doing wrong. I cannot get my paint brush tool to selct black. Here are the steps I am taking when I start going wrong. Open photo>Duplicate background layer> select Filter>Blur>Maximum Blur (adjust slider, check circular, apply) Select Mask (button on lower left panel)>Select Paint Brush Tool>Adjust brush size>Select Black(from b/w circles at top of left panel>turn hardness down That is as far as I can go. When I hover over what I want to paint back in, the color is white no matter how I select the black circle. I think where I am going wrong is that a Mask layer is not showing up on my left panel, I only see the two background layers but I am selecting the Mask layer as I see to in the tutorial. Do you see where I am going wrong? I could attach a screen print but that is just showing a blurred out photo at this point.
-
Never mind! I just used the little trash can on the left panel, removed the layer and redid the text correctly. Thanks for the help offered.
-
I was trying to put the phase "Happy Valentines Day" on a photo I was editing and the first letter comes out right side up and the rest come out upside down. How the heck did I do that? I clicked Text from the left hand tool bar, selected text style/size and where I wanted the text to be on the photo and started typing. Came out like this:
-
Very good videos in an easy to understand clear flow for a beginner. Will you be posting here when the Solid Foundations series is ready? To subscribe i would have needed to sign up for a Google account and had no other need to do that, so didnt.
-
I'm sure no one is as slow as this newbie but just wanted to say thanks for adding Share>Add to Photos at bottom of File Menu. I think it was added in the latest update but who knows, at my age it could have been there from day one. But it saves me a step from having to do this after exporting photo to Finder.
-
Not a question but didnt know where else to post. There is a nice article in latest issue of MacFormat magazine on Affinity Photo including how-to's. This is the first of 5 monthly articles. It's a UK based magazine and I am in the US but it is a good mag and very nice info on Affinity.
-
Thanks Asha, that has a lot of useful info.
-
Again, thank you so much. I have finally gotten a workflow that works for me. I used Marquee>Edit>Fill(adjust to brown color, lower slightly Opacity, Blend using preview to select best>Apply. Then use Mask for each Adjustment Layer I want to make. This is a crude ending but it was just a learning example for me to further my elementary skills in AP and I will get better and more precise as I go along. And BTW, I now have an external speedlite for my camera that greatly helps to prevent these "Pet Eyes". But as I said, I needed to learn how to perform this correction. So here is my result for today: I have not attached original photo but it had brilliant turquoise eyes.
-
Cut and Paste
PhotoNewbie replied to Petej's topic in Pre-V2 Archive of Affinity on Desktop Questions (macOS and Windows)
I am very much a Newbie, too and have made my own tutorial in language simple enough for me to understand and will share it with you in hopes that it can help you. It is most likely the same process that Madame but mine is basic for dummies (me, not you). 1. Use Selection Brush Tool making sure you have Snap to Edges checked and select White circle at top of Left Panel 2. Draw around what you want to cut and Command C to copy 3. Make New Document and Command V to paste image you copied. - Crop down as close to this image as you can and Apply>Save As .AF Photo 4. Choose Open in AP and bring in the Photo you want to add this image that you just cut/saved into and choose "Place">choose your saved >AF Photo (your cut image) 5. You can adjust size and move it (V) around to position this image you have brought in 6. When it looks like you want it>Export it -
Thank you so much for all the suggestions here. I had already tried to follow the video re: changing the baby's eye color to brown and found (for some newbie reason) that after drawing the marquee around the pet's eye, I could not get anything else named in the video to respond. But, I was able to draw the marquee around the pet eye and use Edit>Fill and work the color around to brown and apply to the eye. And then Mask and add a curve layer and darken it. I just now need to be able to get the sparkle back to the eye as it is a flat dark brown. I tried adding some more adjustment layers to the Mask such as Shadows and Highlights but that does not quite do it. I especially need that little white dot in the eye. Sorry to have to keep my actions so simple but I find that works best for me as a newbie. Again, thanks so very much for taking the time with me.
-
I have been experimenting with my green eyed dog photo for over an hour and tring every one of these methods. I can accomplish one step in most of the methods but another step does nothing even when I follow the videos very carefully. But since I do get the brown eye color I need using the Fill layer, how do I accomplish the whole thing, i.e. I draw the marquee but am unsure when to use a mask layer, when to use the fill layer. If you have any spare time, I would most appreciate a step detail. I apologize for asking you to do this but I have been able to accomplish other edits I need to my photos on my own, but too green for this one.
-
Thank you, Asha, I'll have to figure out how to find/use Selective Color or Color Balance, as I have not found those in a tutorial. I did try the methods in the tutorial video for changing that model's eyes but could not figure out how to get brown eyes. Coukd get green to blue but not brown.
-
Thank you, Darren, I will give that a try.
-
Another basic question, but I am not going to learn this great Photo Editing software even for my very amateur needs if I don't ask. I take a lot of photos of my two Shih Tzu and even tho I have purchased an external speedlite (and know about bouncing it off ceiling) for my Canon camera I still occasionally get the green or turquoise eyes on one of my dogs. I assume I will get better at the actual photo taking and eventually eliminate this problem. But until then, I want to be able to fix this with AP. Right now, my process (that doesn't work for me) is: Use Select Paintbrush Tool>lower brush size to about 3 px>select black color under Colour on left panel>paint within green eye(s)>delect How could I do this better to make it actually work? My desire is to have this not come out coal black but more natural dark brown and then be able to finish by putting the tiny white "catch light" dot in the eye. Oh, and I have watched the video 'changing eye color', I am still doing something wrong. I sometimes do get an improvement from outright green but am still left with a discernible very dark shade of turquoise which at first glance may look ok, but not anywhere near dark brown. Thank you for any help you might be. I see that this software is designed for professional users but I have been doing so well with it to improve the photos I have taken of my dogs, I will for sure stick with it to meet my very simple needs. And apologize each time I am a bother with these very basic questions.
-
And of course, that did it! Thank you so much, Madame. I have learned another basic tip to add to my collection. I record them all in Notes on my Mac and will have my own Manual!
-
Speaking of the Curves Adjustment Layer, I need to move the sub menu (the little screen that has the curve you move the nodes) to the right a little because it is over the top of the photo I am trying to adjust. The video I watched said 'just move it over to the right' but when I try I am moving the photo itself over too far to the left leaving the curve screen in the way. This is such a basic question I am embarassed to ask and why a manual would be so beneficial, well if it included some of the basics. As an amateur beginner, I get so much from your tutorial videos but am always missing some simple little detail either because not included on the video or because the cursor moved so quickly and is small on my 15" mbp or worse, my iPad
-
I was able to cut an object from one photo (one of my dogs) and add it to a photo of the other so they look as iff they are sitting side by side. Original individual photos were taken as portraits and all was the same for both original photos so that part was easy. But all in all, the end result of combined photos into one was very easy. I thank you guys very much for providing the info you did. I used the Selection Tool to select the outline of the dog I wanted. Made a New Document. Copied the selected dog from my starting document and pasted it into the New Document resulting in an image of the outline of the dog. Then opened a photo of the other dog. Pasted the image in the opened photo of dog 2 and voila! a Combined Photo as if my two dogs agreed to pose side by side. I am just so VERY HAPPY!!! Thanks for the help
-
I am very much a newbie to photo editing and am sure I didnt ask this question correctly. I have two small dogs and they have sparked my interest in photography. And in Affinity Photo I have learned how to take my camera captures of them and improve the photos. One dog has black fur and most photos I take require editing due to this. I have been very pleased with AP itself and the vimeo videos for helping me do this. But what I am still trying to figure out is how to bring just one dog's body from one photo into the other dog's photo, placing it where it looks appropriate. This is because I cannot get them to actually pose side by side. I have tried to search for the process but dont think I am asking the right question. I would so appreciate if someone could help and if so, please keep it very simple. Thank you so much to anyone that takes the time.