paolo.limoncelli
-
Posts
1,083 -
Joined
Everything posted by paolo.limoncelli
-
 Hi Matti, does it work with other apps?
 -
Hi! What do you mean when you say "to save a mask"? Do you need to export this to an external raster file? If you mean to save to Channels it is pretty easy. In this case I have a vector rectangle with its own transparency together with a clipping mask and a clipped painting layer... So a fairly complex mask. Just select the layer/group you need, go to Channels and after right clicking on Composite Alpha choose Create Spare Channel and you're done.

-
Hi Stephen, I do not use Windows version intensively, but my macOS is even older than your PC and things seems to be pretty smooth. Aside Wacom settings (you did not mention them, but I guess you have updated drivers there) did you check HW Acceleration in settings? Also... How many brushes are in your library? I strongly suggest to avoid automatic import v1 > v2 because it could make a mess, and port them them manually. This makes me think that there is something more behind maybe?
-
Affinity V3.0
paolo.limoncelli replied to Repeated's topic in Affinity on Desktop Questions (macOS and Windows)
Freehand and Ventura... I dreamed of using them when I was 14... Then I discovered Page Plus SE. You want me to drop a tear. I'm getting old... 😓 -
Hi! This is still a bit related to "personal" workflow. I own an XT4, and use AP for BW conversions since it offers a better control on tones and transitions... The overall look has some sort of "analog feeling". Also it has been improving a lot since earliest releases... Regarding "pure details" not yet compared but C1 used to deliver sharper results. Should go back to a nerdy attitude... 🤪
-
Affinity deals with clipping masks in a different way, in PS "white" is alpha, AP needs "real" alpha, so instead of painting with "white" you need the Eraser Tool. This is an example, a simple stroke I did above this rectangle If you right click on its layer and hit Mask To Below you have your clipping mask Now to edit, you need to paint with the Eraser For a Non destructive approach you could also do the following. Create a second layer above the first, here I'm using a different colour to spot the difference, and group them Set its blending mode to Erase And then Mask To Below And you have a sort of "multi layer clipping mask" on the fly... Try following this quick tutorial, I tried to explain how to deal with mixed masks. Hope this helps! Paolo
-
Hi Tony! As far as I know it is not possible yet... You can only sync libraries within the same platform and different apps (link/chain icon aside the brush category). No way to merge, only move single brush from a category to another.
- 1 reply
-
- 1
-

-
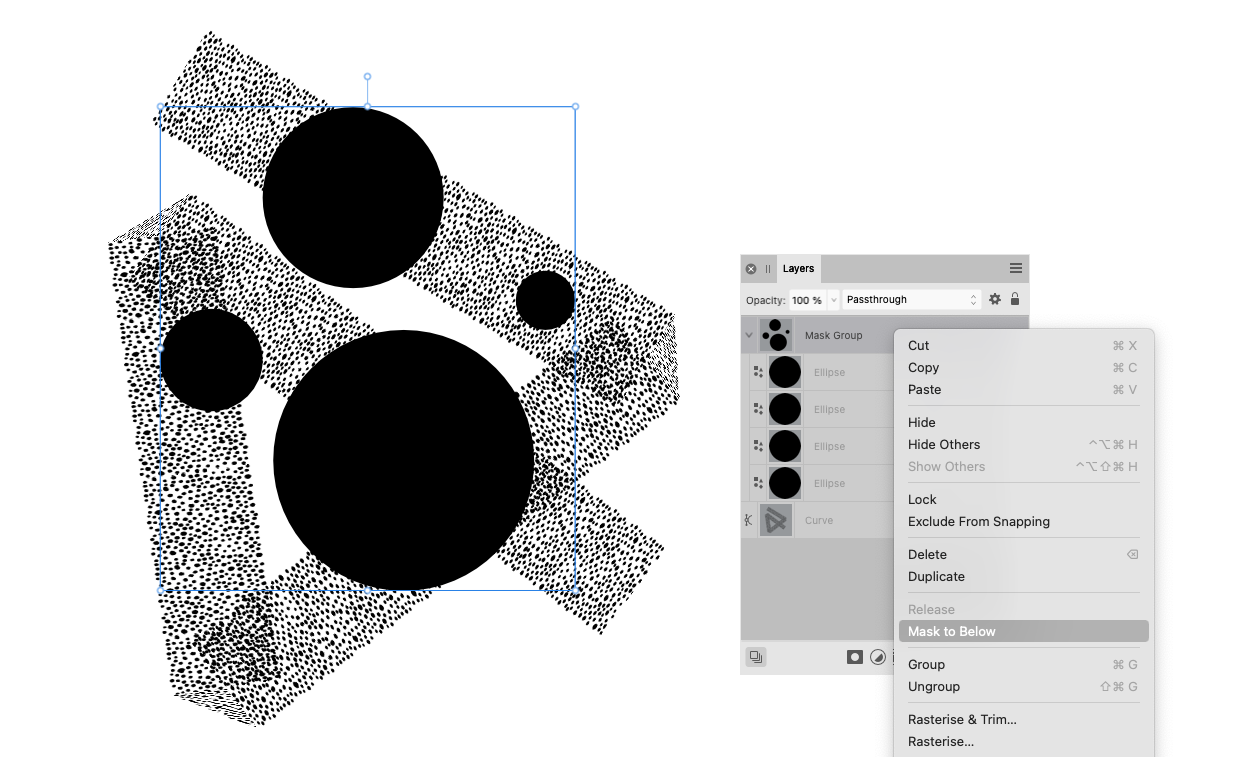
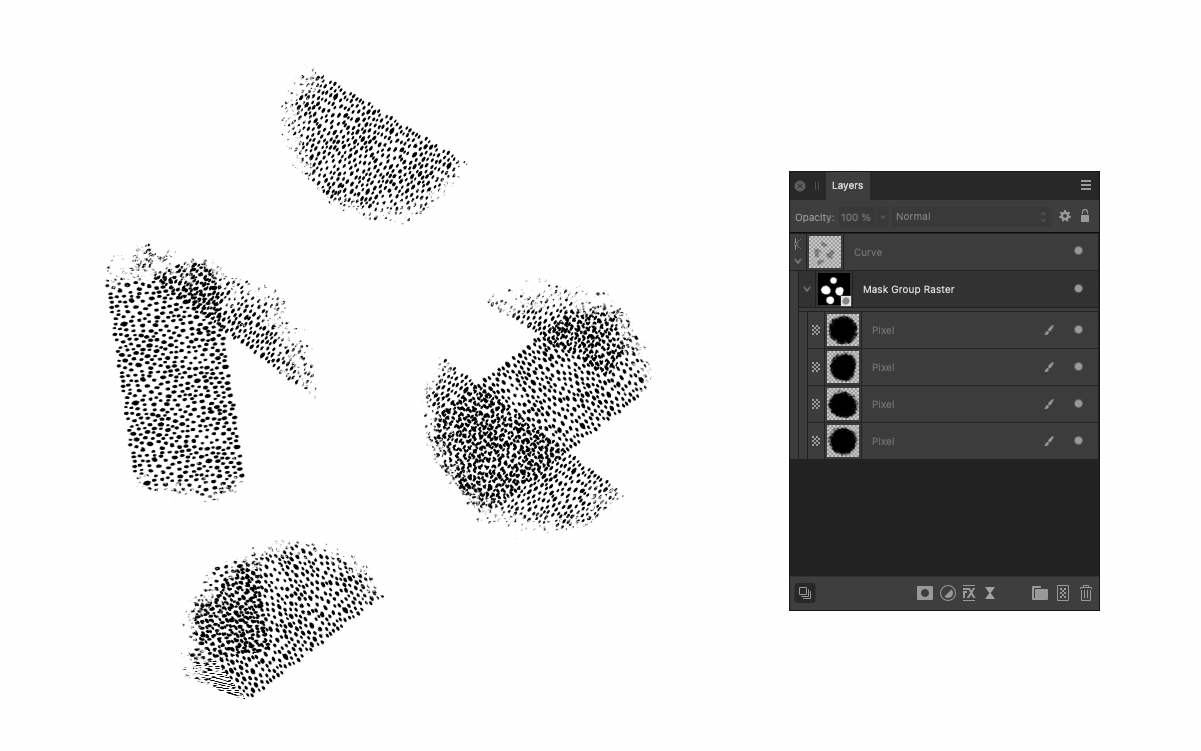
Hi Alex, this is the way I do it... Not sure it is the only way nor the faster... Anyway it is pretty quick I create my vector shape, group it and place above my graphics Then select Mask To Below And here we go... If I need to make this a Raster Mask just hit "Rasterise" This step could be done also before the "Mask to Below" Obviously it works in both Photo and Designer, and with pixel layers too In Photo you have a further option... If your scenario is the following, so two (or more) stacked raster layers Group them, Rasterise and then hit Filters > Colours > Erase White Paper Now you can perform Mask to Below This process also explains how Affinity deals with Raster Masks: you do need to have alpha (100% transparent) pixels in your layer to make it a clipping mask. The white to alpha step allows it. Hope this helps! Paolo
-
feather edges?
paolo.limoncelli replied to kirk23's topic in Affinity on Desktop Questions (macOS and Windows)
Hi Kirk! No direct feature to do that, but there is a non destructive strategy I use and it works pretty well. Create your shape and fill with bitmap Duplicate it, fill with black From Layers studio right click on it and select to "Mask to Below" Apply a Gaussian blur Fx to this mask layer, and scale it independently so fit your needs Also, if you play with Multiple Fills on this mask, you could achieve complex feathering solutions Hope this helps! Cheers, Paolo
- 1 reply
-
- 2
-
-

-
New icons are clearer and Stroke panel looks pixel-perfect. But from the ribbon bar I spent 5 minutes trying to clean my glasses... 😅 Soon after I realised that there should be a sub-pixel offset Also "Mitre" label seems to be shifted a bit. Cheers, Paolo
-
Crashes caused by Affinity Store Brushes
paolo.limoncelli replied to paolo.limoncelli's topic in V2 Bugs found on Windows
Happy to know that... Before passing to the AffinityStore all brushes are checked with configurations other than the one has been used to design them (2018 MBP with far lower specs than your workstations). So if something lags or skips goes back to me until the QA level is spot on. Obviously this approach cannot cover any situation... Also between different updates performance issues could happen. I didn't yet check this beta update on Windows, but I can confirm that V2 is finally closer to macOS speed and responsiveness. PS. I designed default brushes too... 😜 -
This is what’s wrong with the brush in affinity photo 2
paolo.limoncelli replied to ZufDraw's topic in V2 Bugs found on macOS
We have same configuration and specs, less pronounced for sure but is there. Photoshop needs smoothing on... 😉 Short strokes PS_01.mp4 Long strokes PS_02.mp4 It has been there since the first introduction of the Smoothing check box in 4.0 or 5.0 (can't remember). It something that could be fixed in AP I guess, anyway it is definitely linked with hardware/drivers combo too... My Cintiq has 2x lpi of my my Intuos. Also Wacom drivers work in a very odd way... They use keystrokes, basically when you're drawing it is like typing on a keyboard... 😃 After a long term usage I can perceive different behaviour and need to work in a different way. -
This is what’s wrong with the brush in affinity photo 2
paolo.limoncelli replied to ZufDraw's topic in V2 Bugs found on macOS
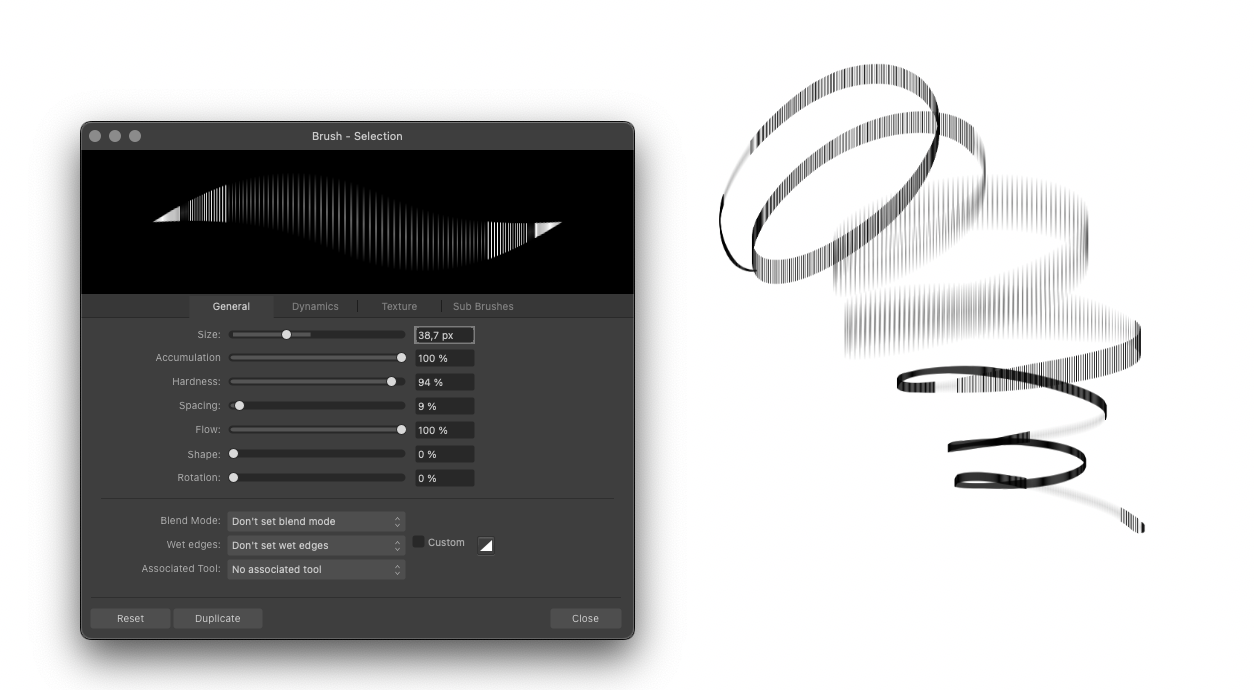
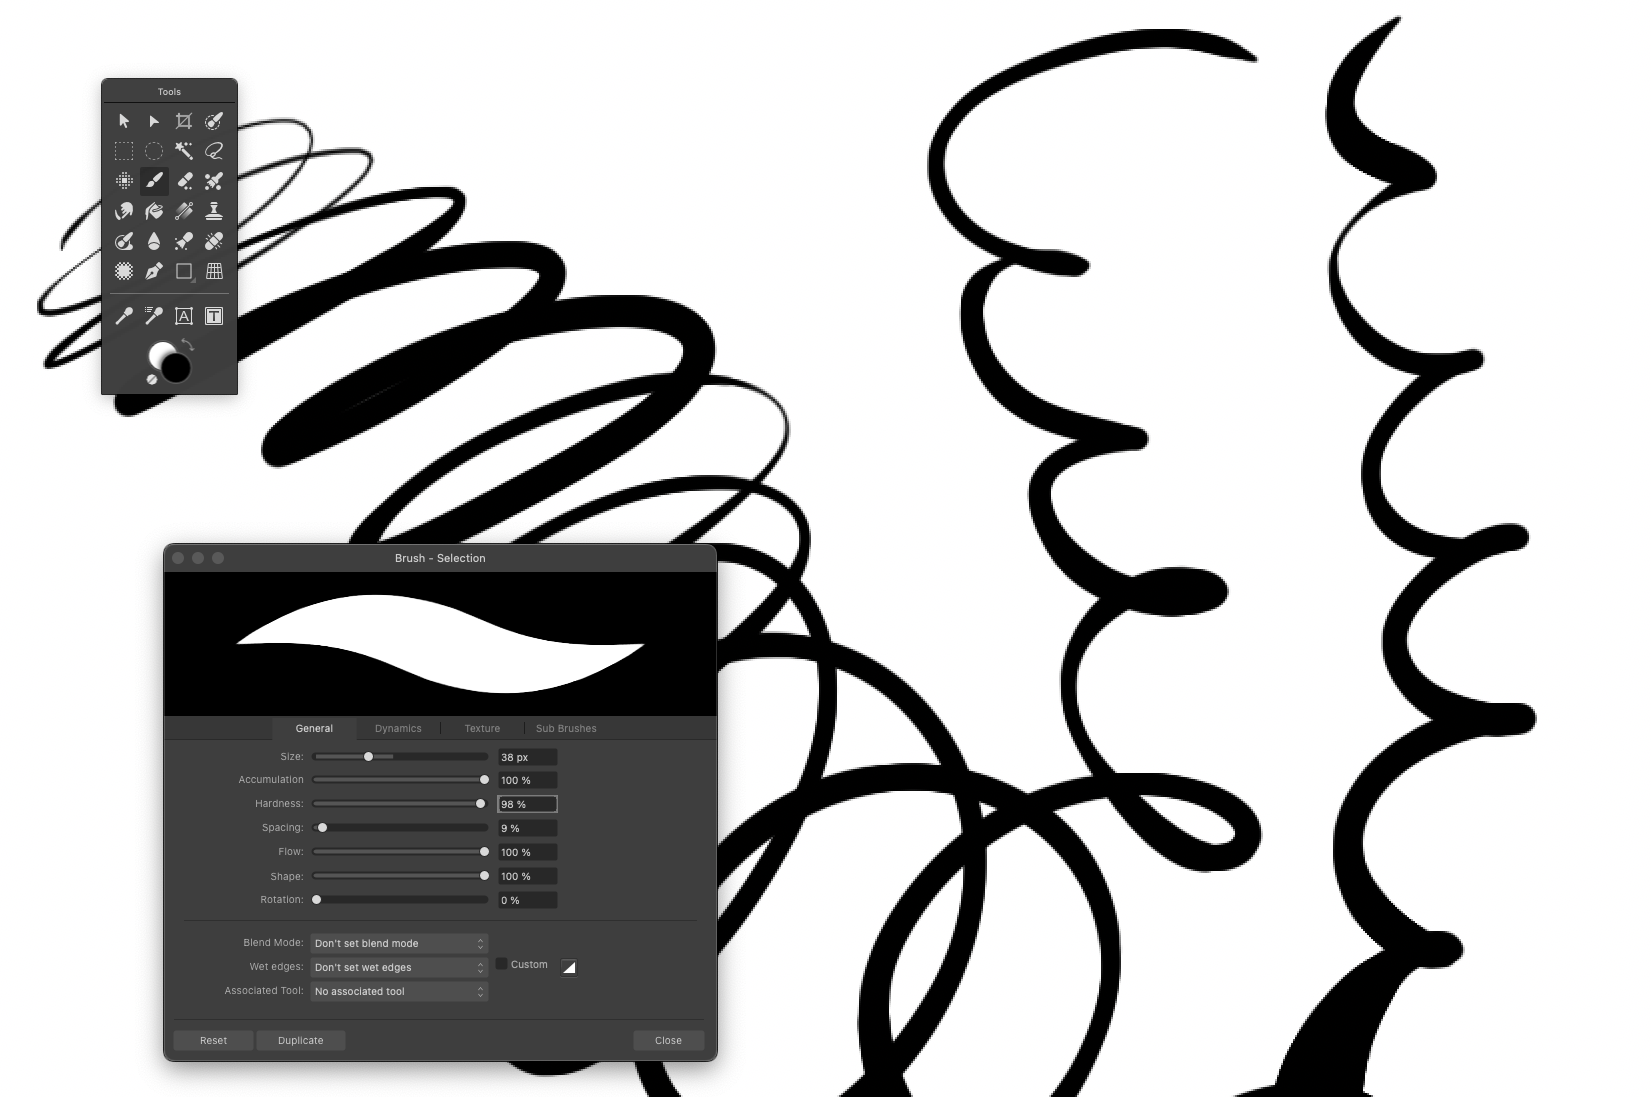
Yes but it is by design. 100% Hardness in AP is very close to Pixel Tool and makes almost impossible to avoid "steps" with such a tiny brush. You need to set 98% to have a smoother transition, or deal with a custom WE ramp. You could also use Hardness Jitter.
-
This is what’s wrong with the brush in affinity photo 2
paolo.limoncelli replied to ZufDraw's topic in V2 Bugs found on macOS
Ok found... You're making tiny circles on a 25% zoomed out 10k wide canvas. This is not my personal way to deal with digital ink so it has been impossible for me to spot so far... I tend to zoom in for tiny details (no matter what APP I use). Definitely related with both Cintiq/Affinity combo but also to zoom ratio and stroke size ( = movement your hand/pen on the tablet). Being the 27QHD more precise (I guess) I have far less polygons as you can see. This is something I've been noticing since 2014... Affinity's precision seems to "disclose" input hardware's performance much more. When I moved from Wacom Intuos 4M > Cintiq13HD > 27QHD I've always found improvements whereas others (CSP, PS...) stayed the same. Also... Stabilisation does nothing in this scenario. polygonalStrokes.mp4 Photoshop for example works in the exactly opposite way... For Long strokes you desperately need to enable Smoothing in brush panel, otherwise you'll get polygons (no matter zoom/size) but small strokes are always fine.
-
This is what’s wrong with the brush in affinity photo 2
paolo.limoncelli replied to ZufDraw's topic in V2 Bugs found on macOS
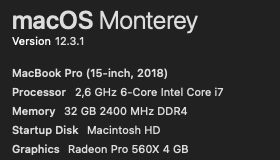
For sure there are still some glitches here and there, and about spacing, I somehow think there is a "by design" behaviour to increase responsiveness... Reaching parameters' limits we could occasionally "uncover" these offstage solutions maybe? Those skips make me think about rounding errors in calculations... But I’m making arbitrary assumptions... 😄 My MBP is a 2018 one too and I'm using a Cintiq27QHD (2015 model) This is a quick screengrab using a 10000x6800px canvas. AP_paintingEngine.mp4 As you can see... 25% zoom, very quick circular scribbles... Smooth on my side... Internal cycle doesn't offer a great edge control, I'm showing you also a different way to obtain pin sharp edges using custom Wet Edges Ramp. PS. In the very first part I'm hunting back and forth trying to remember where I put the dotted brush... 😅
-
This is what’s wrong with the brush in affinity photo 2
paolo.limoncelli replied to ZufDraw's topic in V2 Bugs found on macOS
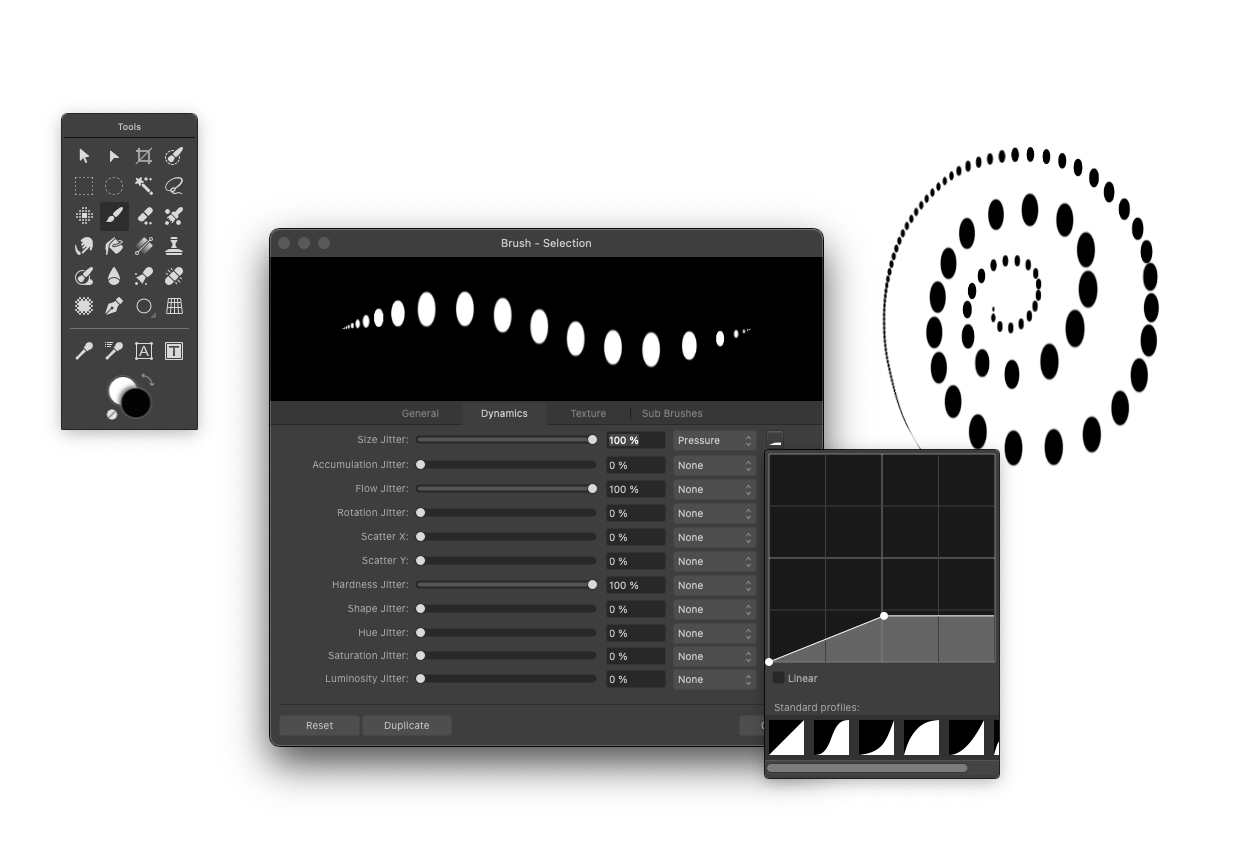
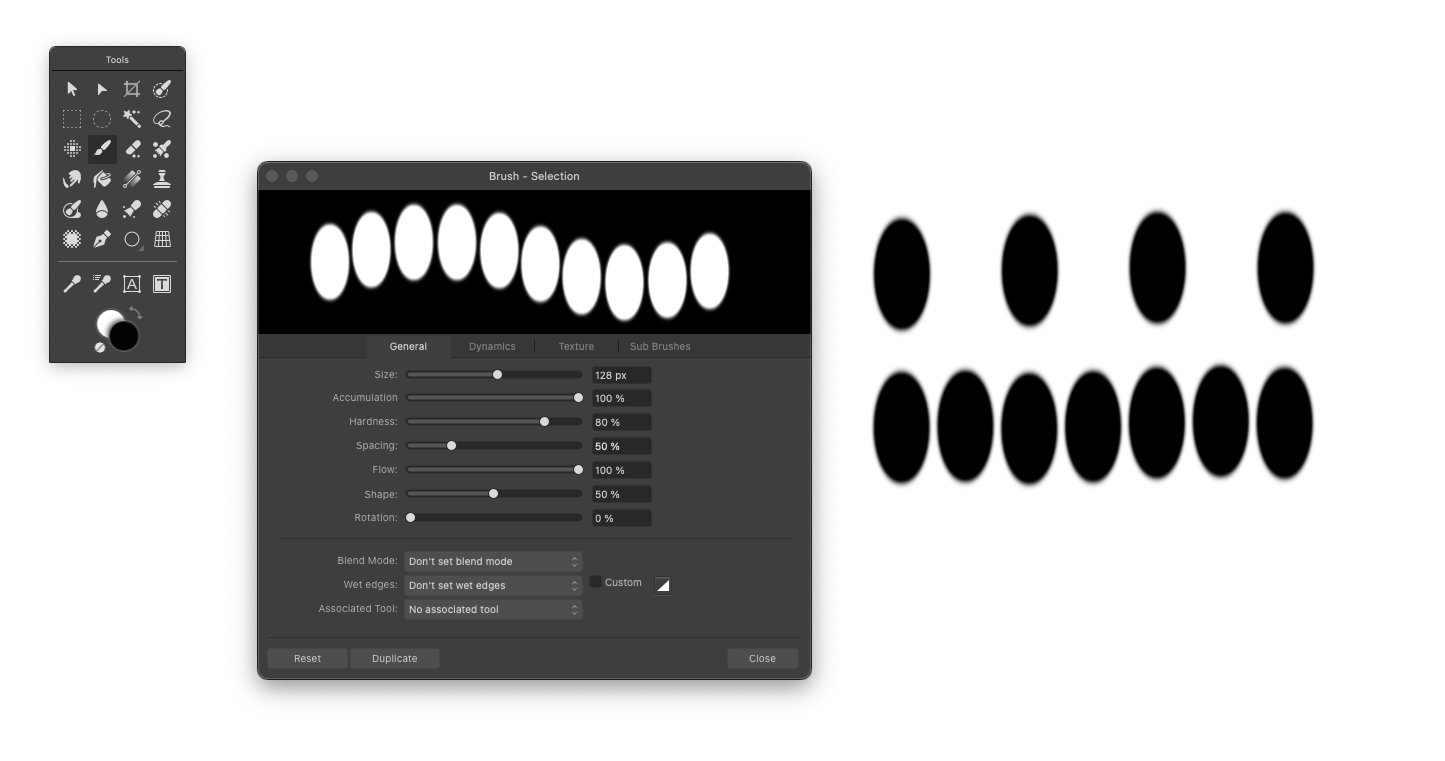
Also again... Forgot to mention. Spacing is a variable value and can't be controlled yet. This value is calculated starting from the Size of the Round shape, so in order to have a stroke like the one you showed here you need to set Spacing equal to Shape percentage and as you can see below that dabs get closer (second stroke with 7 dabs) Size Jitter ramp should be like this (for the reasons I've mentioned above) Anyway being Spacing a variable linked to Size, it is not possible at this stage to completely mimic the Sketchbook/PS behaviour. We should have a Spacing Jitter and set a constant ramp there, otherwise with light pressure values (so small size) dabs will always be close enough to blend together. This is why head and tail of the stroke look "dense".
-
This is what’s wrong with the brush in affinity photo 2
paolo.limoncelli replied to ZufDraw's topic in V2 Bugs found on macOS
Yes, and I'm pretty sure it is the non-linear behaviour of the ramp to cause the issue. Or at least playing with it you can find a "PS like" behaviour. Shape, Size and Spacing seems to be considered as "unrelated" by AP. I also suspect Hardness has a role here... This is about the preview weirdness. The second part of your post shows a poligonal approximation in curves. What I cannot reproduce is that issue.. This usually happens with difficoult communication between app and tablet drivers. Or when you're short on memory/resources. -
Crashes caused by Affinity Store Brushes
paolo.limoncelli replied to paolo.limoncelli's topic in V2 Bugs found on Windows
Will ask and let you know! -
Brushes and Assets 😀
-
This is what’s wrong with the brush in affinity photo 2
paolo.limoncelli replied to ZufDraw's topic in V2 Bugs found on macOS
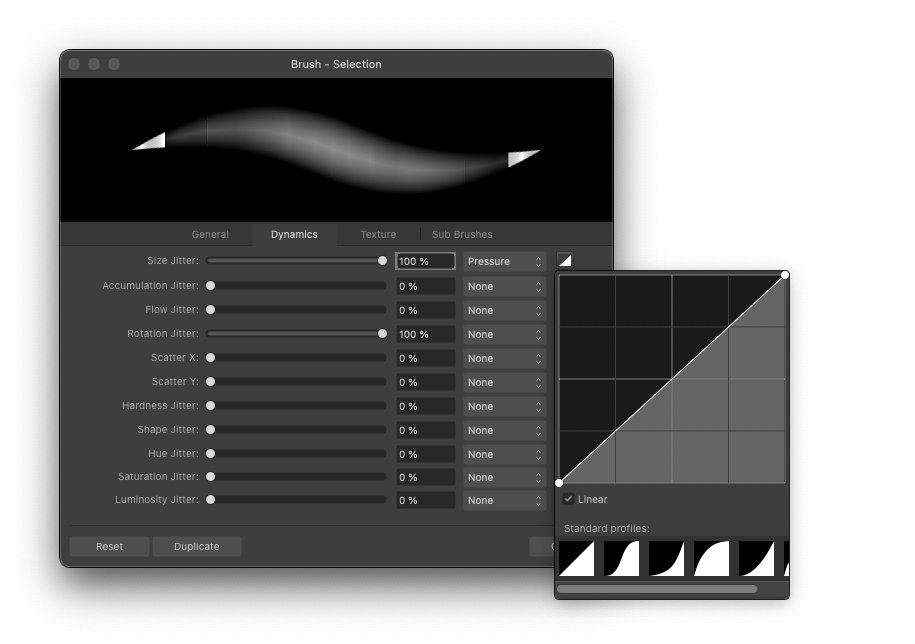
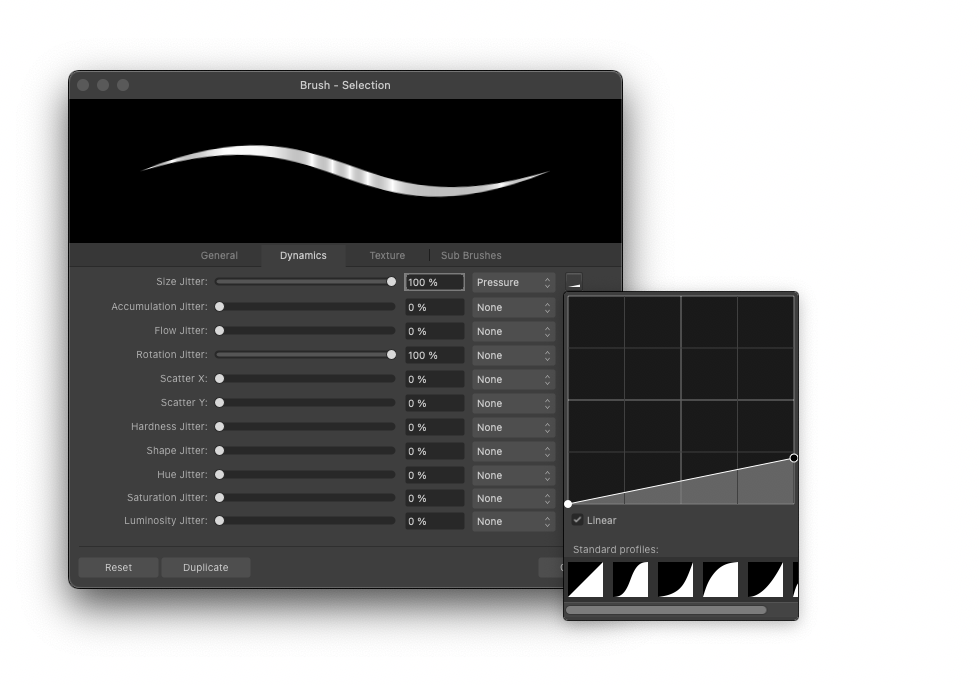
To show this non-linear relationship between Size, Shape and Pressure Ramp here you can see the preview of a brush with 0% Shape like your Full Ramp Half Ramp Slightly lower than 1/4 of the Ramp And this looks to me the expected result...
-
This is what’s wrong with the brush in affinity photo 2
paolo.limoncelli replied to ZufDraw's topic in V2 Bugs found on macOS
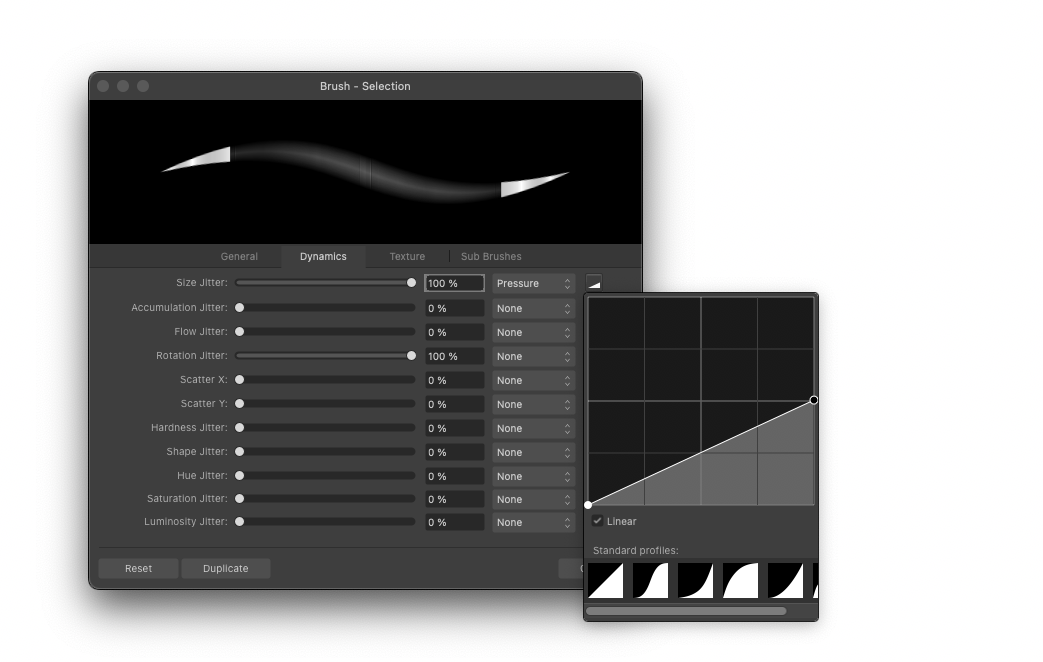
Mmm... This is hard to test... the 0% Shape produces artifacts. Moving it back to 100% and increasing the hardness a little bit produces a smooth result on my side... This is a 200% zoom Also a suggestion which is still a bit "hidden" and could explain why this engine works in a different way from CSP/PS. Ramps work as multipliers, so if you create a 32px brush and set the ramp to the top right corner it will go from 0px to 64px. The red circle is 64px, the first dot aside is done with full pressure and a ramp that ends in the middle. The second black dot is the same 32px brush but with ramp ending end top right, and as you can see it is 64px wide. My guess is that since shape is calculated in percentage from Pixel Size, it refers to 32px, so using "corner to corner" ramp together with shape ends in jagged lines. Not sure about the calculation... But with this insight I solved these sort of things. Also with internal cycles (round and square brushes) you can use 1% spacing without problems and I strongly suggest to use this value in particular together with shape. The only thing I still see is the "straight" starting point that occasionally happens. About "straight" corners it could be an hardware/resources issue.. Which tablet are you using?
-
Hi, I've tried the automatic import of v1 to v2 of my resources but something went wild... All categories were there, but previews were "empty" and double click on preset did nothing. I needed to reset default ones. Importing v1 sets to v2 using the old ways (drag&drop or menus) work fine. I'm using macOS Monterey 12.3.1
-
I feel guilty here... A specific thing I asked for... 🤣 All the parameters you cannot modify never worked in v1 with raster brushes and this was confusing for users trying to smoothen or distort nozzles using hardness/shape thinking it was broken. I think that disabling these is a better way to communicate that nothing will happen at this stage... But in the future... Who knows! 🙃
-
Crashes caused by Affinity Store Brushes
paolo.limoncelli posted a topic in V2 Bugs found on Windows
Hi! I'm here to share this feedback coming from one of my customers using AP on Windows. Cannot find a way to replicate it on my side... These the Specs Cheers, Paolo -
Ok... This is the old one. Will share this with Amy to get sorted. Cheers! Paolo