Gatada
-
Posts
96 -
Joined
-
Last visited
Everything posted by Gatada
-

Outline part of mask?
Gatada replied to Gatada's topic in Affinity on Desktop Questions (macOS and Windows)
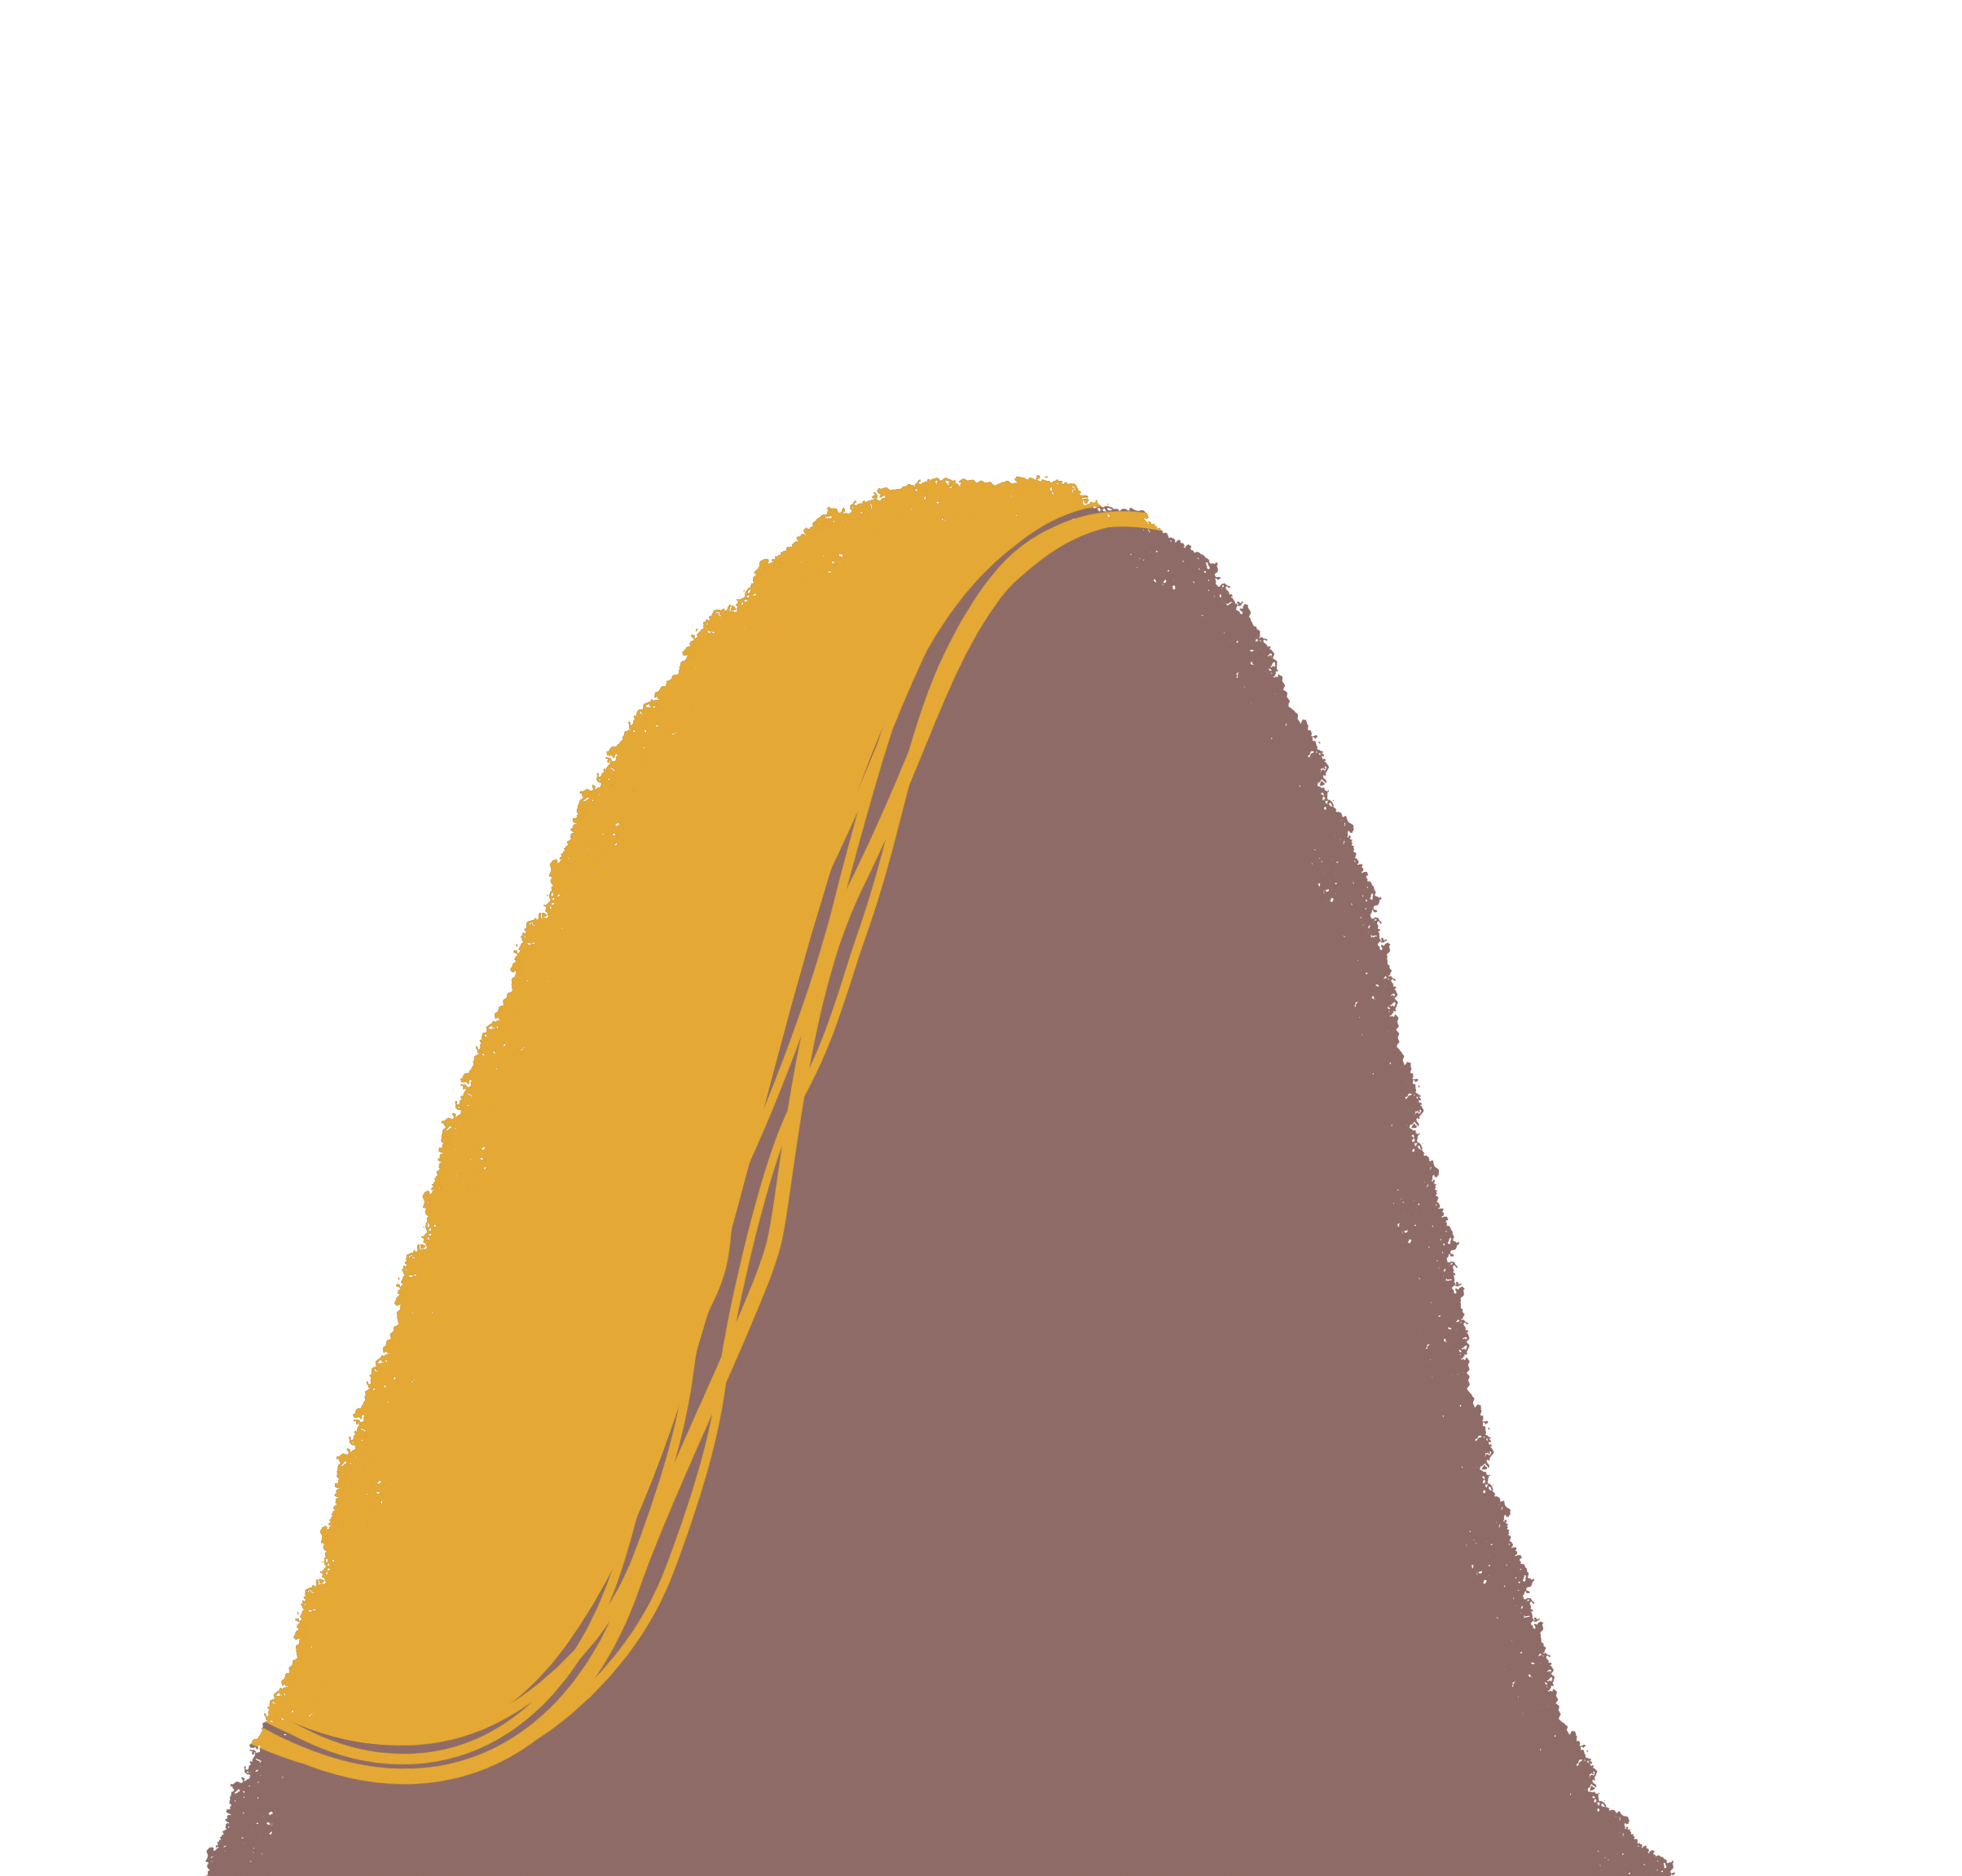
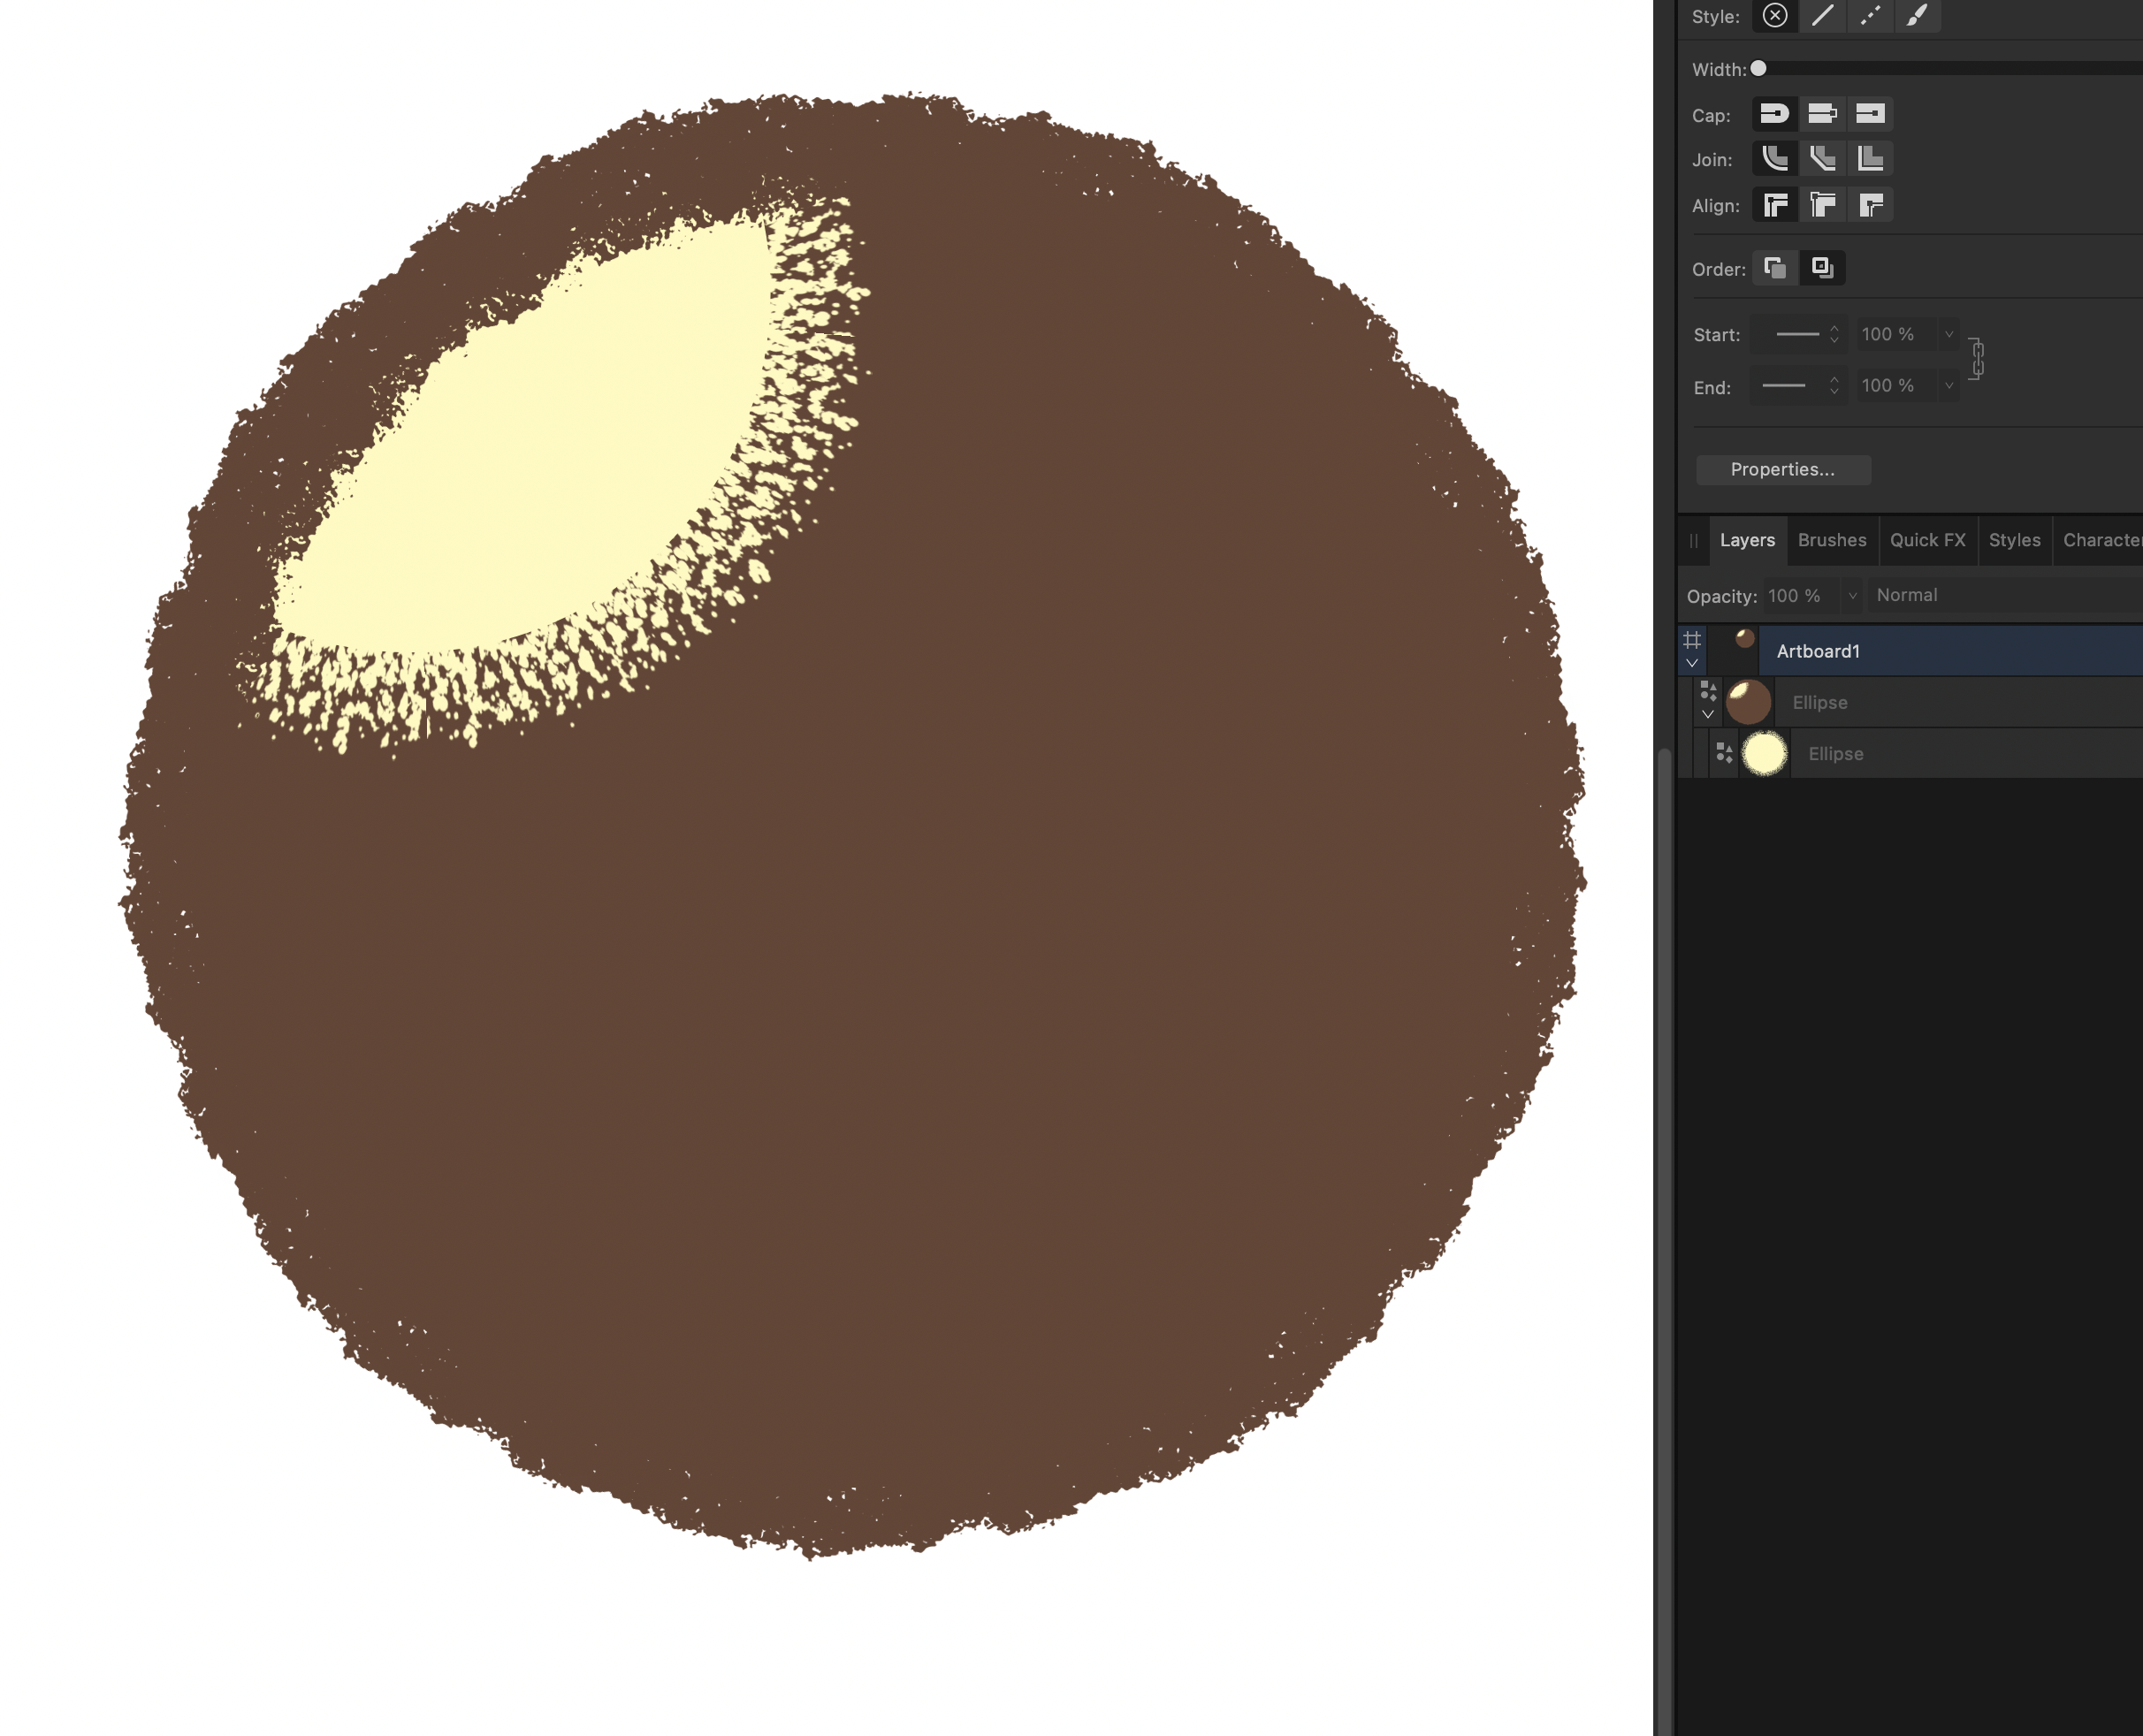
Hey all, so grateful for answers, suggestions and contributions! Thank you! Now that I see it wasn't simply something obvious that I had overlooked, I've been motivated to try to find other ways. So, there is this approach, still tedious and far from as simple as a "include outline in masking operation" toggle: Create shape with desired brush, named it Hill. Duplicate shape and make fill and outline 100% black, named it Mask. Select the Hill shape and create Highlight shape with desired brush, it is between Mask and Hill. Right-click Mask in Layers tab and click "Mask to Below". Voila! The result is vectors and masked with outline. Hm, oh, is this what @NotMyFault mentioned? 1. If the Hill is made into a symbol.. And duplicated... and with sync disabled, changed to all black (this is the Mask) Then changing the Hill shape will also affect the Mask. Nice! Now I can change.. But of course... I cannot modify multiple Hills individually.. So still a pain... virtually unsustainable.
-
Yes, sure, which I do. But often it is faster to simply export. And that workflow would be even faster if the selected artboard dictated the filename of the export.
-
Outline part of mask?
Gatada replied to Gatada's topic in Affinity on Desktop Questions (macOS and Windows)
When artwork is finished, and is exported, the format is not significant—as long as resolution is respected. I’ll try the above though it sounds .. quite .. tedious. I would expect Designer to have a toggle to include or exclude outline when masking. It’s quite obvious that some feature like this is needed, as all sample files have hard shapes and masks—no fuzzy brushes anywher (unless when manually brushed). -
Outline part of mask?
Gatada replied to Gatada's topic in Affinity on Desktop Questions (macOS and Windows)
Yeah, but as you also demonstrates: this fails when the brushes are dramatically different. -
Outline part of mask?
Gatada replied to Gatada's topic in Affinity on Desktop Questions (macOS and Windows)
Well, color overlay works and includes the outline brush. This is basically what I need, right? But the overlay has to be a shape with a brushed outline.. The idea of using Designer is to keep it as vectore and non-destructive. -
And have you noticed that the Export command always uses filename for the exported artboard—even when selecting a specific artboard? I think Designer could do better: when an artboard is selected, use the name of the artboard as defined in the Export persona.
-
Ops, the "option" key was left out of the shortcut.
-
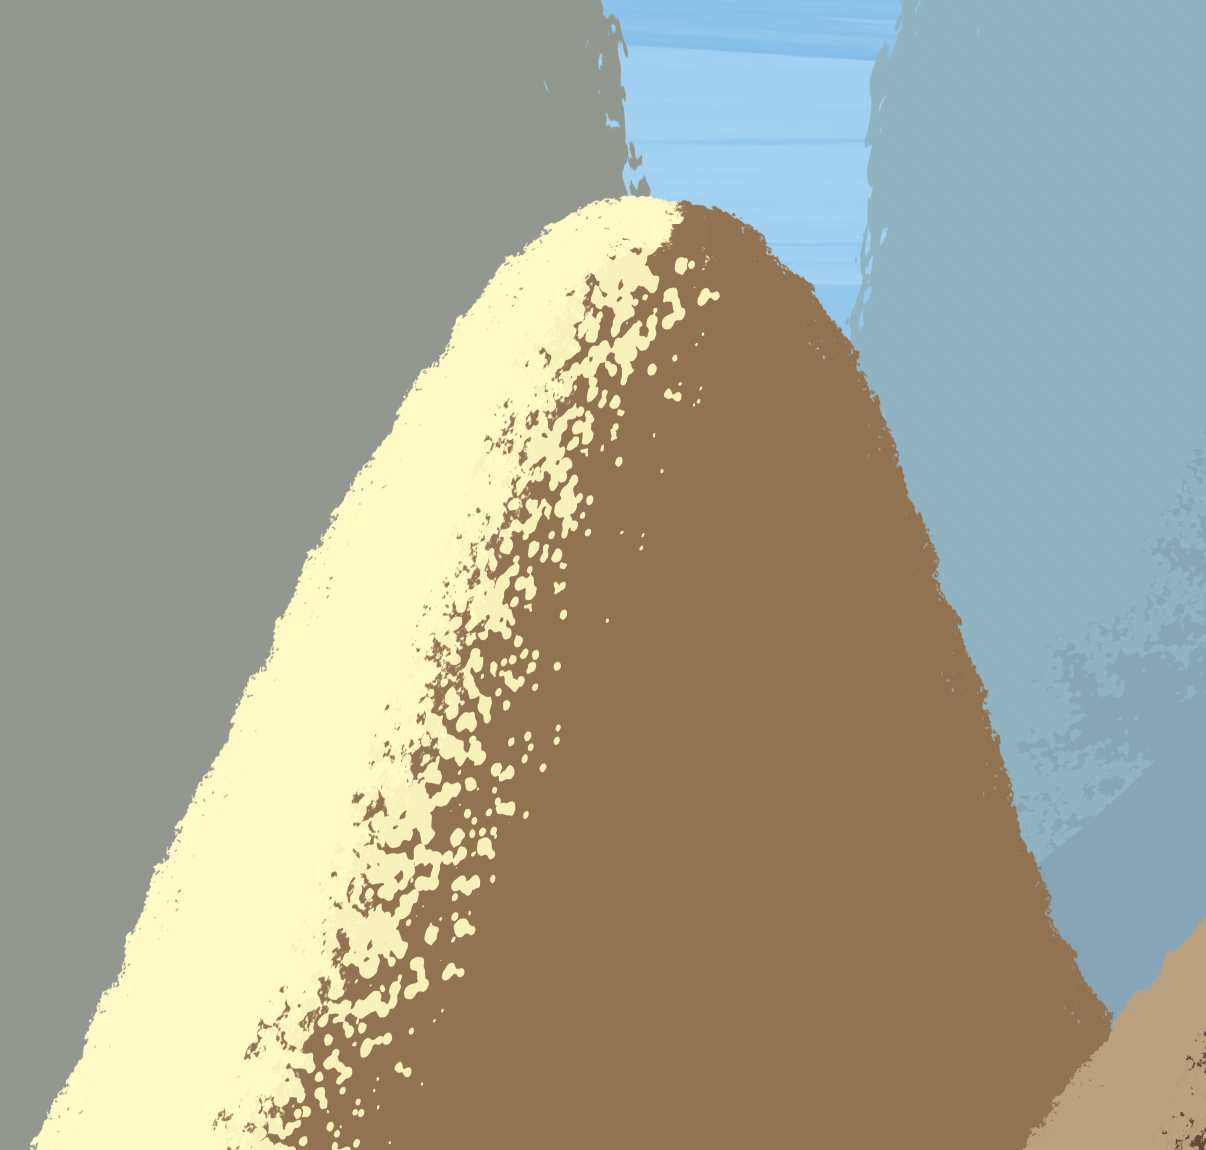
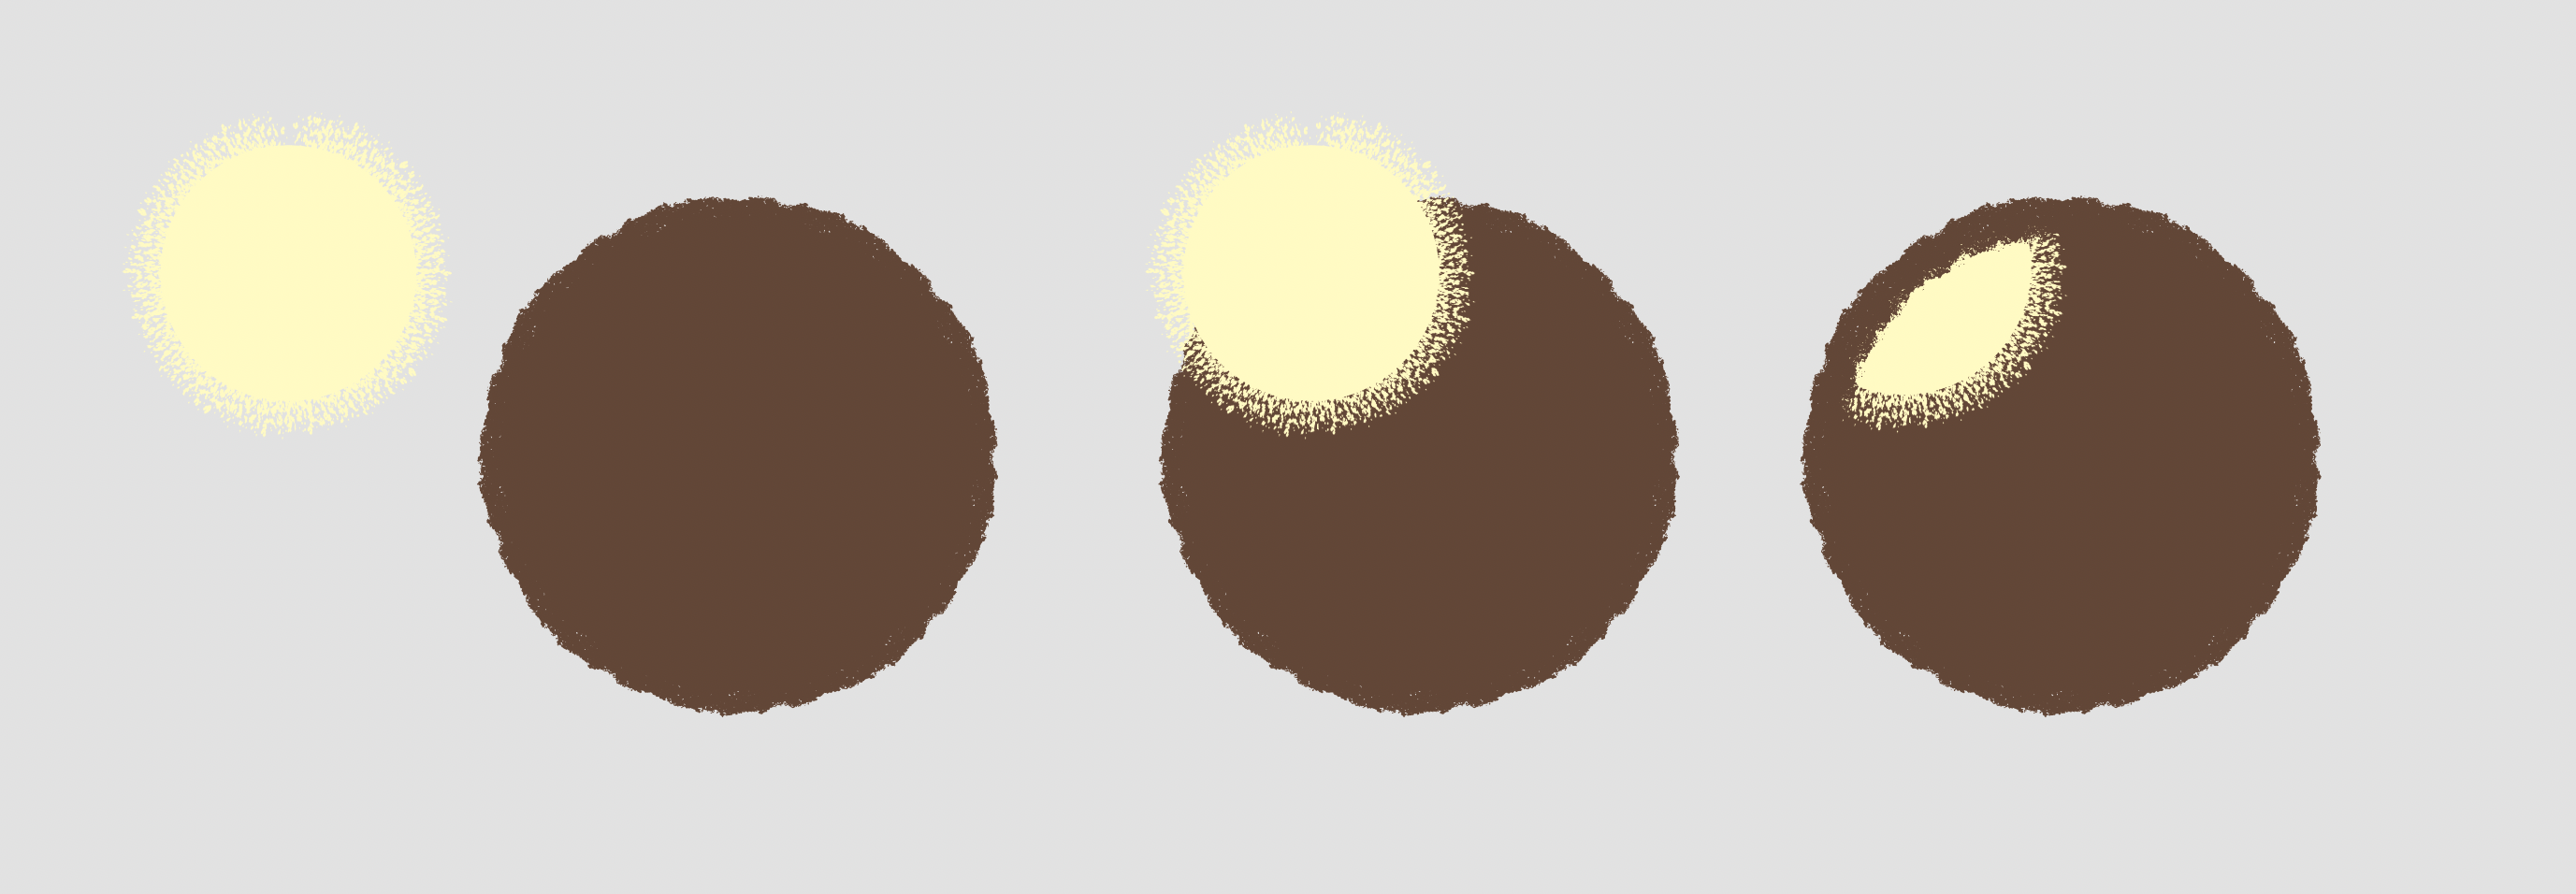
In Affinity Designer 2 I cannot figure out how to create the effect similar to the hill (center image). What I want is basically add a brush outline to a shape A, then add a brush to a shape B—and then have shape B clipped by both outline and all of the shape A, so that I is left with an added highlight to shape A. Any suggestions how this can be done without using an extremely time consuming workaround (like I did with the hill)? Thanks!
-
When saving an artboard using CMD+Shift+Option+S I save time if the default filename would be the name given to the slice in the Export Persona of Designer. Why use the filename when the file has multiple artboards and only one of them is exported?
-
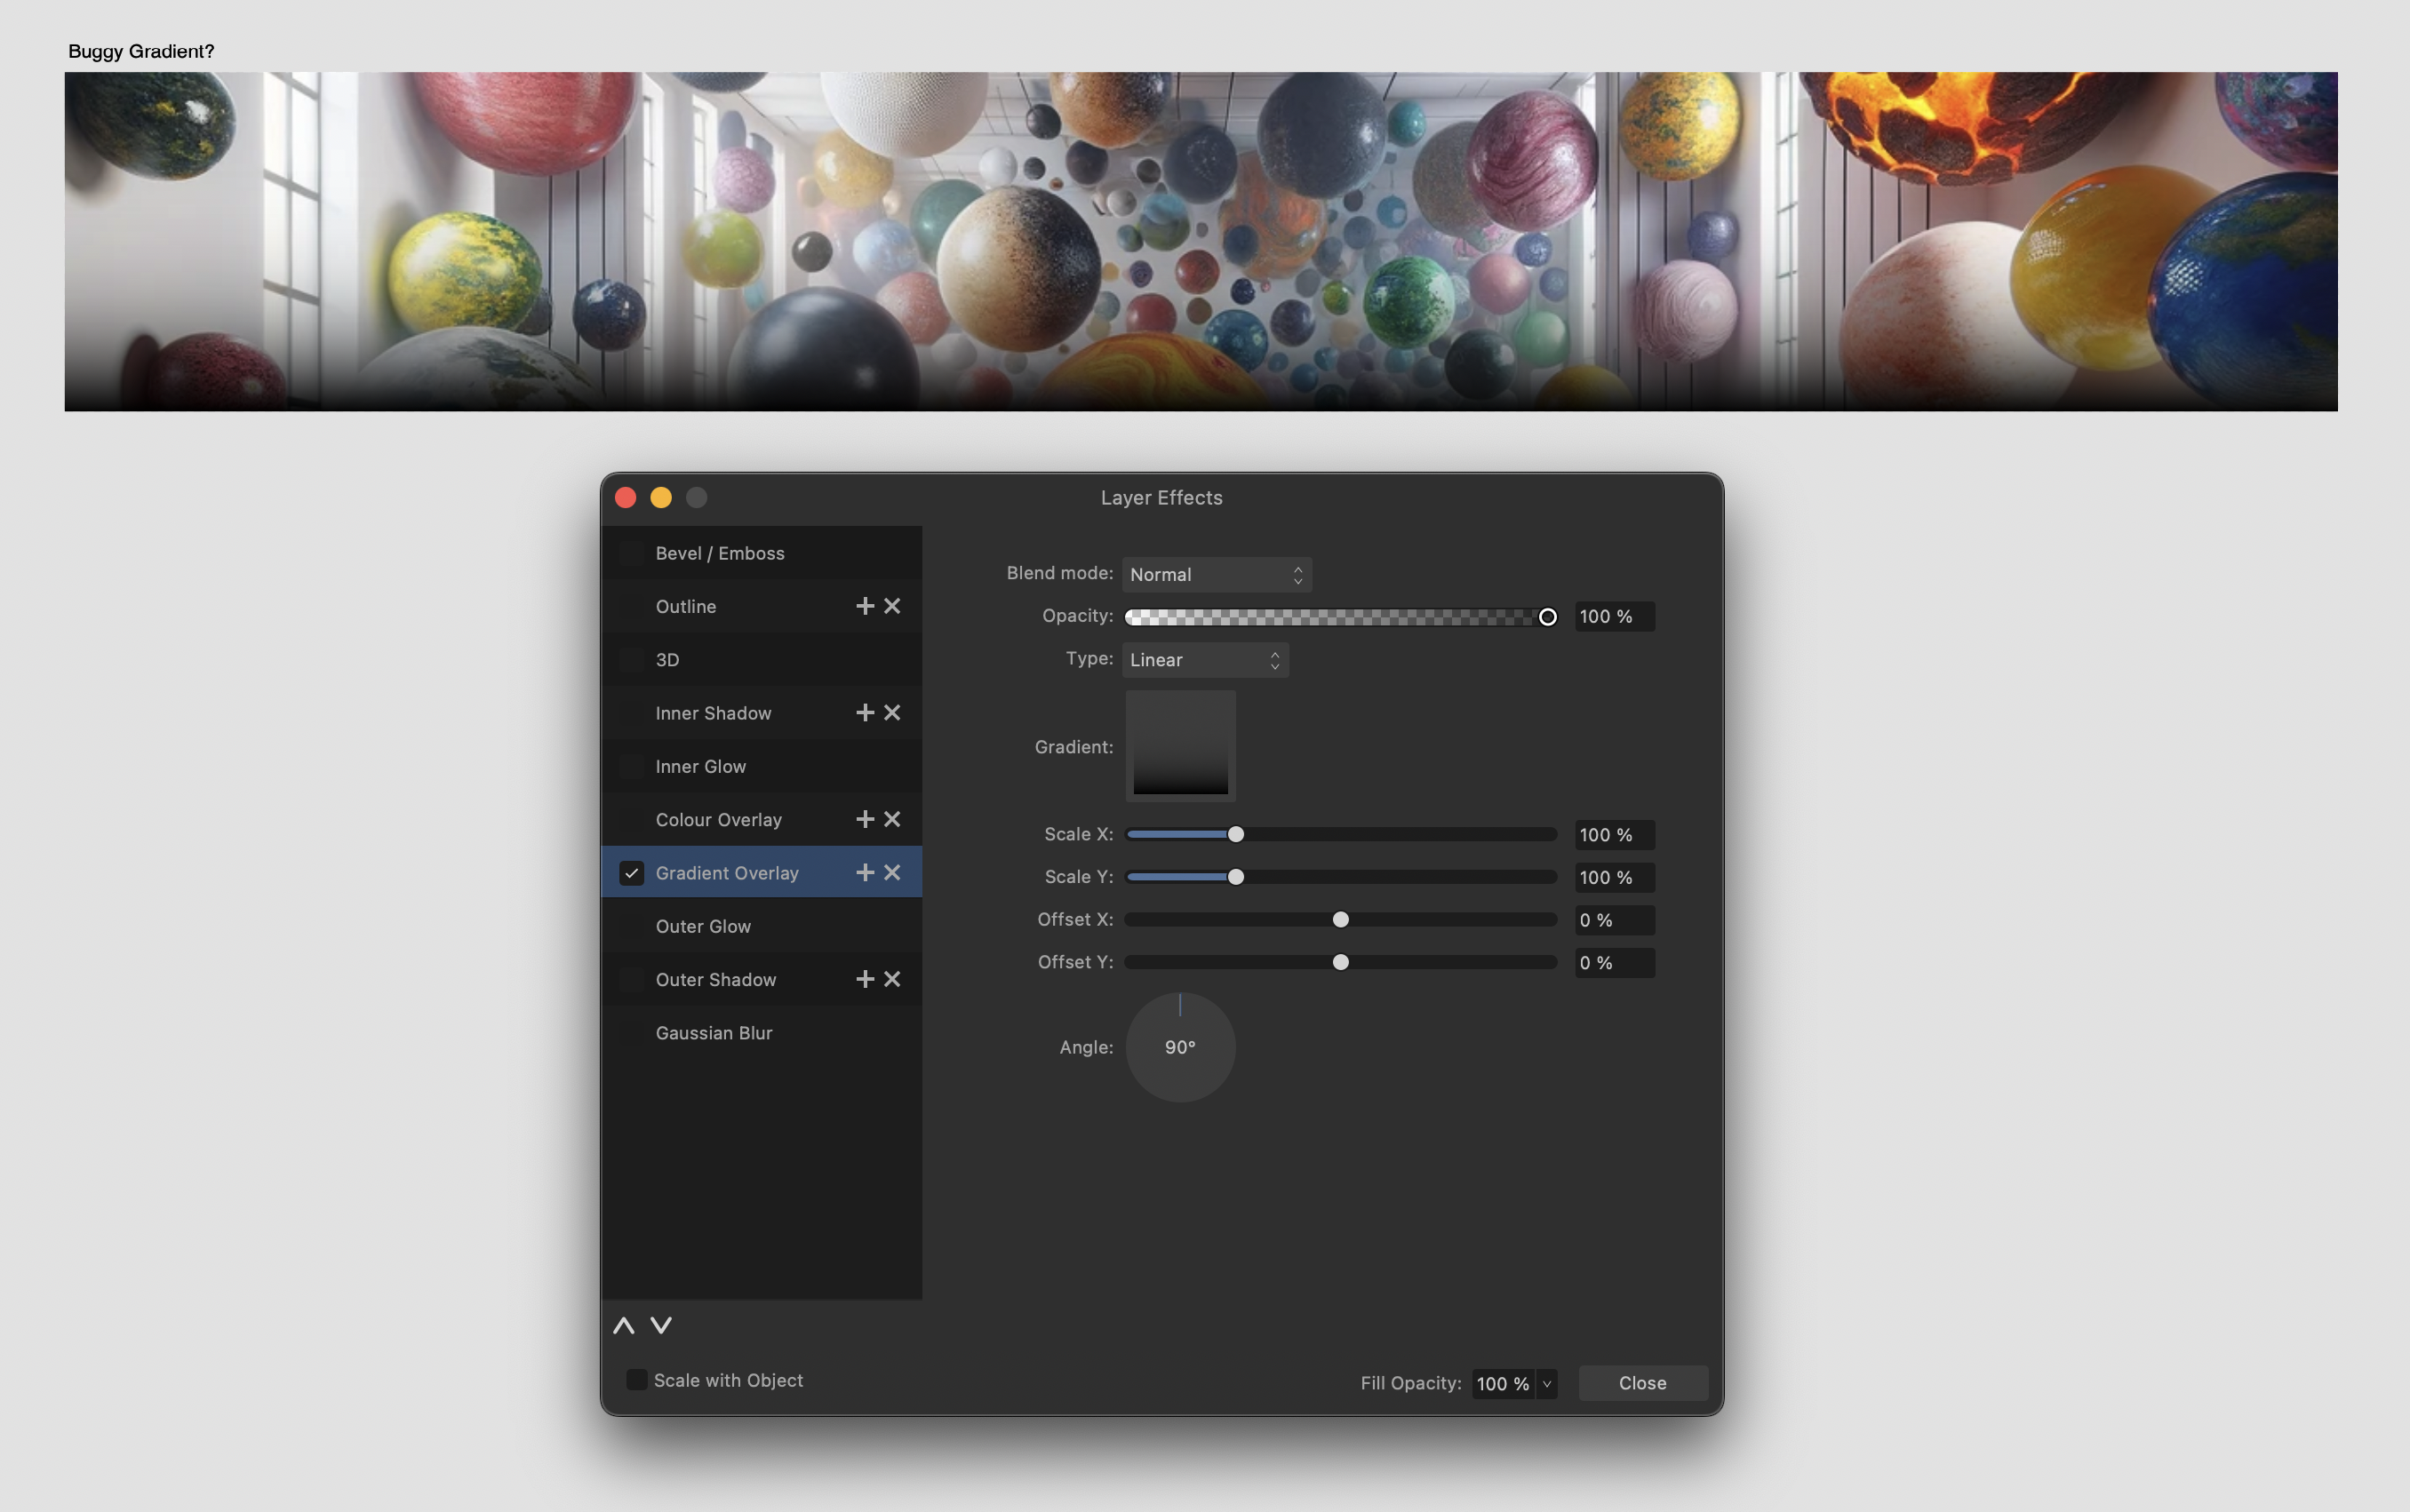
Version 2.2.1 MacOS 13.5.1 (22G90) Apple M1 Max 64 GB File attached. Buggy.afdesign
-
Hi, I have added a gradient FX to an image. When exporting it (CMD+Shift+S) I'm not getting what I see on screen. Behold! Johan
-
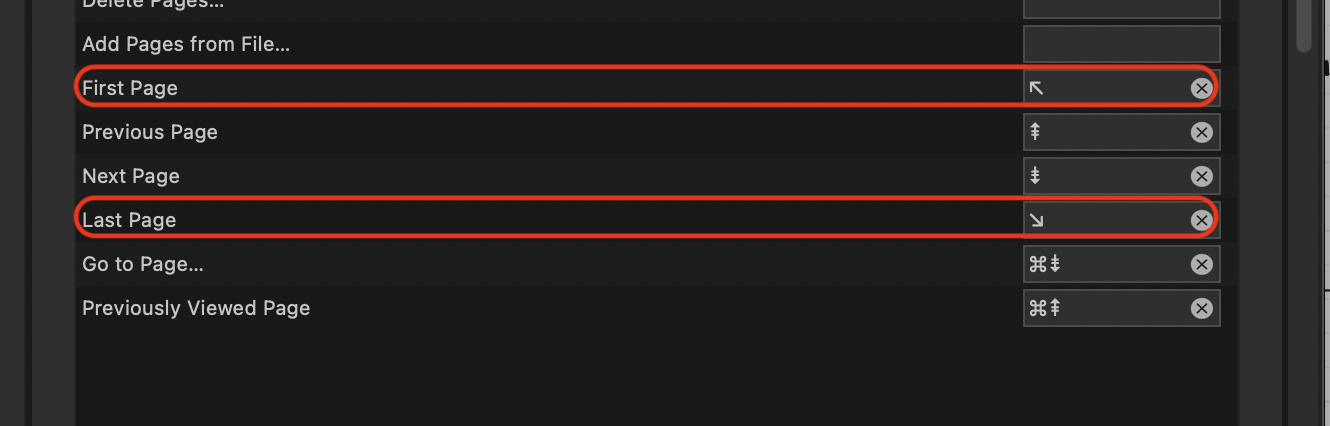
Thanks for that screenshot. First and last page shortcuts though, does not accept the appropriate keys (ref screenshot), so was forced to add CMD.
-
I have had this issue many times myself. They should add this as a feature: break up text flow into stand-alone text; i.e. severing the text links, making each text box independent.
-
Would be nice if the Page Up and Page Down would work to navigate a Publisher document.
-
Running headers
Gatada replied to Ash's topic in [ARCHIVE] 2.4, 2.3, 2.2 & 2.1 Features and Improvements
Hm, I have an other issue: it seems Running Headers is only taking 1 paragraph style into consideration? I want the table of contents to have space before some sections, to group the content. The only way to do this, as far as I can understand, is to have two header 1 paragraph styles: "Header 1" and "Header 1 + TOC space". The latter has space added to the related TOC style. However, the result is that the running header does not show the correct title, as it only tracks "Header 1". Is there any way around this? I do not want to have to update the styles of the generated TOC manually every time I "fix" the TOC. -
Hm, I have nested artboards, and the reason for this is my need for each "sub-dartboard" to show different parts of the larger image. Don't know of any other way to achieve this, without taking the detour by symbols.
-
Not even for text styled headings? I mean, the table of contents can do it—but I cannot? Oh man, that is a major bummer. The Hyperlink Properties dialog would be a great place to add a drop-down to select how the link should appear: Appearance: Unchanged (link) Page number Section text
-
Preflight Errors Not Important
Gatada replied to Row13's topic in Affinity on Desktop Questions (macOS and Windows)
I find the Bleed Hazard warning in preflight to be very silly: If I have an image or a shape that I want to extend beyond the page, I have to let the shape extend beyond the bleed area. So why am I given a warning? The page data inside the bleed area should be included in the export to ensure the dieline doesn't end up without print. "Intentional bleed" or whatever it might be called—should not trigger a Bleed Hazard warning. -
I solved this by changing the language of the Base Text Style. I don't know why it wasn't set to English (UK) or English (US) by default. I mean, when I create a new document, the dialog box doesn't ask me what language I want to use—so shouldn't it default to something sensible?
-
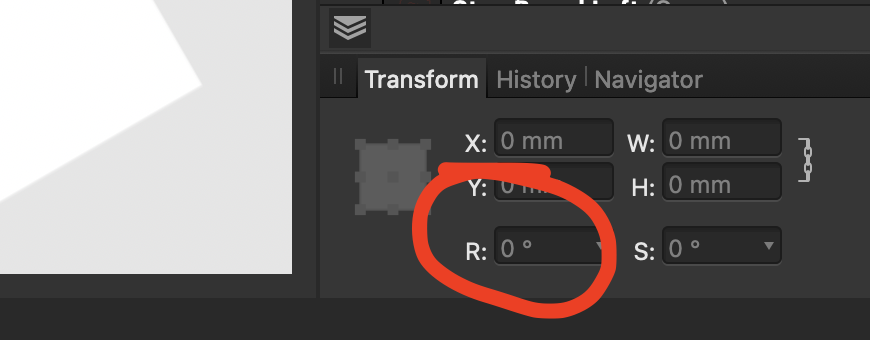
For all your apps that offer document/canvas rotation, when nothing is selected, please add the rotation of the canvas to the "R" field in Transform so I can manipulate it by typing. You know it makes sense.
-
Serif linked to your reply when I asked for inline cross-references - appears that this is now the "official" workaround. The lack of this feature is puzzling, to say the least. Anyway, thanks Walt. I might give it a try..
-
Cross reference support
Gatada replied to The Wook's topic in Feedback for Affinity Publisher V1 on Desktop
Yes, cross-references that are kept up-to-date when content move around is essential for me. I feel it is as fundamental as a Table of Contents. I'm really hoping work is already being done to deliver this soon 🙂 -
Been so long since I used PS and AI I don't remember, but is this for pixel or vector or both? Cause I'm here to post a feature request for copying the selection from a vector shape. Which I have not found a workaround for. So for vector, I could eg. select 3 of 6 vertices, and have only those three vertices (with only the connected edges) copied (CMD+C), allowing me to paste (CMD+V) to create a new layer. Your feature request sounds like the mouse-dragging variant of the same feature?
-
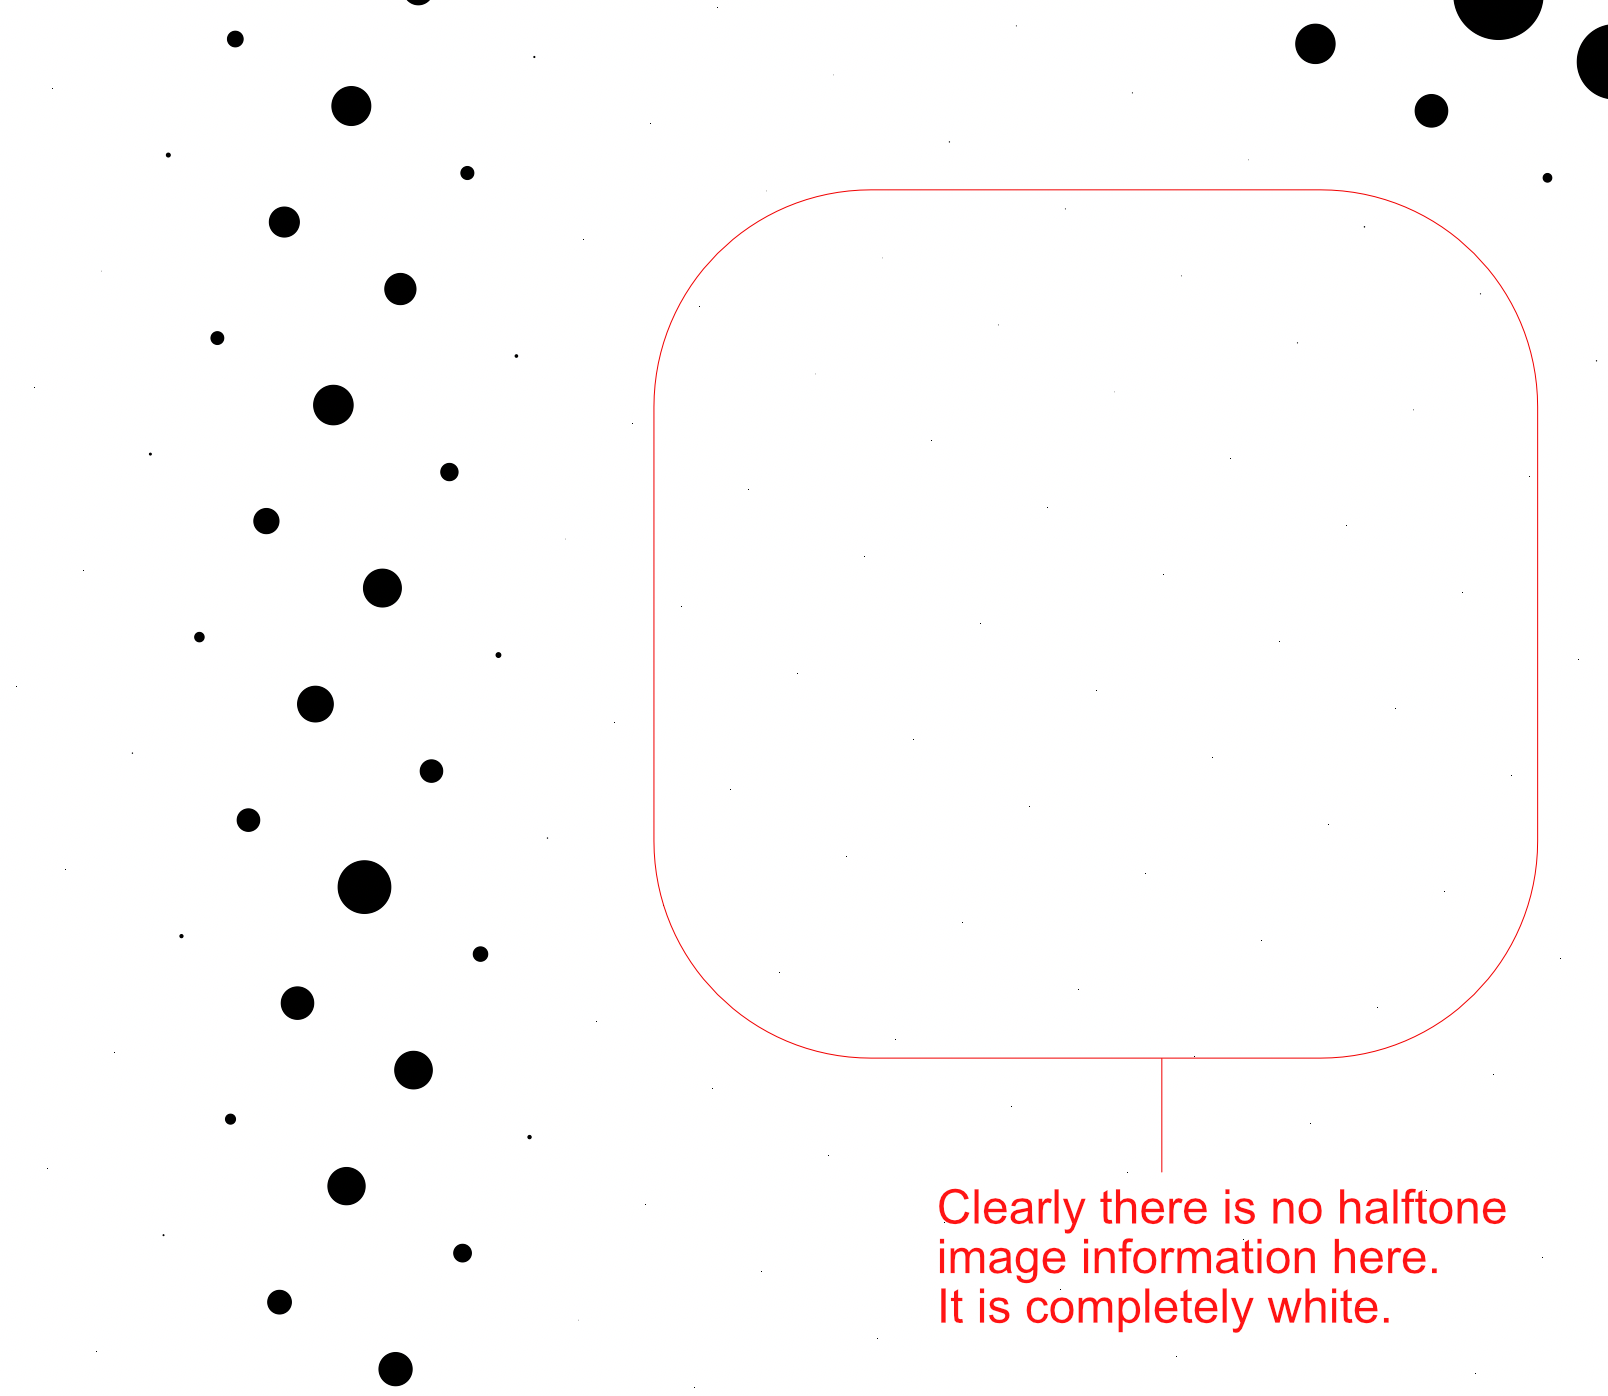
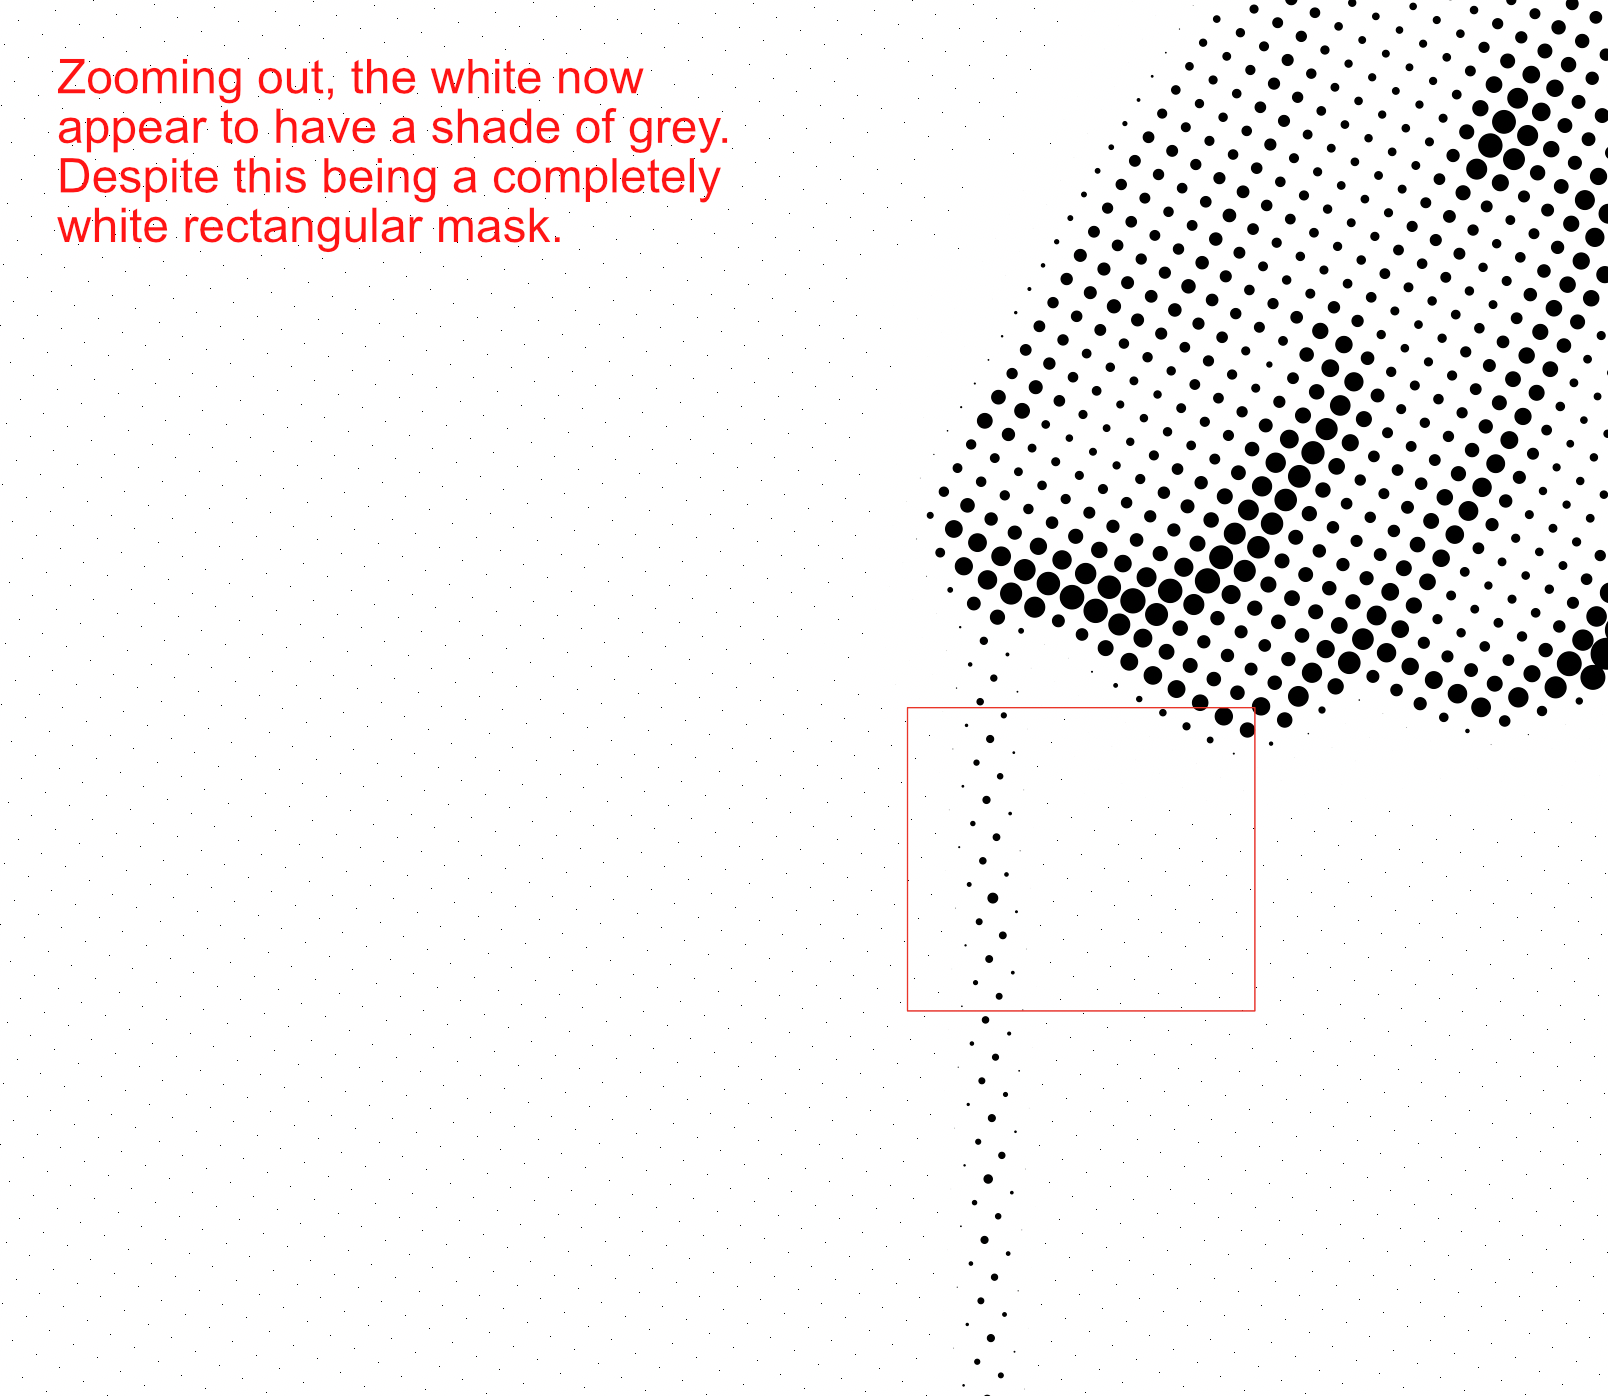
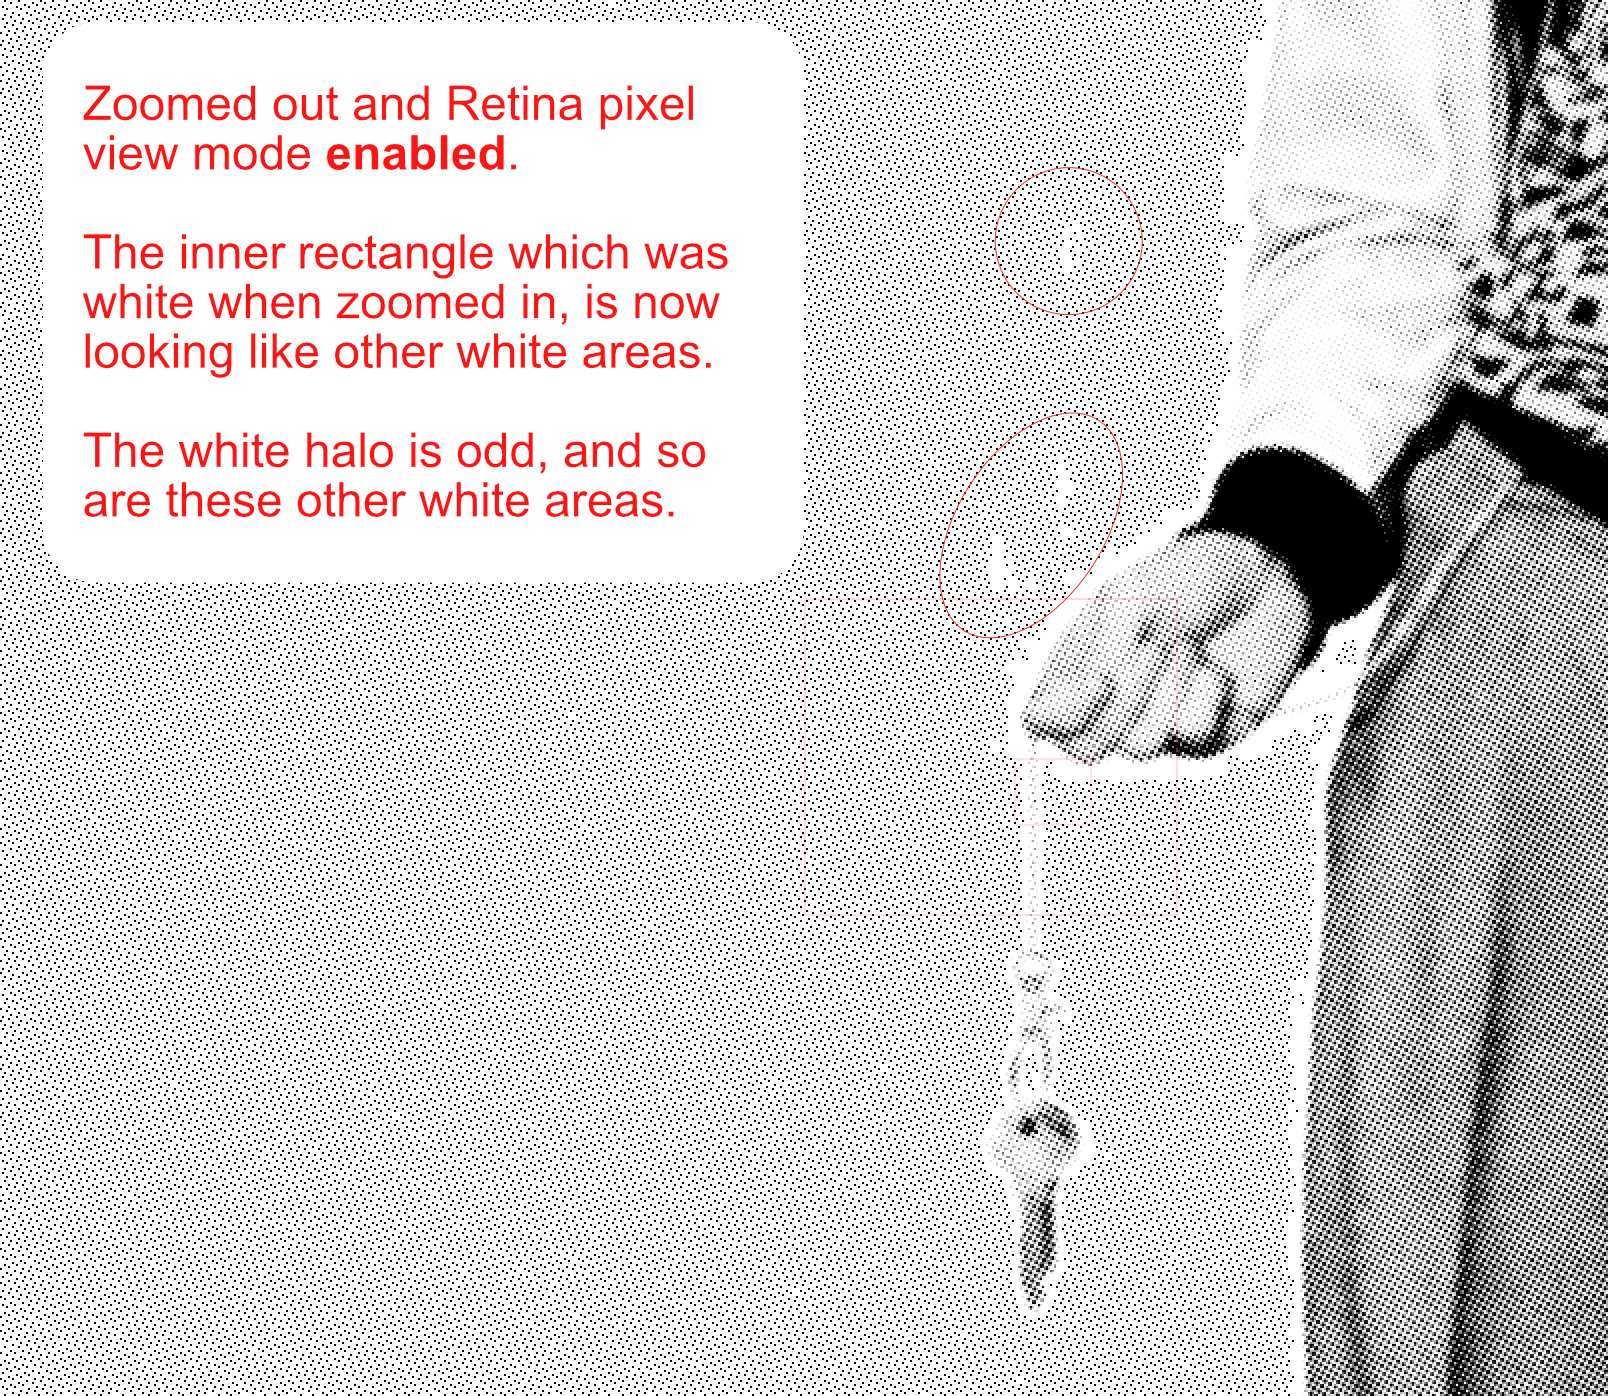
Err, maybe I didn't make the problem clear: the export is the issue, not the screen. The screen however, can be used to verify that there is no halftone details in the white areas, yet the export gets a base gray. The seemingly unavoidable problem is that: The completely white regions of the picture are exported as halftone "gray". The only white in the exported area is the halo around a halftone area. This is clearly not how halftone should work. Even the zoom on screen shows that the white turns gray when zooming out. Again, white should stay white in halftone - no matter the zoom level. A border is added to the image along the outer edge of the exported image. Any idea how to fix it? To me this looks like a bug in their algorithm, as the filter is really to simple to mess up. But I would LOVE to learn about any available workaround that does not require a manually added mask. In short: I would like any and all suggestions that will allow me to export halftone versions of photos containing white, where white stays white - without the demonstrated pixel gray. Thanks again!
-
Hey, I want to create a halftone version of an image. Seems only way to do this is by using Live Halftone filter? I am no expert, but I think it is safe to say that the halftone filter is not working as expected. Comments on the images themselves as well. This is a close-up of a detail in the picture, with no pixel view mode selected. Clearly, the white is entirely white - there are no real half toning going on here that is worth conserving in the exported image. Zooming a bit out, the halftone fill for the white remains the same size as in the first image; now a bit more visible. Enabling pixel view mode, the white is filled - as if it is gray. This is how the PNG export looks like. Which of course is completely useless. And white is there a completely white halo around the desired halftone pattern? Again with pixel view mode disabled, the white even is no clearly no longer white - despite the first image showing no such contrast. Same image with pixel view mode enabled, clearly making the issue even worse. I have no idea how to work around this, or how to "bake" the halftone at a certain zoom level - if that is possible? I need to fix this, as what I have tried so far results in rasterised exports (PNG, JPG, etc) that are completely useless to me. Am I doing this all wrong? Thanks, Johan