carl123
-
Posts
8,530 -
Joined
Everything posted by carl123
-
 From the help.... To crop an image to selection: From the Tools panel on the left, select any Selection Tool. Draw out the selection to set the prospective crop area. Select the Crop Tool. (Optional) Adjust the context toolbar settings. (Optional) Drag a corner or edge handle on the grid to resize the grid to suit, then reposition the grid by dragging within it. From the context toolbar, click Apply or press the Return key to commit the crop. It's 2 moves but much better than not being available at all
 -
[feature request] "rotate canvas" tool
carl123 replied to lashman's topic in Feedback for the Affinity V2 Suite of Products
Depending on your tablet and if you have a spare button available/unused you can assign that button as the Mouse Wheel then in conjunction with the ALT key that button will allow for canvas rotation using the tablet
-
Flood fill / Freeform lasso keyboard shortcuts?
carl123 replied to Bk1's topic in Affinity on iPad Questions
Actually it's my mistake I should have noticed you posted in the iPad forum Someone with an iPad may be able to assist you one way or another- 7 replies
-
- 1
-

-
- flood fill
- freeform lasso
- (and 2 more)
-
Flood fill / Freeform lasso keyboard shortcuts?
carl123 replied to Bk1's topic in Affinity on iPad Questions
If you are using Designer make sure you are in the Pixel persona to see those tools...
-
Convert curve to selection
carl123 replied to lrzf's topic in Affinity on Desktop Questions (macOS and Windows)
Use the Selection Brush Tool for this and then hit the Refine button to tweak your selection (if needed) then output as a new layer. (You can switch-off/hide the original layer at this point Lots of tutorials on the Selection Brush Tool on YouTube etc for cutting out objects. -
Flood fill / Freeform lasso keyboard shortcuts?
carl123 replied to Bk1's topic in Affinity on iPad Questions
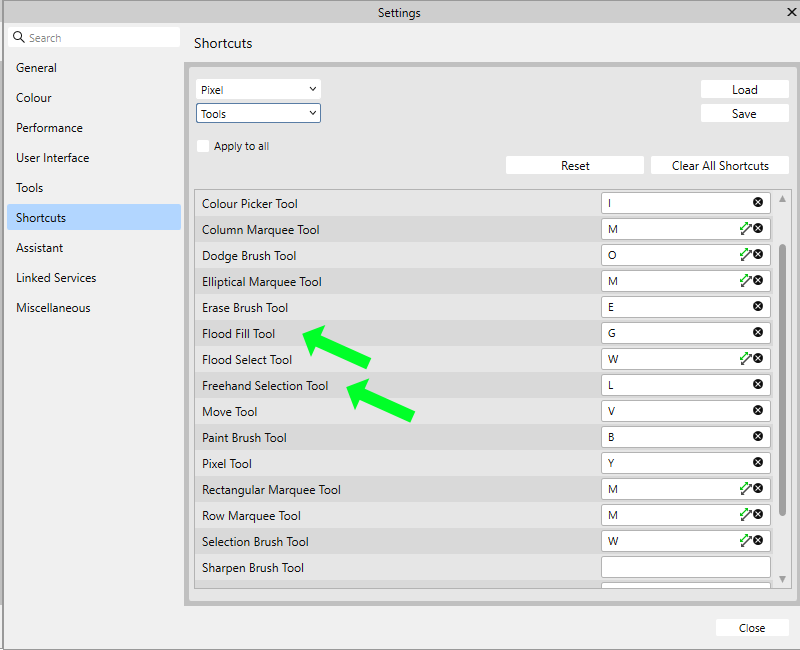
You can set shortcuts for "all" the tools in.... Edit > Settings > Shortcuts (Tools section) -
Unsure what you mean? But you should be using the Selection Brush Tool for this and then hitting the Refine button to tweak your selection (if needed) then output as a new layer and add whatever background you want Lots of tutorials on the Selection Brush Tool on YouTube etc for cutting out objects. Once mastered it's very easy to use on images like yours APhoto file attached so you can change the background if you want HoHoHo.afphoto
-
Remove "noise"
carl123 replied to TypeTosse's topic in Affinity on Desktop Questions (macOS and Windows)
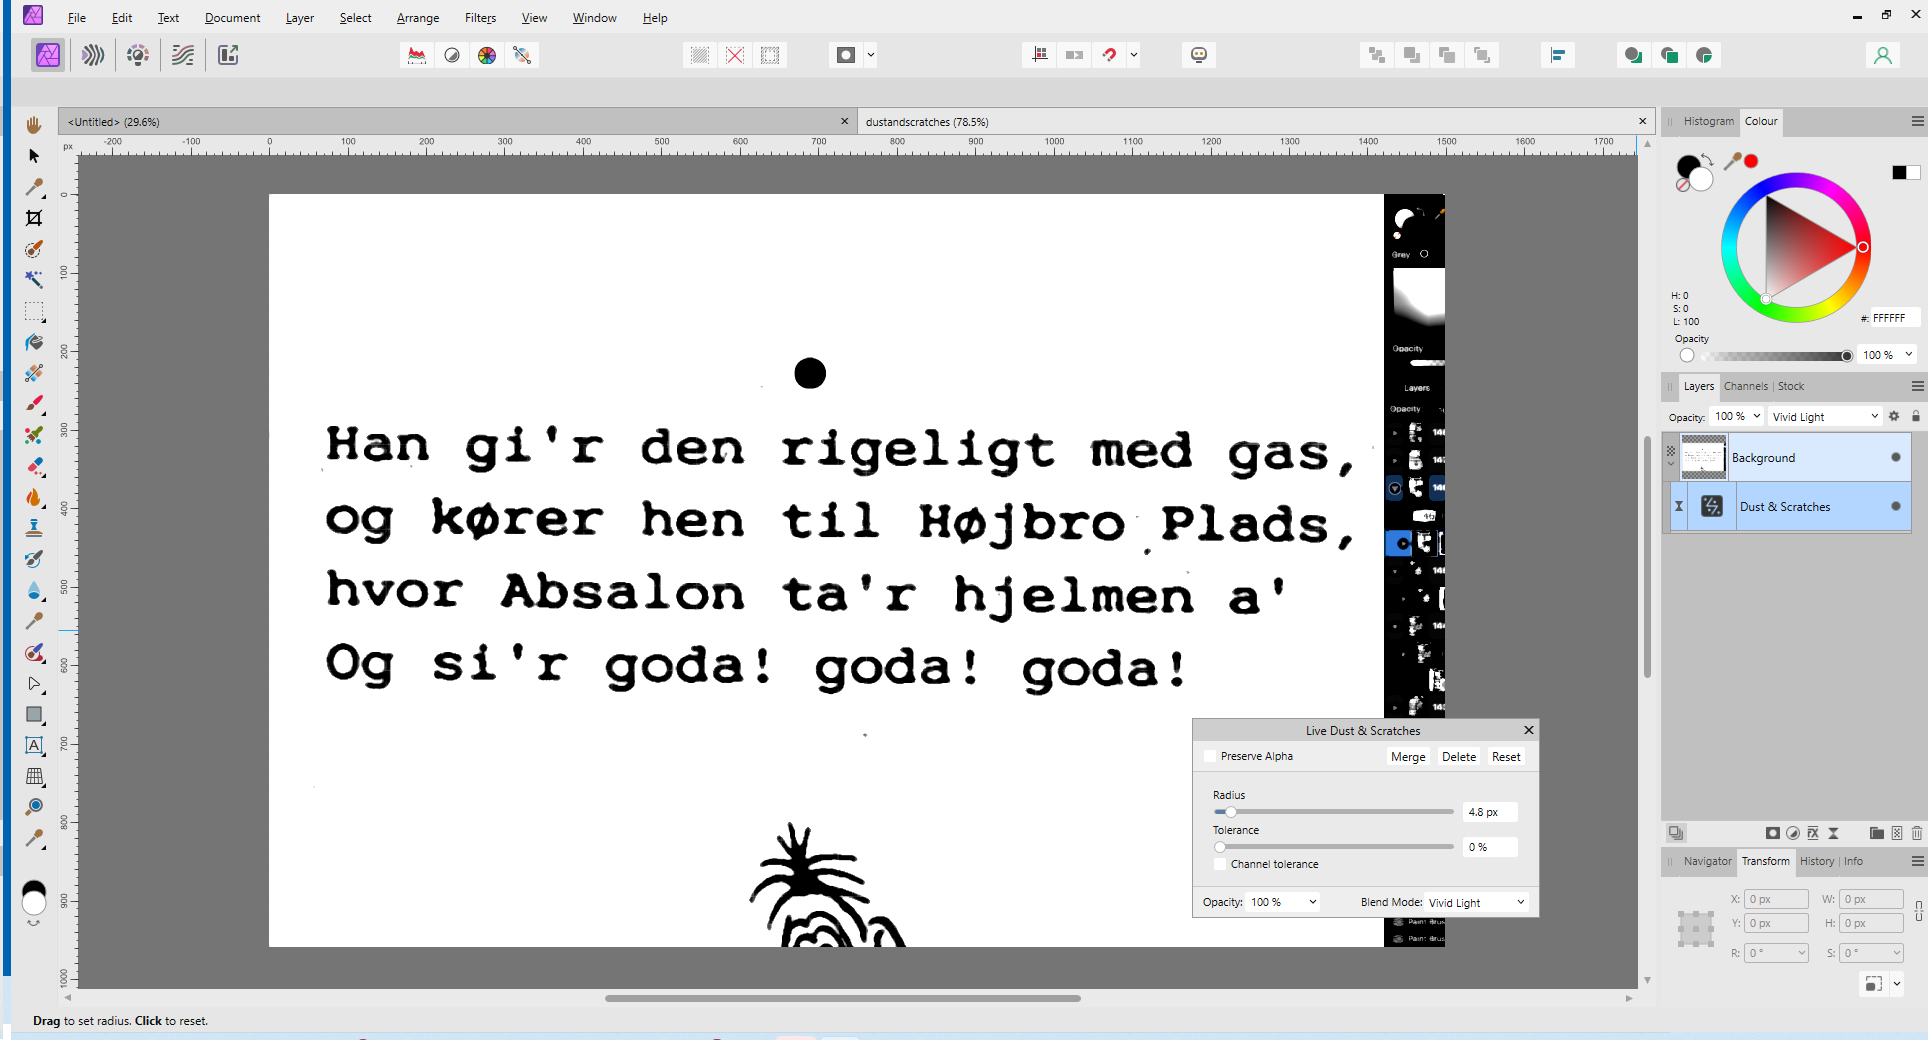
In APhoto try the Live Dust & Scratches filter with Blend Mode set to Vivid Light
-
dodge and burn with inverted layer
carl123 replied to edward g's topic in Affinity on Desktop Questions (macOS and Windows)
Check the Blend Mode of the Brush (in the context toolbar) is not set to Darken, it should be on Normal. There's been a lot of that lately If not that please supply a full screen screenshot at the point it does not work -
I would have thought that applying filters and focus stacking were more CPU and Memory tasks rather than disk I/O But you can monitor all 3 to see what exactly is being used and if there are any bottlenecks
-
Flexible Shapes behind Text
carl123 replied to deinTobi's topic in Feedback for the Affinity V2 Suite of Products
Alternatively... Create your trapezium then Layer > Convert to Text Frame Add your text & set shape background colour If adding more or less text just change width of shape to fit See attached file... shapetext.afpub -
Error: Does not compute! What exactly are you trying to do? You can't delete all guides in the document but retain some of them If some or all of the guides are the same on all pages you can place the guides on a master page and then just delete them from the master when you no longer need them
-
View > Show Guides works across all pages You can also make all Guides invisible by changing their colour in the Guides manager (View > Guides...)
-
The Rotate (canvas) commands are in the View menu
-
With the Master Page field having focus but without activating the drop-down list in your screenshot can you select the required Master page by using the up/down arrow keys?
-
Every Publisher files are corrupted!!!!
carl123 replied to gianni.brienza's topic in V2 Bugs found on Windows
If you are still getting file corruptions on NEW files (not previous ones) disable pCloud synchronisation for wherever you store you Affinity documents locally Also, don't store/save your Affinity documents directly to pCloud (if that's even possible) Then see if you still get file corruptions on documents created from that point forward (we need to eliminate pCloud synchronisation as a possible cause) Don't forget to periodically backup your documents to another drive (not a synchronised cloud service) just in case you need to restore something later -
Me too but it doesn't But if you create a new blank master, you can apply that with Migrate and it works. Then delete that blank master (optional) Bear in mind Migrate only seems to work for Frame Content (e.g. Text Frames or Picture Frames that have had content added on the corresponding regular page) It does not work for stuff like shapes or images just placed on a Master page
-
Select the pages in the Pages panel Right-click and select "Clear Masters" Is that what you did previously? Or do you want to promote all existing Master page content onto the normal page? (for several pages)
-
Did it open for you?
-
On first glance it is recoverable using the "Add pages from file" method and can be opened but it warns there are still some "file errors" I'll upload what I have for now but I think the official support staff will need to take a deeper look at it Let me know if you can at least open the attached rec4.afpub
-
Which Affinity app(s) do you have? Can you upload the file to the forum?
-
Unable to open file
carl123 replied to der_gent's topic in Affinity on Desktop Questions (macOS and Windows)
Bye -
Unable to open file
carl123 replied to der_gent's topic in Affinity on Desktop Questions (macOS and Windows)
On Windows any app/dialog showing on the 2nd screen can be moved using the Winkey+Shift+Left/Right Arrow Keys So, it's easy to move an app without having my 2nd screen switched on but I just have a desktop so no mobile working so I can't test if that works without physically disconnecting my 2nd screen (which due to my cable management system, is not easy to test right now) In addition, Windows appear to have some settings (see below) that may control what happens when a 2nd screen is disconnected. I'm not sure if Macs have something similar but I'm surprised that we have not had a lot more reported issues with using Laptops and mobile working if this is a generic problem.
-
Yes, (but be sure to attach the actual image files not screenshots of them)
-
Unable to open file
carl123 replied to der_gent's topic in Affinity on Desktop Questions (macOS and Windows)
All my work is done on my main screen but I have other "monitoring" apps (e.g. Task Manager) automatically started on my second screen when I switch on my PC I don't use my 2nd screen every day and just switch it on/off when I want to see the status of those apps In my opinion it would be wrong (and very annoying) for those apps to move themselves to my main screen if they detect my 2nd screen it not available/switched on.