Glennsart
-
Posts
67 -
Joined
-
Last visited
Everything posted by Glennsart
-
 @Mike V - FYI, I updated to Ventura tonight after loading in the newest Wacom drivers (released on the 15th). My functions all appear to work just fine. I'm not sure about the Wacom Desktop Center. They claim there are still a couple of problems with it, but I have found the new DTC pretty much useless to be honest. It keeps telling me that I have a firmware update available to me, even though I've installed that firmware 3 times now; and it never let me know about this (and possibly the previous) driver update. I deselected the auto-start function in that and won't run it anymore. Anyway, thought I'd let you know FWIW.
 -
@Mike V - thanks for this. I am curious though - Ventura should not be blocking the download. It might ask you if you want to download from the Wacom Site (that's a Safari thing though), but it should still allow it. Are you using Safari, or another browser? In terms of the security settings, Wacom Drivers have always required you to go into System Preferences (now Settings)>Security & Privacy, and grant permissions there. I think they used to do that more or less automatically but Ventura is somewhat tighter that way so you probably have to do it manually. Now, from what I'm hearing, even doing all that doesn't necessarily mean the tablet will function as a tablet under Ventura. What exactly is taking Wacom so long in getting drivers up and running I'm not really sure, but they are behind Xencelabs and I think even Huion in this regard. I agree with you, let's hope they get things sorted out sooner rather than later (although to me, it's already, 'later'). Thanks again for posting. Appreciate your input.
-
@Gnobelix - Thanks for this. I'll check that out .
-
Yup, I get this too with my Cintiq 24 Pro. @Gnobelix, where do you find the "Scaling" option? Is this somewhere in the Affinity Preferences or in the Wacom setup? Thanks .
-
Ok, thanks for this. Actually, the OS is the 'parent' so it's up to the apps (the 'children') to adapt to the OS. That's definitely not a knock on developers though, especially Affinity. They've actually been ahead of the curve when it comes to the changes over the past couple of years. It does take time to get everything sorted out and I'm sure they'll get that glitch sorted. Anyway, I really appreciate the input. By the by, this is a relatively minor thing in the end. I chatted with Wacom recently and they told me they 'hope' to have drivers ready for their tablets in time for the new year. THAT I'm not happy about at all. So, I may not be updating anytime soon I guess . Thanks again @mach49
-
@MikeTO - Many thanks for this. I'll check that out. I've heard similar things elsewhere for other apps as well. Appreciate your time.
-
I'll preface by saying I checked the News section of the forums first and didn't find any announcements regarding my subject. Just wondering if anyone is using Affinity Photo and/or Designer on Ventura yet, and if so, are there any serious issues you've found. Also, is anyone running Ventura and using a Wacom Cintiq and/or Intuos Pro? Again, if so, any issues. Thanks a bunch .
-
I suspect t could get messy as you suggest. However prophet’s idea works very well, and it’s quick and easy, so we’re mostly good. Unfortunately it also bakes in some other clipped layers as well, so we’re still not quite there with it, but I’m a lot further ahead than I was before. Either way, I really appreciate yours and the others input. It helped a lot 👍. Many thanks.
-
Ahhh yes, I see what you're getting at. That does work if I have a fill in those curves. However, without that, no, it's not working. The curves are closed, but not filled. In my graphic, the curves and subsequent selections contain windows in a house that will have lights shining through them from the inside, so a fill doesn't work for these. I'm not quite sure how the program differentiates between the fill and non-filled curves, but it does seem to. Good idea though, and yeah, it should work, but alas... . Many thanks .
-
Ok, so that does select each curves layer, but I don't see where I can make selections from that, unless I do as prophet suggested, going through the Geometry option. Selecting the layers isn't an issue. It's making selections from the vectors that were drawn out using the Pen Tool, where one has several vector layers to be made into selections at the same time (i.e. in my example, 8 selections showing at the same time). I did try out your suggestion and yes, that selected all the curve layers, but there were no options to turn those all into selections at the same time. Am I missing something here?
-
@Old Bruce Yes, I did try from the Menu as well, but no luck. Perhaps it was the layer structure, I'm not really sure. Thanks though - good thought.
-
Ok, found the solution. It was kind of a mixture of the ideas here. I merged the curves using the Geometry option @prophet suggested. Then I simply clicked on the Pen Tool and the Selection option became active on the Options bar. That did the trick. I did try grouping them as @Old Bruce suggested but it didn't work. Even after clicking on the Pen Tool, the Selection option never became active. So, I'll file this little bit of info away and continue with my project. Thanks a bunch people .
-
@prophet - thanks, I'll give this a try (this is the 3rd time I've tried to post a reply - not sure why they aren't showing up) .
- 17 replies
-
- 1
-

-
- affinity photo
- pen tool
- (and 1 more)
-
Thanks for this. I'll give it a go. Appreciate your time .
-
I've made about 8 curve layers via the Pen Tool that I wish to convert to selections. These selections should all be active simultaneously (like adding selections via the lasso tool). The selections are discontinuous over several parts of my image. I can't quite figure out how to make this happen. I can convert each curve to a selection, but that only happens one at a time and as soon as I convert the next curve, the previous one deselects. Is there a way to do this such that all the converted curves are active at the same time (have the marching ants around them)? Thanks very much.
-
Well, don't I feel stupid. I certainly got sucked in, thinking that was something you (@DinapixStudio) created yourself. While the artwork is certainly impressive, I am definitely not impressed (at least, not in a good way) by you allowing me to think you created it by hand/stylus. My artwork may be less than great, but at least it's mine, generated from my mind, through my hand and onto the digital canvas via Affinity software. It's not generated by a series of commands via some AI software. AI art is coming for sure, but you need to state it was generated by AI up front, given the audience and the hosts of this forum. To not do so is disingenuous.
-
That's impressive!!!! 😳
-
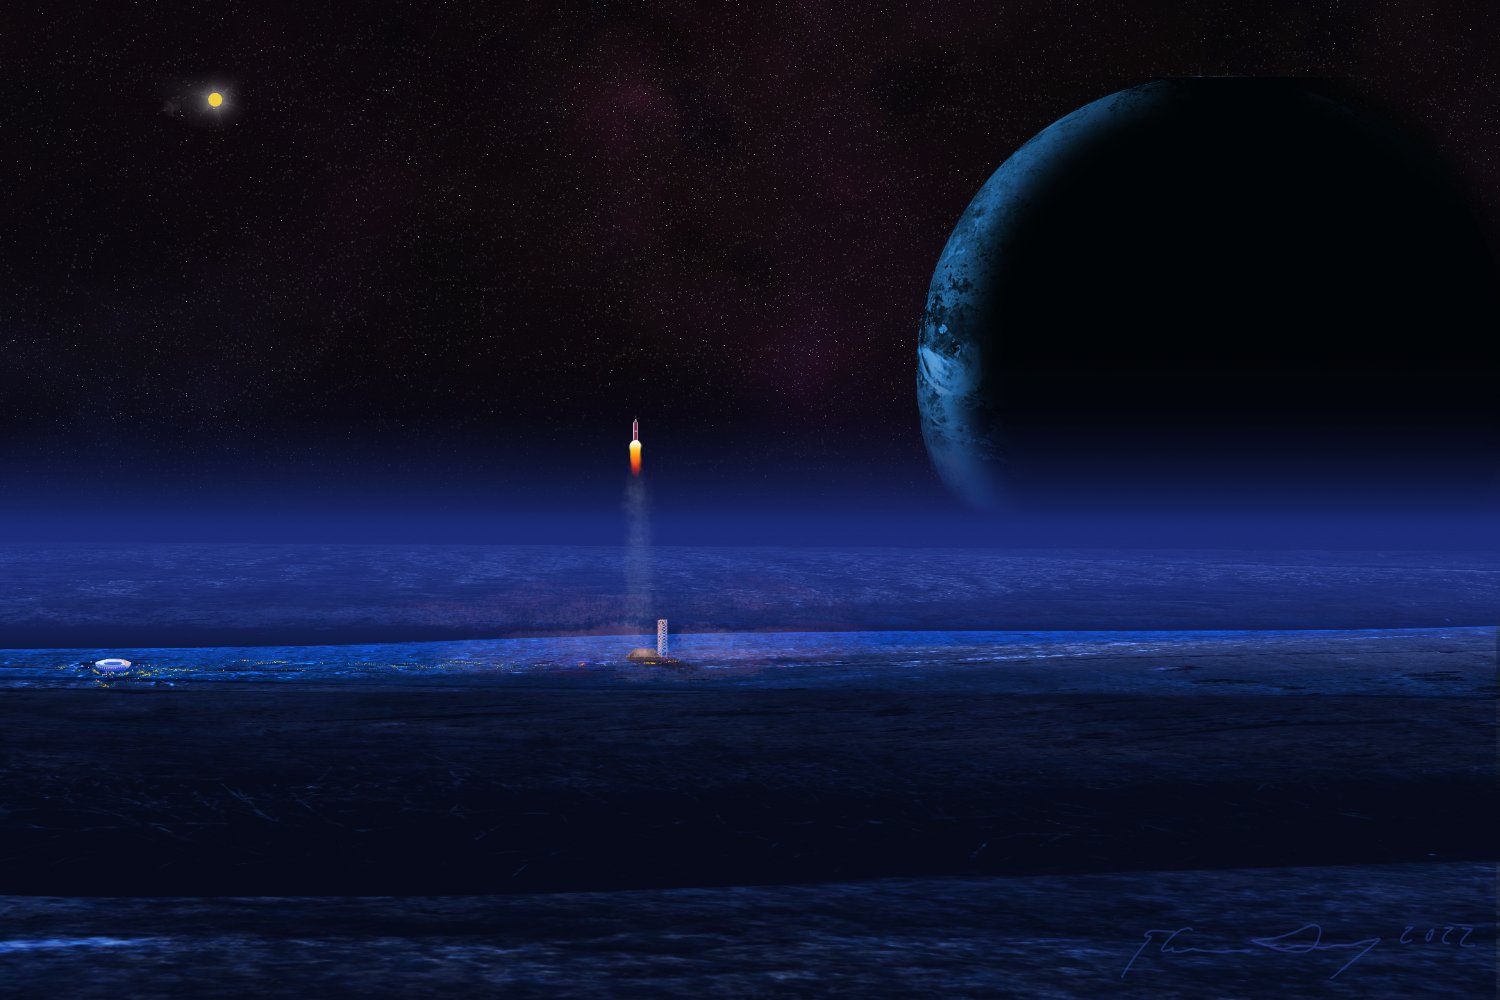
In a galaxy far, far away... oh wait, that's been used already. Ok, never mind (but it is! 😁). Anyway, my iMac died last week and I'm stuck temporarily on my MacBook Air until my Studio arrives (probably in a month 🤞). I can't go that long without producing *something* so I made do with the MBA's 13" screen and my Intuos Pro, and just started playing. This is a composite/painting done in Affinity Photo and Designer. The rocket was made in Designer then brought into Photo. The planet we're on is actually a 2 x 3 foot section of granite I photographed a bunch of years ago for a client plus there's another rock outcrop in there from the same shoot; the moon is a moon I got from Universe Creator picked up from Design Cuts, as is the flare around the sun and the gas clouds. Everything else is coloured/designed/placed using Affinity Photo. It's not much really, but I had fun (and I'm now blind from squinting at a 13" screen 😆). Enjoy.

-
- 3
-

-
- affinity designer
- fantasy
- (and 1 more)
-
Promotional Suggestion
Glennsart replied to Glennsart's topic in Feedback for Affinity Photo V1 on Desktop
@SrPx - thank you very much for this, and I too apologise for the long delay in responding to you. I've been "consumed" with experimenting of late 😜. More on that in a minute. I'm really encouraged by what you have written here wrt your ability to get the "traditional" look that I'm trying to achieve. Now one quick note before proceeding, I have been checking out Rebelle 5 since it is really designed to do what I'm trying to do in regards to painting (for compositing or photo editing, I've found none better than Photo and Designer, so that part hasn't changed). I just noted your remark regarding not being able to do large canvases in Rebelle. Is that due to brush lag, because that's something I read about on their forum and is what's keeping me from buying it. If you could comment, that would help me greatly. Anyway, back to Photo. I'm using a Wacom Cintiq 24 Pro and so I have my pen size adjustment shortcuts keyed to my pen button, which works reasonably well (it's a bit "sticky" sometimes getting it to move initially however). I am intrigued by your making of simple round brushes mimic traditional media (or perhaps is more in how you use them than the brushes themselves?), and to be honest, I think I would like to give that a try myself. It would sure simplify things. It is something I'll have to work at a bit though. I should also mention that I'm now a hobbyist so I have no demands on me in terms of 'gigs' and whatnot anymore. My genre in the painting is landscape (realism style). I don't do any illustration work at all. I just tried this out now and all I get is basically the "More..." window opening with the same options as if I had clicked the "More..." button at the top of the frame. Is there something here I'm missing? In terms of lag, I have to say I've never experienced a serious lag in anything I've done with Photo or Designer, so pretty much all the options are open to me that way. Now, I am typically making my paintings around 36x24" 300 dpi so I'm somewhat below the sizes you are dealing with, which may be why I'm not experiencing any lag to speak of. The idea of just using 3 brushes though, is one I really like the idea of. I've tended to download gazillions of brushes in the past with less than great results, so obviously I'm doing something wrong there 🙃. I'm running v1.10.5 for both Photo and Designer and my computer specs are in my signature. I do know about the Flow and Accumulation settings of course. The issue I have with the Flow settings is that with a round brush and the spacing set to less than the diameter of the brush (as you would see if your spacing was set to 1%), then basically you are drawing over your initial stroke many times over by simply moving the brush at all. Since each round brush is basically a circle, these circles will overlap several times as you drag the brush since you are laying down a circle based on the spacing setting. As such, as soon as you move the brush any distance, your flow will increase several times over as you drag from one side of the brush to the other (this is a bit hard to explain in words). With that, even if you set Flow to pressure sensitive, you will never get a very light flow of a stroke that is overlapping itself from the outset. Set the spacing to the diameter of the brush and then you will see a light to strong flow, depending on the amount of pressure applied, but you will also have a series of regular circles, not a continuous brush stroke. With Opacity, as you know, you have to lift the pen from the 'canvas' then reapply in the same place to increase the opacity of the stroke. Until you do that, the stroke will stay at the same opacity no matter how long the line, depending on how hard you press on the stylus (if pressure sensitivity is turned on). I think I need to experiment a bit more with this, and after reading your post above, you've given me some ideas with which to work. Another realization has come to me as well - with oils there is a limited ability to play with opacity anyway (using traditional media). It's more about the loading, and the Mixer Brush in Photo is actually quite brilliantly done IMO, so that option is certainly open to me. Anyway, I will work with this and look deeper into your suggestions for my own work. Thanks so much for all this, and again my apologies for being so late on this. Oh, and if you could drop me a quick note re Rebelle and your experience with it, I'd very much appreciate that. I can't really afford to be buying software that doesn't work anymore (one of the reasons I'm so pleased with Affinity - it does work, and work very well). Thanks again . -
Being somewhat new to Affinity Photo, I have discovered this recently as I'm doing a painting (several actually). This design feature, admittedly, is driving me insane (ok, *more* insane, if that's possible 😂). So, let me add my voice to the gang that really hopes for a change in this. I often change the size of the brush as I'm working then wish to select the same brush again to reset it, but I often don't remember exactly which brush I chose. Not having the names in the window (other than by hovering, which I commonly don't do if I'm really concentrating) sure doesn't help. Let's hope the powers that be see this (and others who have commented on this) and fix that in the next update 👍.
-
Resource/Memory Issue Merging Layers...
Glennsart replied to Glennsart's topic in V1 Bugs found on macOS
Ahh, very good. Easy fix. Thanks for this. -
Resource/Memory Issue Merging Layers...
Glennsart replied to Glennsart's topic in V1 Bugs found on macOS
A quick update - turning off Acceleration does help greatly with this. Merge times are reduced to a few seconds and the memory pressure stays under 60%, although it does rise significantly from where it was previous to the operation. That's likely to be expected. -
Good Day. I've run into a verifiable/reproducible issue when merging layers that originate from another file type than an .afphoto format. I noticed this when working on a multi-layered painting that was in the .afphoto format, and I copied in a .png file as a new layer. If this .png layer is then resized downwards then duplicated (in my case, 3 or 4 times) followed by a merging of those layers, the memory pressure on the Info Panel shoots from about 20% to roughly 150% and the merge can take minutes to an indefinite period depending on how many layers that file was copied. I increased my max RAM limit in preferences to the max and while that helped, it still took an extended period of time (in my case 15s to 2 minutes) to merge those layers, and after several minutes following the merge my memory pressure was still so high that doing anything anywhere on the computer was pretty much impossible. I am enclosing the file herein and below are the instructions to reproduce the issue. Please note I sent this same file to a friend (also on a Mac but not the same models) and he was able to reproduce it on 2 of his machines (Mac Pro and MacBook Pro). Instructions for reproduction: 1. Open the .afphoto file enclosed 2. Note the 4 layers at the top entitled "Smoke" 3. Select all the layers marked "Smoke" 4. Go Menu>Layers>Merge Selected. Note the layers entitled "Smoke" were a single .png format that was resized and duplicated 3 times as layers within this document. The same thing has happened when I imported .jpg files to an .afphoto document. You should see the issue arise from that. Note that if you duplicate other layers within this document that were part of the original file and saved as a .afphoto file, the merge using the above is instantaneous. Further, if I first save the imported .png file as an .afphoto file, *then* import it to the document in question, the merge is also instantaneous. This seems to occur only when mixing file types. If working with a .jpg document and one imports another .jpg document as a layer, there is no issue merging copies of those. Please note I am using the latest version of Affinity Photo. My computer specs are in my signature, although my friend was able to reproduce this on 2 other Macs so I'm not sure how relevant the computer model is. This issue was not tested on a Windows machine. Thanks for your time. Glenn 702574370_Outpost1aff.afphoto
-
If you go to the menu in Photo and click on View>Studio>Info, you'll get a readout of Memory Pressure at the bottom of the Info Panel. Make sure that's open when you try to reproduce your problem. Now, I've actually removed my post that I referenced in yours because further info has come to light. In my case, it's only when I merge overlay files that I've brought in as layers. It's unlikely you have those files but why they should cause any issues isn't something that's clear. They are .png files for the most part, and what I'm doing is bringing a single file in, shrinking it quite small, then duplicating that layer 3 or 4 times. Then I select them and then select Merge Selected. That's when all 'you-know-what' breaks loose and my memory pressure in the Info window suddenly jumps from about 15% to 150% (roughly) and the merge takes forever and a day (actually it never did complete). Conversely, if I simply merge layers I've made from right in Photo, the merge is instantaneous. So what I did is before copying the .png file and pasting it in my document, I saved the .png file as an .afphoto file first, then pasted it in, copied the layer several times then merged them. The merge was instantaneous in that case. I sent my composite to a friend and he was able to reproduce the issue on his computer as well, so there is a memory issue under certain conditions in Photo. It's quite conceivable that the issue you are seeing is another iteration of what I'm seeing at my end, but it would be worth checking out the Info Panel's memory pressure numbers while you reproduce the conditions that causes your problem.
-
Something to try since I'm also having hanging problems (and this may or may not be related), is first open the Info panel and see what it says re memory pressure. Then try repeating the process that's causing your hanging. See what the memory pressure reading is before and after. That might be a clue as to why and help the tech's with their troubleshooting. I'd be interested to know as well. See my thread here.