Canon5D6D7D
-
Posts
8 -
Joined
-
Last visited
-
 RichardMH reacted to a post in a topic:
Affinity Photo - new at ICC Profiles and soft-proofing
RichardMH reacted to a post in a topic:
Affinity Photo - new at ICC Profiles and soft-proofing
-
Well now, this is very, very interesting. I've read several articles and listened to some videos all referring to using Affinity Photo for the colour management and not the printer. Well, I have discovered the complete opposite! If you look at the settings in these screenshots, I used a configuration where the printer settings colour management/control is set to Epson (not off) and used instead of AP. The results I am getting now, after some tweaks during soft proofing the image, are very acceptable. I welcome any further comments from users if you think I have missed anything. cheers Garry

-
Actually getting the watermark into the bottom right hand corner is quite easy, because I simply 'place' the file (signature) into the image anyway and use the alignment tools to align it to the bottom, and then to the right. The real issue was to have the watermark 'scaled' so that it represented a % of the overall image so that it looked ok whichever size of image. If I can find a way to reduce the number of different sizes of images used I can then use different macros in batch jobs.......for example 1. assuming I'm using one image size only, I only need one batch job and one macro to put the watermark in the bottom right hand corner. quite easy 2. if I have two sizes of images, size A and size B I could setup two watermark macros (one sized for size A images, one sized for size B images). Then have a batch job with size A macro applied, and another batch job with size B macro applied. It just requires me to organise the files in two folders (sizeA and sizeB). I could then run each batch job separately.
-
 Canon5D6D7D reacted to a post in a topic:
Affinity Photo-macro for adding a signature to an image
Canon5D6D7D reacted to a post in a topic:
Affinity Photo-macro for adding a signature to an image
-
ok, thank you. Maybe, as an alternative solution to 'scaling the watermark' based on image dimensions......I could do this: 1. find the image with the greatest width in a batch of images (I do vary my images sizes sometimes for different purposes) 2. create a watermark/signature 3. add the watermark to each image during a batch process, centering it and aligning it at the bottom of each image, then saving the image etc that might work? (I think). of course,
-
Hi there. I would like a little help from someone if possible. I know how to add a photographer's signature (copyright watermark) to an image but I want, as part of the macro, to set the size of the signature to be a specific % of the overall image size, so that if I apply the macro in a new batch job, the signature will look 'proportional' and not oversize when being added to slightly smaller images. thank you for any help you can give. Garry
-
the image colourspace is sRGB
-
at this stage no the monitor hasn't been calibrated yet, but prior to processing this image I ran a test on a sample calibration image (provided by Fotospeed), I performed all the soft-proofing tasks, printed the image etc and the printed version was very, very close to the image on screen. So, "hopefully" there shouldn't be too much of an issue (I hope).
-
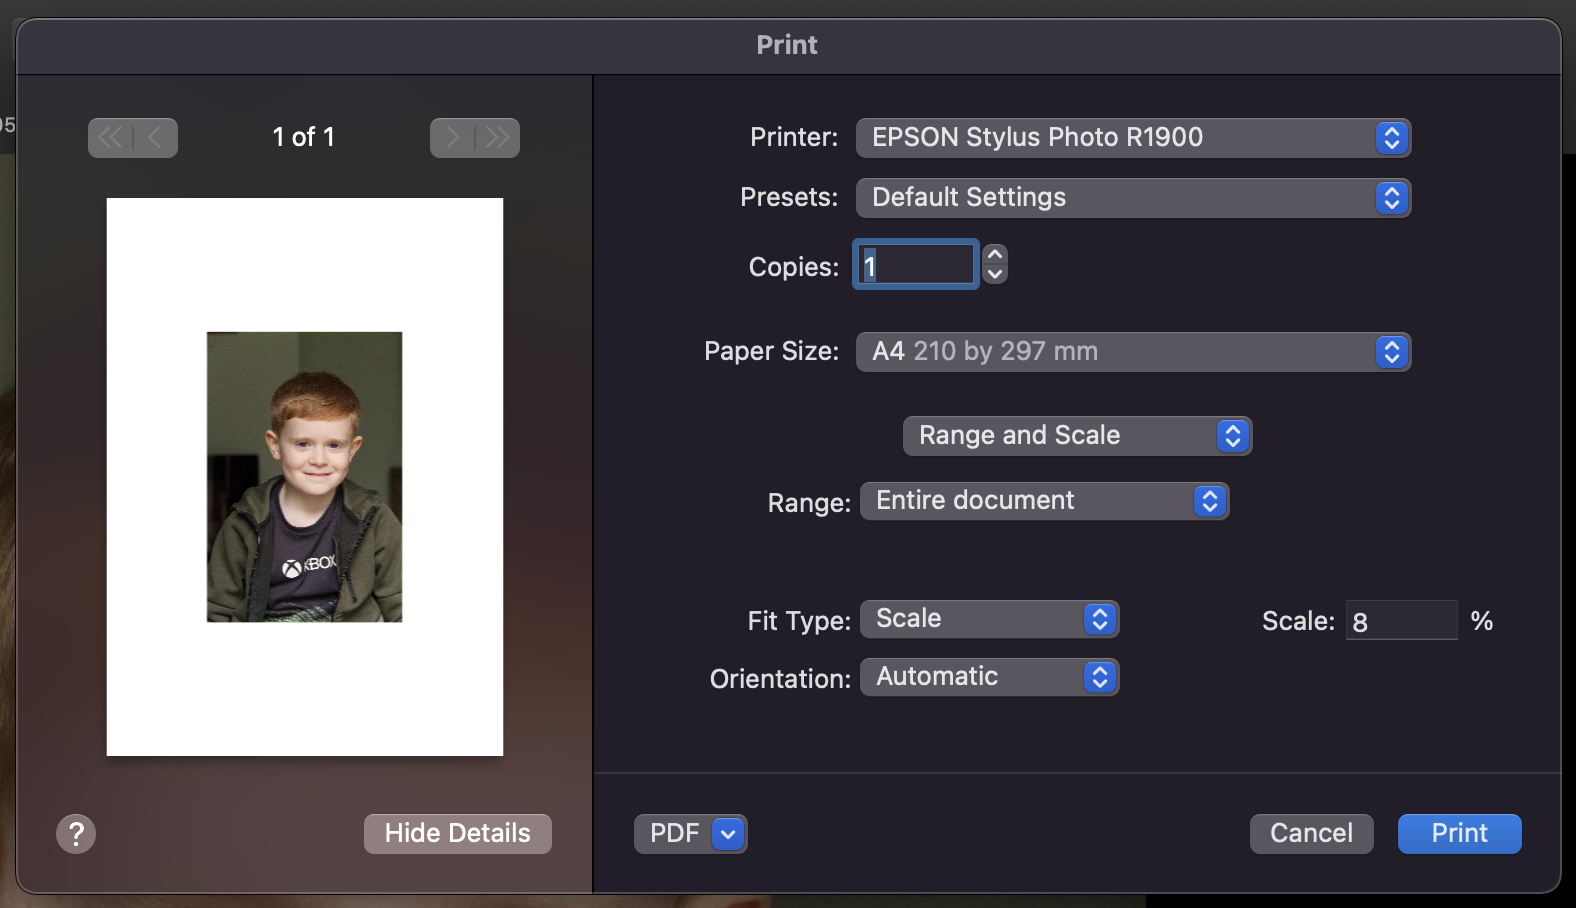
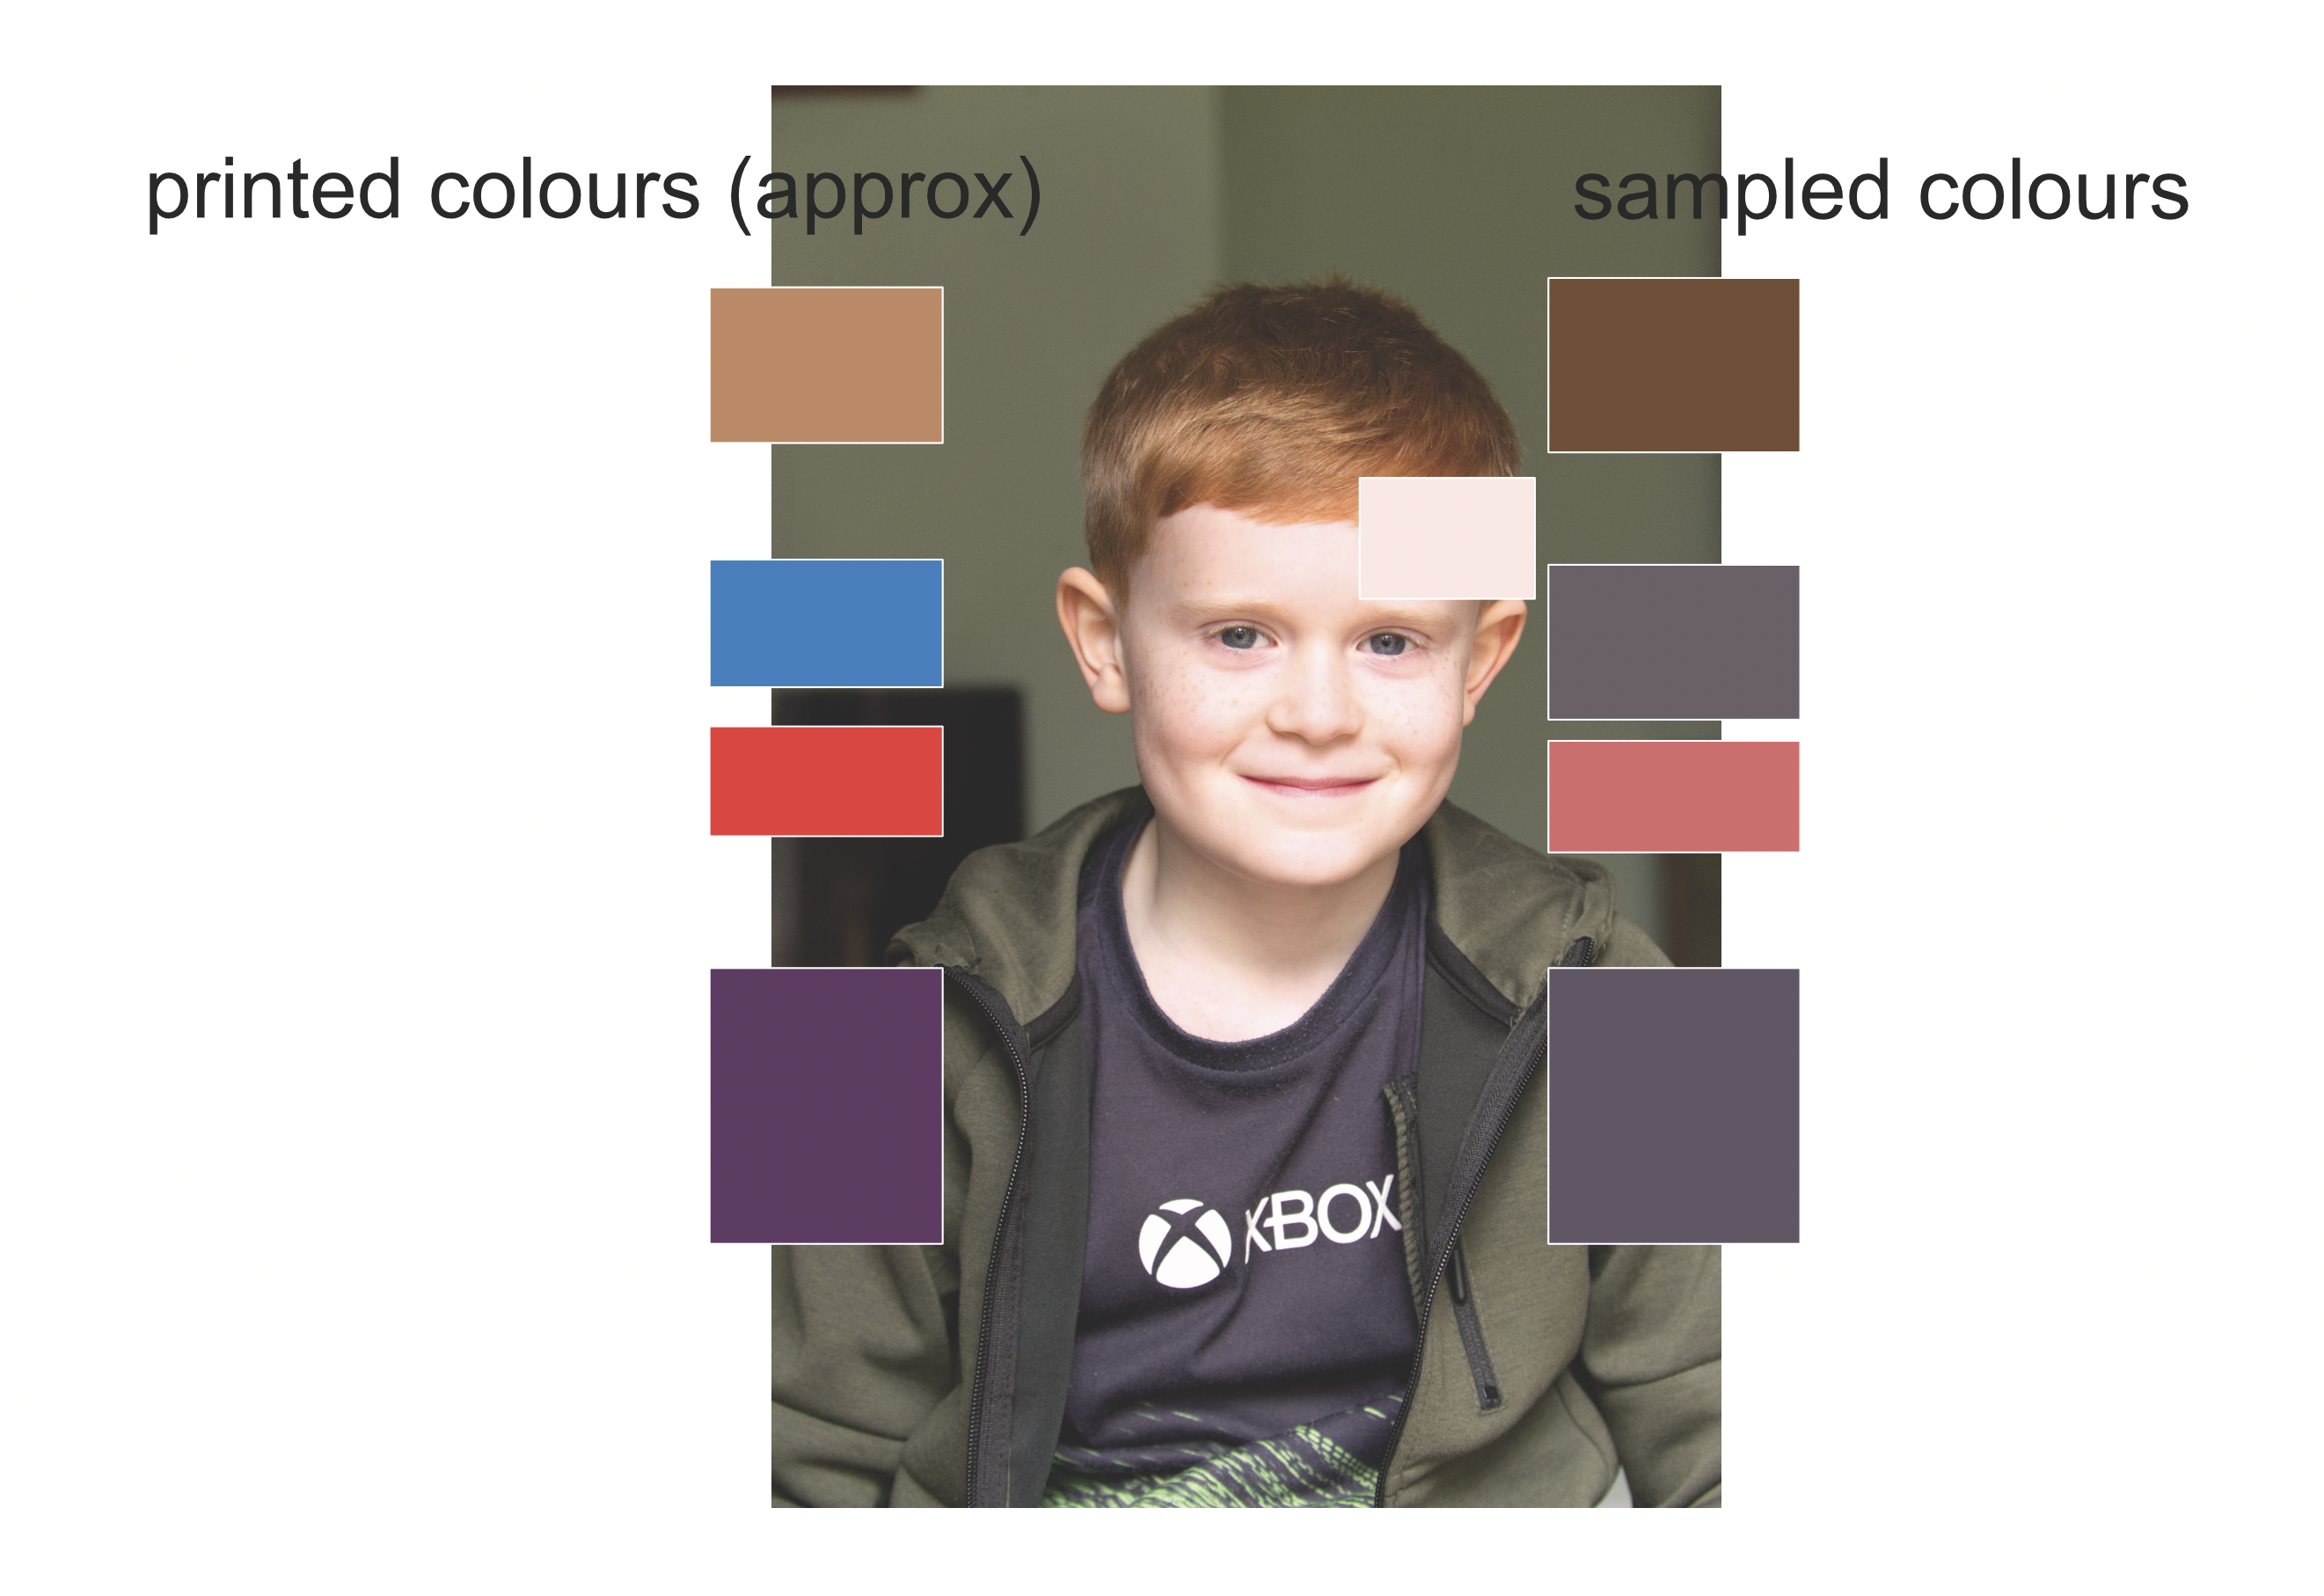
Hi all. I hope someone can help me please with this issue as I am somewhat stumped. Although I've been doing photography for some time I have never ventured to print anything before. I recently learned about ICC Profiles and how to set them up on my Mac. I also learned how to do soft proofing (a Robin Whalley video). My issue is that when printing I still have quite a dramatic shift in colours. The image I'm testing is of my grandson, shooting into the house with patio doors open, so the lighting is natural light only. I checked the image with auto color (collar cast test etc) and nothing changed. Here's my data: my printer is an Epson R1900. The image colorspace=sRGB. The papers ICC profile=1FS_PSP290_R1900-Epson_Generic.icc (Fotospeed photo smooth Pearl 290). I chose Relative colorimetric for this paper profile because, when selecting the gamut check, it left me with very little 'grey areas' (out of gamut colours). So I adjusted accordingly. When comparing the image on screen and toggling on/off the soft proof adjustment I had very little difference. So I proceeded to print. I've stopped here because I am stumped at what to do next; I'm not sure what to adjust next. Regarding the image, what I have done since is to show key elements of the image (hair colour, eyes, lips, t-shirt colour etc) as blocks of colour adjusted to show RGB representations of both sampled colours from the image and printed colours (approximate). To give an indication of this visually, I've included here a screenshot. I am willing to provide the file as an afphoto file too if someone can genuinely help me sort this out. I hope I have been able to explain myself clearly enough and wish to thank anyone in advance for any assistance they can give me . regards Garry