
Silvia
-
Posts
70 -
Joined
-
Last visited
Posts posted by Silvia
-
-
I have an iPad Pro 12.9, 2nd gen (2017), running whatever the latest update to IOs is. I keep my files in iCloud Drive. It sounds like you can see them in Dropbox. I'll try changing to Dropbox and a hard reset, just in case it solves the issue for me. But indeed is very strange that your iPad can read them, whereas this other member, Dave Gamble, and I cannot.
-
Thanks! Hope they resolve it soon. Most of my LUTs are .cube
-
-
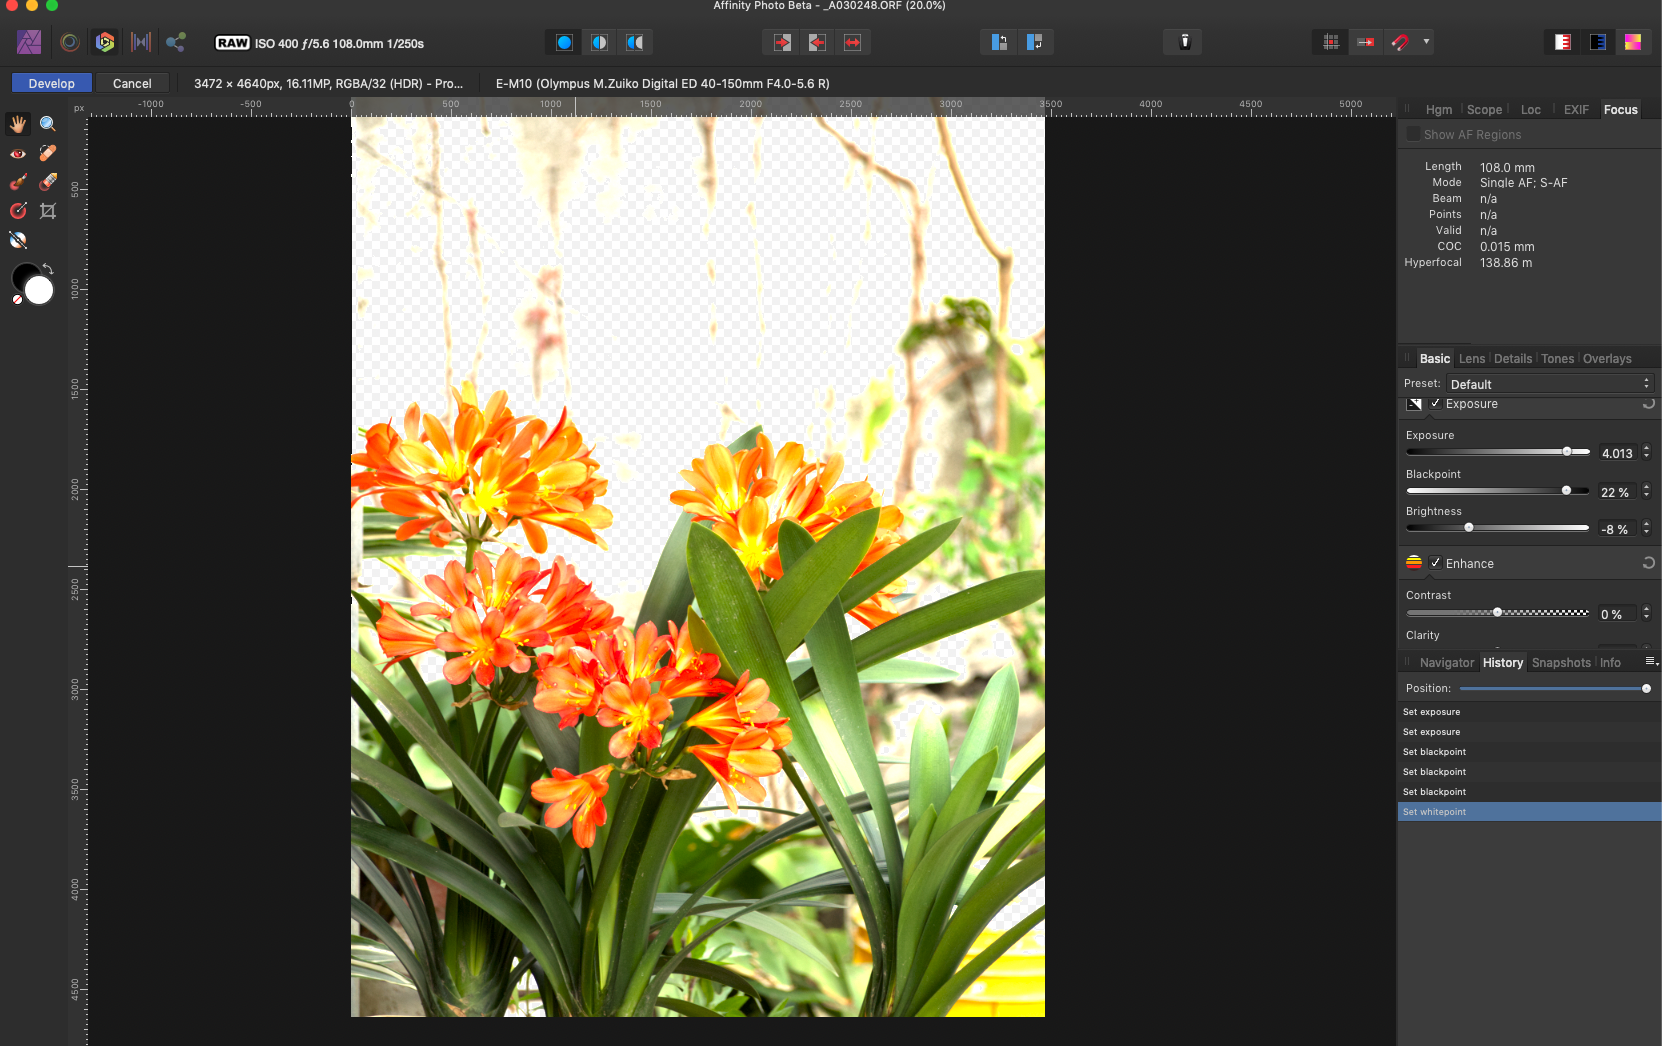
I increased the exposure a lot on purpose as I'm going for a 'high-key' type of editing of this image. I noticed immediately that the gray wall background behind the flower turned into transparent. pixels. I then opened in Photo 1.6 and this does not happen,, it just turns all wall pixels white. Wondering if this is by design or a bug. Kind of like it. Thanks

-
Thanks Gabe. Someone in an FB forum suggested two days ago that I change my settings from using Apple RAW to Serif as explained on the thread below, and it seems to be working for now. Very strange because it affected pics with taken with certain lenses only. I’ll keep your suggestion in mind in case it happens again.
-
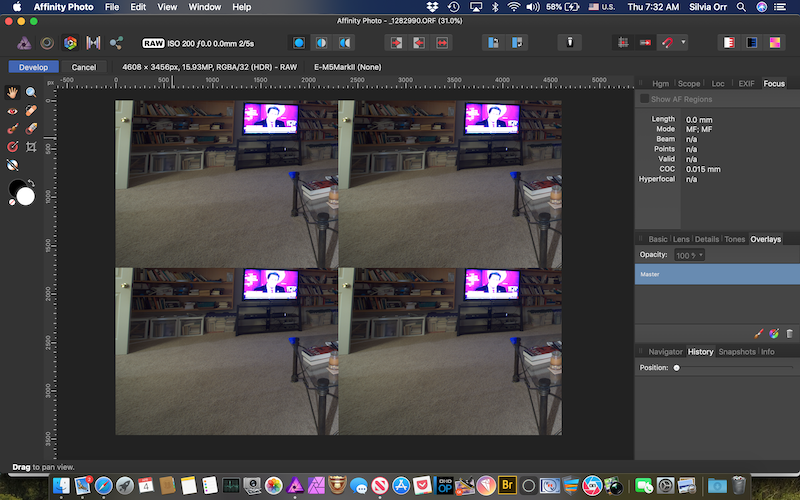
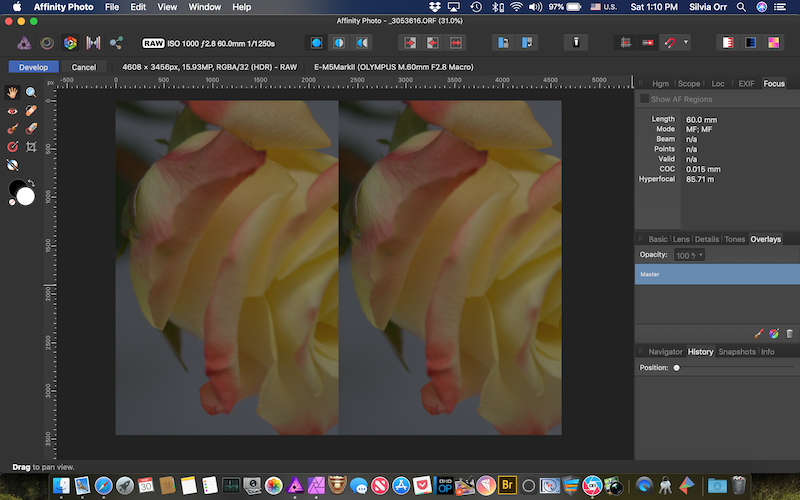
Ever since I installed Photo Beta (MacOS Mojave), when I tried to use Photo 1.6.7, I can't open a raw file, whether it is a Canon or Olympus raw, it appears to depend on what lens I use for my photo. I get a single image showing double if I shot it with a particular Olympus lens not all, but quadruple if I shot it with the Venus Laowa. If I click develop, I still see the very same, double in a single image. Beta works fine though, but for some projects, I'm not yet comfortable using it. This started happening when I downloaded beta. I had no problem with 1.6.7 before then.
-
If it is just the cataloguing facility you're missing, try Adobe Bridge. It's free and as far as I can see it reads all adjustments I made with LR before unsubscribing. You can rate, color code, add keywords, etc. Just no access to any adjustments.
-
If you're asking about the lasso tool, yes, look for Free Hand Selection Tool. Once selected, in the top bar, you'll see the 'magnetic' option.
-
1 minute ago, owenr said:
I posted correct info in response to your posts. That was an amazing piece of luck if I didn't read your posts.
Regarding the one you edited: I didn't see the edit because I was typing my reply to the pre-edit message while you edited.
I know, I didn't say you were not right. My apologies once again.
-
1 hour ago, owenr said:
I already said that and I've said twice that it looks like a bug!!!
I need to stop wasting my time posting in this forum.
You are getting upset and responding without reading my posts. Sorry if I annoyed you.
-
Thanks. I did google it. See my Edit above, made before you posted. I'll see how to report this as a bug. Thanks again and have a great weekend.
-
“The misbehaviour happens on my Mac if I do ctrl-click instead of right click on the thumbnail.” Oh, then I’m doing it wrong!! I’m doing Ctrl click. How do I just right click on a mouse pad in my laptop ? I rarely use right click and thought ctrl click was the way to bring up that right click menu.
Thank you so much.
EDIT: I changed my track preferences to double tap to right click and this works. However, I still believe it is a bug. Ctrl click is another way of right-clicking on Mac. It should work with both, double tap or Ctrl click.
-
While trying to copy a mask on MacOs (High Sierra), right clicking on the mask thumbnail and selecting copy and/or duplicate, makes a copy of the Layer + mask. Yet, if I use Cmd J or Cmd C, a copy of just the mask is made.
What am I doing wrong please? Or is this a known bug? Thanks
-
Very useful for cut outs, please add a way to decontaminate colors in selections, as well as an option to remove white/black matte. These are very useful options to remove halos around selections. Defringe, whether Colors or Live Filter, doesn't do anything on masks. The manual alternatives off painting the halo off the mask is very time consuming.
-
1 minute ago, R C-R said:
The dot is optional in recent macOS versions: System Preferences > Dock > Show indicators for open applications determines if it shows or not. However, closing an Affinity app (& many other Mac) apps) is not the same as quitting it. If the dot indicator is enabled in System Preferences > Dock, it will still show as long as the app is open, even if none of its windows are open.
There's no closing an app command in Mac. It's quitting an app. You close a document and quit an app. Sorry to have misused "closed". I thought it was clear by pointing to Affinity > Quit and Cmd Q.
Thanks for the explanation on the dot. I haven't touched my dock system preferences since 2008. Didn't know that is now option. I have it set to show open applications. I tend to stick to old habits. -
I disagree that that how Mac works. When you see the dot under the icon in the dock, like with other open Apps. it means the App is open, but if you close the app, dot goes away. You need to do Affinity Photo > Quit (last option) or Cmd Q
-
While waiting for Affinity to develop a Lightroom like app (DAM plus quick edits than don't require layers nor saving huge files to be able to make changes later), I finally settled for the free Adobe Bridge. I've tested numerous trial versions of other LR like or only DAM software, paid for a few of those, and concluded that no other affordable app produces such an excellent RAW conversion as Bridge, plus rating, labelling, stacking, etc. Super easy for fast culling.
-
Sorry, I didn't explain myself properly.
You said " If it’s showing in the Layers studio as ‘Pixel’, export it (without background) to PNG format and then use the Place command to import it: the imported copy will show as an ‘Image’ layer,"
I was trying to apply Styles to an image I imported from Photos. Any image I try is a Pixel Layer (whether I duplicate, rasterize layer, etc., always is a pixel layer.)
You mentioned that Styles don't work in pixel layers, to export it to PNG and then place it back. That works, just like you said, but sounds like a cumbersome workaround. Isn't there any other way to covert a pixel layer to an image layer to apply styles?
I have several Styles but mentioned the rainbow because it's such an obvious one that would show immediately if it is applied. By the way, one of the first three default styles (sunset, rainbow or metal) do anything in a pixel layer or any of my imported styles. Yet, Onyx, Glass and Salmon seem to work.
Reason I'm asking again for another way of converting to an image layer if necessary it's because the Image Style macros work great, so I figured in those macros there must be a step to do the conversion pixels to image layer, then record my own macros with some styles I downloaded which are great.
-
Thanks. Dragging an image from Apple Photos to Affinity Desktop creates an image layer.
Isn't there any simpler method of converting a pixel layer to image layer, or otherwise applying Styles, than converting a jpeg to png and then importing using Place in Affinity iPad?
-
I've used before Image Styles in iPad. (iPad Pro). I'm now attempting to use a style but it's un responsible. Maybe I forgot how to use it.
I open image, go to FX, Styles and pick the Rainbow default style which is very obvious. Nothing happened, whether I tap on the icon or the name of the style. Holding down the icon opens up a fly out window to remove or rename. I tried with background layer and just in case with a pixel layer on top. Even tried with a different image.
I closed the app, reset my iPad, and still no results. Is there anything I'm missing on how to apply a style to an image using iPad Affinity? (Same image imported from Photos no issues in applying an image style with desktop version.)
Thanks
-
Thanks, h_d. Fn+Delete works !
-
Thanks, guys. I did notice that issue with going back one step in the history panel instead. I'll try the Fn+Delete keys to see if it works in my Mac. I was feeling frustrated seeing it works with other tools but not the freehand tool. It thought it was me doing something wrong.
-
Using Affinity desktop in Mac. I have a jpeg which should not require rasterizing but I even tried that. I duplicate the layer, make a selection with the free hand tool and press the DELETE key. It deselects it.
If instead I make a selection with the rectangular or the elliptical tool and press DEL, it works. Pixels inside selection are removed.
Is this normal behavior? I tried with a different photo and also restarted my laptop, but same behavior. Of course, I can remove the pixels by using Refine and Mask, but I would've thought that the Delete key would work to delete pixels inside any selection, regardless of how one makes it.
-
Why not do your edits directly on Affinity Photo? Is there an advantage of using Photoshop Express for your edits over Affinity Photo? Thanks

Placing an Olympus or Nikon RAW photo issues
in Pre-V2 Archive of Affinity on iPad Questions
Posted
I’m having an issue with placing Olympus ORF and Nikon NEF files, not so with CR2 or Jpeg (as long as the jpeg is not from Apple Photos and wasn’t originally shot with Olympus). I tried both with version 1.7.2 as well as with beta version 1.7.2.153.If
If I try to Place an ORF file from Apple Photos, it tells me it’s ready to be placed but it’s nowhere to be found, in or outside the canvas. Same happens when placing from Apple Photos an edited jpeg which has assets attached (the original ORF file).
If I try an ORF file from iCloud, it doesn’t do anything, doesn’t even attempt to load. (Files open fine otherwise in a separate document, just placing is the issue.)
NEF files (albeit these are old from a 3200 model work but are placed with a black thick border on top and bottom of the photo.
CR2 files from an old Canon 60d and jpegs from iPhone or exported first as jpeg work just fine.
I don’t believe I’m doing anything wrong, and never had an issue composting with my ORF files in previous versions. Any ideas ? Thanks.
PS posting from iPad couldn’t figure out how to removed first try to upload a clip that failed. Second clip works