Ambros
-
Posts
20 -
Joined
-
Last visited
Everything posted by Ambros
-
I am also experiencing regular crashes and hangs on most recent update, not experienced on previous versions (i.e. as of most recent rolled out update problem has arisen) Crash file attached AffinityHanging.evtx
-
Thanks @thomasothat's exactly what I was looking for.. and thanks for the RTFM link as well
-
edit : I had used the command 'delete white paper' this is what caused the issue..
-
Ah OK, you have to use develop and tone map personas I still can't seem to increase the brightness (turning up the 'brightness' slider from 50 to 100 does precisely nothing)
-
As the title says. Auto White Balance never works, Auto Contrast does some weird things, and also never works. The 'Shadows / Highlights' Panel also does very little of use. Where are the controls for adjusting the white balance / levels by hand ?
-
Thanks @Andy05 I'll try that if it happens again
-
OK I re-booted Affinity Photo and it now works fine.
-
I have a pixel layer selected. If I use (for example) the brush tool. I can draw etc But the erase brush tool does nothing. Opacity is 100%, Flow is 100%, hardness is 100% Layer is not locked. So bloody exasperating just wasted 10 minutes trying to get it to work.. How can it be that unintuitive !?? If I use the select tool and draw a box, and then hit delate.. similarly it does nothing I have removed all layers except this layer
-
OK. yes, lens distortion definitely helps. I just wanted to check if I was missing a technique / tool .. I don't think I am (beyond the lens correction) It does seem to be a 'missing feature' to some extent (a more rigid method for adjusting an image) Having come from photoshop, I miss the edit/transfom/warp function. To be clear it's not that anything is 'impossible' it's more that deform is perfect / amazing in some instances.. and more challenged in others. in Photoshop parlance.. Deform is very similar to puppet warp, but there isn't a direct equivalent to 'warp'
-
Yes !! Exactly I'll try that thank you
-
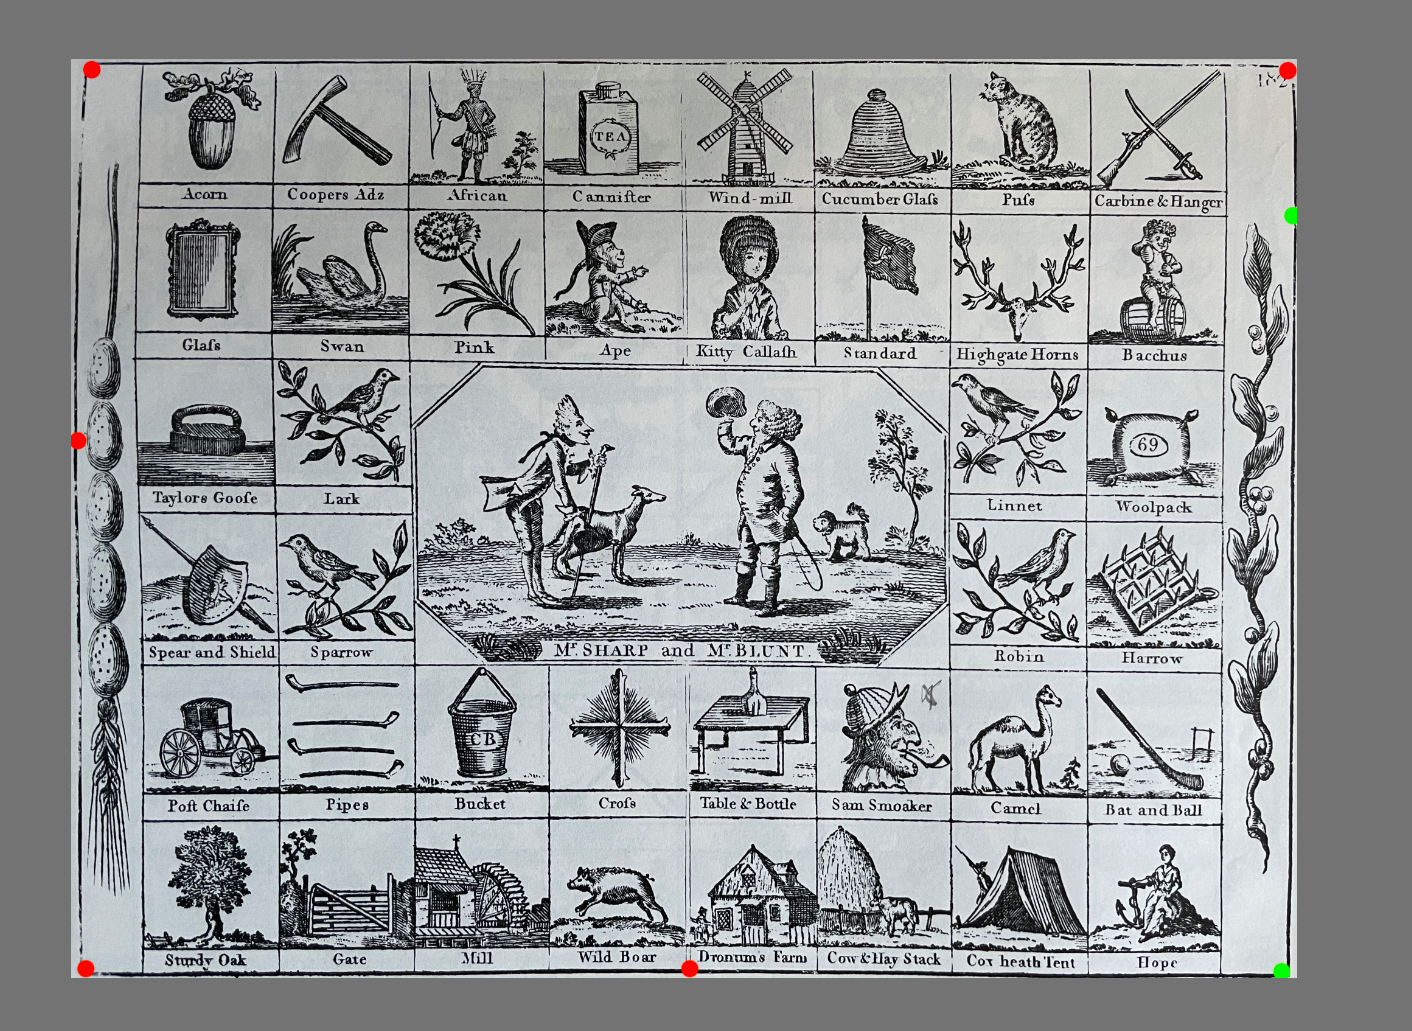
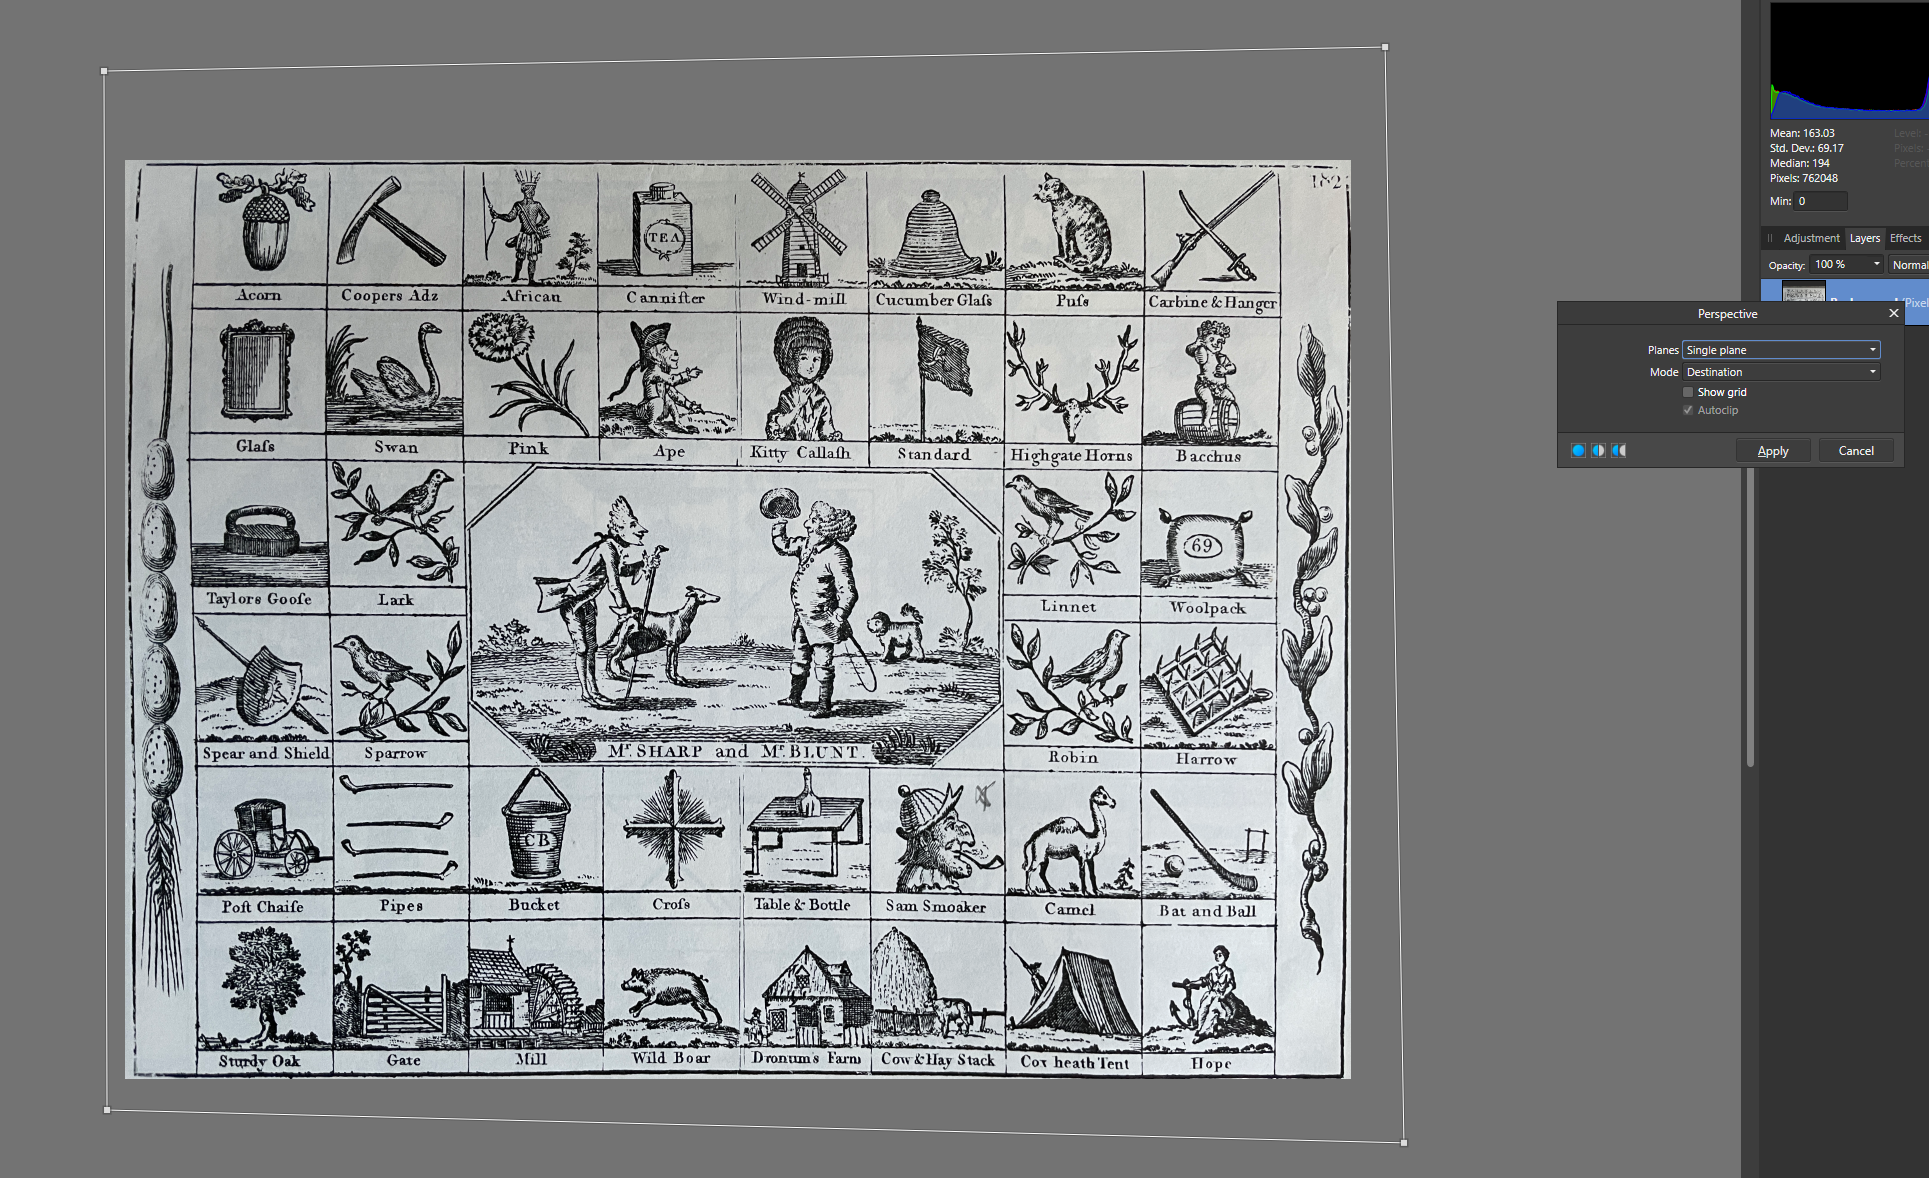
I'll try... Here's 3 images.. it's a bad quality photo of the page of a book. I use perspective to get as close as I can .. then I would hope to just add the nodes detailed on the attached image where I've shown as green and red dots.. maybe that's a bit too optimistic.. but you get the idea. .. But (and I accept that this is likely user error - bad technique as much as anything) when I use deform.. see how many nodes (48) I have to use to get it right (i.e. black border) A LOT of those nodes are just to bring a wavy line into a straight line.. but much of the 'waviness' is introduced using the deform tool.. by design it is a 'fluid' scuplting tool. What I need (arguably) is a more 'rigid' version of the same

-
I really like the deform tool . A very neat and compact solution with a massive scope. With one major caveat.. it's no good when trying to distort a 'square' image. For example.. I take a photo of a square. Due to the angle of the camera, the square is distorted in the photo (a bit of parallelogram) So I want to 'grab' each corner of the image and drag it into a perfect square. Deform gets me most of the way there.. a node in each corner, and then drag to the corner of the square canvas.. BUT this creates curved edges.. and no matter how I add further nodes to try and 'straighten' the curve.. it's never perfect. The other problem is that there doesn't seem to be any other 'distort filter' which allows me to stretch/distort an image using straight lines Perspective is too limited. Something like a [modifier key + node drag] which constrains the drag to straight lines would be invaluable
-
Just what I was looking for .. disappointed that there are NO resources for publisher on the link in your signature. Looks like a good resource..
-
Affinity 1.10.4 on Windows 11 crashes every time it is used
Ambros replied to Ambros's topic in V1 Bugs found on Windows
Yes of course. They're here. I did notice after posting the above that my NVIDIA driver was out of date.. I've since updated *(last night). Hopefully that resolves the issue. I'll report back if not !
-
Every time I use Affinity photo on Windows 11 with latest build it hangs (spinning blue wheel) if I do a series of 'pen tool' selections. Has happened each time I have done this.. Seems to be linked to the file not being saved. If I open the photo, and DON'T save as an affinity file.. then do some editing it crashes/freezes. If however I open the same file, save immediately as an Affinity file and carry out the same operations it doesn't crash
-
Yes !!!! Thank you. I had given up on recovering a file when Affinity crashed.... But read your post and tried double clicking on the source jpg and my work was (partially ) restored. It should present itself when the programme restarts I agree
-
convert Page to Master Page
Ambros replied to Haba_Lunga's topic in Feedback for Affinity Publisher V1 on Desktop
Just to add that I was looking for that functionality.. It's user error really (I shoudl have planned ahead better) but teh facility to copy the page and grid/guides to the master section to then apply to other pages is a nice idea (and I was used to it coming from InDesign) -
Thanks Bruce, Yes, thanks you're right, as I alluded to in my (rambling) post I did suss it out eventually after watching a few of the Affinity tutorial videos. These Affinity apps are great... ridiculously good value.. It's just hard to learn a new way of doing things after having been a Adobe Devotee since CS2 !! Suffice it to say, Affinity have created some world beating apps. I just need to get my head around a few core concepts
-
Lol I keep ending up at this page. I still can;t find out how to select a curve and convert to a selection UNLESS i remember to do it immediately I complete the curve. Someone please help for the next time I google 'curve to marching ants' and end up here !! The manual says "ctrl click on the layer thumbnail' but if do that for the layer which has the curve it does nothing. I am using the pen tool to create the 'outline' (aka marching ants) as it gives the best control (tightest / cleanest selection) I am using Affinity Designer BTW Ah got it. Go to "edit in photo" then the above works. you ctrl-click on the curve thumbnail and it converts to marching ants unfortunately you can't seem to do anything with the selection.. cut (for example) just cuts the entire image and doesn't allow just the selection to be cut from the main image. OK will read manual again. That's obviously intended workflow, I just need to work out how to 'cut' the selection from the main image./ It's not intuitive It's the difference between an 'image layer' and a 'pixel layer' I had imported the photo into the document using 'place' I'll leave this here in case someone else gets as stumped as me.. the manual didn't help.. but the videos are good
-
UI too small
Ambros replied to mr.burns's topic in Pre-V2 Archive of Affinity on Desktop Questions (macOS and Windows)
Yep, I have to say after ten minutes using this programme I am thinking "this cou;d replace illustrator - the functionality is there" EXCEPT the tools are so small as to be illegible. Sorry. This is eye strain