vihtla
-
Posts
13 -
Joined
-
Last visited
-
That sounded promising. I tried it. Applied same shadow as Photoshop file had and yeah, I can't spot a difference. And it doesn't require me to create a specific layer each time to apply effects to. And I can save it as a style. Dude, thank you so much! And everyone else as well for eventually caring for it even more than I myself did. I will go forward with that solution. Guess we were too stuck in ADesigner and didn't consider APhoto's solutions that I luckily also have. I'd only ask, just in case, what are the exact gradient options that you used (I can see position and everything for the first point, but position, mid point, oppacity, colour and what not about the other points as well)?
-
 vihtla reacted to a post in a topic:
Best way to add stroke to digital stickers?
vihtla reacted to a post in a topic:
Best way to add stroke to digital stickers?
-
vihtla reacted to a post in a topic:
Best way to add stroke to digital stickers?
-
I have selection active, but still can't figure out how to fill "tresholded" selection and grow/shrink is grayed out as well. I don't know if a screen recording would help, but it probably isn't a viable solution in my case anyways.
-
@PixelPest Yeah
-
But I'd still need to create a new layer for effects with each image
-
vihtla reacted to a post in a topic:
Best way to add stroke to digital stickers?
-
Wosven reacted to a post in a topic:
Best way to add stroke to digital stickers?
-
@StuartRc Thanks for giving it a go! Didn't get past 3rd step, control click (on Mac) on the layer icon didn't give an option to fill it with a colour, neither worked just flood fill tool. Grow/shrink option was grayed out as well. But it seems to be another duplicate layer method. I have a bunch of stickers to apply that effect to and wouldn't really want to mess with getting a duplicate each time first before being able to start applying some effects. Would still check out the solution just in case, if I could get some further help with how to fill the layer and whether that'll allow me to grow/shrink layer then.
-
firstdefence reacted to a post in a topic:
Best way to add stroke to digital stickers?
-
Thanks for everyone's help! Didn't expect to get so many people to try hard to help me with that. 😁
-
@firstdefence That doesn't seem to be much different from just using outline effect, just more complicated to apply to over a hundred images. I need to be able to save some preset. But thanks for checking out, seems Affinity just doesn't have anything specific that they had used in Photoshop for reference image. Wish Affinity added some technique and quality options to outer glow and other effects that Photoshop has. Used some recommendation of outer glow and mixed it together with my shadow presets and it seems to be close enough. Ignores some sharp point now and then and just rounds it up aggressively, but it probably won't be an issue with my own stickers.
-
@GarryP Yes, a little irrelevant for me indeed, as I have no issues with shadows with any of the recommendations or even with my own first tries. What I am struggling with is to get exact stroke effect in the original PSD file.
-
Yes, new effect measures seem to work a little better, but the issue with outer glow I have had is that it is either too rough when intensity is big and too glowy when it's smaller. And like I pointed out at first, those are supposed to become digital stickers in a messaging app. So the difference will be more visible. I try to mimic what the official sticker example suggests to use.
-
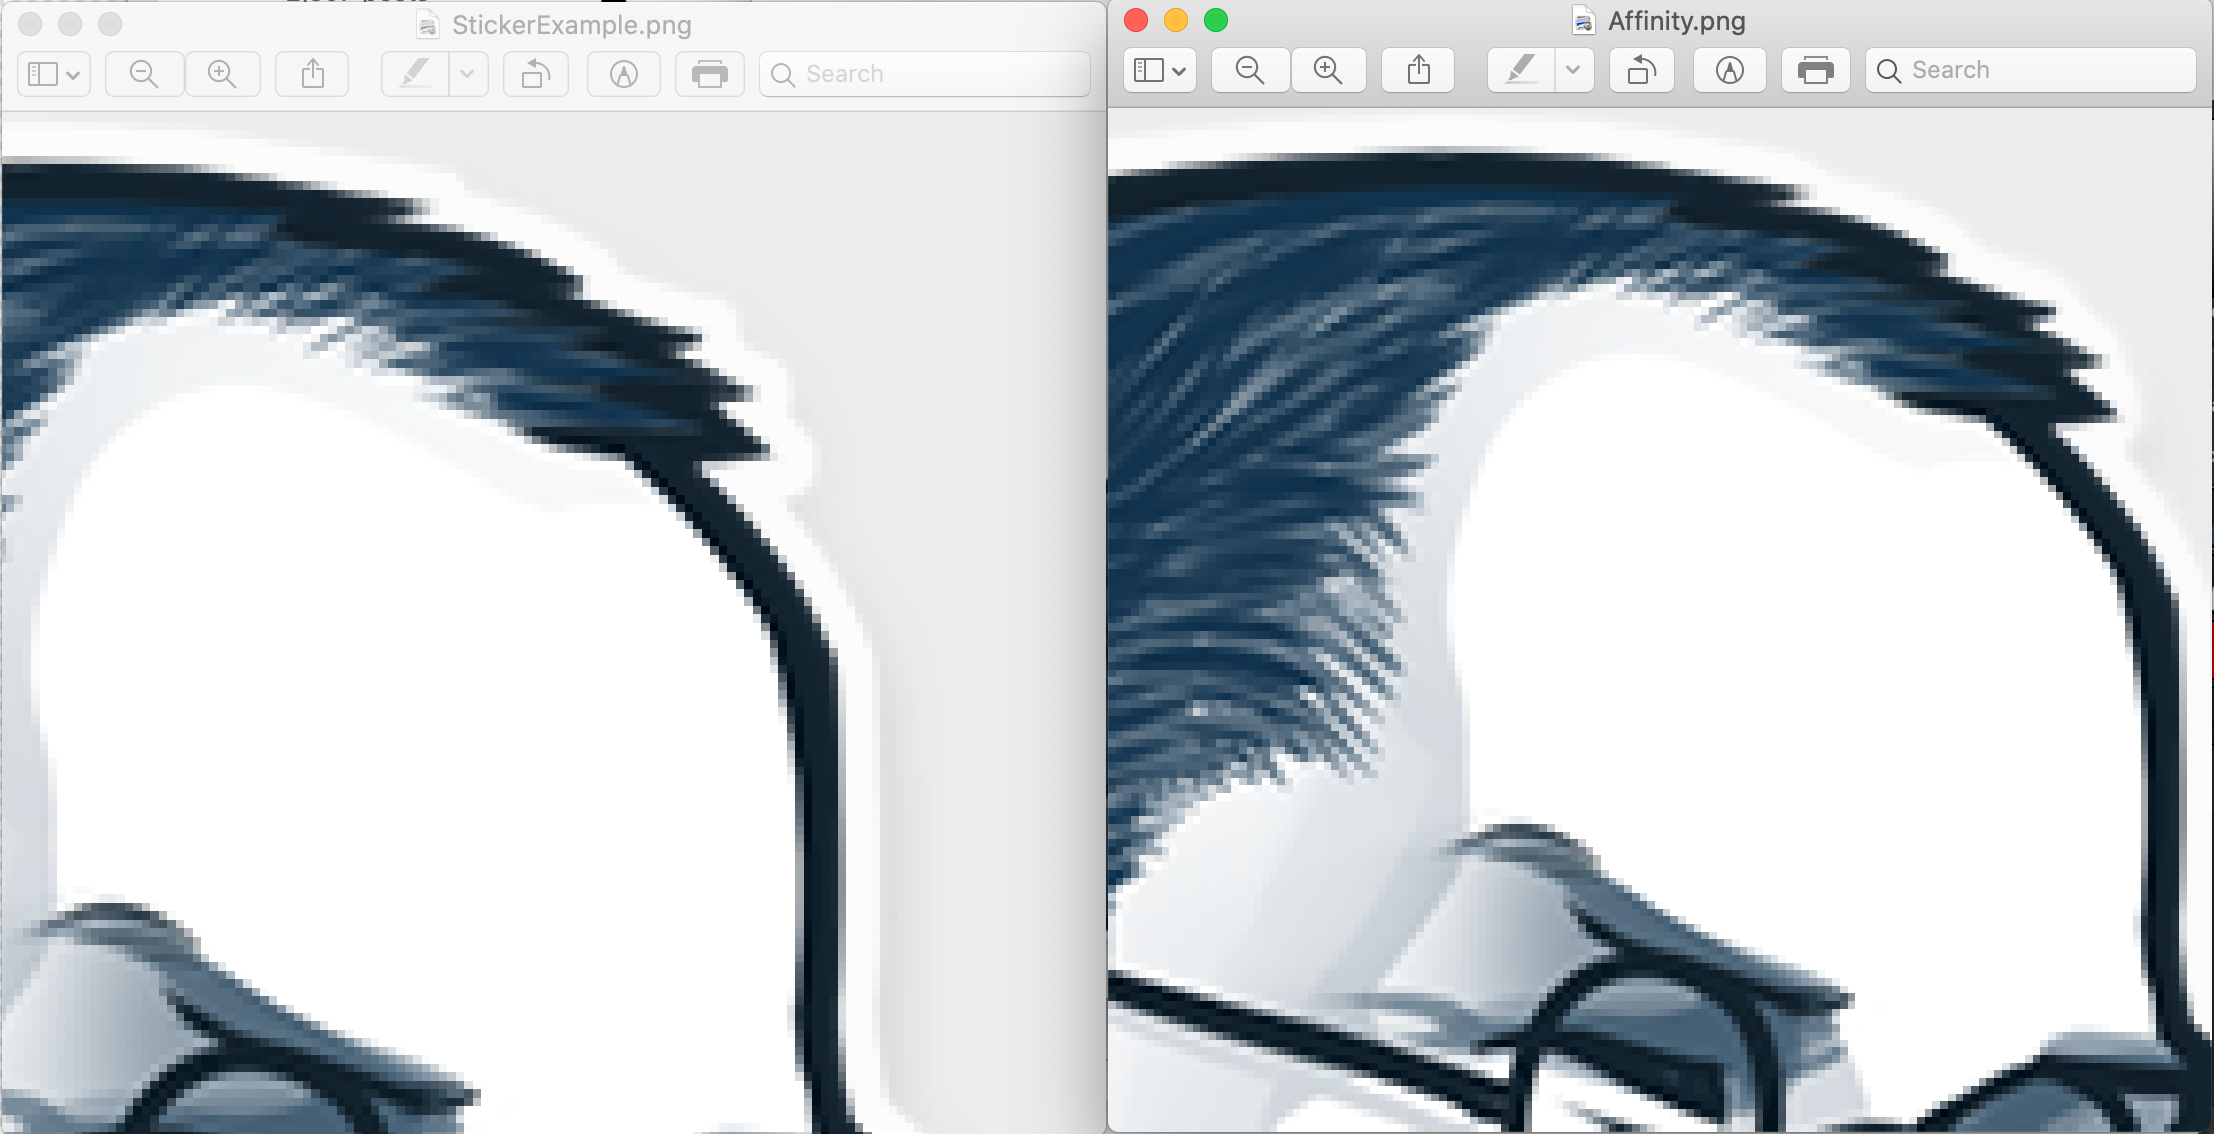
Exported yours and compared it to the original, it still is partly too much of a glow and not enough of a stroke. As you can see from the screenshot comparing the two, Affinity's one doesn't follow the edges very precisely always, especially noticable with the fringe part of the hair.

-
Like with previous suggestion — this requires to create a new selection with each sticker and I've many to add stroke to, so I'd love to make some preset. Also this solution doesn't seem to get a stroke like on the original either
-
I am using Affinity Designer, it has no Photo Persona. But I can try it in Affinity Photo as well then. Also I use a Mac as well, but I assume I have to use Command instead of Control then. About the actual process, what you're suggesting is to create a selection of sticker layer each time for new sticker, fill the area and then blur the selection and adjust. That seems to be for drop shadow though, which I have no issues with. I need a better white stroke solution, that's what I have issues with. If I used selection and and added outline to that, it seemed to be less robust than before, but still not quite the thing (very edges of the white stroke seem to soften up on the reference image). Also that would require me to create a selection layer for every sticker. I hoped to create some sorta preset that I could apply for every sticker quickly instead with existing effects and such.
-
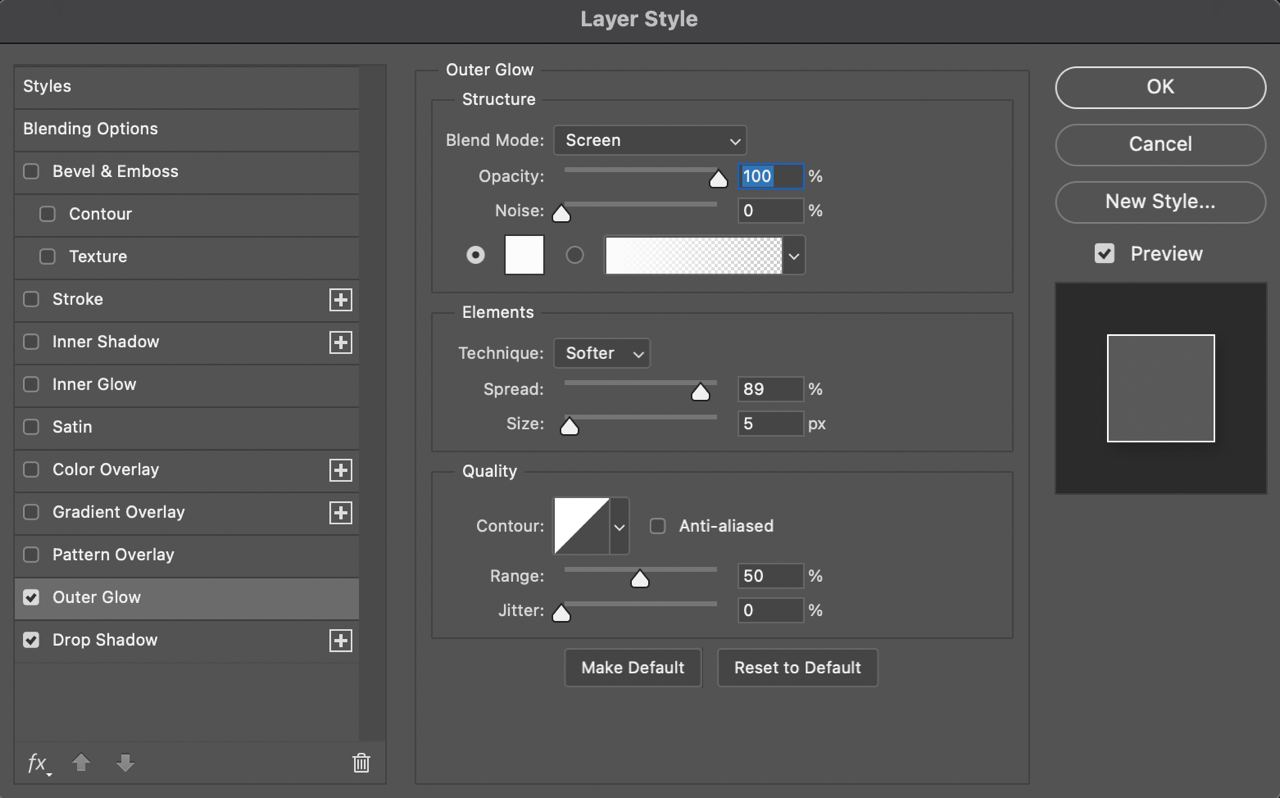
Hi! Am new to Affinity tools and struggling to find out what is the best way to add a white stroke with some drop shadows to a png sticker's edges. Basically I need to achieve what is on the included Photoshop file (StickerExample.psd). I have also got screenshots of the exact stroke settings from a friend (first image shows settings for the white stroke, second one for the drop shadow). When I open the Photoshop file on Affinity Designer, the stroke is way slimmer though. And even if to match settings 1:1 according to this forum page, it won't match. I used Outer Glow for white stroke as in had been used in the Photoshop file, but in Affinity Designer there's not all of the fine tuning options available that had been used on Photoshop file, so when I tried to match them, it turned out to just be glowy, instead of some harder line around it. Also the line is way slimmer and if I increase it, it just gets more glowy. I then tried Outline effect instead of Outer Glow, but its stroke is just very harsh and needs to be little smoother for my use. There seems to be specific stroke option as well, but that applies stroke to square box of the png, not just to the outline. So... what can I do? Essentially I need to mimic the stroke and shadow of the original (third picture). Right now, exact replica in Affinity would be shown on the fourth picture (too thin of a stroke) and adjusted one on the last one (too glowy and not really a line around the sticker).