pxp
-
Posts
8 -
Joined
-
Last visited
-
 borntobe reacted to a post in a topic:
How can I preview pictures in fullscreen mode ?
borntobe reacted to a post in a topic:
How can I preview pictures in fullscreen mode ?
-
DeJeanB reacted to a post in a topic:
How can I preview pictures in fullscreen mode ?
-
Then it uses a fill (instead of only an outline) for the next stroke. But not with style of the last selected, but the "default".
-
Ah yes... the "synchronize from selection" comes close to what I want to achieve. It's not exactly what I wanted - but I guess its just not possible. A "synchronize from last selection" would be nice, I guess! Yes R C-R I ment the "Pen Tool" - I tried your sugestion with the "Use Fill" but that didnt work. Thanks guys anyways for your help!
-
Oh thank you Alfred for the hint! I know, I could do that easily... but I'm really looking for a convenient way to pick up the fillstyle I defined in my previous stroke/path. Its like taking my linestyle/fillstyle from one bit to the next without a lot of "click click click" ... ^^ would take me a lot of clicky clicky to copy the fillstyle for all this tiny, nasty "Ribosomes" from one to the next ... I would prefer using my creative energy on the drawing part instead 😎

-
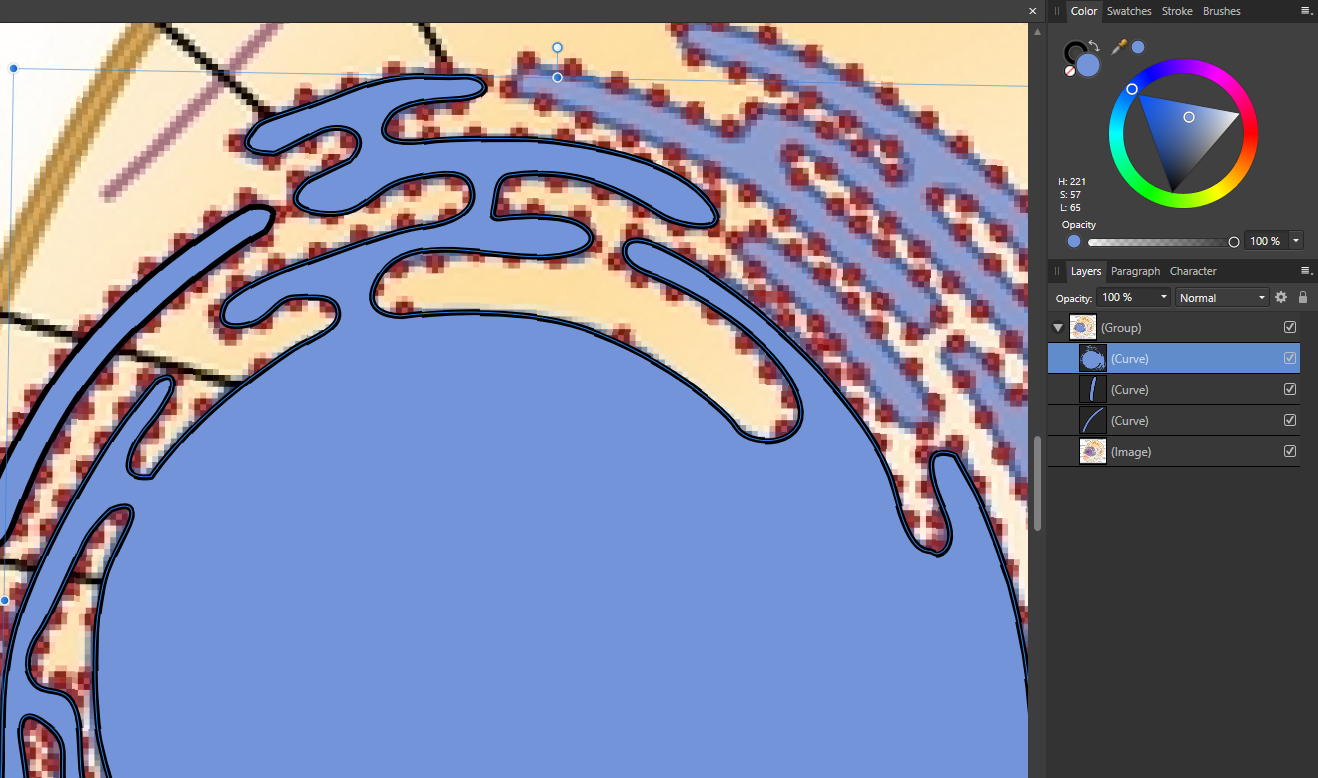
Hello guys, This is the illustration I'm currently working on: I traced the blue vector shape from an image. Now, when I select the shape I already created, the "Color Mixer" in the top right corner shows me black as outline color, blue as fill color. So I expect this to be the color for the next stroke ... But when I make a new shape with the path tool, the color turns into something completely different: Now the outline color becomes black and the fill becomes transparent!? I know that there is a colorpicker tool, so I could easily pick up the color/fill with it - but thats very ineffective when illustrating ... It takes a lot of time and is not very much fun to do every time you want to draw a new shape .... Is this a bug? Or is this intentional behaviour? Is there another way to achieve what I want (copy the old stroke settings to my new one)? Thanks for any help!
-
Yes thank you carl, this seems to be the only workarround for this atm ...
-
Oh thats really a pity... if there is no way to turn that off... It makes sense if you use the Preview Mode to actually have a look how the layout looks when its printed This is with preview mode turned OFF (good to control if all bleeds are made correctly). In this case the white line makes sense. And this is how it looks when you turn preview mode ON: Following the concept of WYSIWYG the white line should not be visible imho. You should see how the printed product looks like. If you render a PDF from it there are no lines in it ... In Indesign this works as it should - without such lines.
-
Hello guys, I'm currently working on a comic book like magazine, that has black pages. I do this by putting a black colored box in the background. This is how the page looks in preview mode with bleed turned on (the pages have a 3 mm bleed) ^^ As you can see there is a thin white frame along the page margin... When i turn on preview mode (to see the actual layout as it would look printed) by pressing ctrl+shift+W this lines dont go away, so there is a white box drawn over each of my pages ... Is there a way i can turn the lines off? It's not a super big thing - but the white line somehow always distracts me from the actual layout and i always must stare on it Any ideas??? Thank you!
-
Moddo reacted to a post in a topic:
How can I preview pictures in fullscreen mode ?
-
pxp joined the community
-
I cant believe there is no fullscreen mode in AF Photo!! Im using fullscreen mode in PS all the time to evaluate my design without having the UI in the eye all time ... Its a very simple feature - but super important imho! Please consider adding it asap.................