ol4f
-
Posts
55 -
Joined
-
Last visited
Everything posted by ol4f
-
Hi, I am not sure if it is realy a bug but I think Publisher should behave differend. As you can see in the first screenshot, i placed a PDF within a picture frame. Becaus the file caused some trouble with transparency I rasterised the PDF document. Looks good on the first glance, but in the second sceenshot you can see that the information in the bleed area is gone. I think Publisher should also rasterise the content of the bleed area. edit: sorry, it is not a Designer document as I wrote first. It is a PDF and i correctet this. Problem stays the same.

-

Masterpages and Layers
ol4f replied to ol4f's topic in Feedback for Affinity Publisher V1 on Desktop
*push* I still think there are various scenarios where you want to place the content of the masterpage above the content of the page. Logo, Watermark, Pagenumbers, ... At the moment the only way I see to do this is by hand and this can be a lot of work. Easy to do in InDesign by the way -
Suggestion: Descriptive Document Sizes
ol4f replied to wls's topic in Feedback for Affinity Publisher V1 on Desktop
In my opinion it is not the perfect moment to think about the format when you set up your Publisher document neither it is the job of a software to say wich document size you need. Think about what size you would like. Think about what would suit the content the most. Look at some books/magazines/posters arround you and what size they have. Maybe ask yourself why they have this size. You can even get some inspirataion for your project from the examples around you. You should also think about where and how you want to print it. Printing at home with an A4 laser printer? Do not use A3 or even a borderles A4 because it would not work. Your favourit online printer only offers A5 and A4? Do not use A6 or something like 250x100mm. Someone says you should set up a document with A4? Just choose A4 and do not care about the size because Publisher already knows it does the job for you. Someone says you should set up a document with 210x297mm? Just type it in an maybe find out later that it is exactly A4 and remember it for the next time ;) I don't want to offend you, just share some thoughts for someone who's new to publishing :) -
Hi, when I select mutliple linked images in the Resource Manager and press 'Update' all selected images get replaced by one of them and not thier own modified file. Seems like a bug. Select some modified files... ...and press 'Update':
-
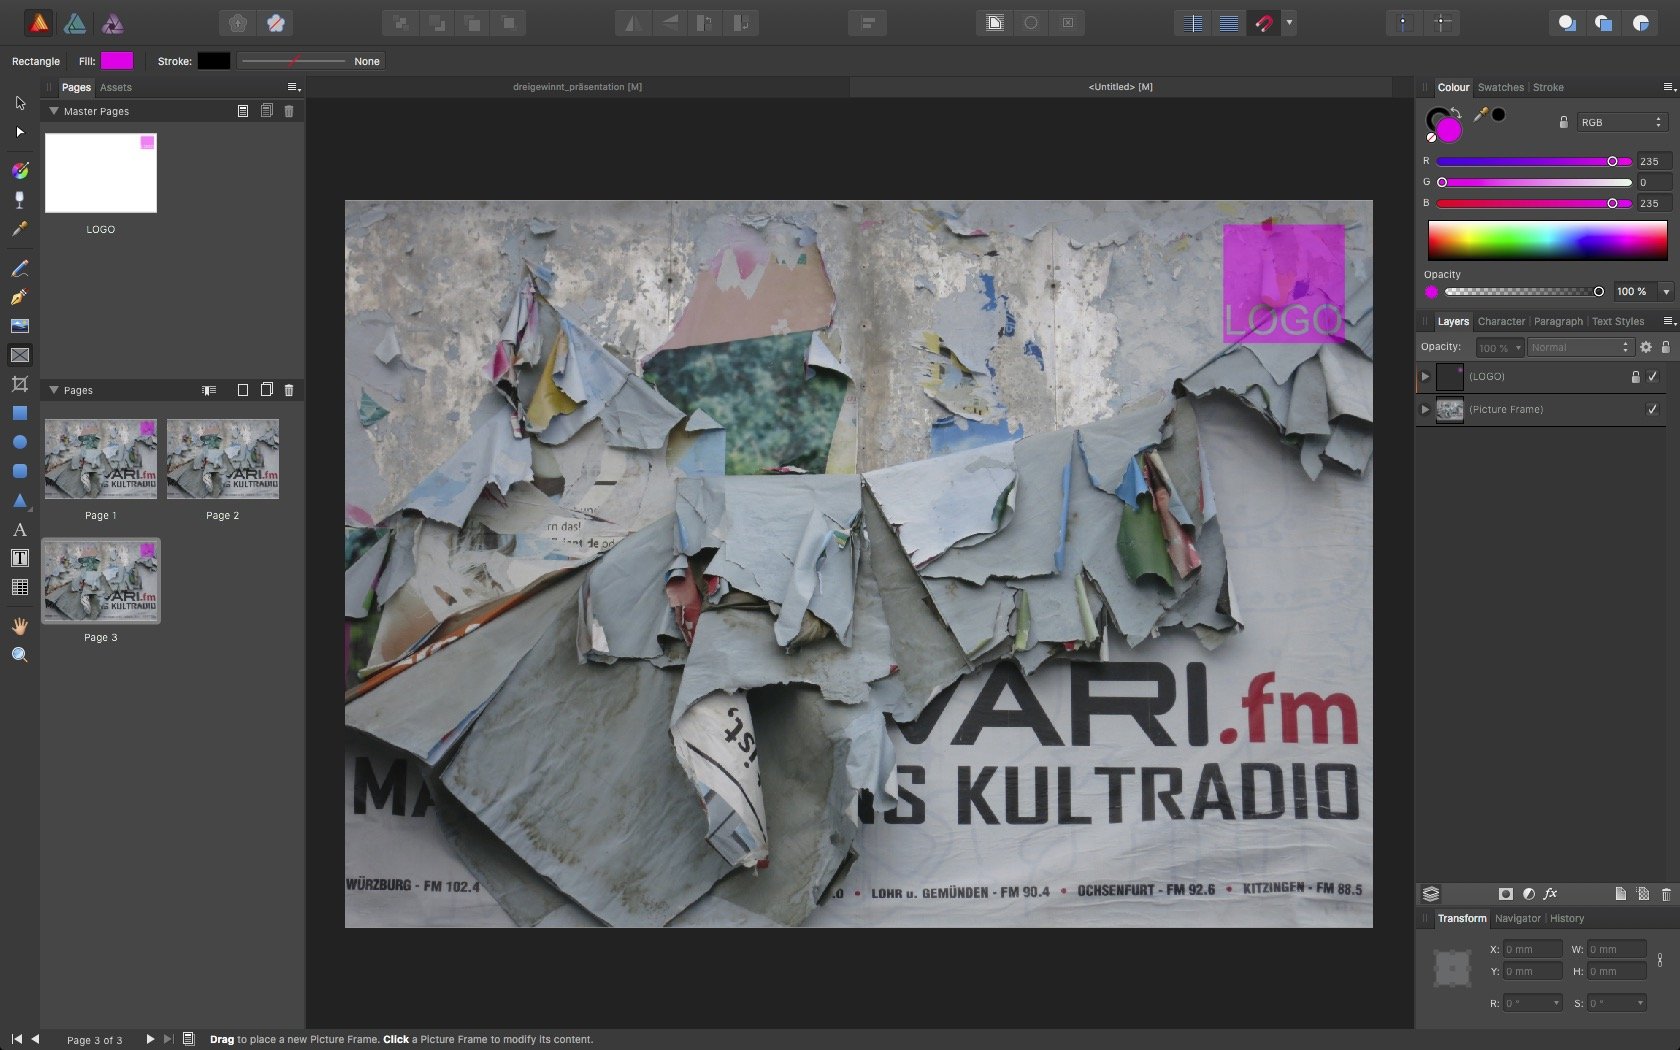
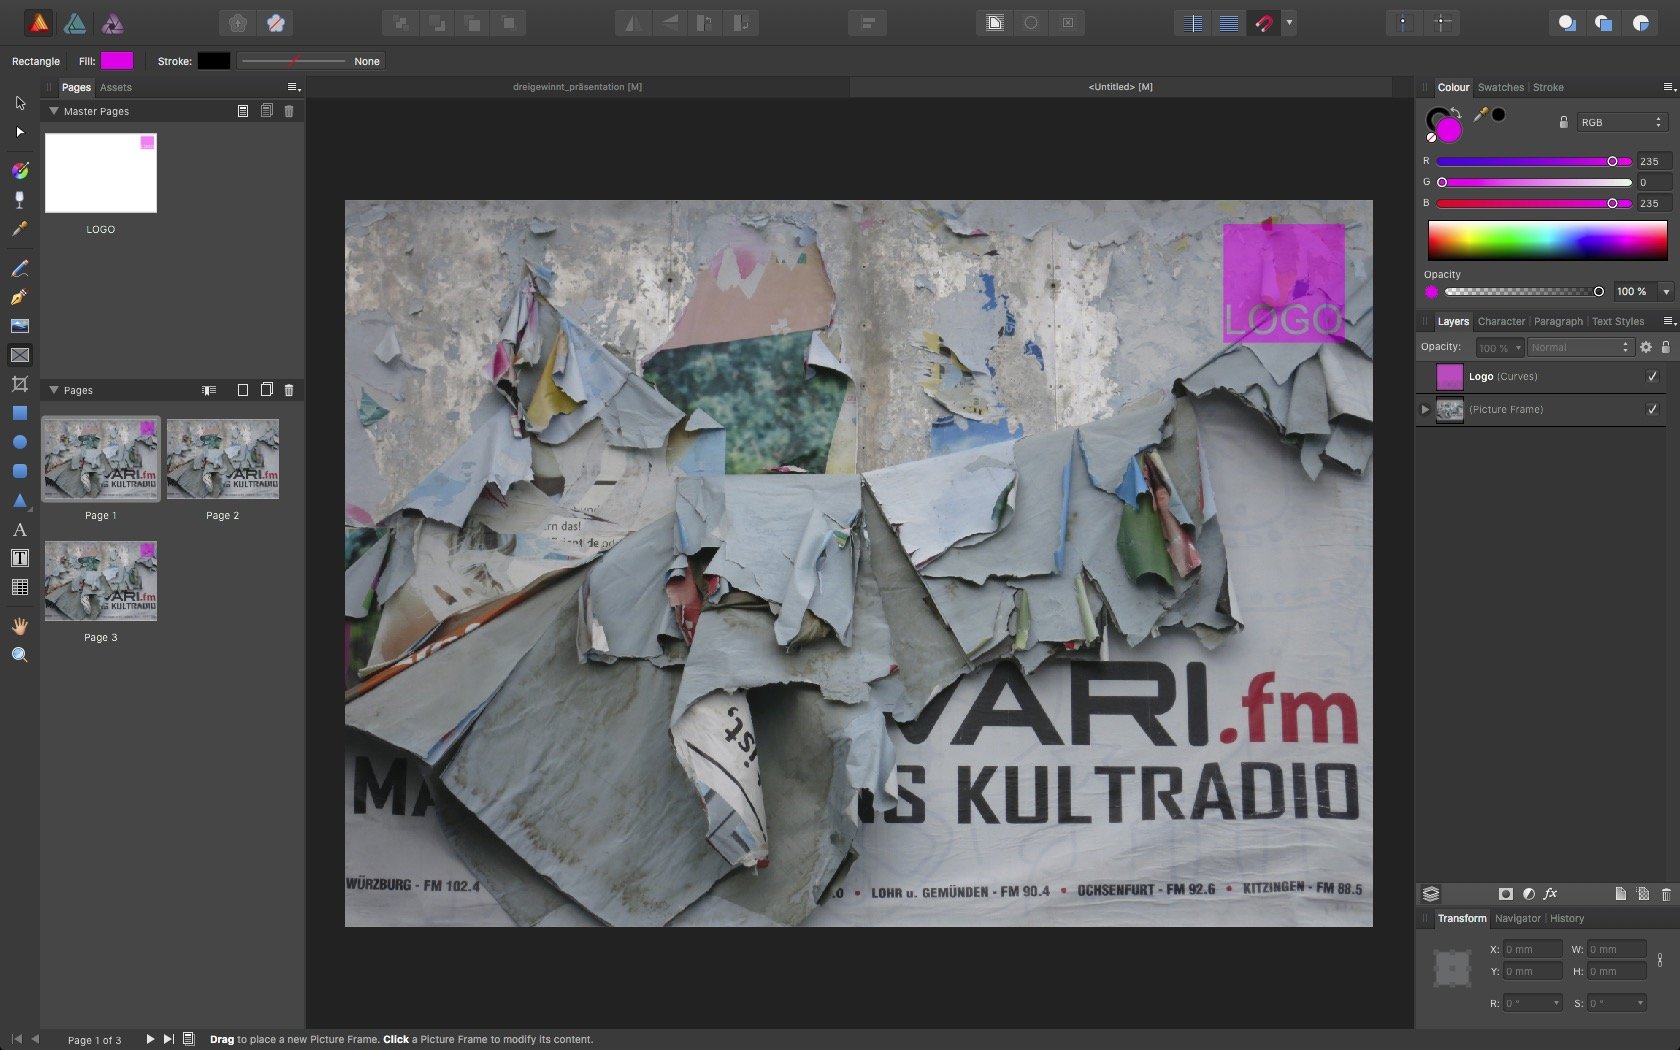
Hi! Lets say I have a lot of pages filled with images and I want to add a tv-station like logo as you can see in the attached 'manually' (1) file where I have done this manually. If you copy the logo to a masterpage and apply this masterpage to a new page and then place an image on this new page, all the masterpage items are behind the new placed image (see 'masterpage')(2) and you have to move the masterpage itemes on top of the page to get the intended look (see 'masterpage_moved')(3). Any other way to do this? Could be also usefull for pagenumbers... Maybe we can have an option for masterpages to always stay on top or something. (1) manually: (2) masterpage: (3) masterpage_moved
-
the whole picture placing thing...
ol4f replied to ol4f's topic in Feedback for Affinity Publisher V1 on Desktop
Great! Maybe the core of my confusion is just the existenze of two incompatible tools for image placing. HERE is another point in forgot to include in my post. In some way it is also related to the whole picture placing thing... -
Hi! Some of the following points are already said but the more things I try with Publisher the more I get dissatisfyed with the whole picture placing thing. The first time I opened InDesign I had no idea how to do anything but after a while you realize that you need a frame for everything. So you draw your frames and fill it with whatever you want. For the last six years I have done a lot of work with InDesign for university and got used to it and how it works. I have never seen any other DTP software and i do not want to say that Publisher should be exactly the same as InDesign but there are some things in Publisher that definietly confusing me completely PICTURE FRAME RESIZE Draw a picture frame in the size you want. Place a image into the picture frame. Select the image in the layers panel to manualy move an resize it (ID: just press 'a' for the right tool or double click within the frame for the right tool to move and resize the image within the frame. If you now change the size of the picture frame the placed image does automaticaly rescale, depending on the choice under 'Properties' Confusion Back to step 3 PLACED IMAGE INTO FRAME I tried placed an image via drag n drop but needed it within an image frame. How to do? Maybe just draw a picture frame and nest the image within the picture frame in the layers panel. The image is somehow within the picture frame now but somehow differend as if you would have directly placed it whitin the picture frame. So how can I bring a placed image into a picture frame? ORIGINAL SIZE It is already discussed in another topic but very important when you place scaled architecture drawings for example, too. CROP TOOL FOR PLACED IMAGES I realized that you can also use the crop tool for placed images and picture and somehow I got something that at least looks like what I opticaly want but with a strange behavoiur. Select differend things in the layers panel, check/uncheck 'lock children', ... All I am begging for is the possibility to draw a frame that fits into the layout (margin, grid, guides, ...) and place an image within the frame that I can move and scale the so that the right area is visible. But the easy way without a search for the right parent or child object or some automaticaly resizing that i don not want becaus a already have done this manually. Please tell me if I just got a strange workflow in InDesign or when there is a simple and logical workflow in Publisher that I have overlooked. Thanks! PS: I often missed something like the artistic text tool in InDesign. So thanks for this!
-
Hi, if you drag a picture (jpg in this case) from finder and drop it over the pages panel Publisher starts a new document with this picture as a page. I am not sure what I have expected but i can not imagine a situation where you drop a file over the pages panel and want a new document. Maybe it would be better if something differend happens. For example placing the image or whatever you are dropping on the page you are pointing at. Just as inspiration...
-
I don't think so. So more options for underline/strikethrou and/or character background would be useful again.
-
Right next to the font color. The same in Designer and Photo.
-
I had a quick look what people are doing with Paragraph Rules and definetly learnd something new. And I also realized that what is in InDesign done with an underline (see attached screenshot) is just the characters background color in Affinity. Sometimes it is easier as you think...
-
Same confusion and opinion here. For example you can use the underline options in InDesign to create some kind of highlighting.
-
Thanks! I still underestimate blend modes.
-
Hi, i wanted to highlight some areas in a map as you can see on the attatched screenshot. But the way I achieved it (with AD on macOS) feels a little bit to complicated to me: draw the vectorshape with no filling and the black outline. (shape A) duplicate it, remove the outline and add a filling. (shape B) add the shadow/gradient arround shape A with a layer effect. rasterize shape A and its effect. draw a rectangle as big as the document and use shape B to cut a hole into it. finaly use it to mask the rasterized shape A. really?!? My first idea was to create the wanted shape, add the shadow and mask the inner area of the shape. But the mask does not mask the layer effect. Any idea how to get the wanted effect more easy and with more vector shapes/adjustable effects and less pixel layer? Subquestion: How to "invert" masks? For example to make step 5 a little bit easier... Thanks!
-
Sequence photo
ol4f replied to whu3's topic in Pre-V2 Archive of Affinity on Desktop Questions (macOS and Windows)
So you just want the three photos next to each other? You can just create a new document with the height an three times the width of your original photos and copy/paste them in for example. -
Set guidlines and margins on more than one artboard would be a great feature! @GT70 : As a workaround for your calender project you can first make kind of a "master artboard" with every guidlines you need and then just copy it. If it is not already to late...
-
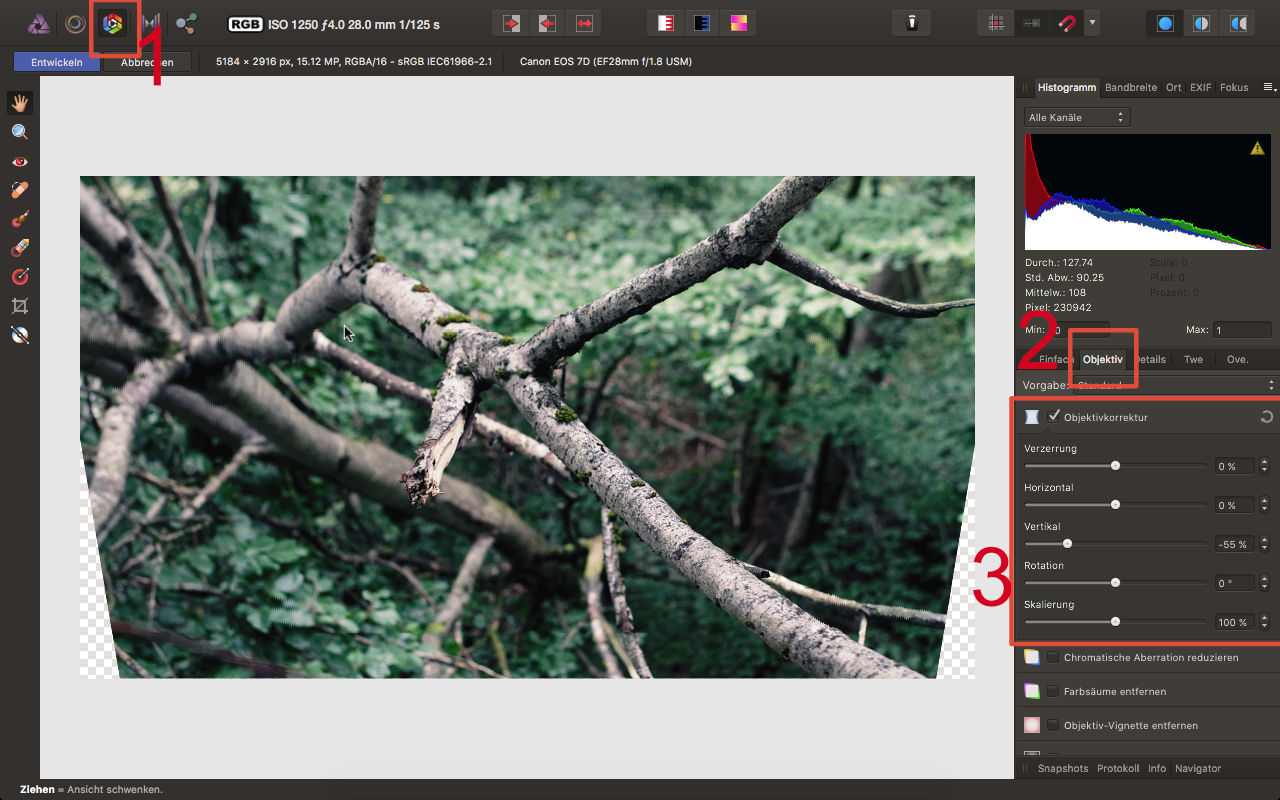
Adjusting camera angle
ol4f replied to Edwa's topic in Pre-V2 Archive of Affinity on Desktop Questions (macOS and Windows)
One way to do this is the function in the develop persona. There is a screenshot attatched. It is form the german version, but i hope you will find it in the english version.
-
affinity designer landscape architecture/urban design presentation
ol4f replied to ol4f's topic in Share your work
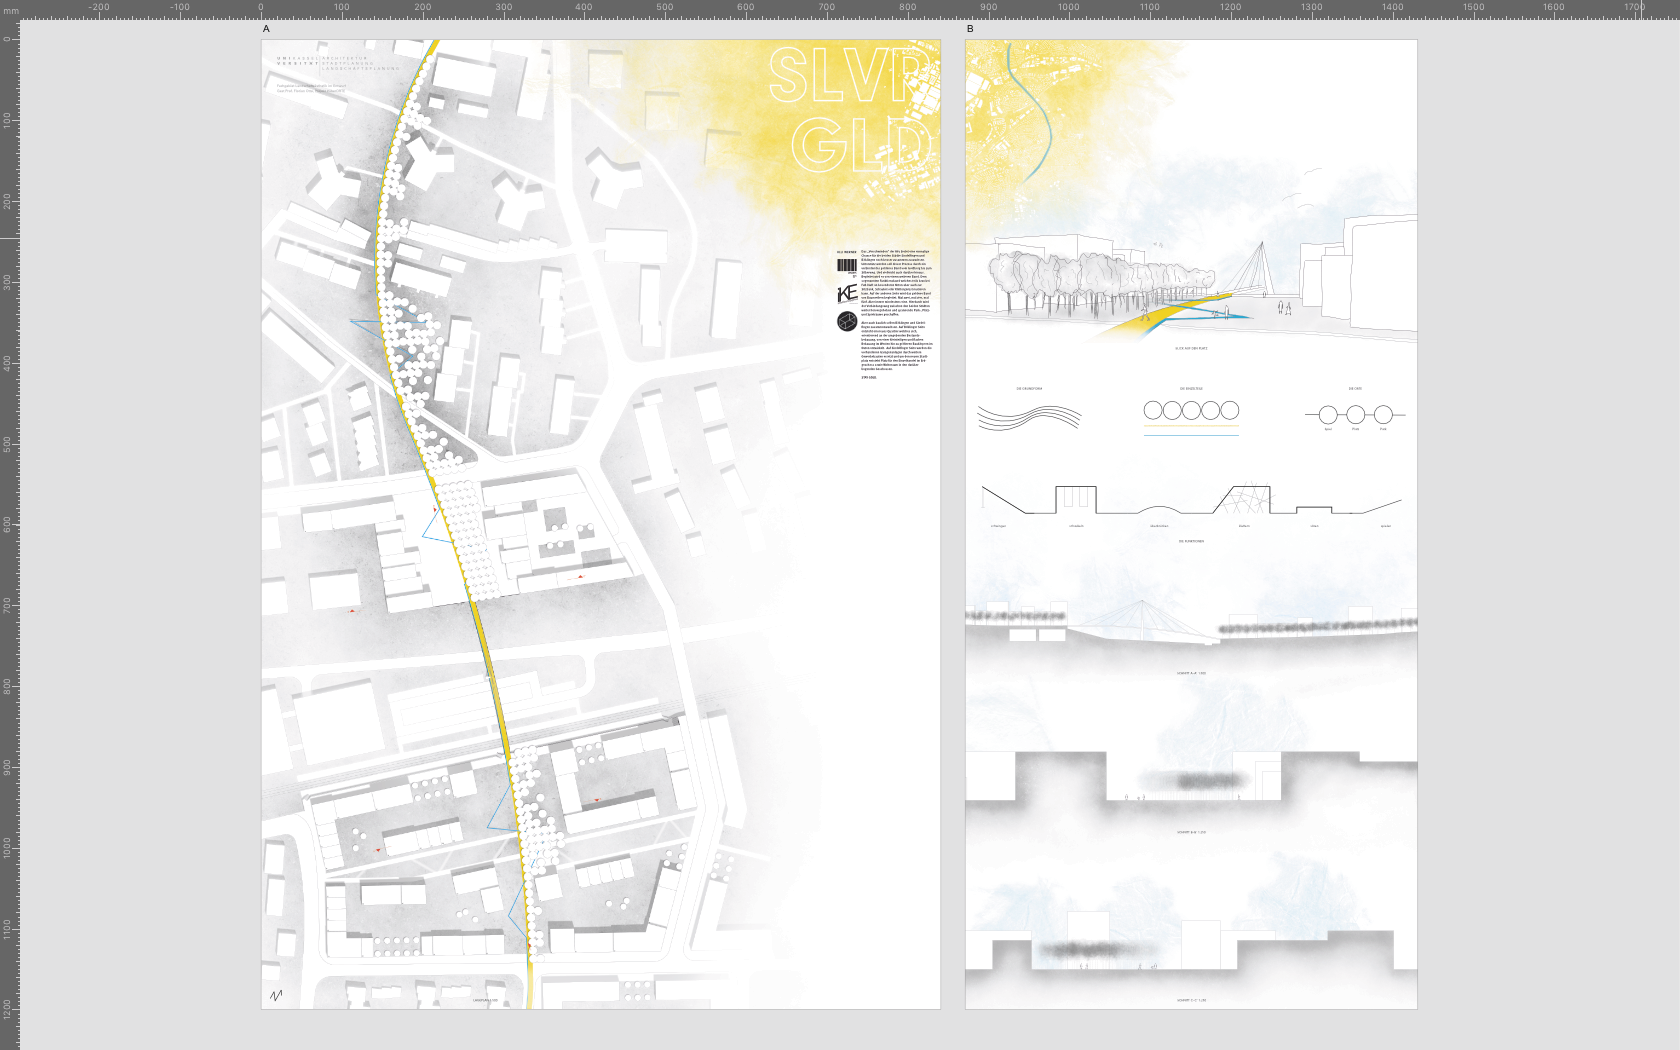
Thanks for your feedback and sorry for the delayed response. I have added a screenshot of the document in the first post. I also made smaler jpg version of the whole thing but the forum won‘t upload it. Ja, PDF Dateigrößen sind immer etwas verwunderlich. Kannst du nachvollziehen, was Acrobat genau gemacht hat? Theoretisch sollte man mit den richtigen Einstellungen in der Export Persona ja ein ähnliches Ergebniss direkt aus AD erreichen. English summary: PDF filesize is sometimes a little weird. Any Idea about settings for export persona to produce a good looking PDF with a smaller filesize? Like with the most other CAD programms you get a free educational version for use in university. For this work I think I used only a small part of the tools an possibility of the programm. Nothing special you can‘t re-create using AD. It‘s more about how easy and fast you can create it. As CAD/computer-aided design already says the tools like simple rotate and move are made for more accurate work and constructing things and drawings. Also the snapping and so on. Another very important point is that the drawings got a scale. So you can work with real dimensions and set the needed scale for the plan in the output options. Or use for example the same drawing in 1:500 and with some added information on another layer in 1:100. For architekture competitions it is a common workflow to draw with a CAD Software and afterwards use Illustrator or Photoshop to make it look nice. And with the whole post I just want to show that Designer can do this job, too. Maybe better. I have added some sceenshots how it looks in Vectorworks and bevore Designer. Maybe interesting for everyone who never was into the CAD/architecture thing
-
nice ones! ...and I have no idea how i would do something like this.
- 5 replies
-
- 1
-

-
- noise
- distortion
- (and 1 more)
-
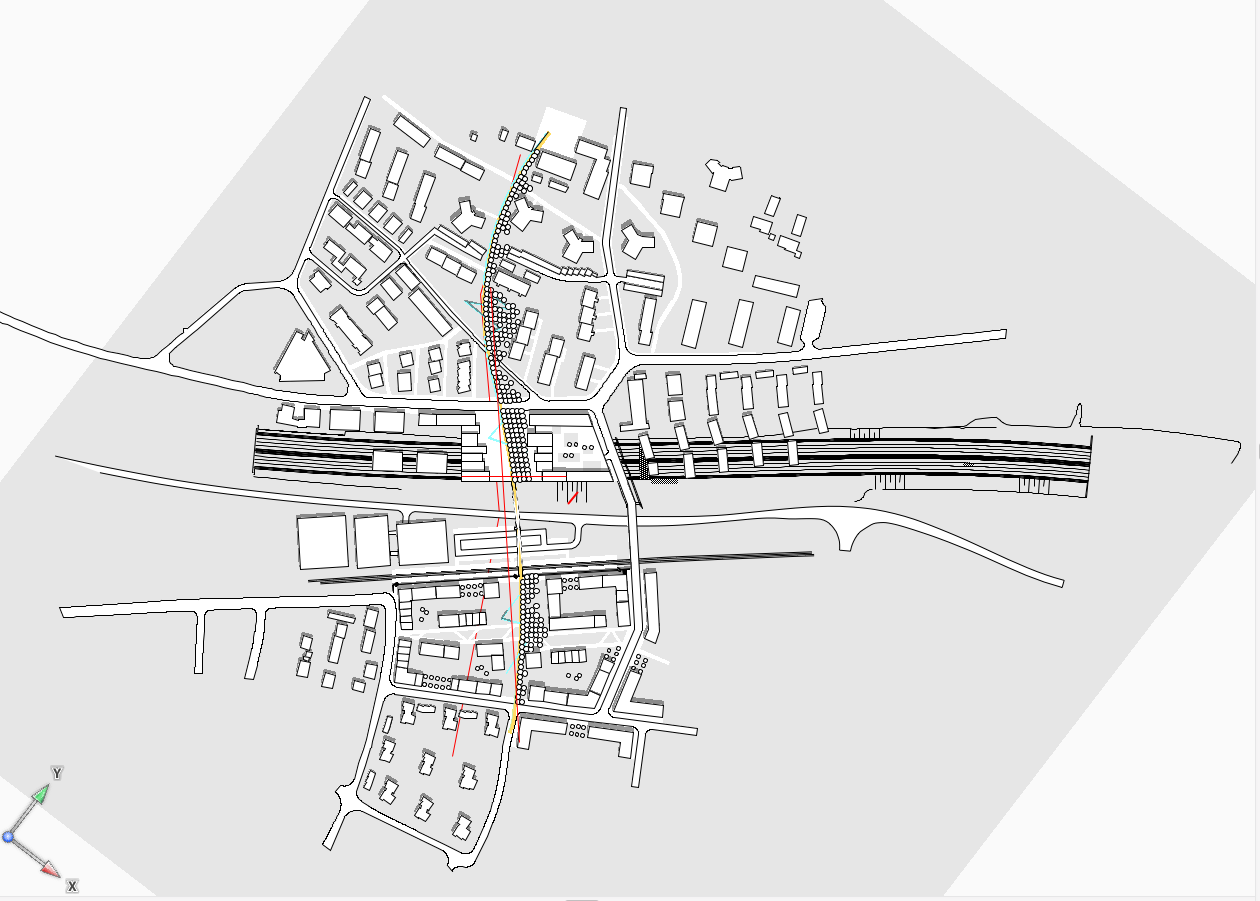
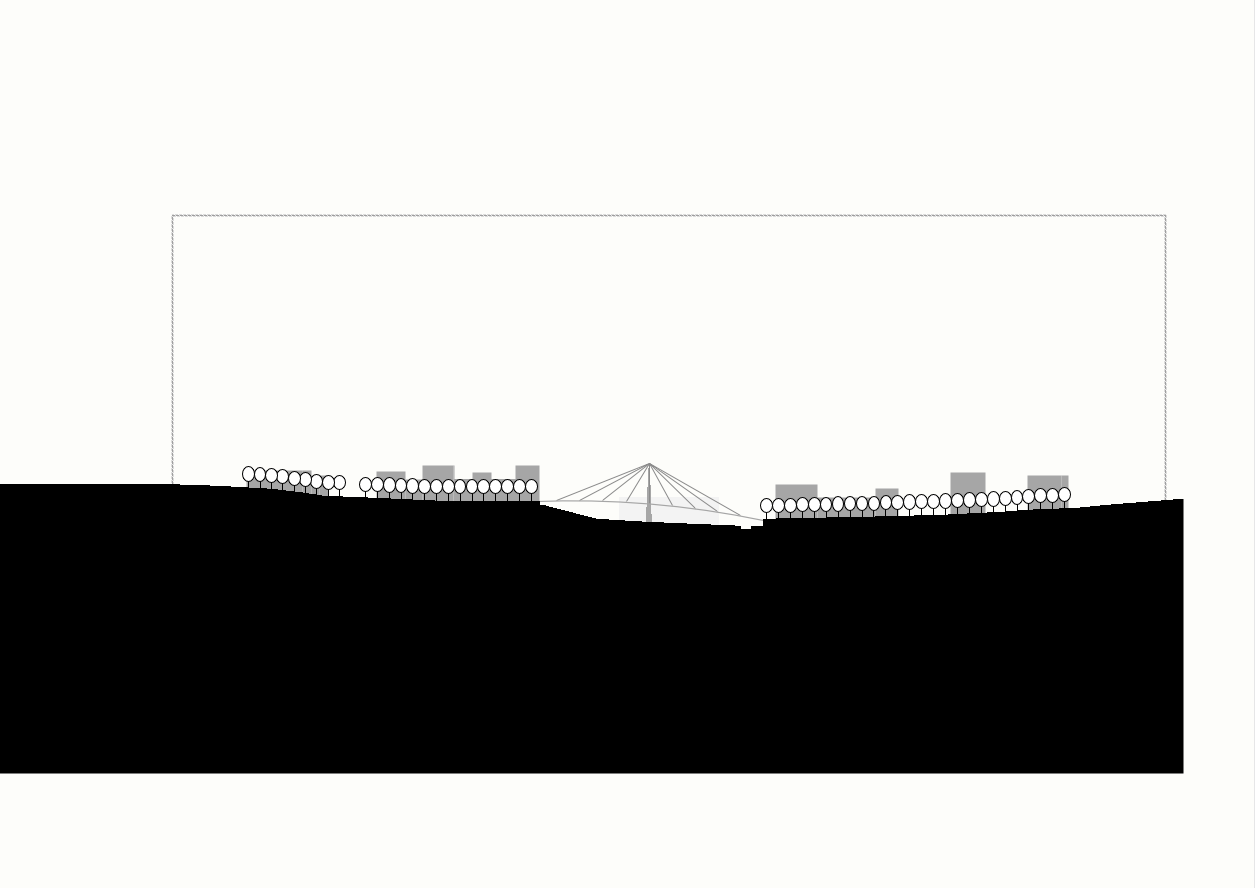
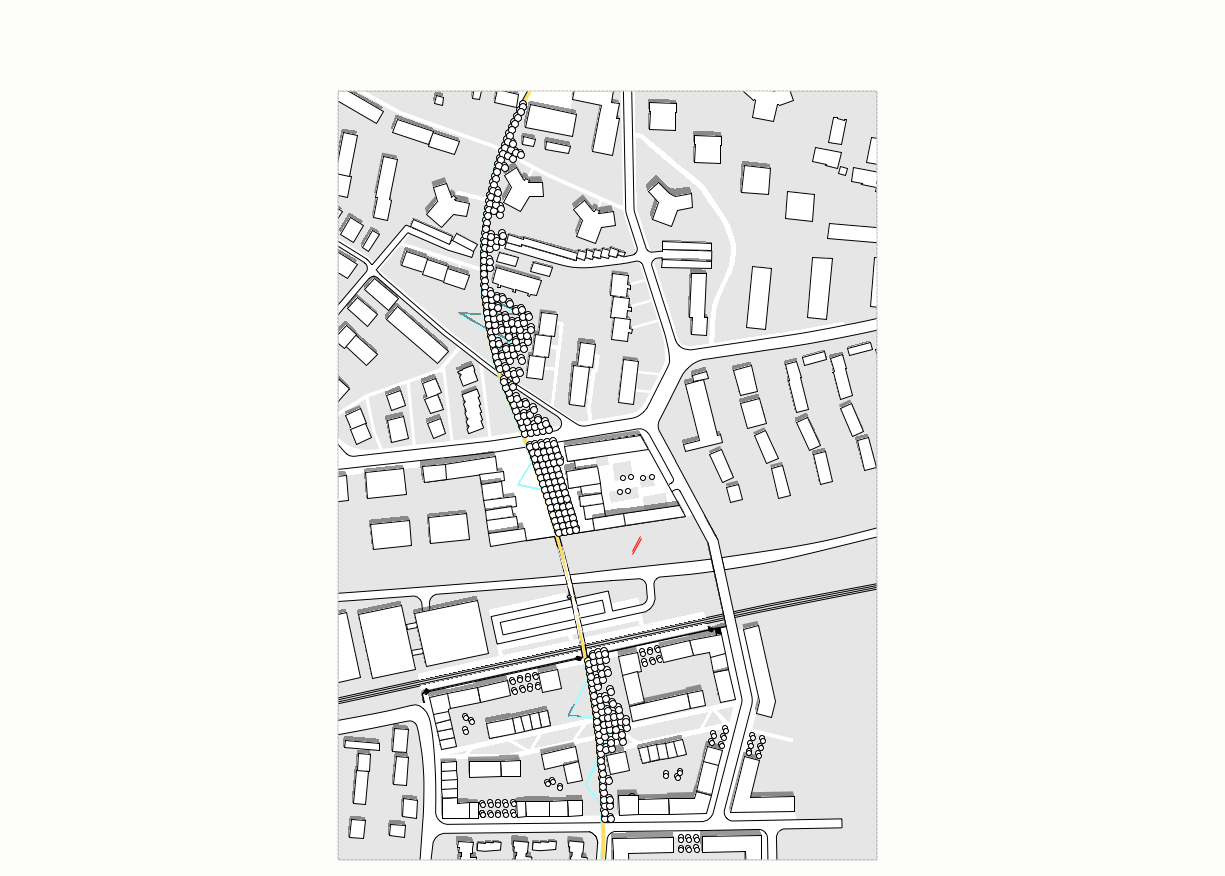
affinity designer landscape architecture/urban design presentation
ol4f posted a topic in Share your work
Hi, this semester I used for the first time Designer for my final presentation posters in university. The site plan and the sections are drawn with Vectorworks (CAD software) and exportet as PDF for Designer. I was delighted how easy it was to adjust colors and line width of the vector parts and just switch to pixel persona for some nice background textures. I used Photo to add the diffuse fade out on the edges of the site plan. I handled the drawings as individual files and embeded them directly into the final layout file. Only the site plan was to heavy to handle for my late 2011 MPB and so i had to export and embend it as a tiff file. Maybe the size (DIN A0@300dpi) and the live blur filter could be an explanation for this ;) Feedback welcome! https://dl.dropboxusercontent.com/u/13340316/RundgangAffinity.pdf(~34mb)
- 7 replies
-
- 2
-
-
- presentation
- design
- (and 4 more)
-
Maybe you are looking for something like this? or that? or something for RAW files?
-
The media browser and also the read the image function are part of OS X/macOS. So Serif has not writen these functions and only uses the capabilitys of the operating system. In the Mac version you already can change brush size and hardness with ctrl+alt+right mouse button, so i hope it works in the windows version, too. Maybe with another shortcut...
-
Great! I have not found this function yet.
-
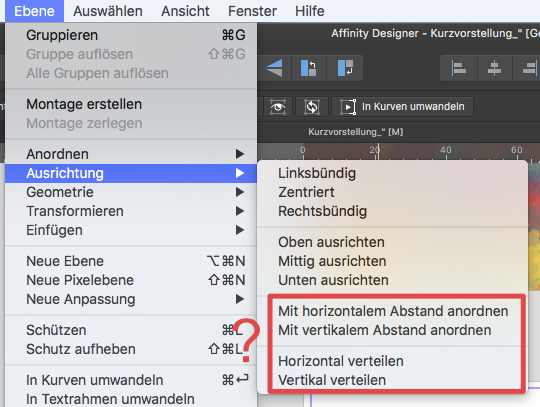
Hey, it's a nice idea to put the buttons for alignment in the front row, but I am missing some options i have used frequently. Will they ever come back? (I‘m not sure if alignment is the right english name for the function and I am sorry for the german screenshots. I hope you can understand my problem.)
-
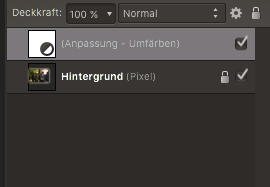
spontaneous i found two ways to get something similary like in the example: 1: just put a colored rectangle above a B/W picture and change the blendmode of the rectangle to multiply 2: just use the "Umfärben" adjustment layer. Sorry, I do not know how it is called in the english version but i attached a screenshot of the dialog.
.jpg.254c4c2b5d1b69039026d62602ae67a9.jpg)
.jpg.ff7063a05e790a17814360dda1f7396c.jpg)


.jpg.90687cb2efd75e5c7c709a46a4722f18.jpg)
.jpg.cb1461451ccd8b52b119ba58a58cfd31.jpg)