DesignCat
-
Posts
17 -
Joined
-
Last visited
Everything posted by DesignCat
-
I tried rasterizing before changing those settings. Changing those settings had no effect by themselves but after I rasterized the layer group after changing the settings, they fit more snugly. Except for one side and I can't figure out why but oh well haha. The decimal place settings were already more than 0, but the numbers shown were whole. I increased the decimal places and the numbers stayed whole, so the dimensions themselves were fine.
-
Thanks for your suggestion. The images are already sized in whole pixels. However, I noticed that after changing the settings to force pixel alignment and use precise clipping, if I rasterize the layer then the lines disappear. So that's not so bad at all!
-
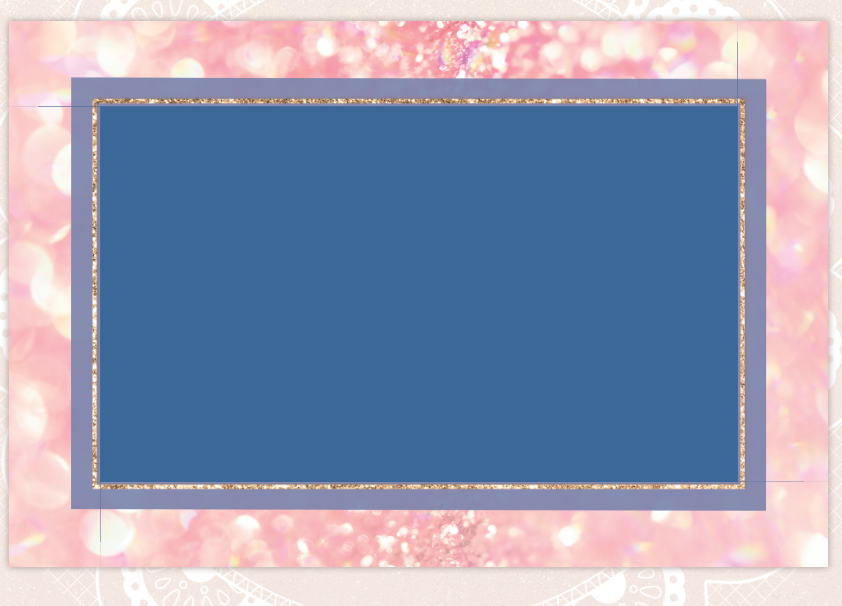
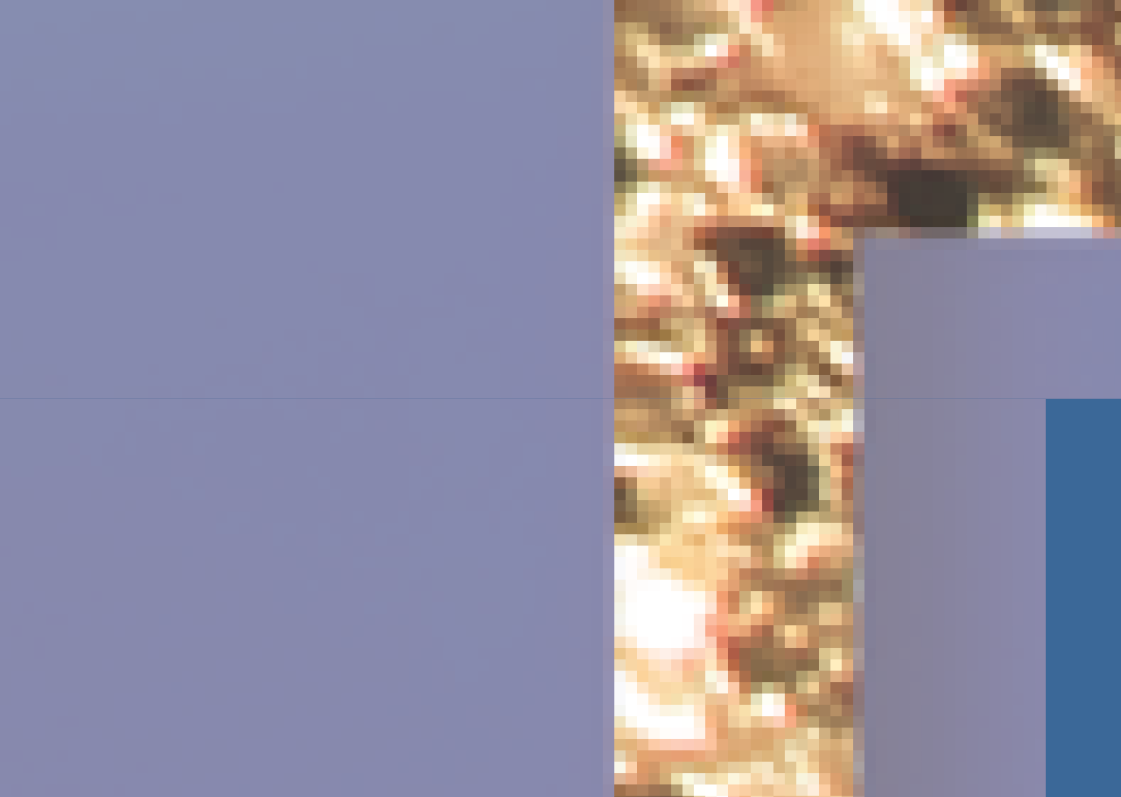
Hi, I've seen the posts about white space when cropping but my problem is a little different. So I have a frame, I cropped each side of the frame to put my image behind it (the frame has some lovely transparency which is why I didn't just put the image on top) and the cropping is flush, each piece snapped to each other, when you zoom all the way in it looks flush. And yet there's clearly visible lines... Both in the document and exported png. I have "use precise clipping" selected in the settings and when cropping, I used the "force pixel alignment" option, and neither made a difference. Please see screenshots attached. The size of the frame pieces is in whole pixel as well. the first image is the whole frame, the second is an extreme close-up where you can see the pixels and the thin line between objects (which is there whether in normal view or preview mode). Does anyone have any advice of what to try? P.S. no workarounds such as "crop along the square lines" please, I want to find a solution to the problem as it's not the first time this has happened to my projects.

-
Oh that could help, didn't realize you can make it desaturate, thanks!!
-
Hi, I'm trying to correct the colours of a photo, did the general colour correction and it looks fab except for one part - there's small areas that were very saturated in the original photo and it really comes out after correction. I tried using the burn tool which was just about okay but it didn't work on the brightest parts at all. Also tried selecting the area and using colour correction on it but that creates a nasty border around the selection. Any ideas?
-
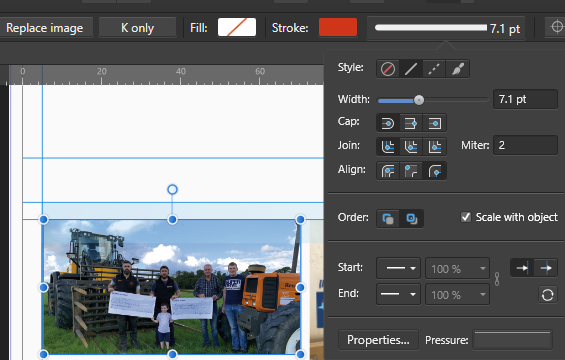
Hi, So I have figured out how to make the stroke show on the outside but... That makes the stroke disappear. I assume it's because the layer size ends at the image's edges and the stroke can't go outside the layer boundaries. I can't find any way to change the layer size to stretch outside the image and am using a crop tool on the image. I can't trim it since it needs to be flexible until the project is finalized. As you can see in the screenshot, the "Scale with object" option in the Stroke menu does nothing... Oh, and I also want to avoid using the Layer Effects function for simplicity's sake. Can anyone help?
-
Thanks for your explanation, that makes it a lot easier to understand.
-
If it was the monitor colour profile, would it still show differently in Publisher though?
-
I see, is there any way to export the document in CMYK to reflect the colours that will actually be printed? I'd rather hand over the CMYK file and be sure the document will print exactly as intended. Changing the PDF export settings myself to CMYK and Fogra 27 made no difference in what the exported document looks like
-
Sure thing, here Newsletter_tester.afpub
-
Ok, didn't know that, but PDF should, right? Yet when I export it as PDF, the colour is also a lot different to what I see on screen while editing in Publisher - have a look at the included document
-
Hi, The image I'm working on looks a lot more saturated when exported. The difference in colour varies when exported in different file formats. I started working on it as sRGB but then changed the colour profile to CMYK as it will be sent off for print. The difference in colour was still there when exporting initially. I'm attaching a screenshot of the page in Publisher, a PNG export (with a PNG profile) and a PDF export (with a PDF for print profile). Hoping you can let me know where I messed up! page 3.pdf
-
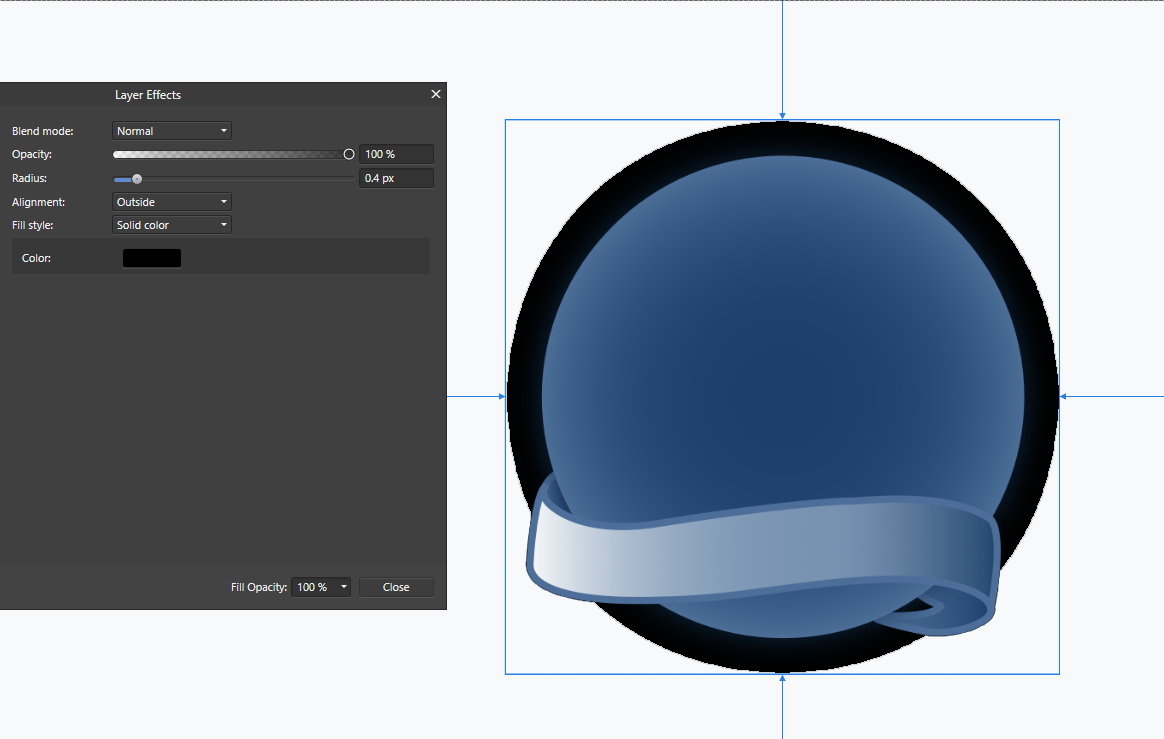
You're spot-on, the shadow effect on the circle broke everything haha, it works just fine after disabling it, creating a lovely outline exactly where I want it! Thanks so much
-
Hi, I've been trying to create an outline for an object made up a few parts with no luck. I rasterized the entire group to merge it too, with no luck at all. The first image is the group of objects I'd like a nice little outline around. The second image is what happens when I try by using Layer Effects > Outline. The result is the same whether I'm trying to do it on a group or on a rasterized group. And it's flat-out bugged because that's the thinnest, claiming to be 0,4... Any help would be greatly appreciated.
-
Still No Text Wrap in Designer?
DesignCat replied to DesignCat's topic in Feedback for Affinity Designer V1 on Desktop
Thanks for clarifying, that explains a lot. Was never a big fan of Illustrator either haha I'll trial Publisher instead. -
Still No Text Wrap in Designer?
DesignCat replied to DesignCat's topic in Feedback for Affinity Designer V1 on Desktop
Hi, I see, can you tell me what the point of Designer is? It seems to be lacking a lot of features otherwise present in design software. I thought it would be an alternative to Adobe's In-Design given the naming. -
Please don't tell me you still haven't added a simple text wrap to Designer? Even Word has had it for years, for the love of god! How can I do text+image design without even a basic text wrap? I hope you'll add one ASAP because as it stands, this app isn't worth its price. P.S. Are you ever gonna add a "warp" feature for quick image editing?