jamesgangcreative
-
Posts
84 -
Joined
-
Last visited
Everything posted by jamesgangcreative
-
Well, maybe a line 🙂 All that was turned off. I didn't set use baseline grid. I'll give these tips a try. Thanks again.
-
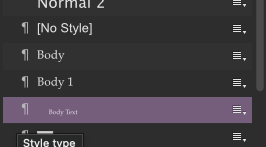
Both. And this is after the text has already flowed into the document. And when I print out and decide it would be better if there was an additional .01" space at the bottom or top. So, yes, if there was a way to get the top and bottom and same number of lines on each page, in set up, prior to doing anything that would be great. In this case, however, what I asking is if there is a way to "just simply" automatically move all 200 pages just a tad higher on the page vs. having to click on the little blue circle on individually pages and move the content up, then move it over to the right margin. As we know, in word.docx, for example, you would "just simply" adjust the margin taking about 45seconds. Yes, different program. Yes, not comparing. Using as an example. I've actually built books using Word and it is a nightmare beyond belief. AF is much much better and very easy to get the hang of, except for the finer adjustments. I still don't have a clue as to what all those instructions are for under the edits for styles for example. Apply to paragraphs, don't apply, but keep local formatting, or not but do ... omg. 🙂 God forbid you accidentally touch one of those little buggers. Speaking of which, any idea as to why - after I did an edit of the body text - the size of the listing became 3 pt? The body text is 12/16. I probably accidentally hit local format edit character strawberry preserves. 🙂

-
Thank you, I'm just writing fast, yes, divided into spreads. I know the difference. As this isn't something that apparently is easily fixed, as I say, I fixed it manually for now and I am going to spend some time trying to figure it out rather than go back and forth with the same information and the same result. Regardless of pages, spreads, counts. It didn't work with 200 pages, or 100 spreads and one front matter page and a blank page at the end, and 10 sections. So, until I discover the secret passageway it isn't going to matter. 🙂
-
I'll create a ten page spread when I have a chance. Hopefully all the masters and such will be set up in default. It seems "reset to factory default" doesn't mean everything. Maybe I'll just try choose a template I've never used before and work from there for this test.
-
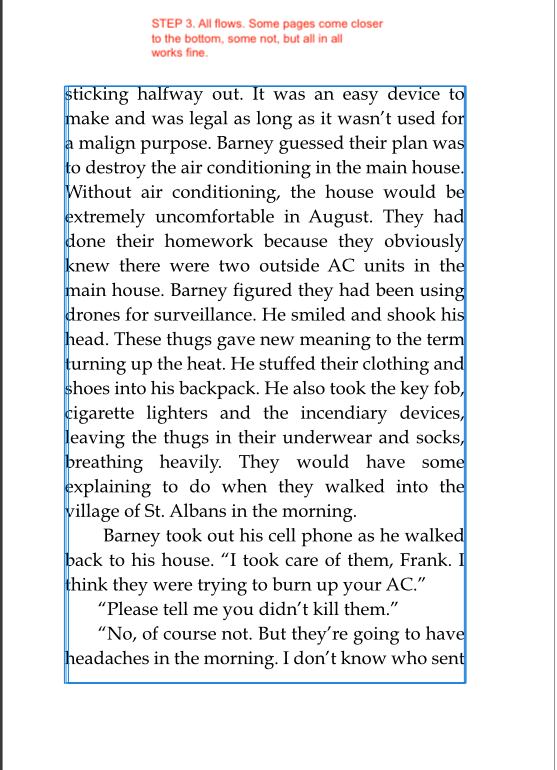
I flowed the entire ms I'd been working on. Those pages I shared with the Steps were the new document following what I have learned here. Whether it's 2 pages or 30 it's not going to matter if it doesn't work for me. If those are the correct steps, I don't know what else to do. In Step 2 I just wanted to show you that the triangles show up. Did the latest images I shared, show the text flow as you required? View Text Flow... All the pages flow, but there are no red triangles on any pages after the flow. I don't work in PREVIEW mode, I work in the View Text flow mode. So, I can cut and paste ten pages from the 160 page document and put them in as I just did with the 160 pg document if you think that is going to suddenly make a difference. I don't think so. Guess I'm at a dead end. I'll continue playing around with putting a text box in the master pages, and trying to change the size of the text box and see if the text reflows into the change while watching more videos and reading instruction pieces. PS I did this (see screen capture) on about 100 of the 160 pages, but I'm trying to understand how to do this automatically. There may be something in here about setting up new text frames that may help. I assumed simply grabbing and resizing a text frame in a master would reflow the content, but apparently that isn't the trick. PPS You mean bottom right, right? 🙂: When a text frame is selected, the frame includes a triangular Text Flow button at the bottom right of the text frame (red or blue). Irrespective of whether the frame text is overflowing, you can click this to draw out another text frame linked to the originating text frame. To link the selected frame to an existing unlinked frame: Thanks
-
Every frame and every page flows. That's how I work on the document. That is never off. You mean this? And if there was a text frame that wasn't linked, I haven't a clue as to how to fix that. I ran into an issue where a chapter repeated, I attempted a cut and paste of one page, that sent the link flying to five pages behind, and duplicating the chapter (the red dot). That's when I gave up and started the second time.
-
How do I reset "factory default" so everything is reset? I ran factory default reset and snapping is still on, my View on the sidebar is all screwed up from my trying to hide glyphs and check text styles, and such. How do I get the sidebar back as it was, and reset everything so text is 100% black, pages are set to default sizes, and such.
-
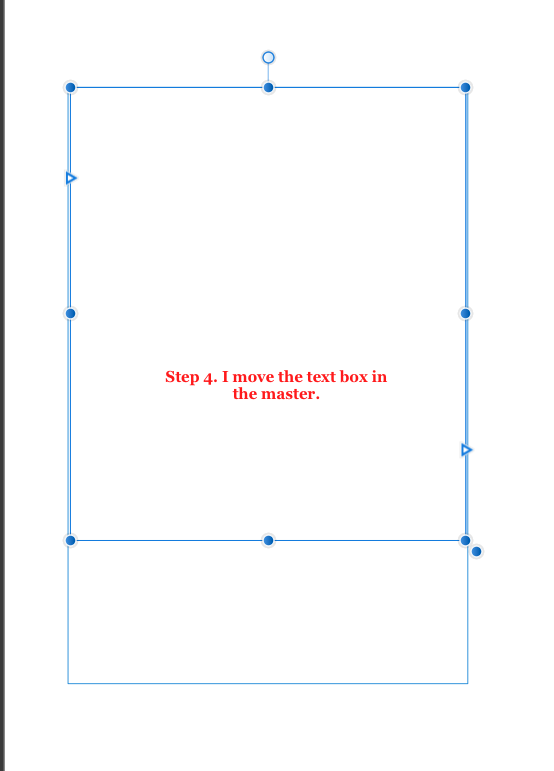
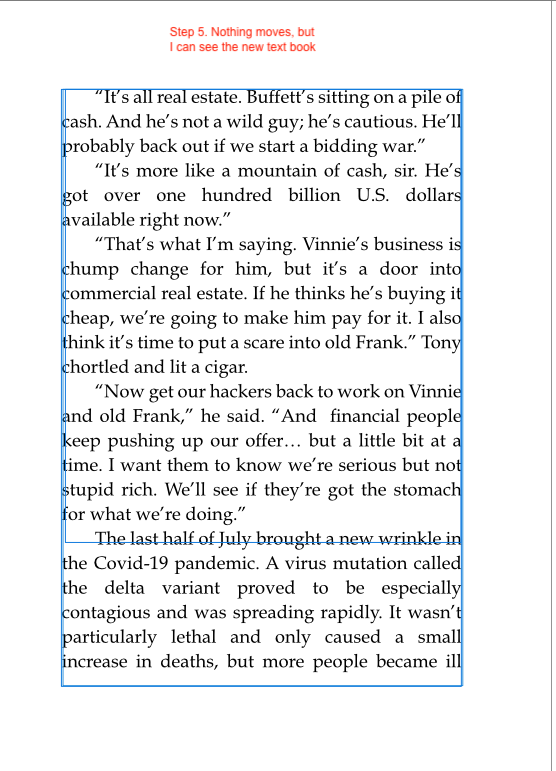
Yes, that is correct. That is Step 2. Look at the additional samples. The pages I'm sharing are pages 50, 51. At issue isn't the flow. I'm sharing that I followed your direction and changed the text box size on the master so the text box automatically changes AFTER I've done the flow of the document. You had said in a previous post that to change the flow simply, would be to adjust the text box in the master. When I do that, you will see on the Step5, that the page flow doesn't change. I see the new Text box indicated in blue behind the content, but the content didn't move when I changed the text box in the master, Step 4. I am asking what is the method to get text to reflow into a changed text box? If I change the size of the text box in a master, and I apply that master to pages, then how do I get the text that has already been placed to now automatically go into the new text box if I change its size on the master. I don't want to delete the content and then reflow it. It seems the only way to do these changes is to do them manually one at a time on 1000 pgs or to delete the placed document, change the text box and reflow the document. Unless there's a secret step (paste inside, paste without format, etc etc) I am missing.
-
Here's my test. What am I doing incorrectly? There is no "just simply" reflow of the text into the new text box. I'd have to adjust each page manually as I have done in the past. PS That's a typo on Step 5. Should say "I can see the new text box, not book." And Step 2 was just to show that the placement works and when I shift-click the ms flows.
-
Great I'll give it a go. It won't take anything to flow the manuscript into a new document just to see if I can then move the text box within the master. Thanks.
-
I just answered Walt above with this. I did use masters. But it seems there may be a step I'm missing with the masters. Take a look at the response I sent him. There were three master pages, all same margins, just different uses.
-
Good plan. I have three masters: Master A is just the margins, blank, no headers or footers Master B adds the header and page numbers Master C is similar to Master A, except that the odd page has a decoration for the Chapters. Question: Now, before I do anything regarding flowing a word.docx into this document, do I place a text box on the left side within the margins of the master spread and a text book on the right side within the margins of the master spread? Then, I go to the first Page and place my flow word doc into that. Then Shift click to automatically flow the document? Because the step I left out was creating text boxes within the margins of the masters. What I did was create the masters, then chose Page one, flowed the document into that. Then, I assign the masters according to need. I did not put a "dummy" text box in the master. Is this where I'm going wrong? G
-
But why would some pages be fine, and other wouldn't be? As I say, all those pages were set to flow with one style. And I tried turning all these on and off, one by one. However, I didn't do all the mathematical considerations. I gave up and decided to take an hour to grab the text box and pull up one line and then drag horizontally. Just wasn't worth spending hours on. Do hope there's an answer as this book is "only" 180 pgs. After setting all the masters, etc, I'd hate to have to do this on 300 pages to add .1" to the bottom. I assume "getting too close is largely..." so is there an easy way to fix this? That's the rub. "How low in your baseline grid goes' assumes I know what you're talking about regarding baseline setup. I am working 100% on defaults, so whatever that default is "No change," etc etc., then that's the baseline setup. All I did was choose a text box and margins. Then I see I need to add .1". How? Any way to do this?
-
I discovered in this current book I'm working on that when I did a test print out, the text at the top of the pages was just a little too close to the line I have separating the header and the body. So, I tweaked "baseline" in the body text style (about -10pt) and it worked beautifully. (See sample "base shift correction.") However, I have discovered two different issues I'd like to figure out how to correct if possible. At the bottom of pages, I will have either way too much content (and sometimes it appears there would be enough space for the next paragraph to continue), to not enough. ("Flow goes all the way to the line") ("One good page one not") I already went through a nightmare of what I thought would be a "just simply" thing, copying, cutting and pasting, a paragraph that accidentally was removed and placed in another part of the book. ... It took me about an 90 minutes of attempting to copy, cut and paste, cut and such, and discovered I was able to drag the link file that was now in the wrong place, and put it back in the right place. I then was able to breathe again. I'm sure there are some tricks and tips that people who have taken classes in using the AF know ... I'm having to learn on the fly and I have to see I've impressed myself in getting the hang of it fairly quick. But, now I have another mystery: without screwing up the entire book and having to start over - again - is there a way to fix this issue like I did with the baseline maneuver? Of course, I can possibly move text up or down a hair, but what about the pages where the content is smacking up against the page number? And I am trying to be proactive in finding out the tip prior to going down a rabbit hole of having to recreate the text box flow by adding .175" at the bottom. Plus, is "Paste without format" a clue when it comes to cutting and pasting linked flowed content? Once it's flowed into the document, can I turn the linking off and then cut and paste if necessary? Mind you, here are some examples. And remember, every page is set up exactly the same. The sample I have called "Bottom perfect" I did nothing to. The others, I did nothing to. The content is all the same style Bodytext. I'm a logic kinda guy so this stumps me.
-
Wasn't using AF to view the PDF. Was viewing the PDF after it was downloaded and saved. Thanks.
-
Guess you had the same issue? I found BOOK ANTIQUA is almost exactly the same as Palatino so I just replaced the font.
- 32 replies
-
- 1
-

-
- font
- 100% black
- (and 2 more)
-
I haven't been using Publisher for a long time, and I've learned a lot through videos. I just finished a 204pg book, 5 x 7, everything looks great. I had to start over twice, had to tweak margins ... and almost a third time, due to some weird thing that happened when one page got pasted in the wrong place. By accident, I figured out how to move it (as cutting, deleting, etc, was deleting the entire chapter). But I digress. I'm done, finished. It looks terrific. I export as a PDF. It looks jaggy. I go back into the filer and everything is not 100% black. It's some 'almost" black. I had created it with CMYK since it will printed not online. Perhaps I didn't have to do that and the publishing company would fix it? But in any event, I found I had to manually change the headers/footers, the Headings, the body font, etc. to 100% black with the sliders. Thankfully, I was able to change the body text with an "all" but ... the "all" didn't include the other items I mentioned. Going forward, why was the content NOT 100% black as a default. #2. This is the most serious issue as I do not want to have to try and change fonts or recreate this ENTIRE thing again. The "ffs" in any word that has a double ff ie bluff, off, offer, ANY word, the double ff is a square indicating missing elements. If I save as a PRINT PDF, they are there. However, that does me no good as that save is on 8 1/2 x 11 and isn't set to print as a book. So... here I am, the penultimate stage to "just simply" send to the client to review so I can "just simply" upload onto Ingramspark and I have flummoxed. What mystery step is alluding me? What setting? What do I need to do to fix this? I assume it is to be exported as PDF/1 ... I think I got the black handled... but this is a head scratcher.
- 32 replies
-
- 1
-
-
- font
- 100% black
- (and 2 more)
-
I assume you are agreeing with what I posted since what I posted was reiterating exactly what you posted. "The eagle flies at sunset"
-
I'll give these a try. But ... what you are seeing is after I corrected the master pages. The "inherited" text frames are the ones that are 5 x 7. You can see those in the new 6 x 9 page. Simply adjusting the size of the Text frames was already done in the masters. The content doesn't change to the new size. The sections, spreads and pages all now say 6 x 9. Yes, the text frames are linked. I will go to the very first page and put the cursor there so the blue lines show up and the little blue circles show up just like they have in the past. I'l try Command A. Then I'll choose copy and delete. Then I'll try to reflow.
-
The master pages do fine. The content doesn't flow to it. (Refer to the attached images. That is what happens afterward). I was assuming "should" but since that didn't happen, I went to the forum. Haven't a clue where the "resize option" is or how to choose or where it lives. Didn't take the exam. 🙂 I did get a pop up that said something like "would you like to resize the page to the page of the pages that is now the new page that you've created?" And I said yes. And that made all the masters pop to 6 x 9. Did nothing to the content.
-
yes, I did what you outline. The masters are only for the margins and head/foot for the special sections. (and to do odd/even)
-
I have a book I'm building that was supposed to be 6 x 9. Somehow, the master templates ended up 5 x 7. I believe I have fixed that issue and all the 490 pages now are showing 6 x 9 with the correct margin locations. However, the flowed content is still in 5 x 7 size. I would like to copy, cut and then reflow that content. Is there a way to do this? When I choose select all, I only get one page. I've tried to select the pages instead of the content and obviously that doesn't work. I tried to do something once before like this and got nowhere. I have already formatted the four master pages, set up odd/even pages, and was working on finishing all the sections when I discovered this. Surely there is some way to do this without having to drag each page of content to the new sized pages. Did I mention it's 490 (249 pg spreads).
-
Because the original Master didn't have a text box in it and I cannot change where the content is showing up on the pages. I can't get any simpler than showing you the afpub document master, and an example of the document page showing how the text. Don't know why that isn't clear. I expected the text to flow into the text box regardless of where the margins are. If I recall, in this thread, it is mentioned that the margins are just a guide. So, the text should flow into the text box regardless of where the margins are showing as set, right? So are you saying if I change the margins to match the text box that now exists that the text will magically confirm to the margins? That's what I've been trying to do. Or, do I change the margins and the text box then paste the content back in? Because everything I have done with masters and pages has not changed the outcome.