Affinity Jack
-
Posts
230 -
Joined
-
Last visited
Everything posted by Affinity Jack
-
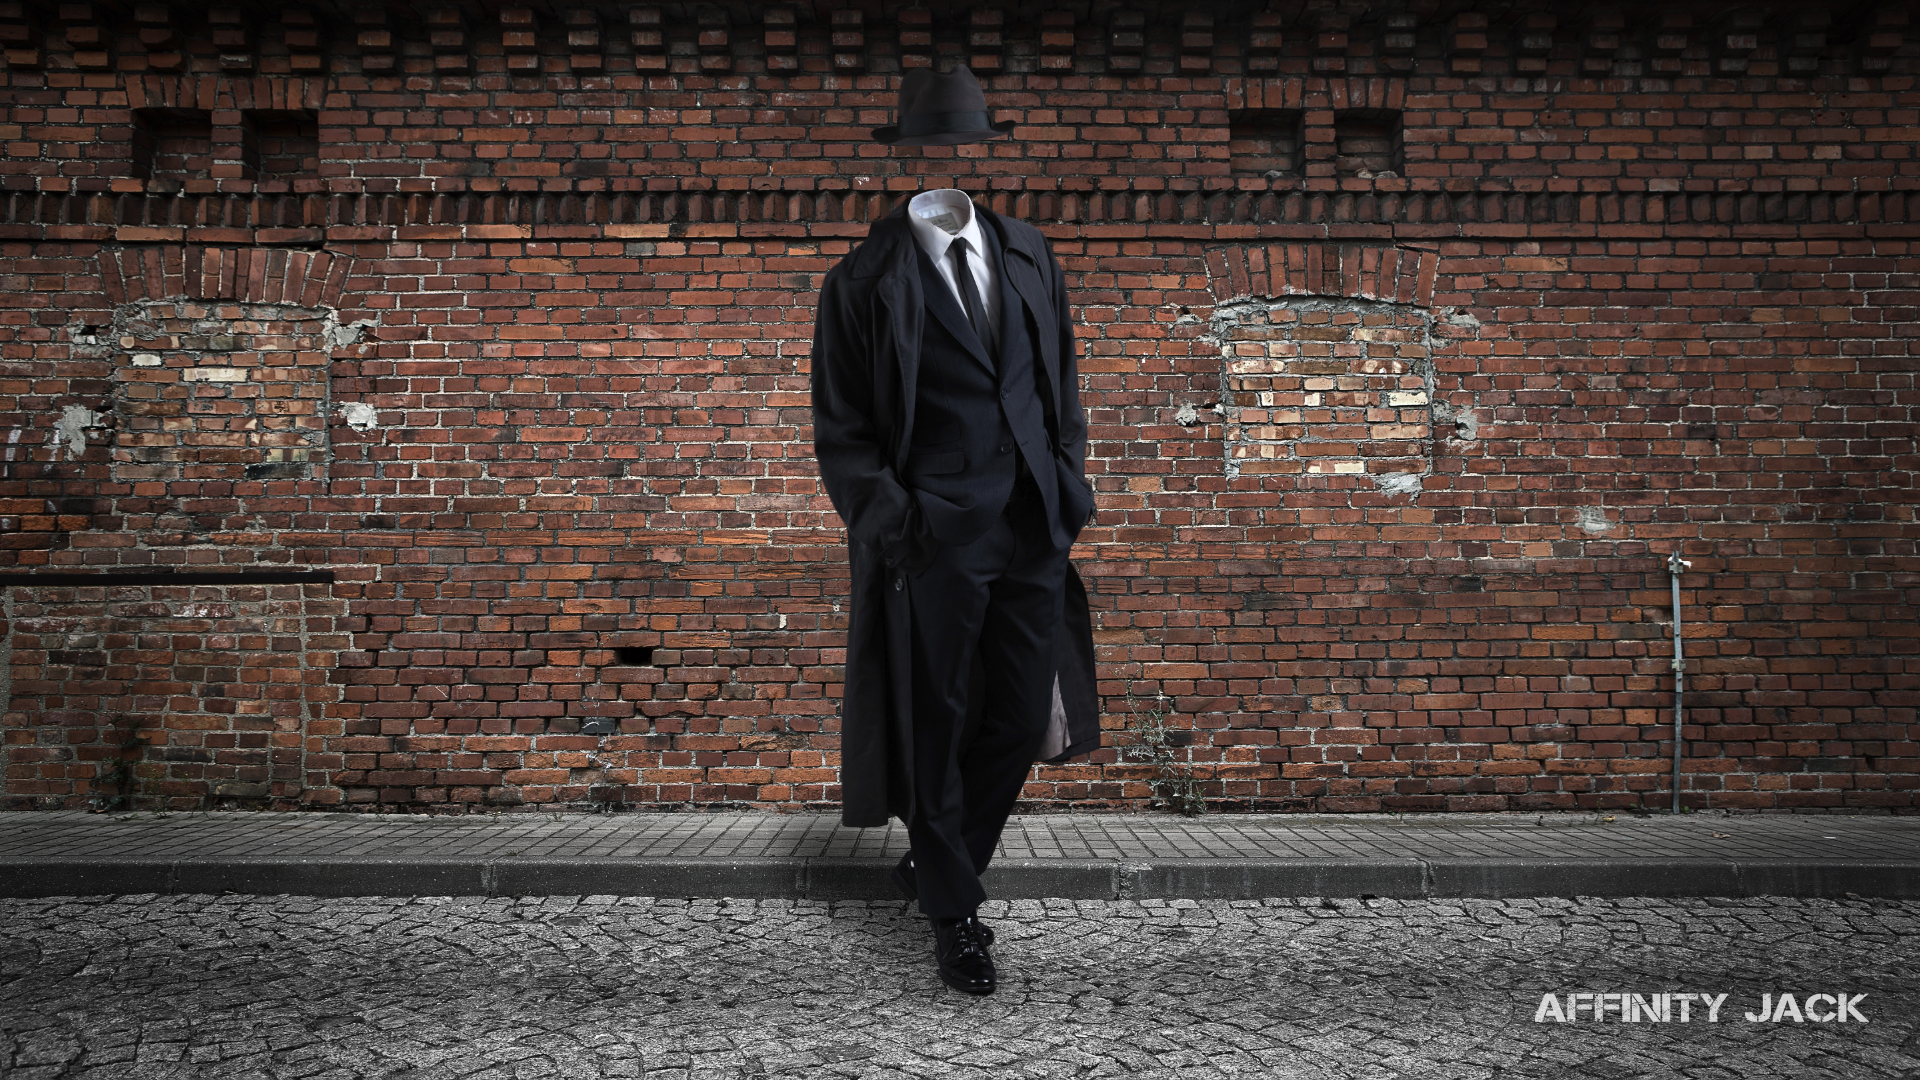
 Hallo, in diesem Affinity Photo Tutorial zeige ich wie man per Manipulation einen Mann ohne Kopf erstellt. Dabei geht es ums Freistellen, Auswahl erstellen, Maskieren und Farbanpassungen. Viel Spaß Jack Hi, In this Affinity Photo Tutorial, I show you how to create a manipulation man without head. It is about selection, masking and color adjustments. Have fun Jack YouTube Video Tutorial
- 4 replies
-
- 3
-

-
- Affinity Photo
- Tutorial
- (and 6 more)
-
Hi MBd, one attional Thing: "cmd & J" for copying a selection on a new layer sametimes works and sometimes not.... :(
-
Hi jmac, thank you for these warm and polite words! They mean a lot to me, because I'm not a pro indeed and I'm still learning. And... I have further a lot of ideas ;). Ciao Jack
- 8 replies
-
- 1
-
-
- Affinity Photo
- Video
- (and 6 more)
-
Hi MBd, copy: it works! brush: The "(" is the "8". "cmd & 8" means larger view "cmd & shift & 8" changes nothing So I made my own shortcut "cmd & 8" and "cmd & 9". Thank you for the tip. I knew already the possibility. So far I denied it because I want in my tutorials that everyone can follow. So I have to tell, and then it's okay. So: Thank you MBd
-
Hi MdB, whiten teeth: what a prefect and precise method! Thumb up! I hope, you there will be more pro tipps. At first, I was looking for the "Info-Panel" at the bottom right. I added it under : view - studio - info Thank you. copy the selection on a new layer: That is strange. Because I tried some methods and they didn't work. "cmd & J" make a copy from the whole layer, including the clipped layers and masks. The same with "cmd & C" and "cmd & V". There is also no right click solution and nothing in the menu bar under selection. :( Also other functions don't work: "cmd & (" for the brush size... I don't know why. I have the newest top MacBook Pro with all extra goodies like force touch, i7 2,8.....All updates. HSL: That is always a good thing and think. Fast adjustable. But in this case, I wanted to use only the colors which are inside. "nothing bad": Of course NOOOOO! I'm always grateful for such suggestions. Really! I'm not a pro and I have to learn a lot. These things help for my development. Your suggestions are constructive and so: :) Greeting from the snow covered Berlin. Ciao Jack
-
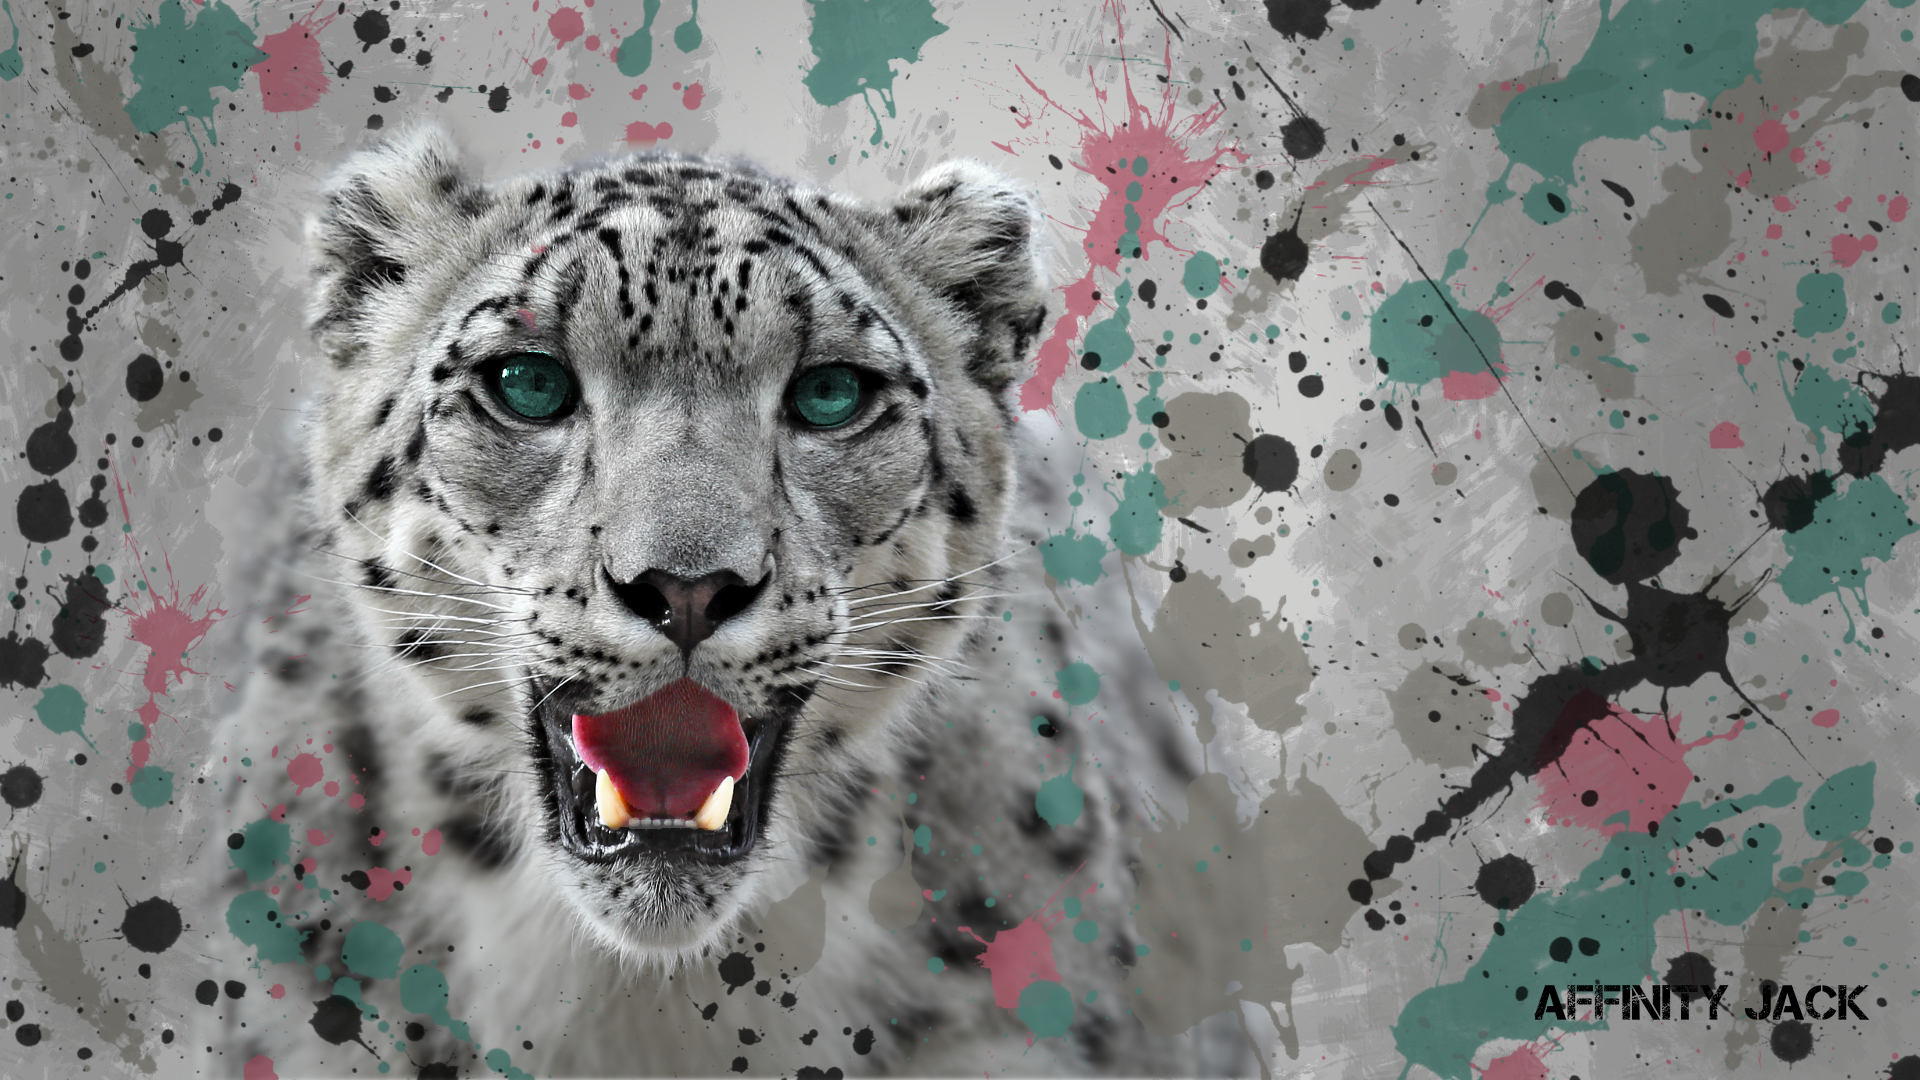
Hallo, n diesem Affinity Photo Tutorial zeige ich wie man den den „Color Splash Effekt“ einmal etwas anders anwendet. Er wird in eine Composition mit echten Farbklecksen eingebettet. Ich bin ja kein Maler und verstehe es als Anregung für möglicherweise ganz andere Projekte mit ähnlichem Vorgehen. Viel Spaß dabei. Ihr könnt ja Eure Ergebnisse hier posten. In this Affinity Photo Tutorial, I show you how to create a different „Color Splash Effect. It is a composition with real embedded color splatters. I'm not a paint artist and my intention is to inspire for other, different projects following this procedure. Have fun and post me your results. Ciao Thomas Jack Pinsel/brush: - „brushsplattersLSD / ink splatter streaks“ von „20_stars“ von www.brusheezy.com - DAUB Tusche / DAUB Ink Link: YouTube Tutorial
- 8 replies
-
- 6
-
-
- Affinity Photo
- Video
- (and 6 more)
-
Hi Simon, I'm pleased to see, that the "Affinity Family" is still growing. :) Welcome! Ciao Jack
-
Hi F_Kal, I agree! Perfect solution. And many more... Ciao Jack
-
In painting brush
Affinity Jack replied to GeeJay's topic in Tutorials (Staff and Customer Created Tutorials)
Hi GeeJay, in my tutorial "Disintegration Effect" I used that tool to erase the woman. https://youtu.be/RH_PWH4pV20 Ciao Jack -
Hi MdB, thank you! Yes I was thinking about separate color layers (I did this for the thumb to refine the hair color :rolleyes: ). For the tutorial I was looking for a fast way. But new for me is the noise reduction. I was also searching for pattern for a comic style, but I was disapointed, because it doesn't exist. Cloning is another great idea. For the hair. In my opinion, the hair has still too much texture. Greetings from Berlin/Germany Jack
-
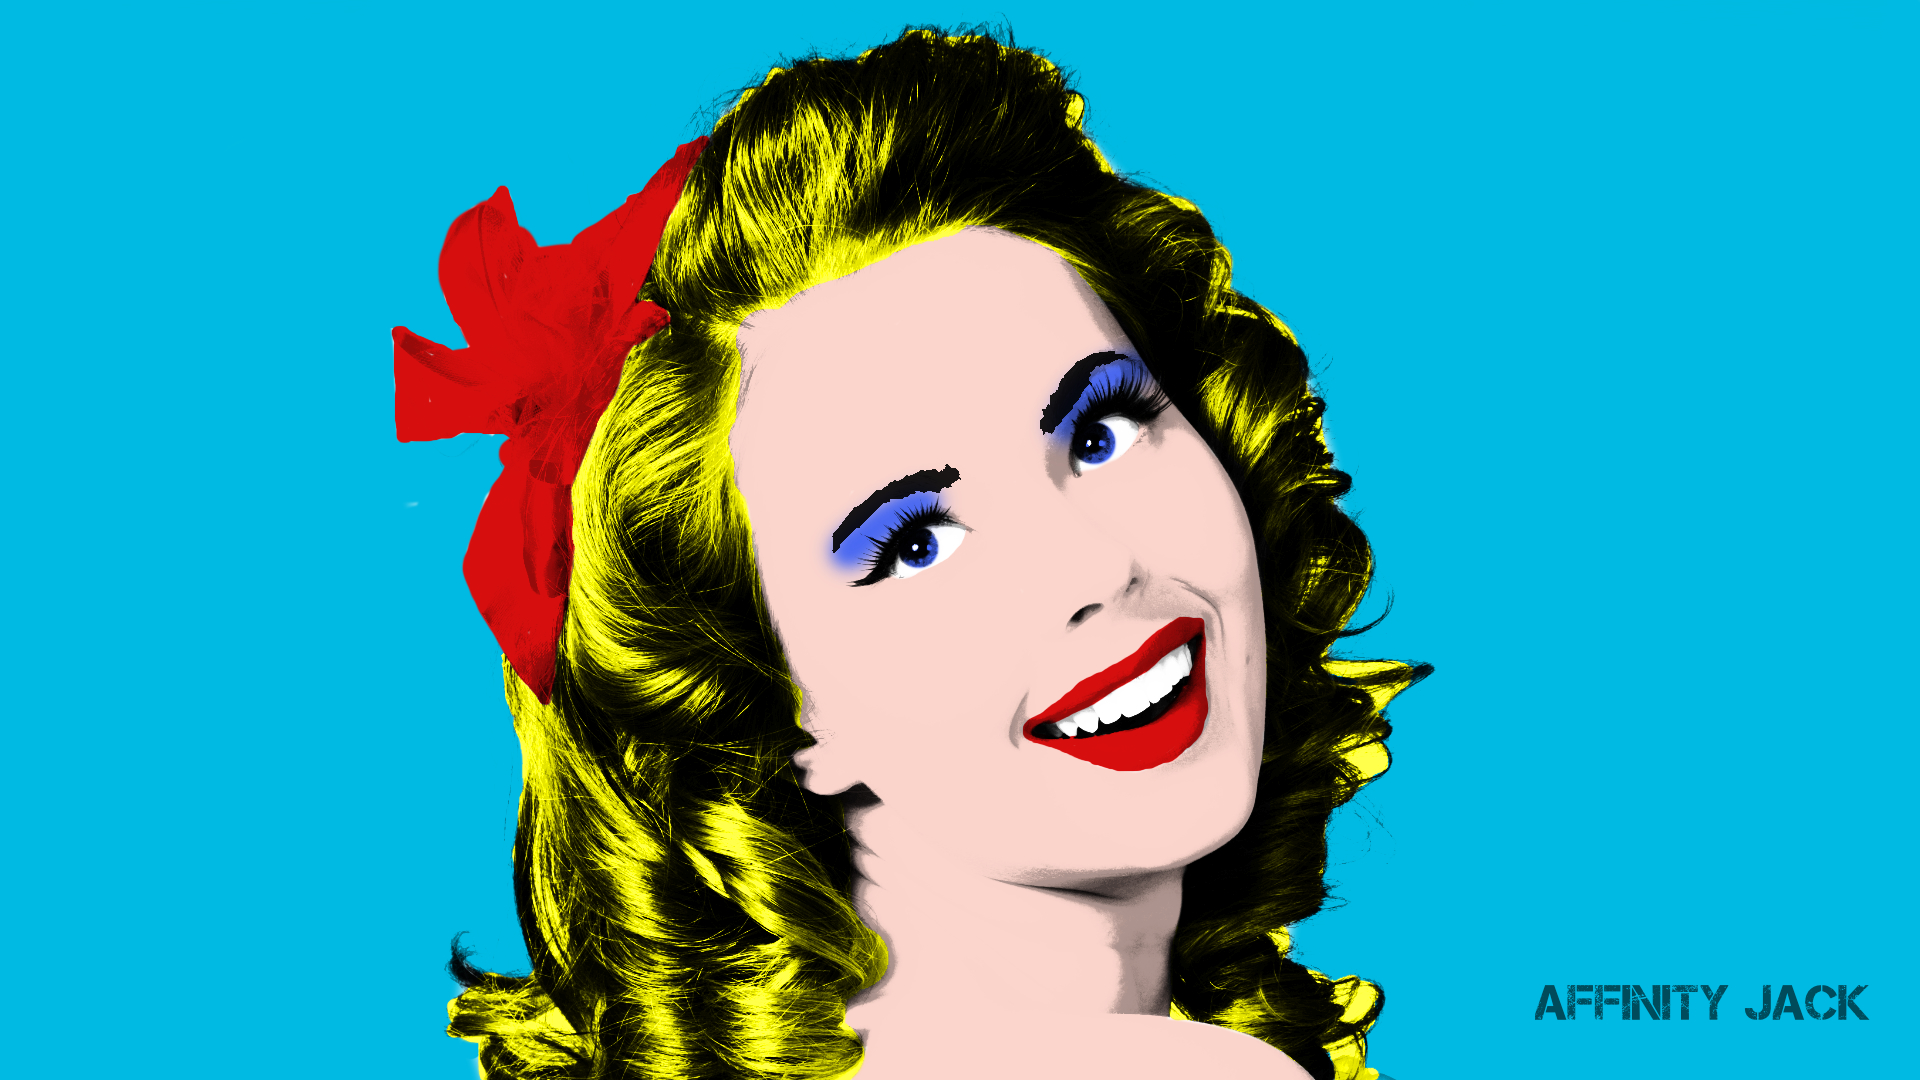
Hi, in diesem Affinity Photo Tutorial zeige ich wie man den Pop Art Effekt erstellt. Er wurde in den 60ern von Andy Warhol erfunden und damals analog durch Entwicklung und Druckprozessen erstellt. Es gab ja kein Photoshop. Heute zeige ich wie man es mit der Software machen kann. Es gibt viele Gestaltungsvarianten, ganz nach Geschmack. Viel Spaß Euer Jack In this Affinity Photo Tutorial, I show you how to create the Pop Art Effect. It was an invention of Andy Warhol who created this with analog techniques like development and print processing, because there was no Photoshop. Today I show how to create this effect with software. There are many variations, like you want. Have fun Jack benutzte Farben/used colors: Hintergrund/background: blau/blue, #00bae3 Haut/skin: rosa/rose, #fbd5cc Lippen & Schleife/lips & hairband: rot/red, #d80e0e Augen & Schminke/eyes & makeup: blau/blue, #4566f3 Haare/hair: gelb/yellow, #ffff4d YouTube-Video https://youtu.be/wF2O1Z1Rpf4
- 3 replies
-
- 1
-
-
- Affinity Photo
- Video
- (and 5 more)
-
Wow! :huh:
-
New to Affinity
Affinity Jack replied to fantasyfreak's topic in Tutorials (Staff and Customer Created Tutorials)
Hi Fantasyfreak, there are many Videotuturials on this homepage about basics. I provide Tutorials on my YouTube-Channel in German with English Subtitels. Perhaps it will be useful. Greetings Jack -
Hi Claude, je pense, non est pas possibile... My french is lightyears ago. :D English or Italian..., German... I think it isn't possible exactly. Perhaps nearby: - Menu-bar - selection - selection from color range - red: now all reds are selected, you can refine that selection if necessary or - take the color picker on the right and pick that orange - Menu-bar - selection - choose selected color then - adjustment layer - colorize: you can change the color and it's saturation Salut a France d'Allemagne Jack
-
Hi Claude, I don't know exactly which source material you use, but... for inverting click "cmd & I". This will change every color to the opposite. Ciao Jack
-
How To "Unerase"?
Affinity Jack replied to Lukeman's topic in Tutorials (Staff and Customer Created Tutorials)
Hi lukenyman, using layer masks are the best method and is also non-destructivly. CarmenCo explained it perfectly. :) White means transparent. Black means hide. When you create a mask, it will be white automatically: transparent, nothing changes With a black brush painting on the mask (not the layer), you hide the content: erase If you erased unwanted areas, change to a white brush to bring them back. Ciao Jack P.S.: I provide tutorials on YouTube. -
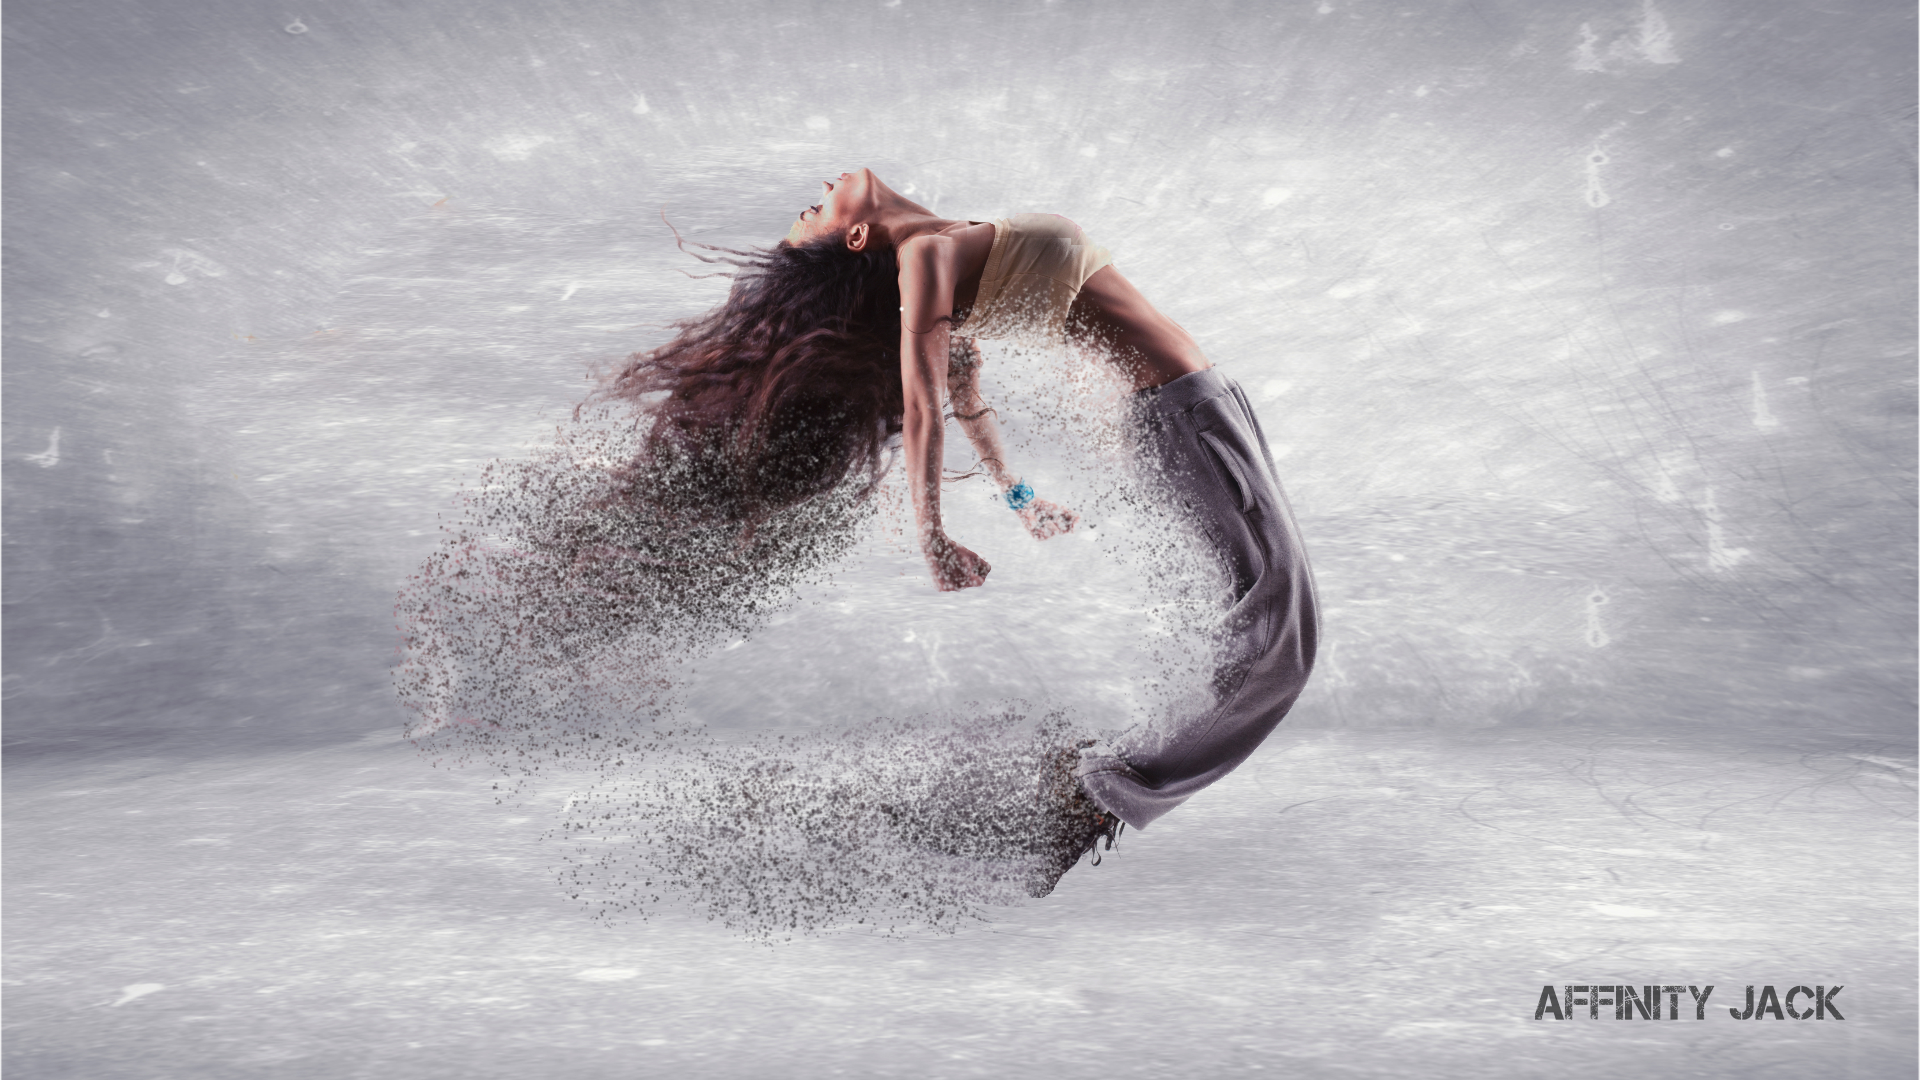
Hallo, In diesem Affinity Photo Tutorial zeige ich wie man den Disintegrations Effekt (= Zerfall) erstellt. Er wird auch Splatter (= Spritzen), Sand, Sandsturm, Pixel oder Dispersion (= zerstreuen, ausbreiten) genannt. Die Methode ist dabei immer gleich. Nur die Art der Auflösung ändert sich. In this Affinity Photo Tutorial, I show you how to create the Disintegration Effect. Also known as Splatter, Sand, Sandstorm, Pixel, Pixelate or Dispersion Effect. The method is the same. Only the kind of dispersion is different. Viel Spaß Jack Pinseleinstellungen (Brush Settings): Dies ist ein original Pinsel aus der Software. (Original brush from the software) Gruppe: Gemälde Group: Painting Art: der erste Kind: the first Größe: 170 px width: 170 px Härte: 100 % Hardness: 100 % x-Versatz: 50 % zufällig x-changing: 50 % random y-Versatz: 50 % zufällig y-changing: 50 % random Rotation: 50 % zufällig (random) Fluss: 100 % zufällig Flow: 100 % random https://youtu.be/RH_PWH4pV20 https://youtu.be/RH_PWH4pV20
-
- 2
-
-
- Affinity Photo
- Video
- (and 6 more)
-
Partial Black and White
Affinity Jack replied to aaford72's topic in Tutorials (Staff and Customer Created Tutorials)
Hi aaford72, I provide Video Tutorials on YouTube via this forum with Affinity Photo . And I made already a tutorial to this topic. In german, but with english subtitles. Ciao Jack https://www.youtube.com/watch?v=fFOjBzKQ1Wo -
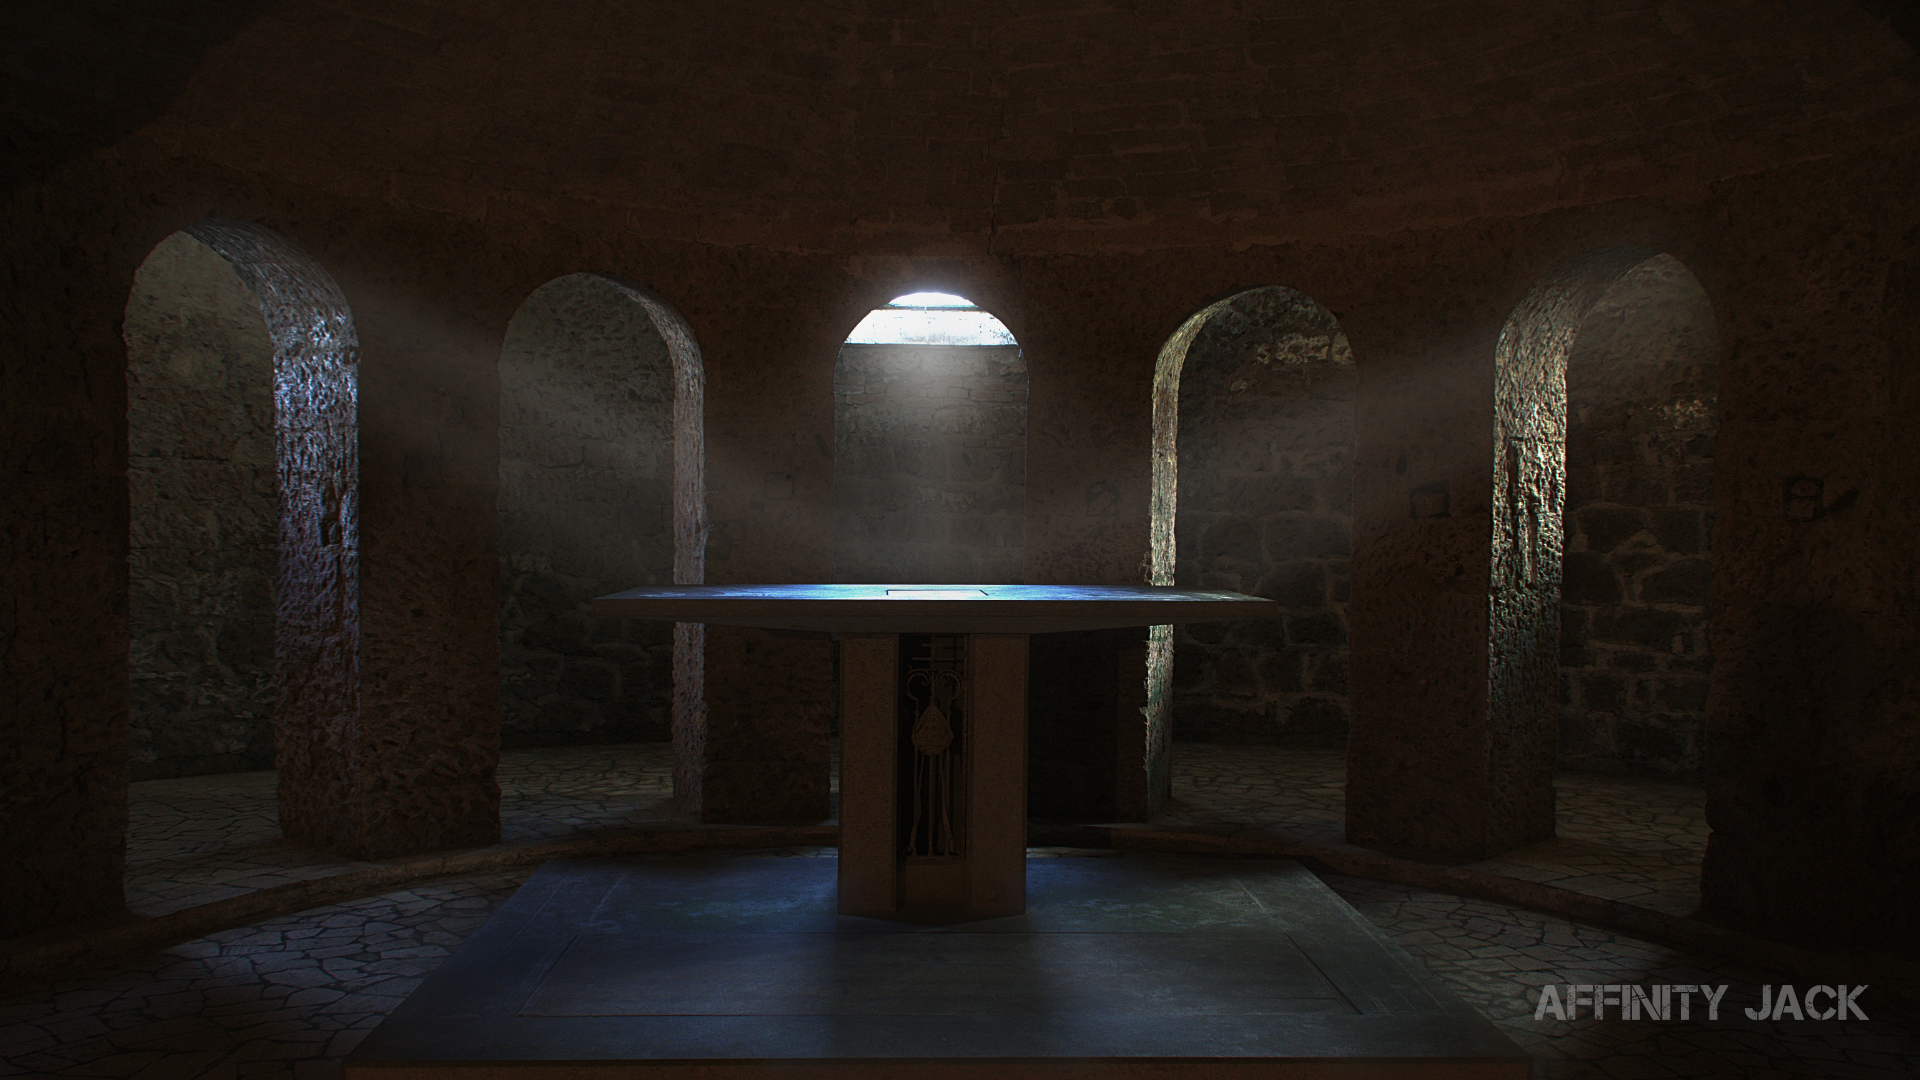
Hallo, In diesem Affinity Photo Tutorial zeige ich wie man Lichtstrahlen und Schatten erstellt. Man kann das mit einfachen Schritten in jedem Bild machen. Mit dem Zeichenstift, ein paar Ebenen und Filtern. Viel Spaß, ich bin auf Eure Projekte gespannt. In this Affinity Photo Tutorial, I show you how to create a light beams and shadows. You can create this in a few simple steps in every photo. With the pen tool, some layers an filters. Have fun, I'm curious to see your projects. Ciao Jack https://www.youtube.com/watch?v=XDeTPbc4F8U
-
- 2
-
-
- Affinity Photo
- Tutorial
- (and 6 more)
-
Hi bassfishjosh, it isn't exactly possible, but nearly: Save your whole project "File - Save as" as a ".afphoto"-file. Then you can change the source picture every time and this file will be effected in the same way.... Merry Christmas to you. Ciao Jack
-
In diesem Affinity Photo Tutorial zeige ich wie man den Tilt Shift Effekt erstellt. Man erreicht hier ohne kostspieliges Spezialobjektiv die Illusion, dass man sich eine Miniaturwelt erschafft. In this Affinity Photo Tutorial, I show you how to create a Tilt Shift Effect. You can achieve, without an expensive special lens, the illusion of a world of miniature and toys. Viel Spaß! https://youtu.be/-mLjT8IB8HU https://youtu.be/-mLjT8IB8HU
- 3 replies
-
- 4
-
-
- Affinity Photo
- Tutorial
- (and 2 more)
-
Hi Madame, sure, wishes are always welcome! I keep it in mind and will offer it later on. I wish you a happy "pre-x-mas" sunday. (I don't know the word, in Germany it's called Advent) :) Ciao Jack
-
Hi Madame, your allways welcome ;-)
-
Hallo, in diesem Affinity Photo Tutorial zeige ich wie man eine Vignette erstellt. Zu den Bildkorrekturen im Vorspann: Wie das geht habe ich im gesonderten Tutorial „Belichtung & Tonwertkorrektur“ gezeigt. In this Affinity Photo Tutorial, I show you how to create a vignette. And the previous photo corrections: I did a separate video „Belichtung & Tonwertkorrektur“ (aperture & curves). Ciao Jack www.youtube.com/watch?v=SPQVQ0UyfFA www.youtube.com/watch?v=SPQVQ0UyfFA
- 5 replies
-
- 3
-
-
- Affinity Photo
- Tutorial
- (and 6 more)
-
I can't import my images.
Affinity Jack replied to Roger55's topic in Tutorials (Staff and Customer Created Tutorials)
Hello Roger55, I made a YouTube Tutorial to this topic. https://youtu.be/Jq6-AukXX5o Take a look to my YouTube Channel "Affinity Jack " or in my posts here in the forum or at www.affinitytutorials.de Ciao Jack