

superhaschi
-
Posts
44 -
Joined
Posts posted by superhaschi
-
-
hello Gear Maker,
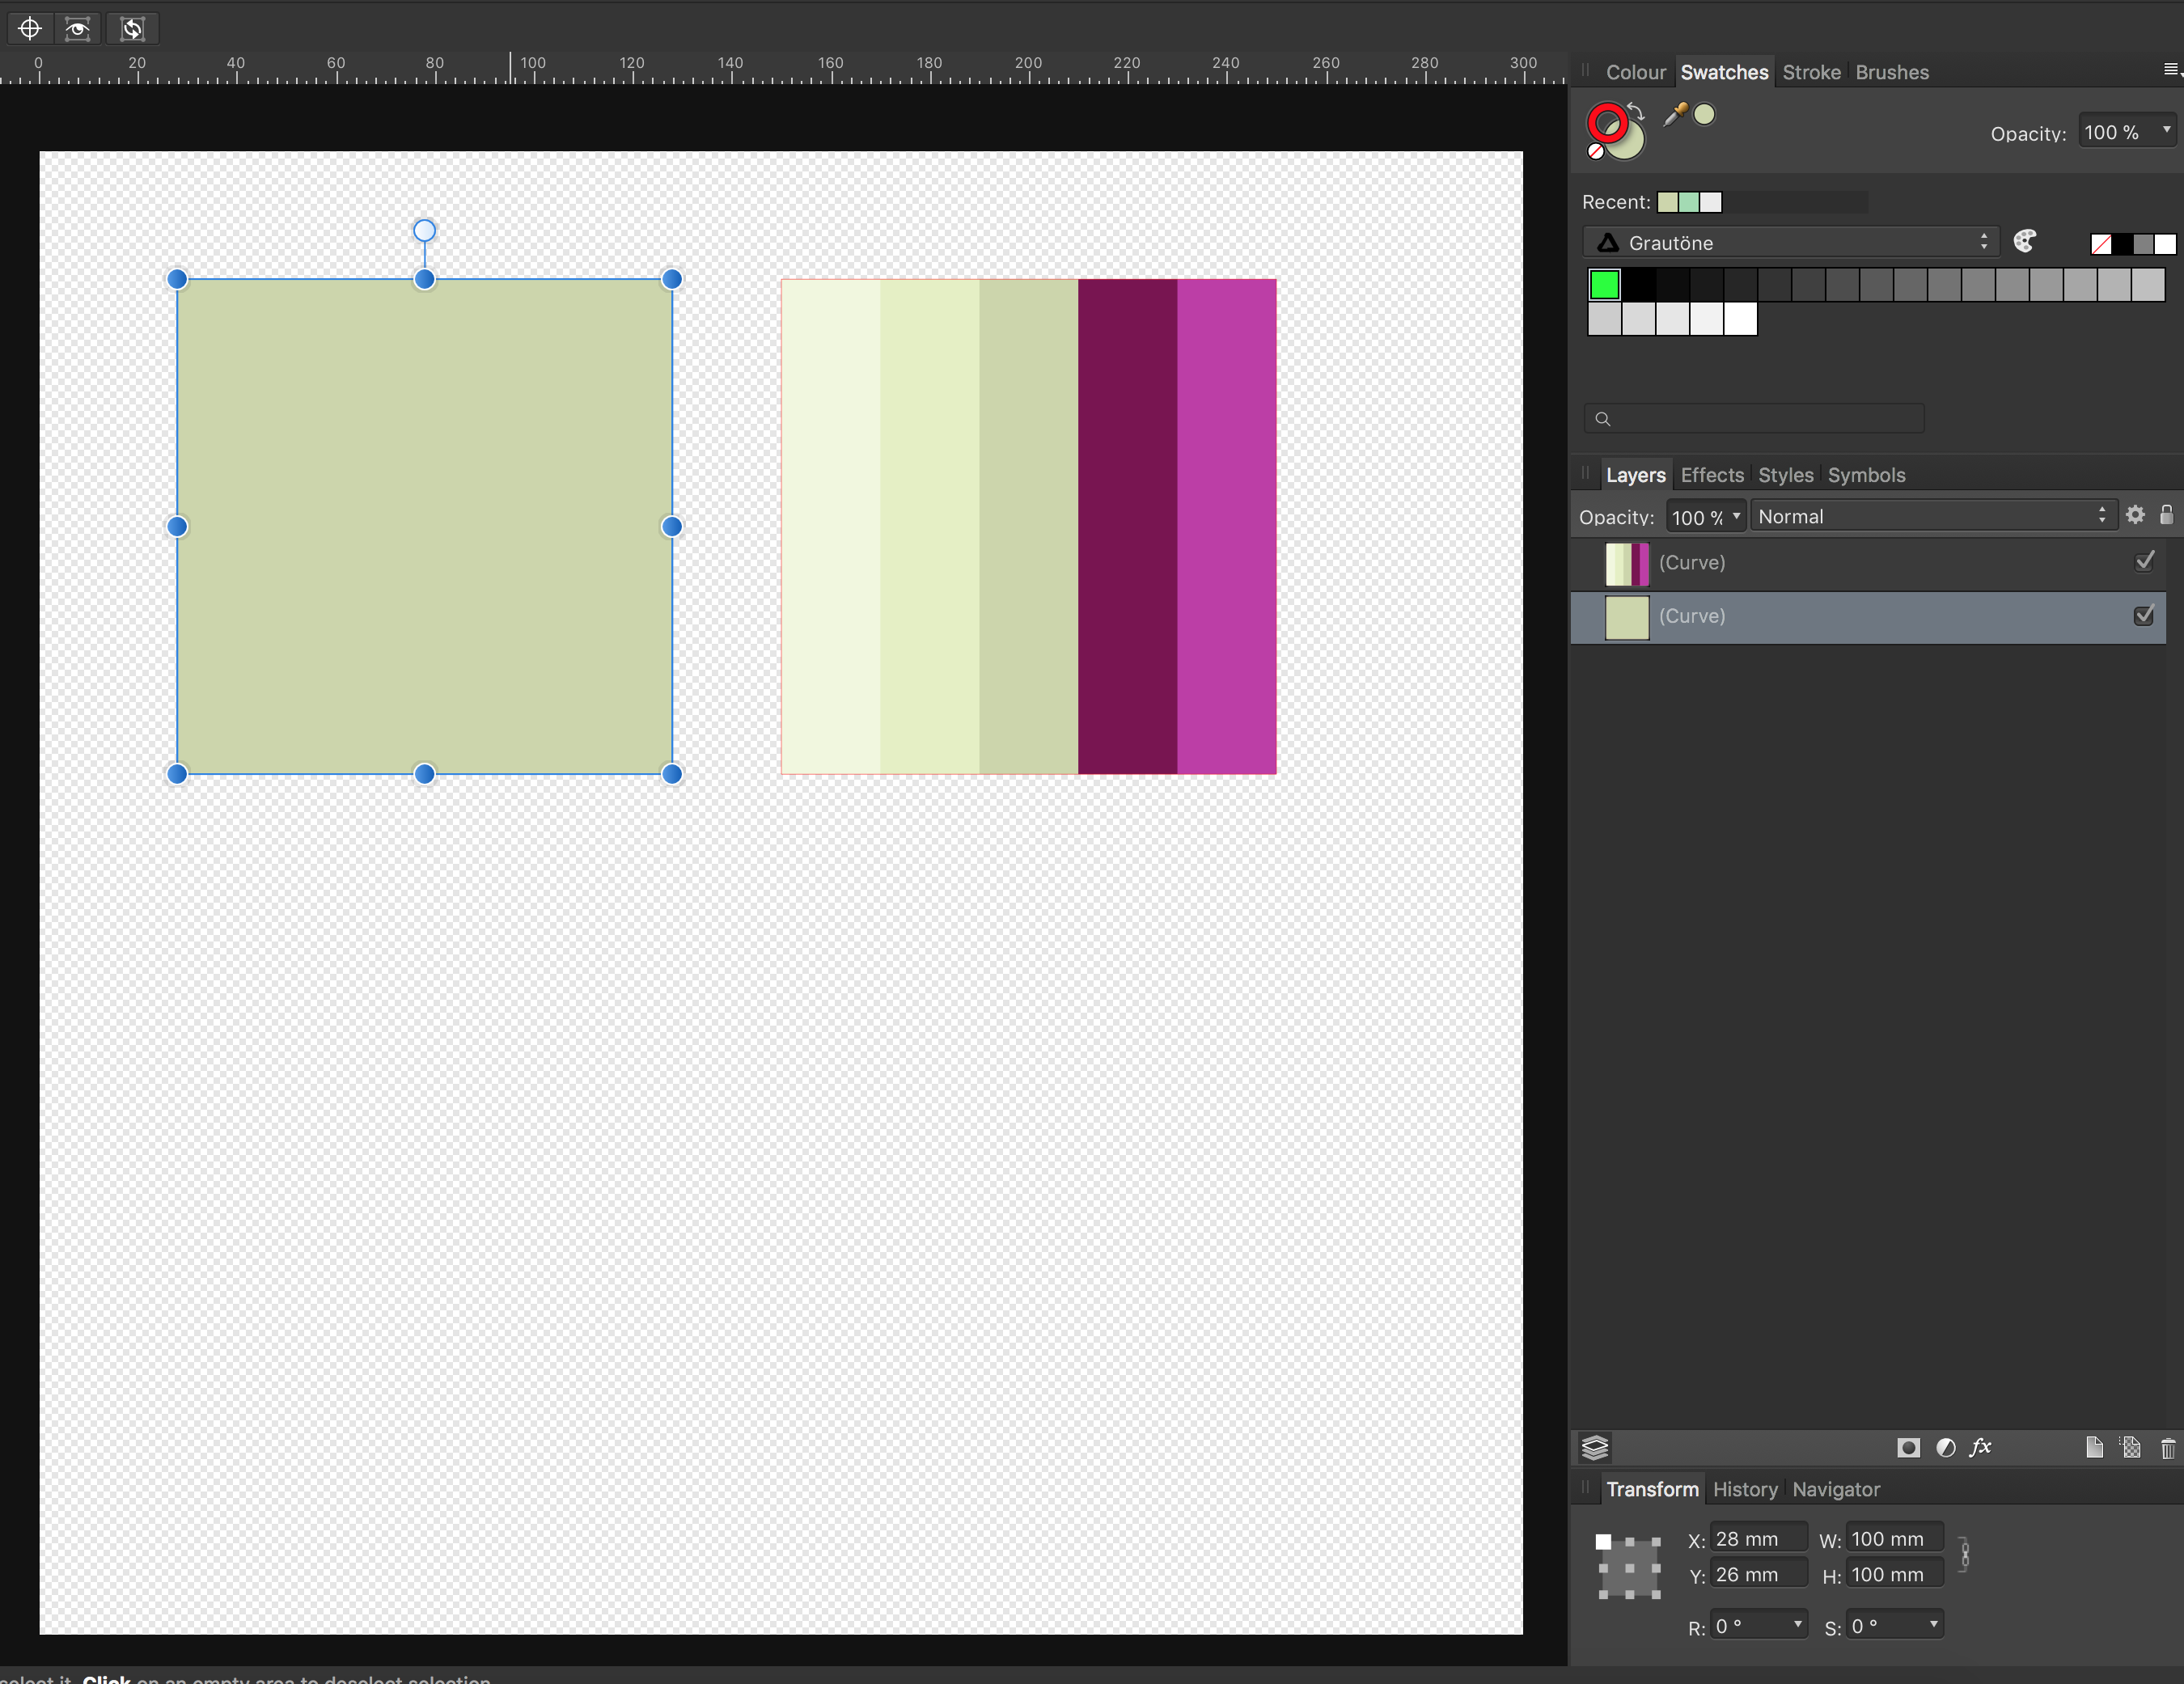
many thanks for your repley ... ungroup etc I know..., but the fill mode was new to me and with Alternate selected it works fine
but I think this workflow is new in 1.9; I haven't have this issue before; when I use normal shapes I get the right result without selecting Alternate filling
-
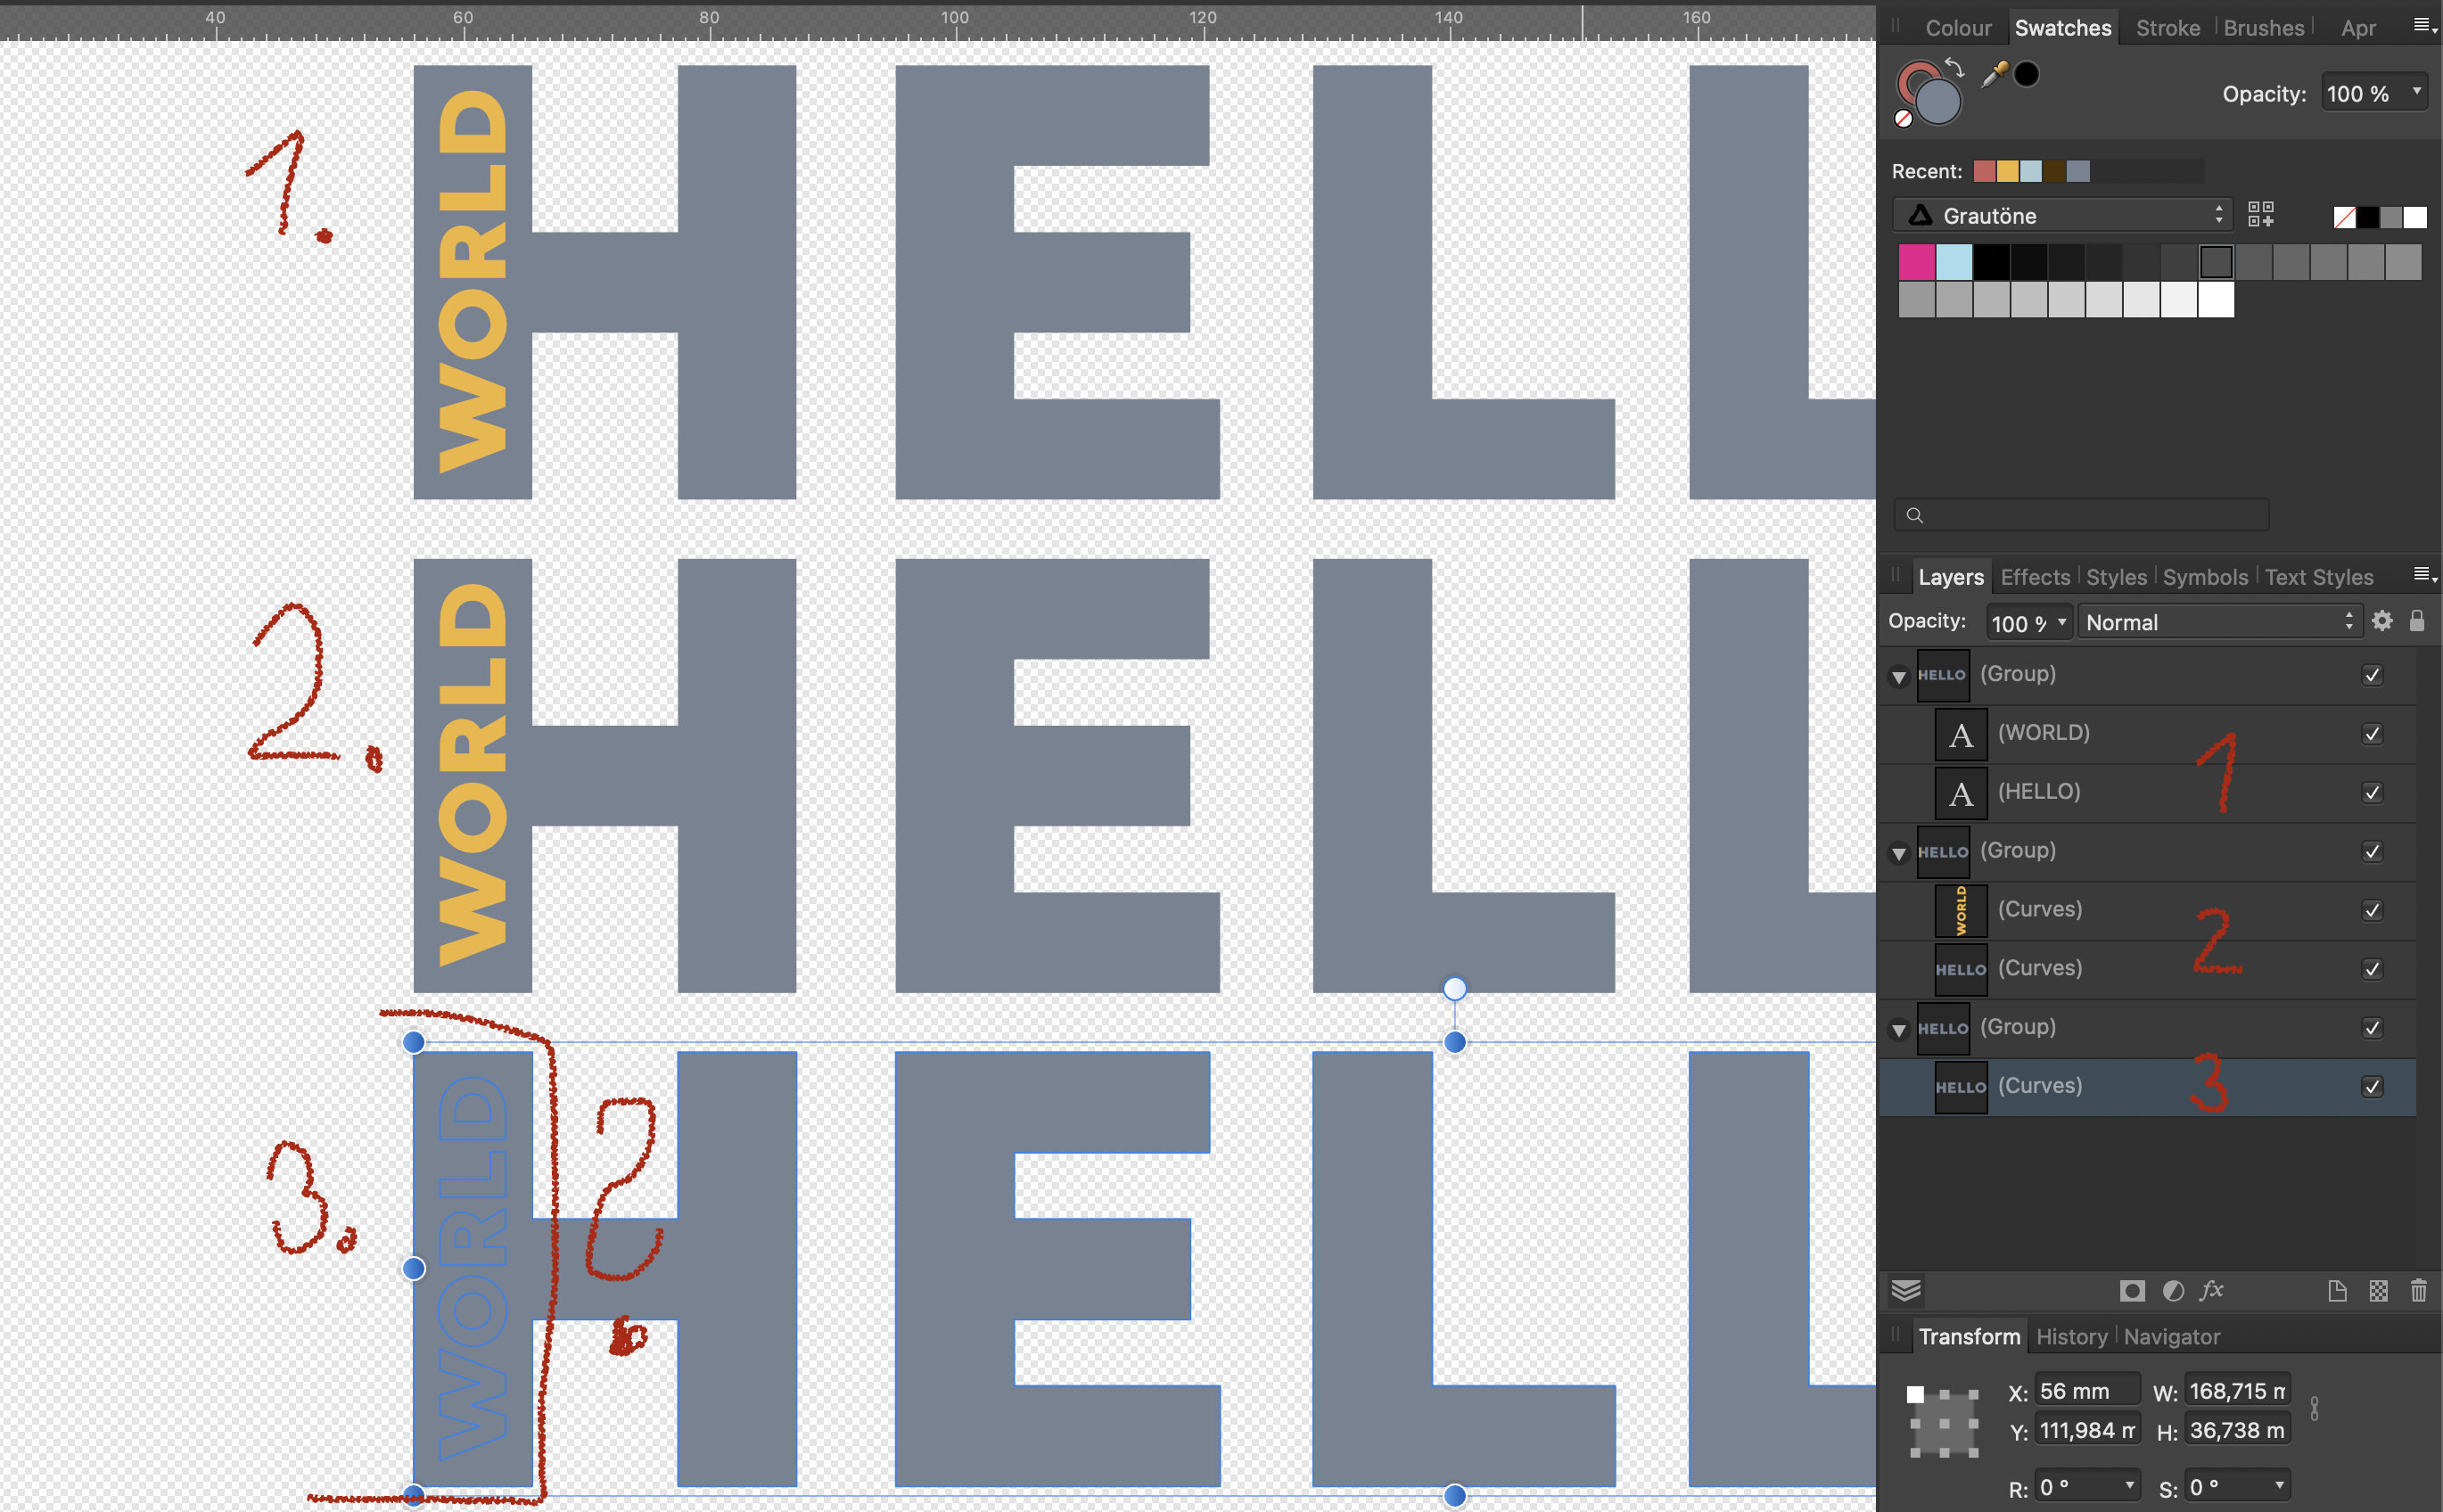
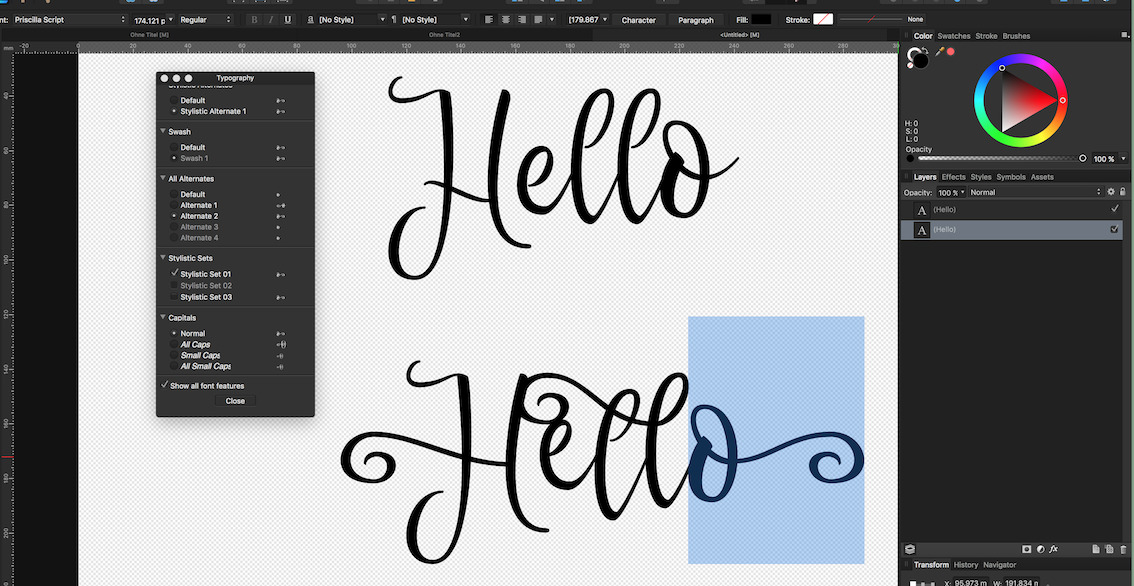
I´d like to cut out (subtract) WORLD from HELLO.
When using "subtract" I get a wrong result: WORLD is included in HELLO and not cutted out; I've tried it with text and curve-converted text.
When I do it with normal shapes (e.g. rectangles) I get the appropriate result
-
I have the same issue. I'm on a Macbook Pro 2017, Big Sur 11.0.1 and Affinity Apps 1.8.6
-
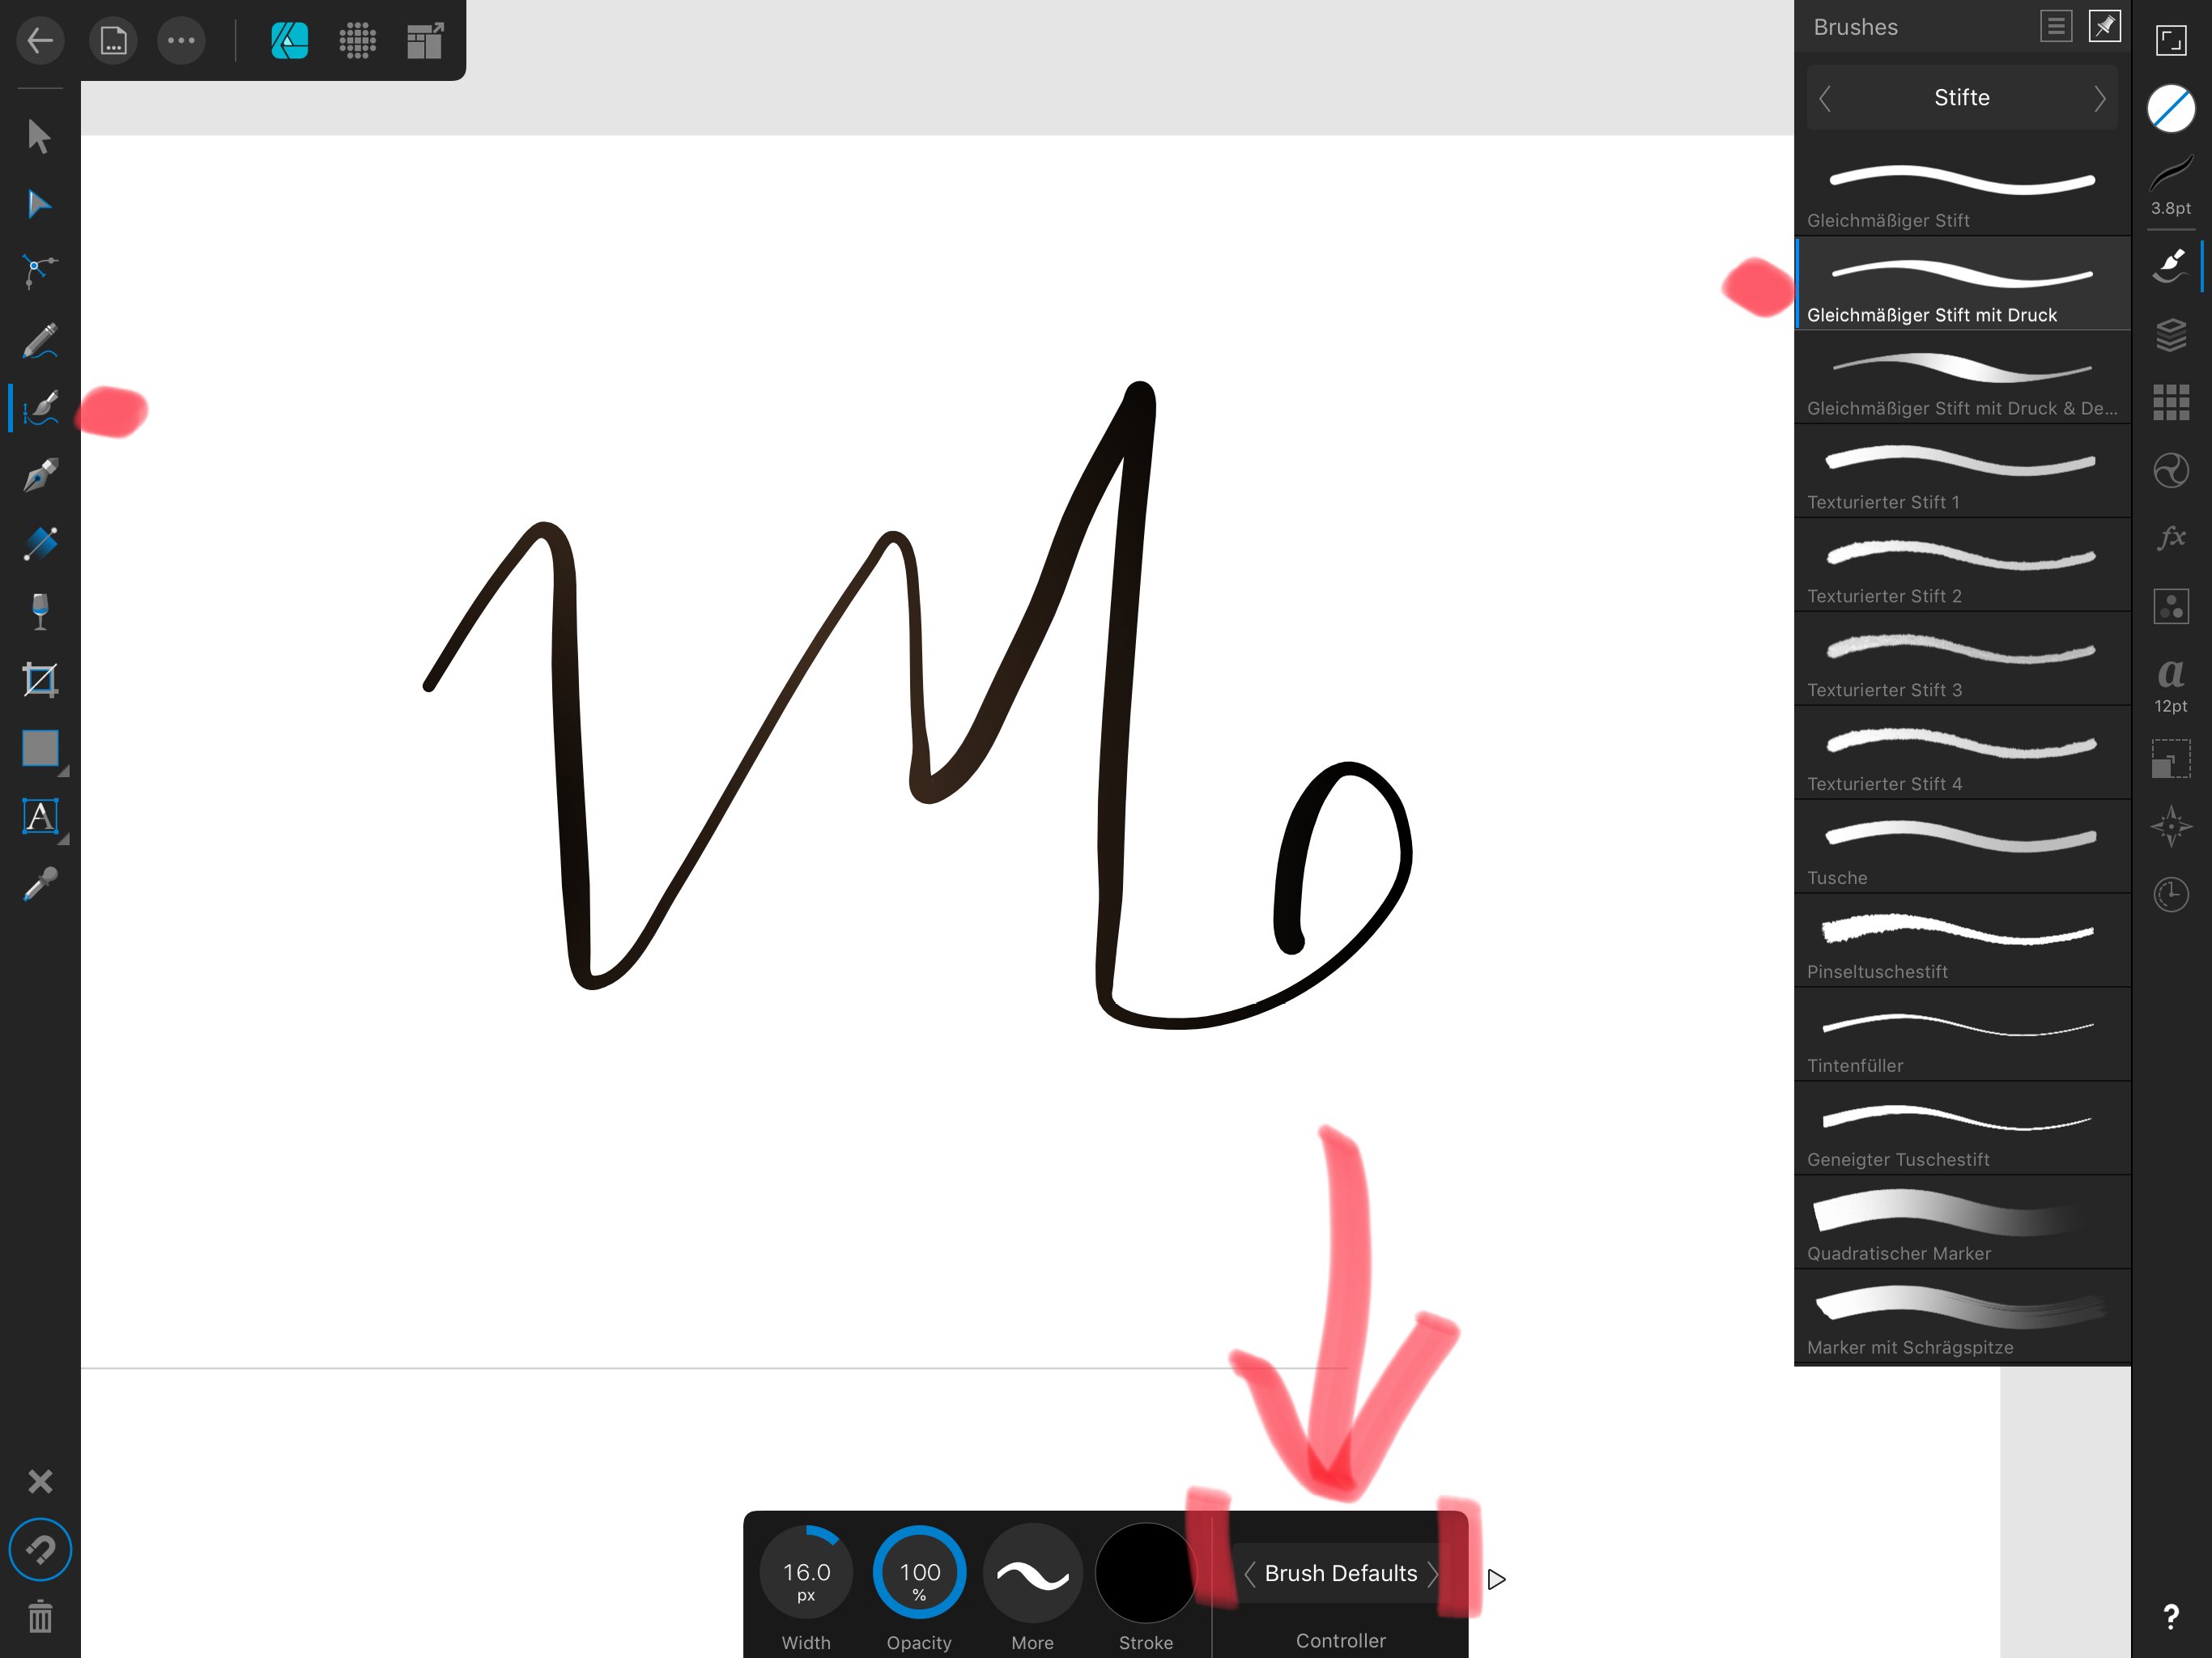
did you set the controller?
-
try this: instead of DIVIDE choose SUBTRACT as Boolean operation
-
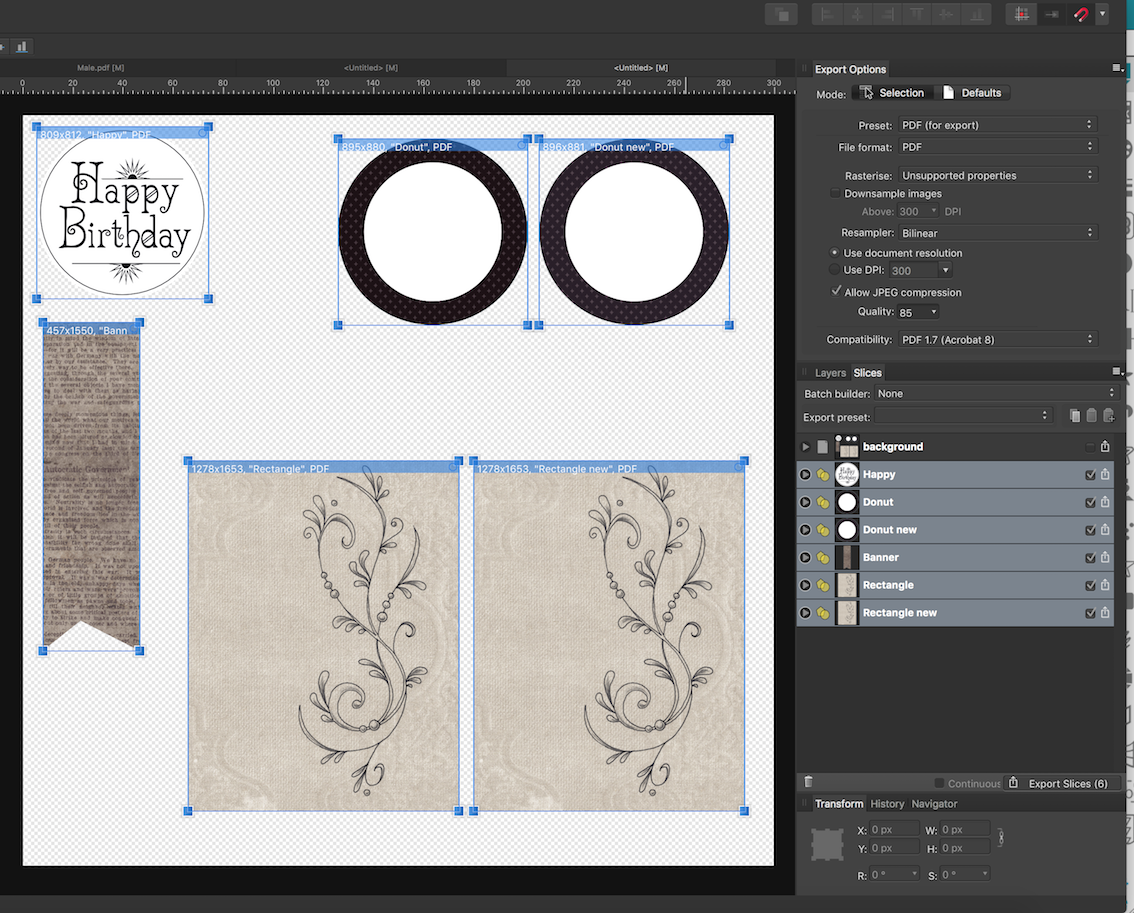
Busenitz, you can use pdf if you want to - please look at my provided files here, Export setting was: PDF (for Export); also look at my screen of Export-Persona here
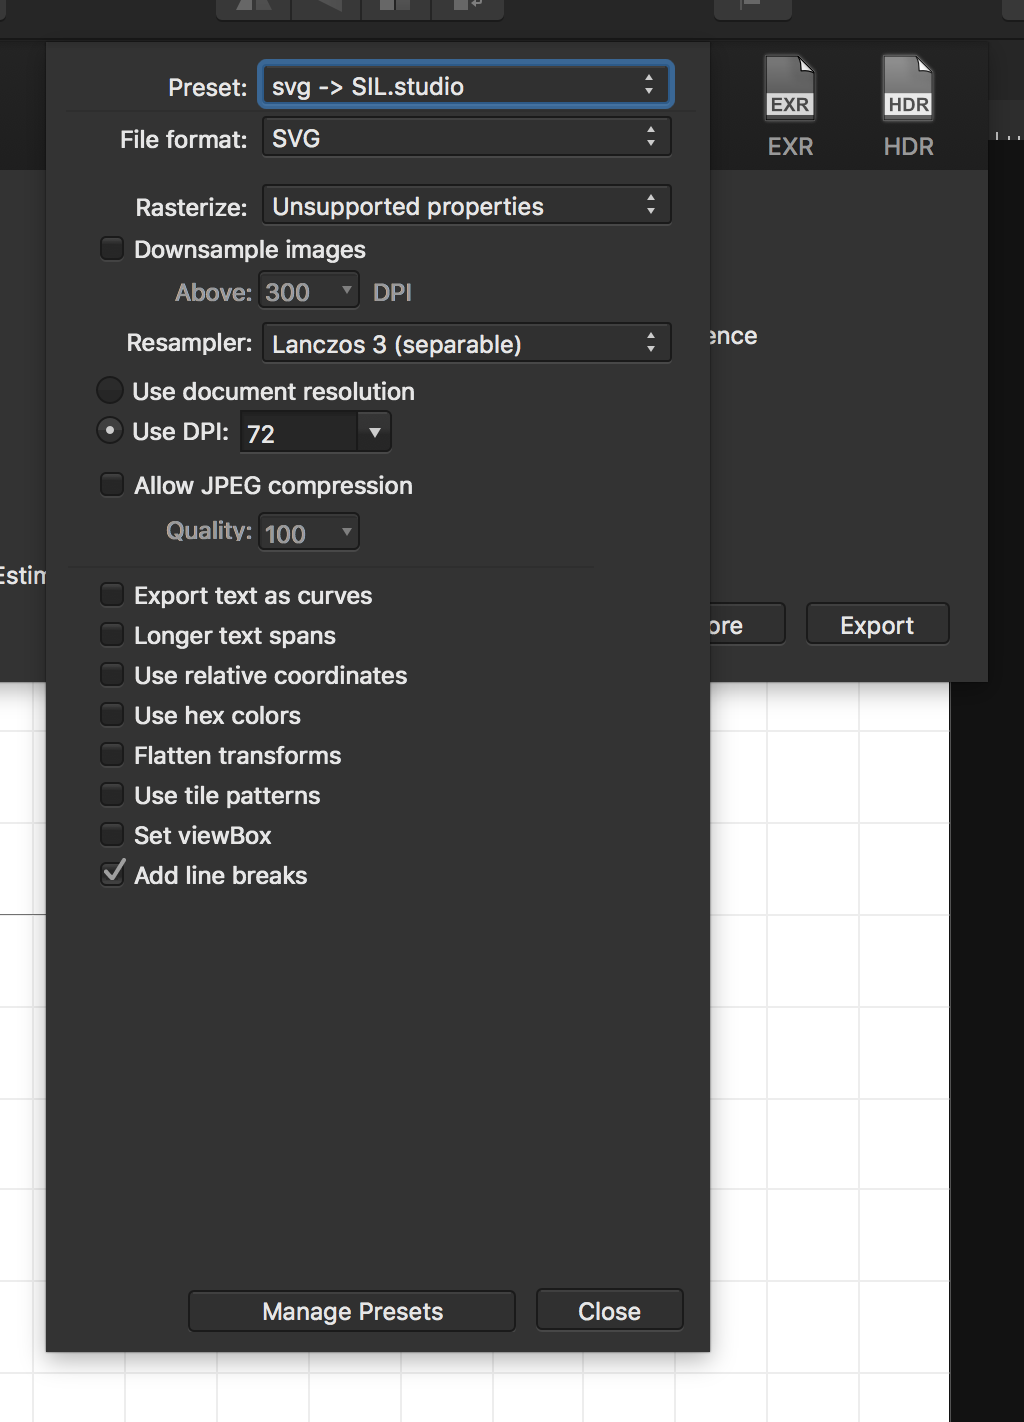
If you like to use svg, you have to export 2 files: the pixel-images as 1 png (possibly make the outline invisible)
and the vector elements as svg;
in SSDE you have to drag the png into the vector shape;
SSDE doesn't show up a bitmap-filled svg (see here)
-
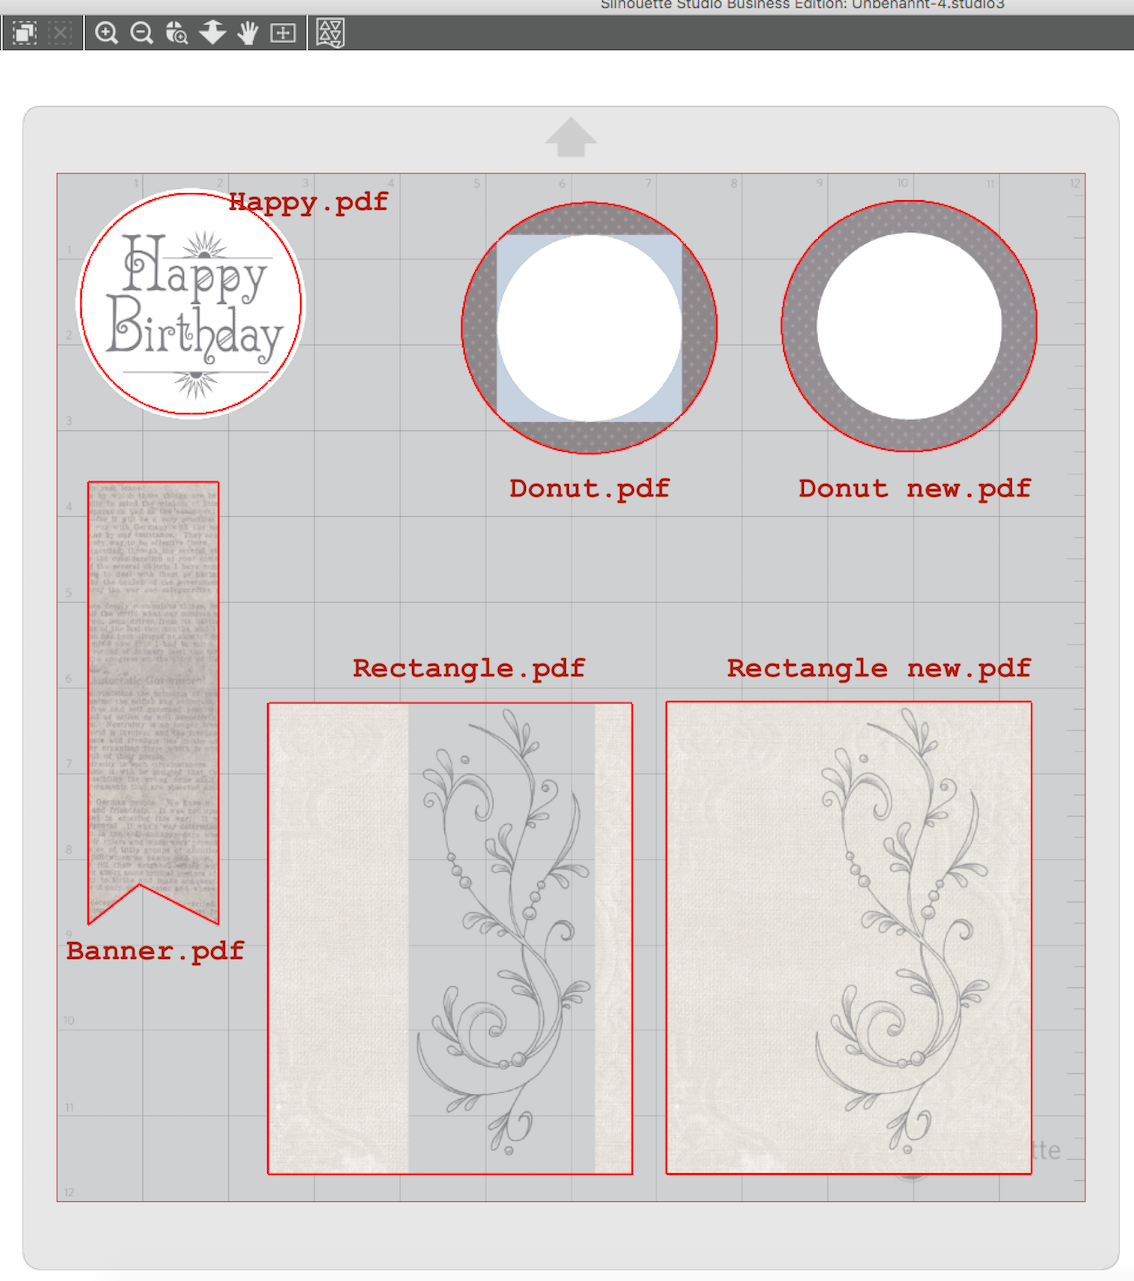
Busenitz, I've suggested to rasterize your image-layers to pixel-layers. In AD there is a difference between this layers, that will solve the transparency problem. Because you don't rasterize the vector elements there is no need to trace in SSDE. Possibly you have to active the cut lines of the vector elements (curve layers, e.g. the rectangle, banner shape, circle), just select this layers an set "cut" in SSDE.
If you have all your design elements in one layer / as one pdf, the layers in SSDE will be that big size of the whole page size (I don't like this - it is a matter of taste
)
Link to AD file (it is to big to post directly): https://www.dropbox.com/s/lq3c451ojq1ajp1/Male_superhaschi.afdesign?dl=0
-
DianeF, there are no vector elements (=cutting lines in SIL-Studio) in your file and the SIL-app doesn't show up svg files that contains pixel elements.
You have to vectorize your file. You can use the auto trace tool in SIL-Studio oder trace it manually (watch some youtube videos https://www.youtube.com/results?search_query=affinity+designer+trace
-
DianeF, would you like to provide the AD-file so I can take a look on it?
-
Busenitz, you can simple create a single png-file of all your separate images: export the group as png, if necessary make some layers invisible
-
Busenitz,
I have following suggestions:
1. group your designs in separate groups (happy-group, donut-group ...)
2. rasterise your images to have pixel-layers
3. avoid using clipping masks; just draw a shape (circle, rectangle ...) and place your image (and rasterised!) or fill the shape with the image (fill-tool -> type -> bitmap)
4. create separate export-slices for every single group and export single pdfs (happy.pdf, donut.pdf...)
-
I create cutting designs using AD and do not have a (big) problem. The only thing is a shape filled with a bitmap - the filling isn't visible in Silhouette Studio. So I have the following workaround:
1. export the filled shape as svg
2. export the filled shape as png
In SIL-Studio I open the svg and fill the empty shape with the png using drag&drop
-
I think this is no help, but the barcode!!! (not the margin) has exactly your desired size
-
I think with DAUB Blender Brush Set you can achieve the desired effect:
-
I think you can save the pattern, if you create a style from the bitmap-filled object
-
I think you have to unchecking Set ViewBox-Button as described here: https://forum.affinity.serif.com/index.php?/topic/13473-svg-export-an-blender-3d/?p=59495
-
-
-
-
but you can try using Typography and choose an alternate (or is that wrong???)
-
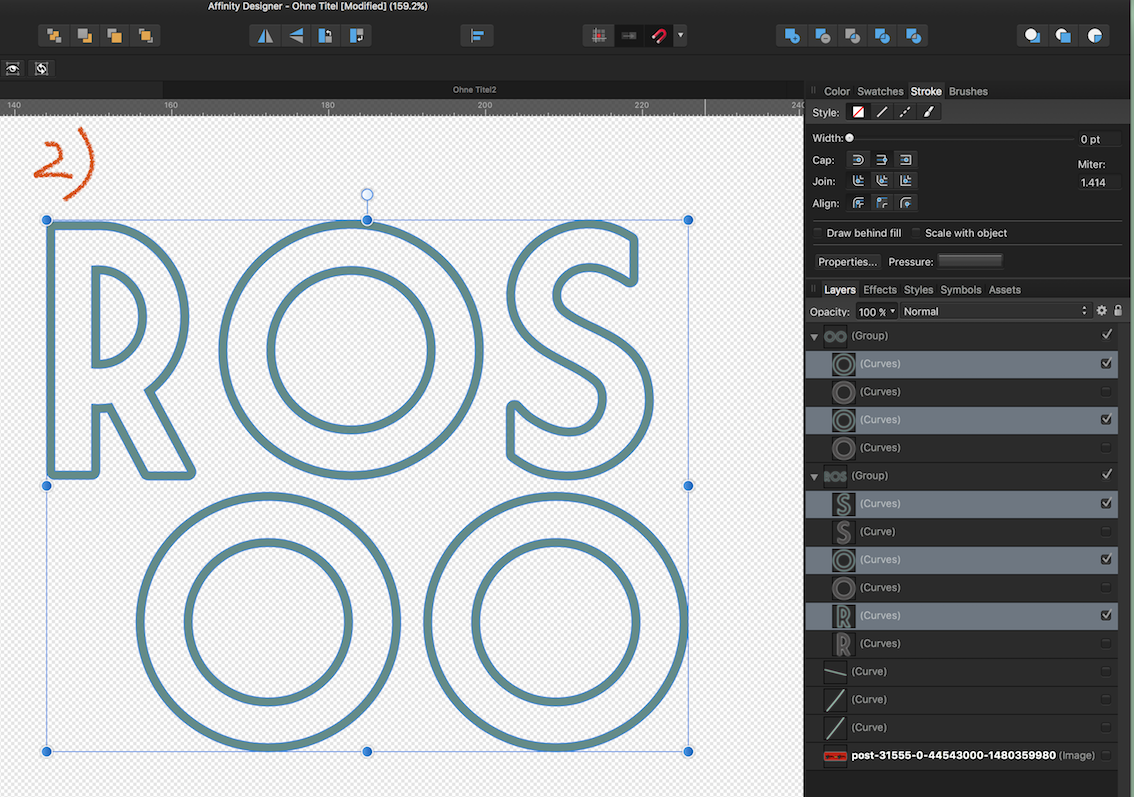
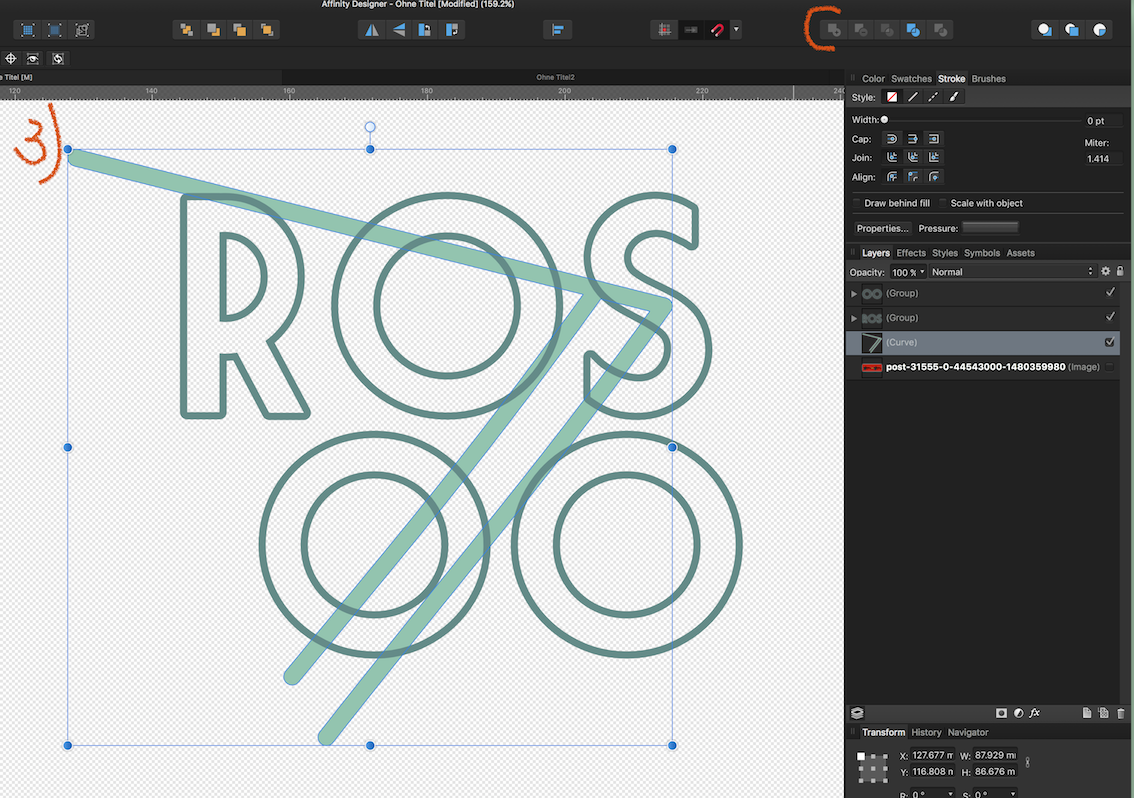
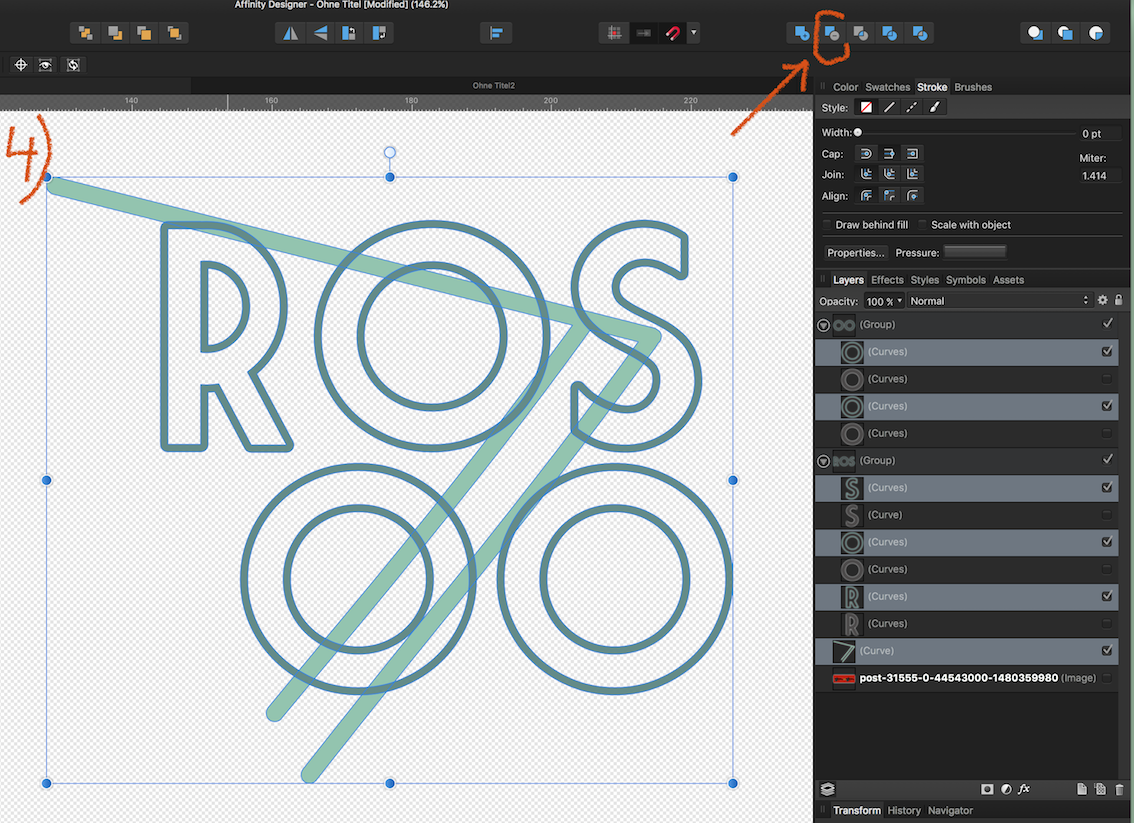
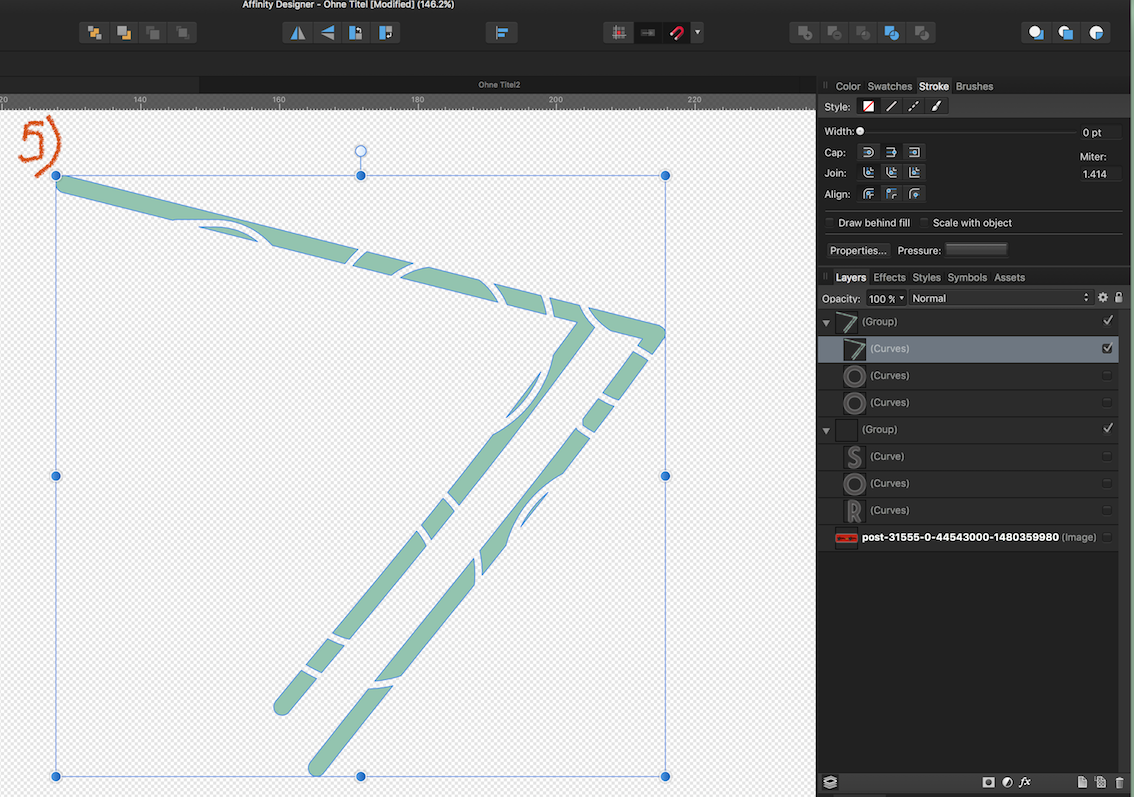
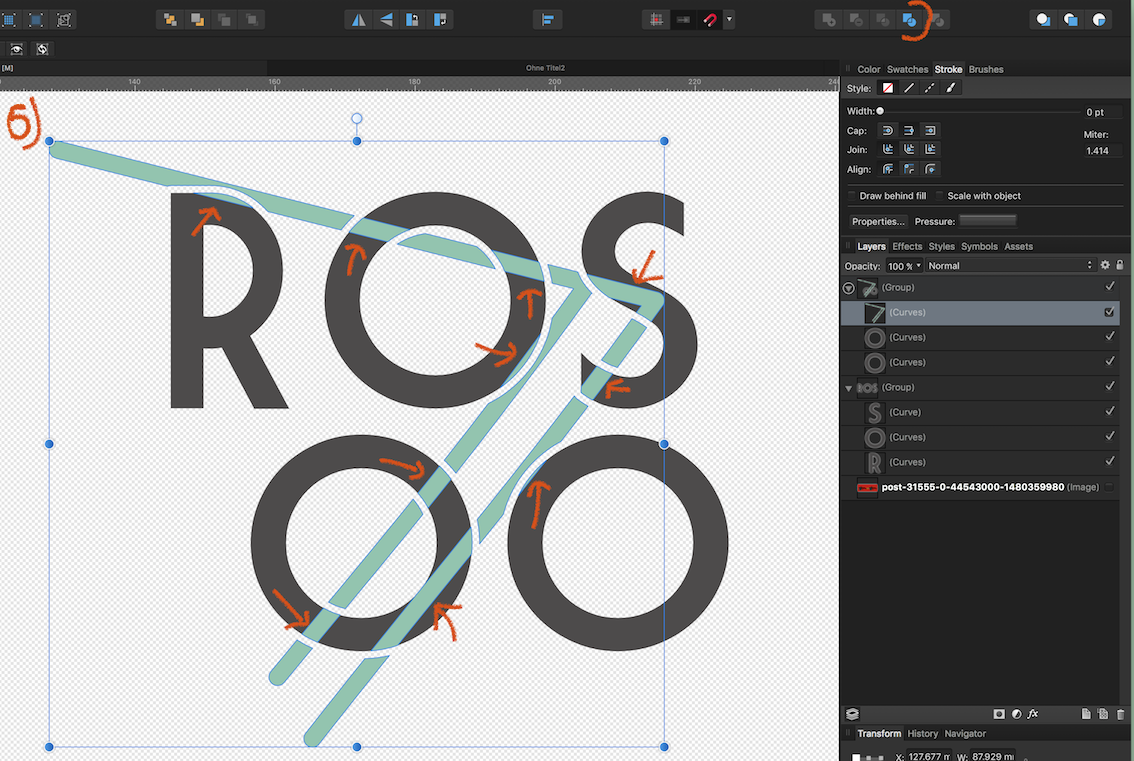
because you need a transparent image at the end, I think you have to cut out the spaces. I don't know if it is the right way but you can achieve it like this...
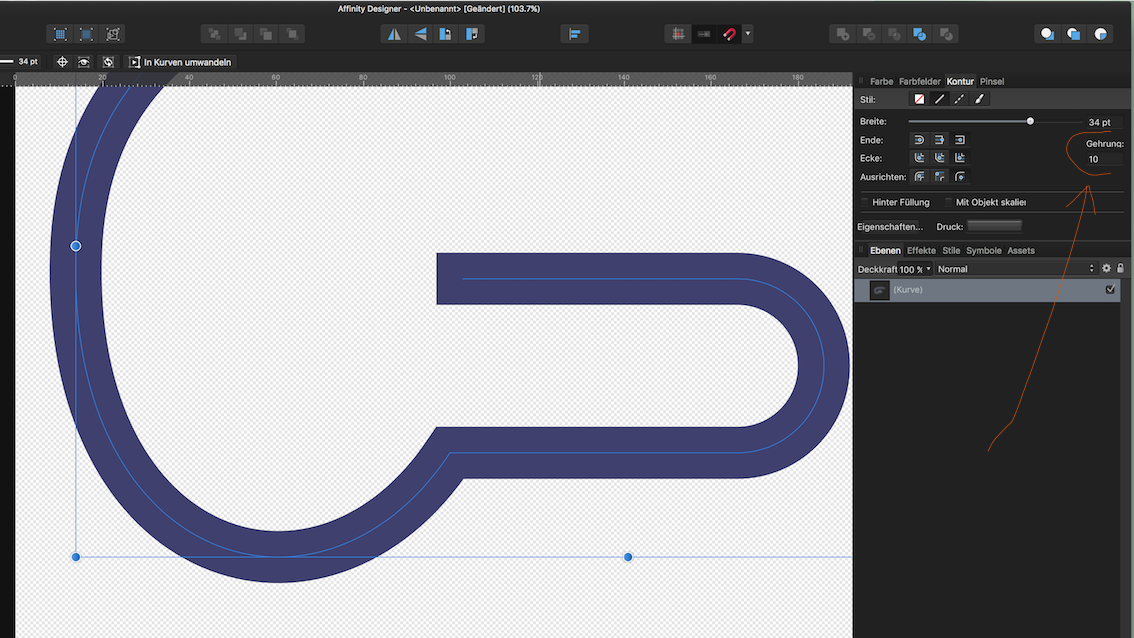
(since we still don't have an offset tool, we have to use expand stroke)1. write your text, set stroke width and align stroke to outside (stroke width will determine the space between your text and your lines later)2. convert your text to path and go to Layer -> Expand Stroke (I've switched off visibility of the black text in the screenshot)3. draw your lines with your appropriate stroke width; highlight your lines, go to Layer -> Expand Stroke and set Geometry -> add, now you have one "line-shape",make sure your line-shape is underneath your text4. highlight the line-shape and all the expanded strokes -> Geometry -> Subtract5. now you have a cutted line-shape6. Geometry -> divide and delete the small pieces7. you're done ;-) -
-
...dir entgeht "nur" in diesem Fall ein tolles Programm
-
genau! lass es einfach
") )
)


boolean operation "subtract" on text
in Pre-V2 Archive of Affinity on Desktop Questions (macOS and Windows)
Posted
many thanks for your input and the file! - it works for me like a workaround, but it works 😀
but... I'm afraid it's a bug; when I draw a H-shape and a W-shape it works without any compounds and filling mode. Just marking the shapes and choosing "subtract" - ready