eaglenws
-
Posts
38 -
Joined
-
Last visited
-
 walt.farrell reacted to a post in a topic:
Moon Processing Workflow
walt.farrell reacted to a post in a topic:
Moon Processing Workflow
-
Thank you, @walt.farrell. I was also going to mention that I did ask in Youtube and James did confirm that my guess that the “Dest” graph is correct.
-
walt.farrell reacted to a post in a topic:
Moon Processing Workflow
-
@walt.farrell - Yes, that is the video I was talking about. Thanks for the tip to provide a link to the video. I’ll definitely remember to do that next time.
-
A few days ago, James released a video with his moon processing video. At the 5:32 mark, he says to click on the cog icon for the clarity filter and adjusting the “Underlying Composition Ranges” graph. I use Affinity Photo 2 for iPad and do not see the cog icon or underlying composition ranges. If I click on the Clarity layer and then the 3 dots to go to the layer options, there are “Source” and “Dest” graphs. Is the “Dest” graph the equivalent of the Underlying Composition Ranges graph in the cog menu in the desktop version?
-
That’s a great idea about using the dpi to set the dimensions in pixels. Thank you again, @DM1 !!
-
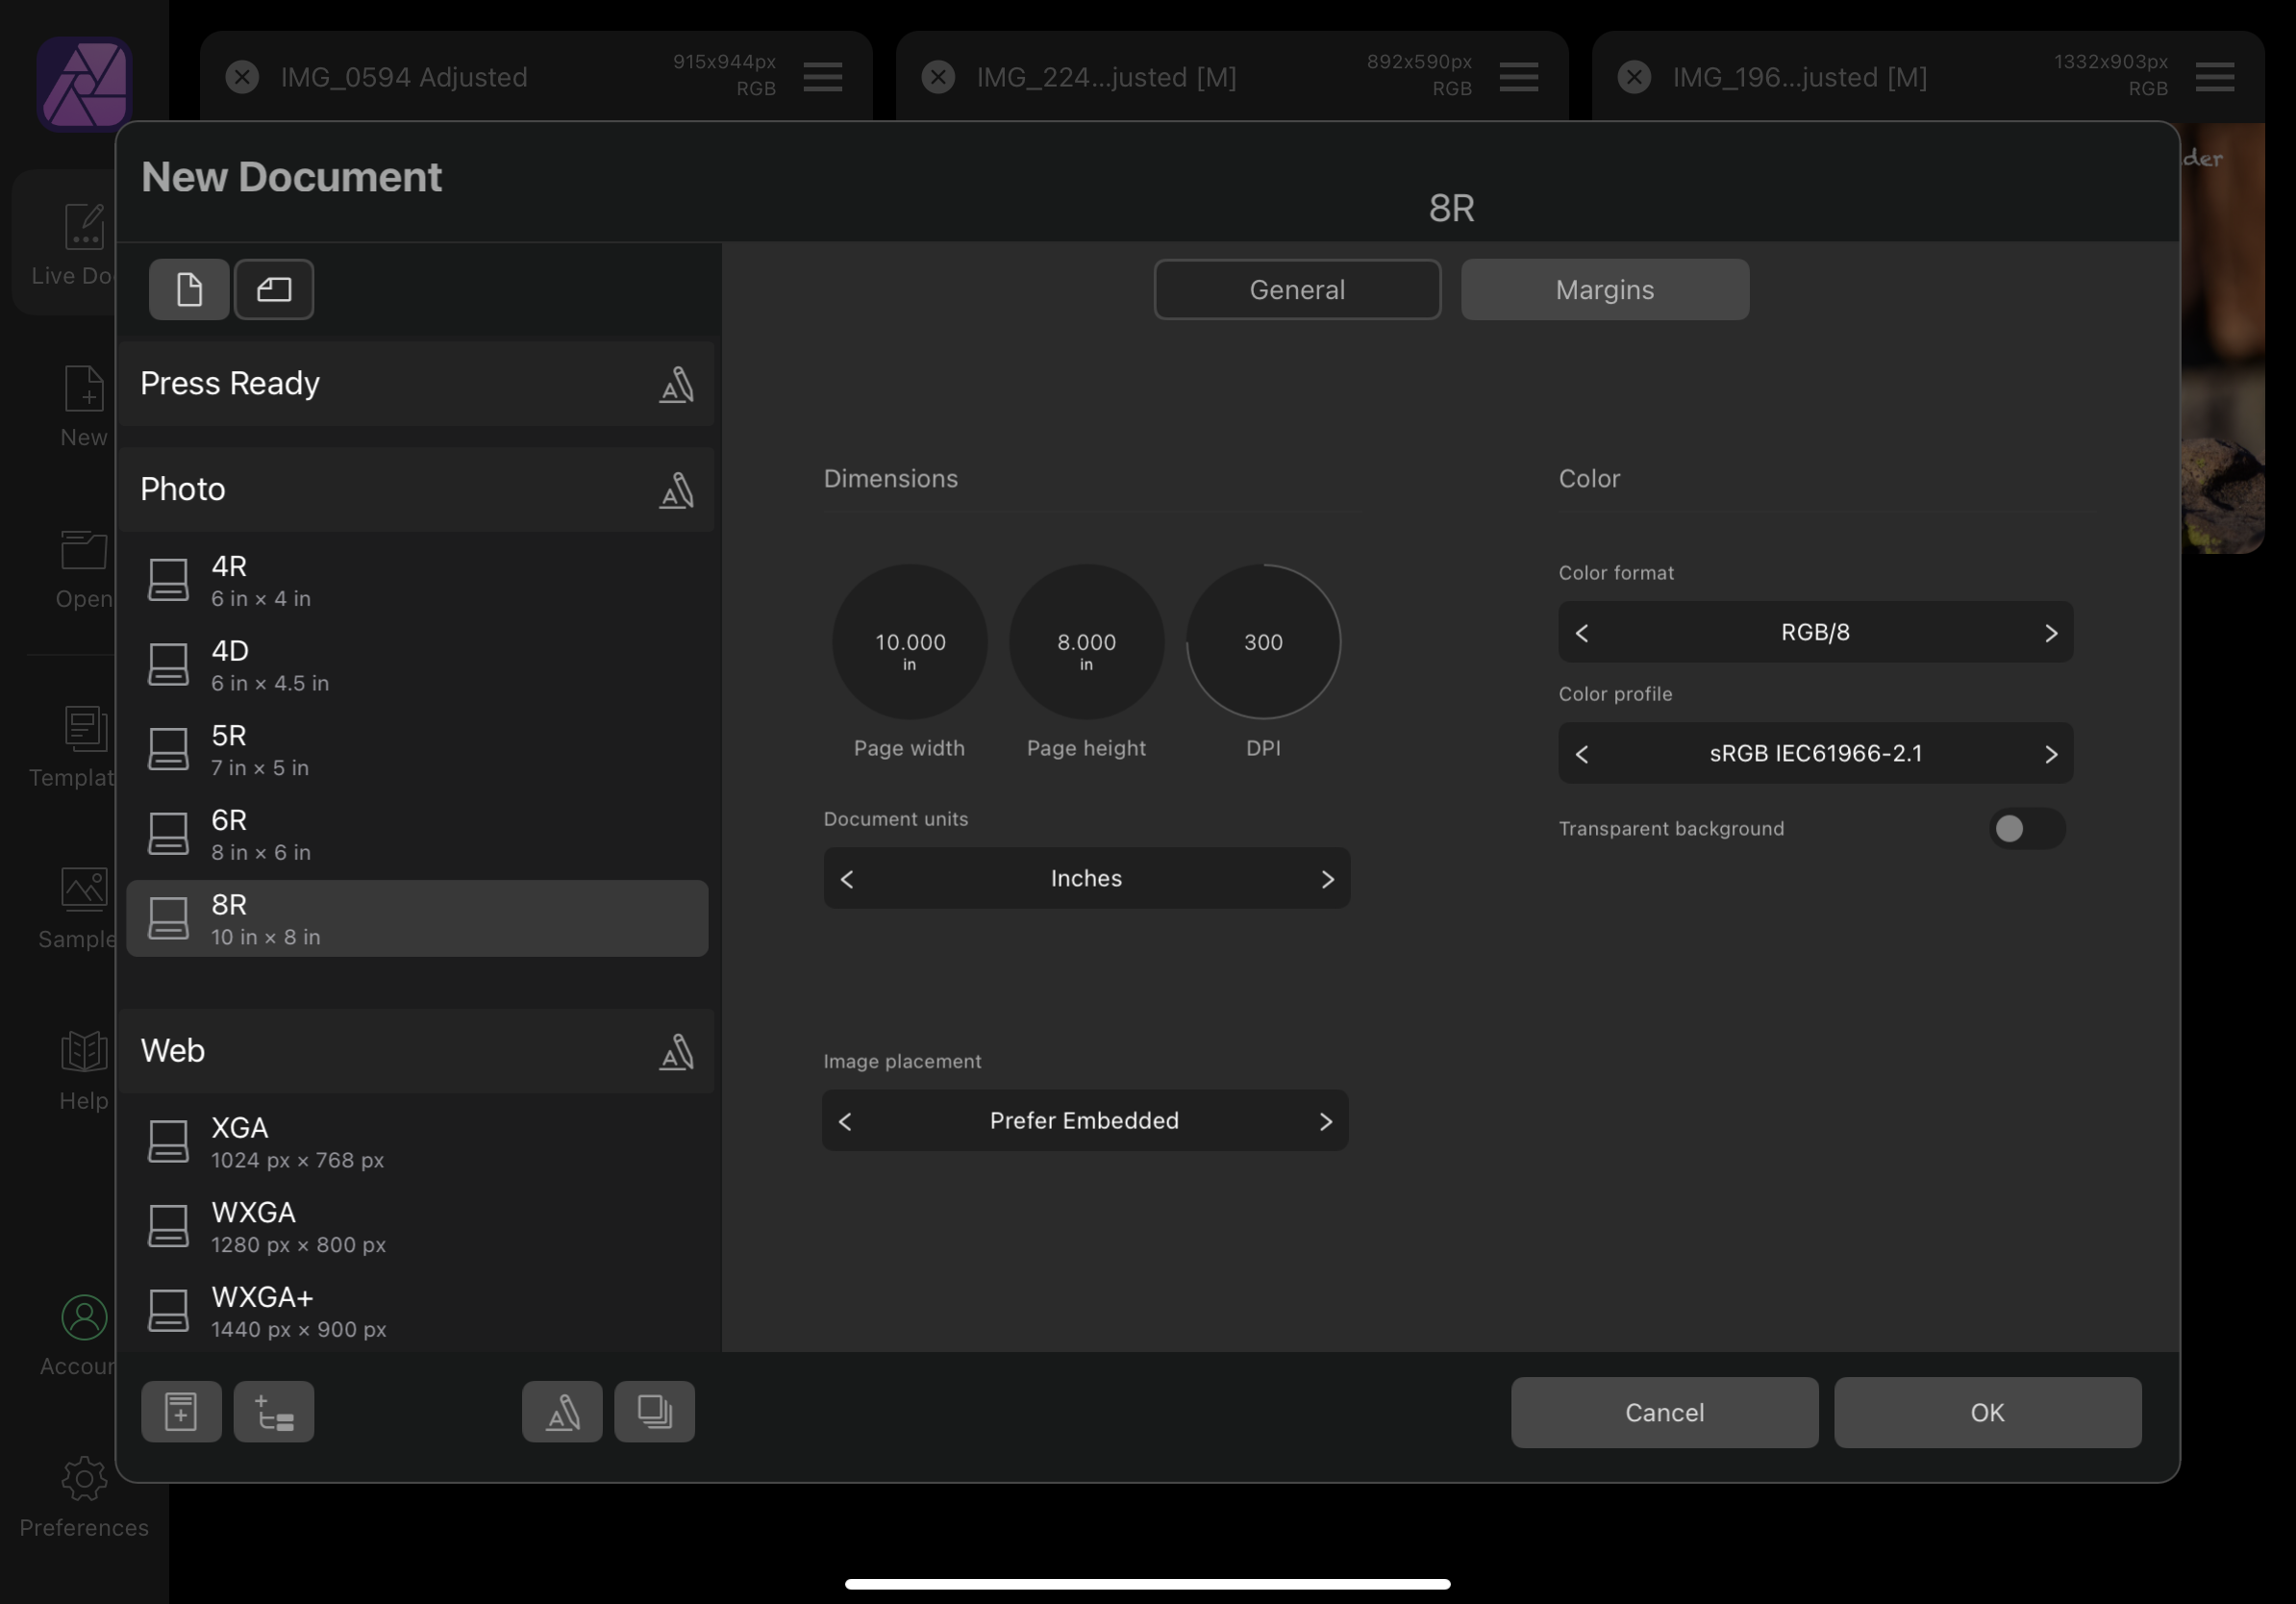
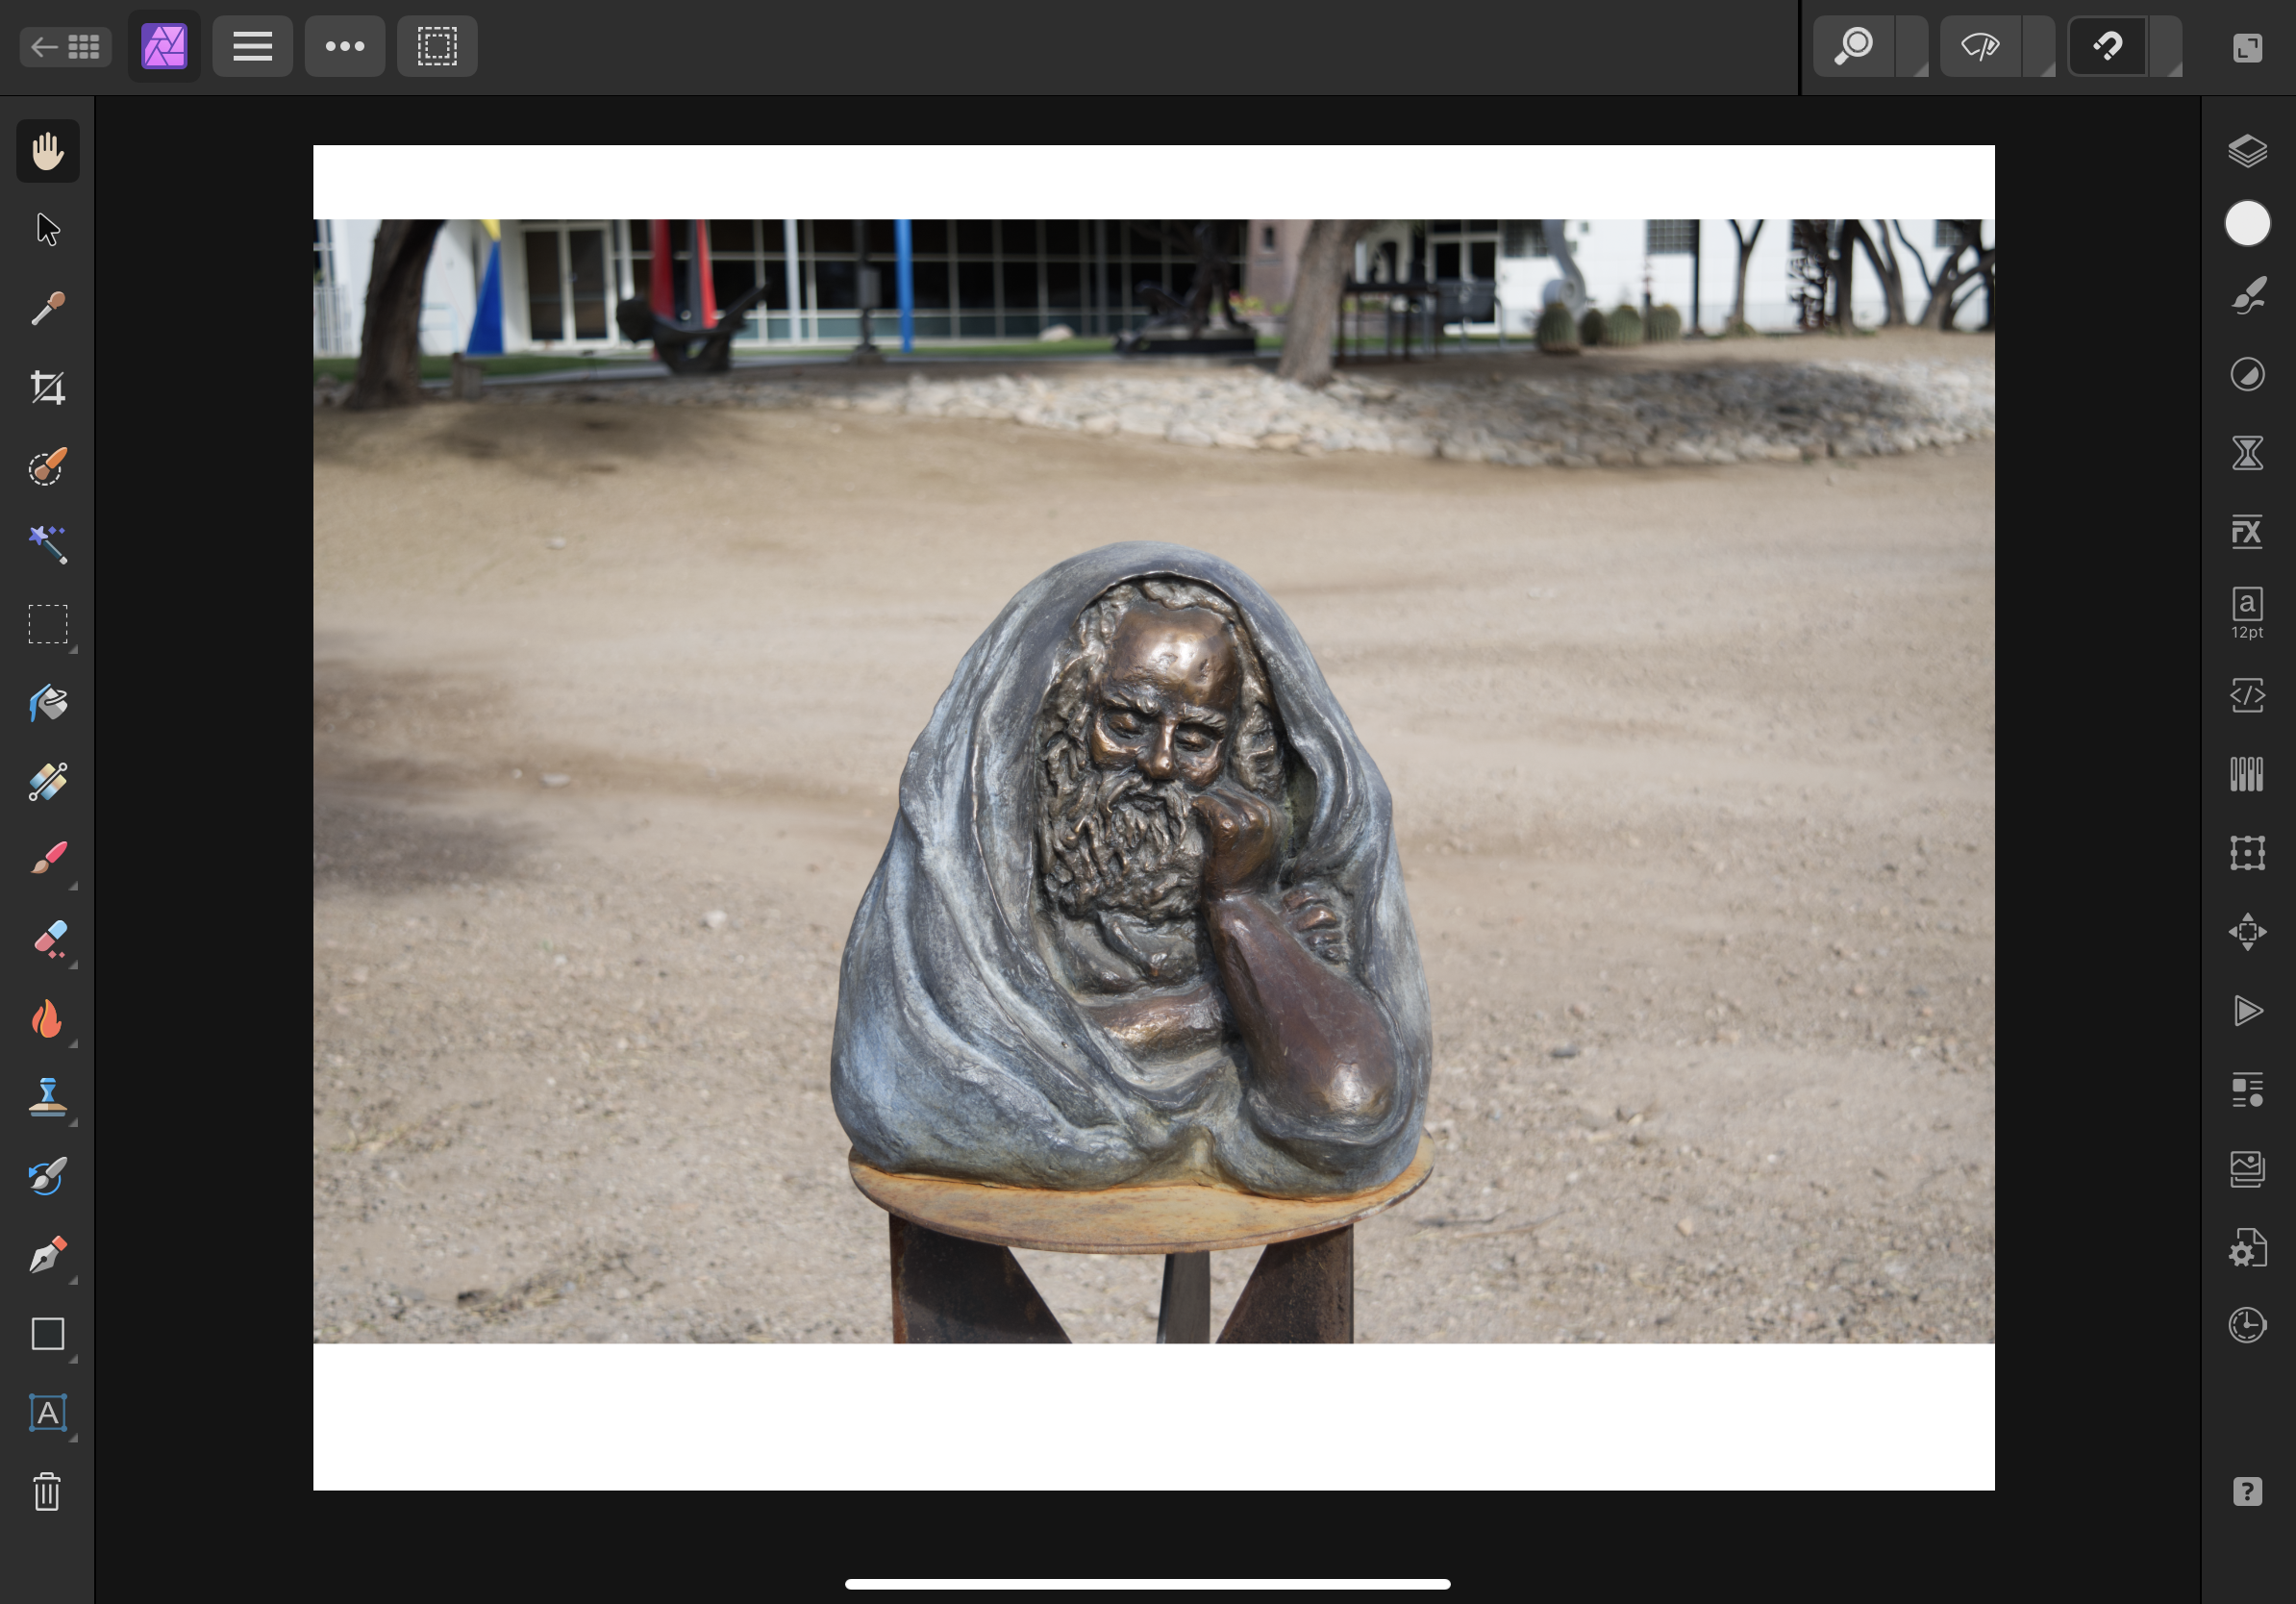
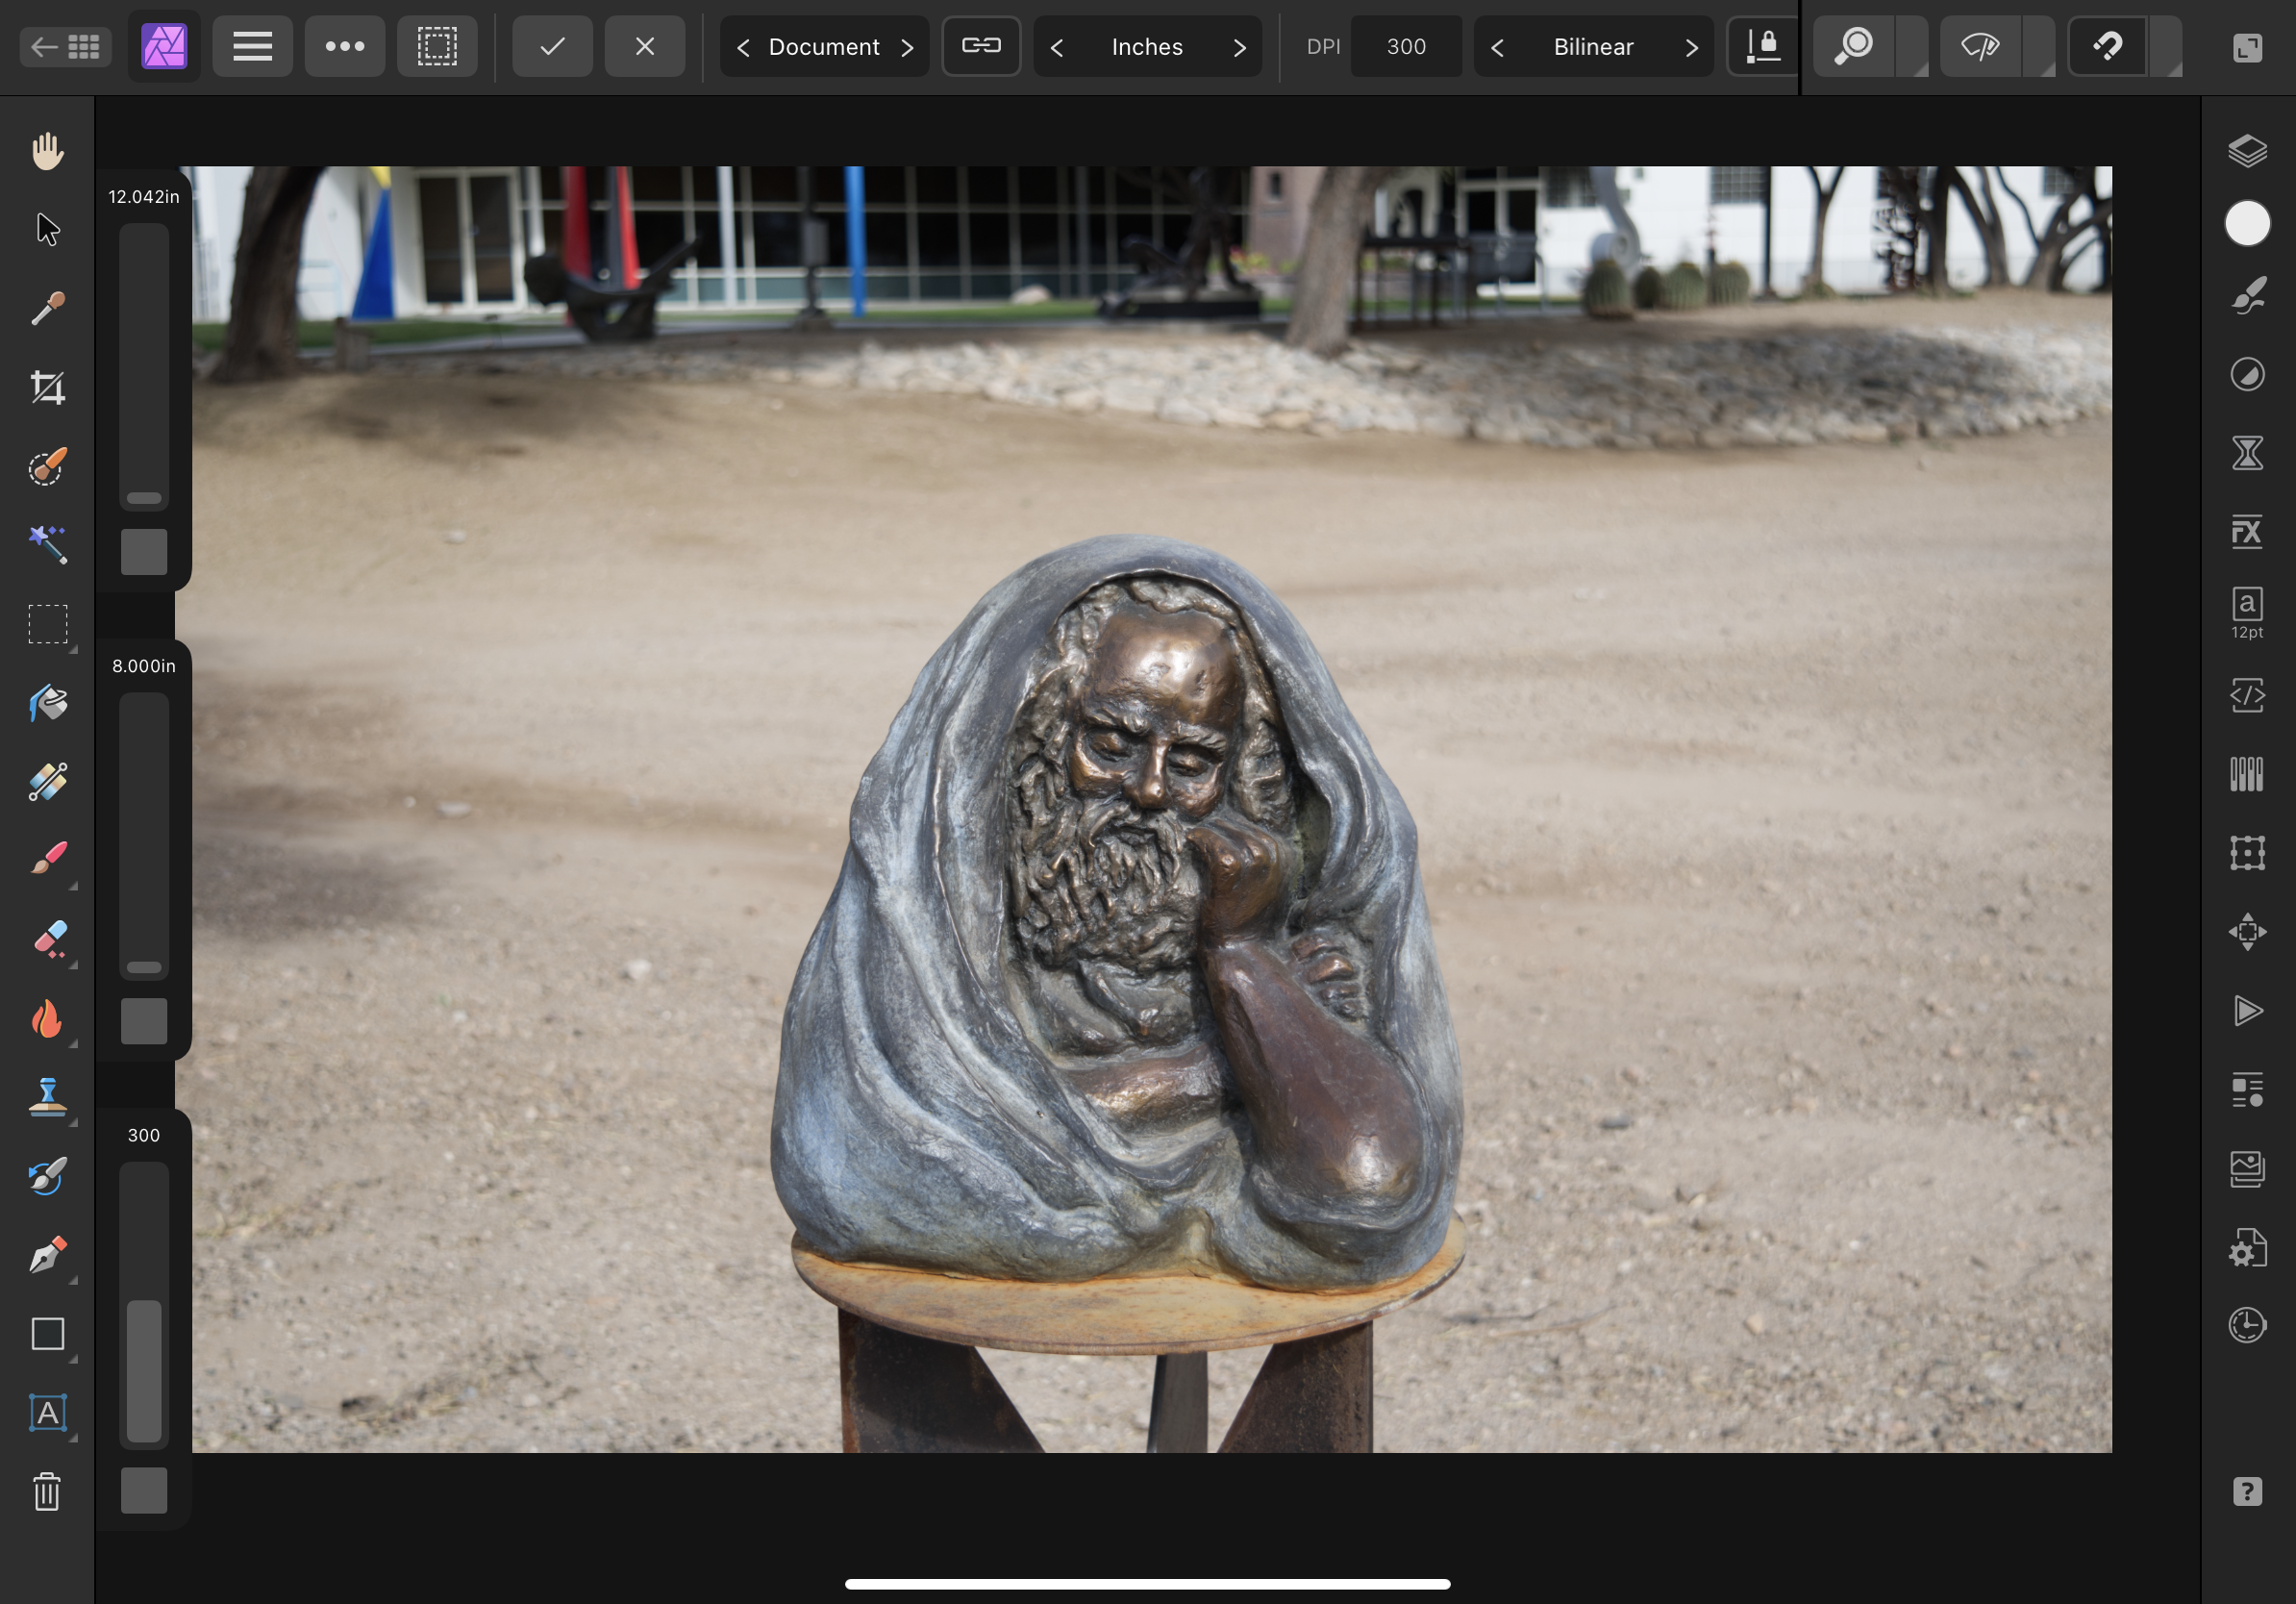
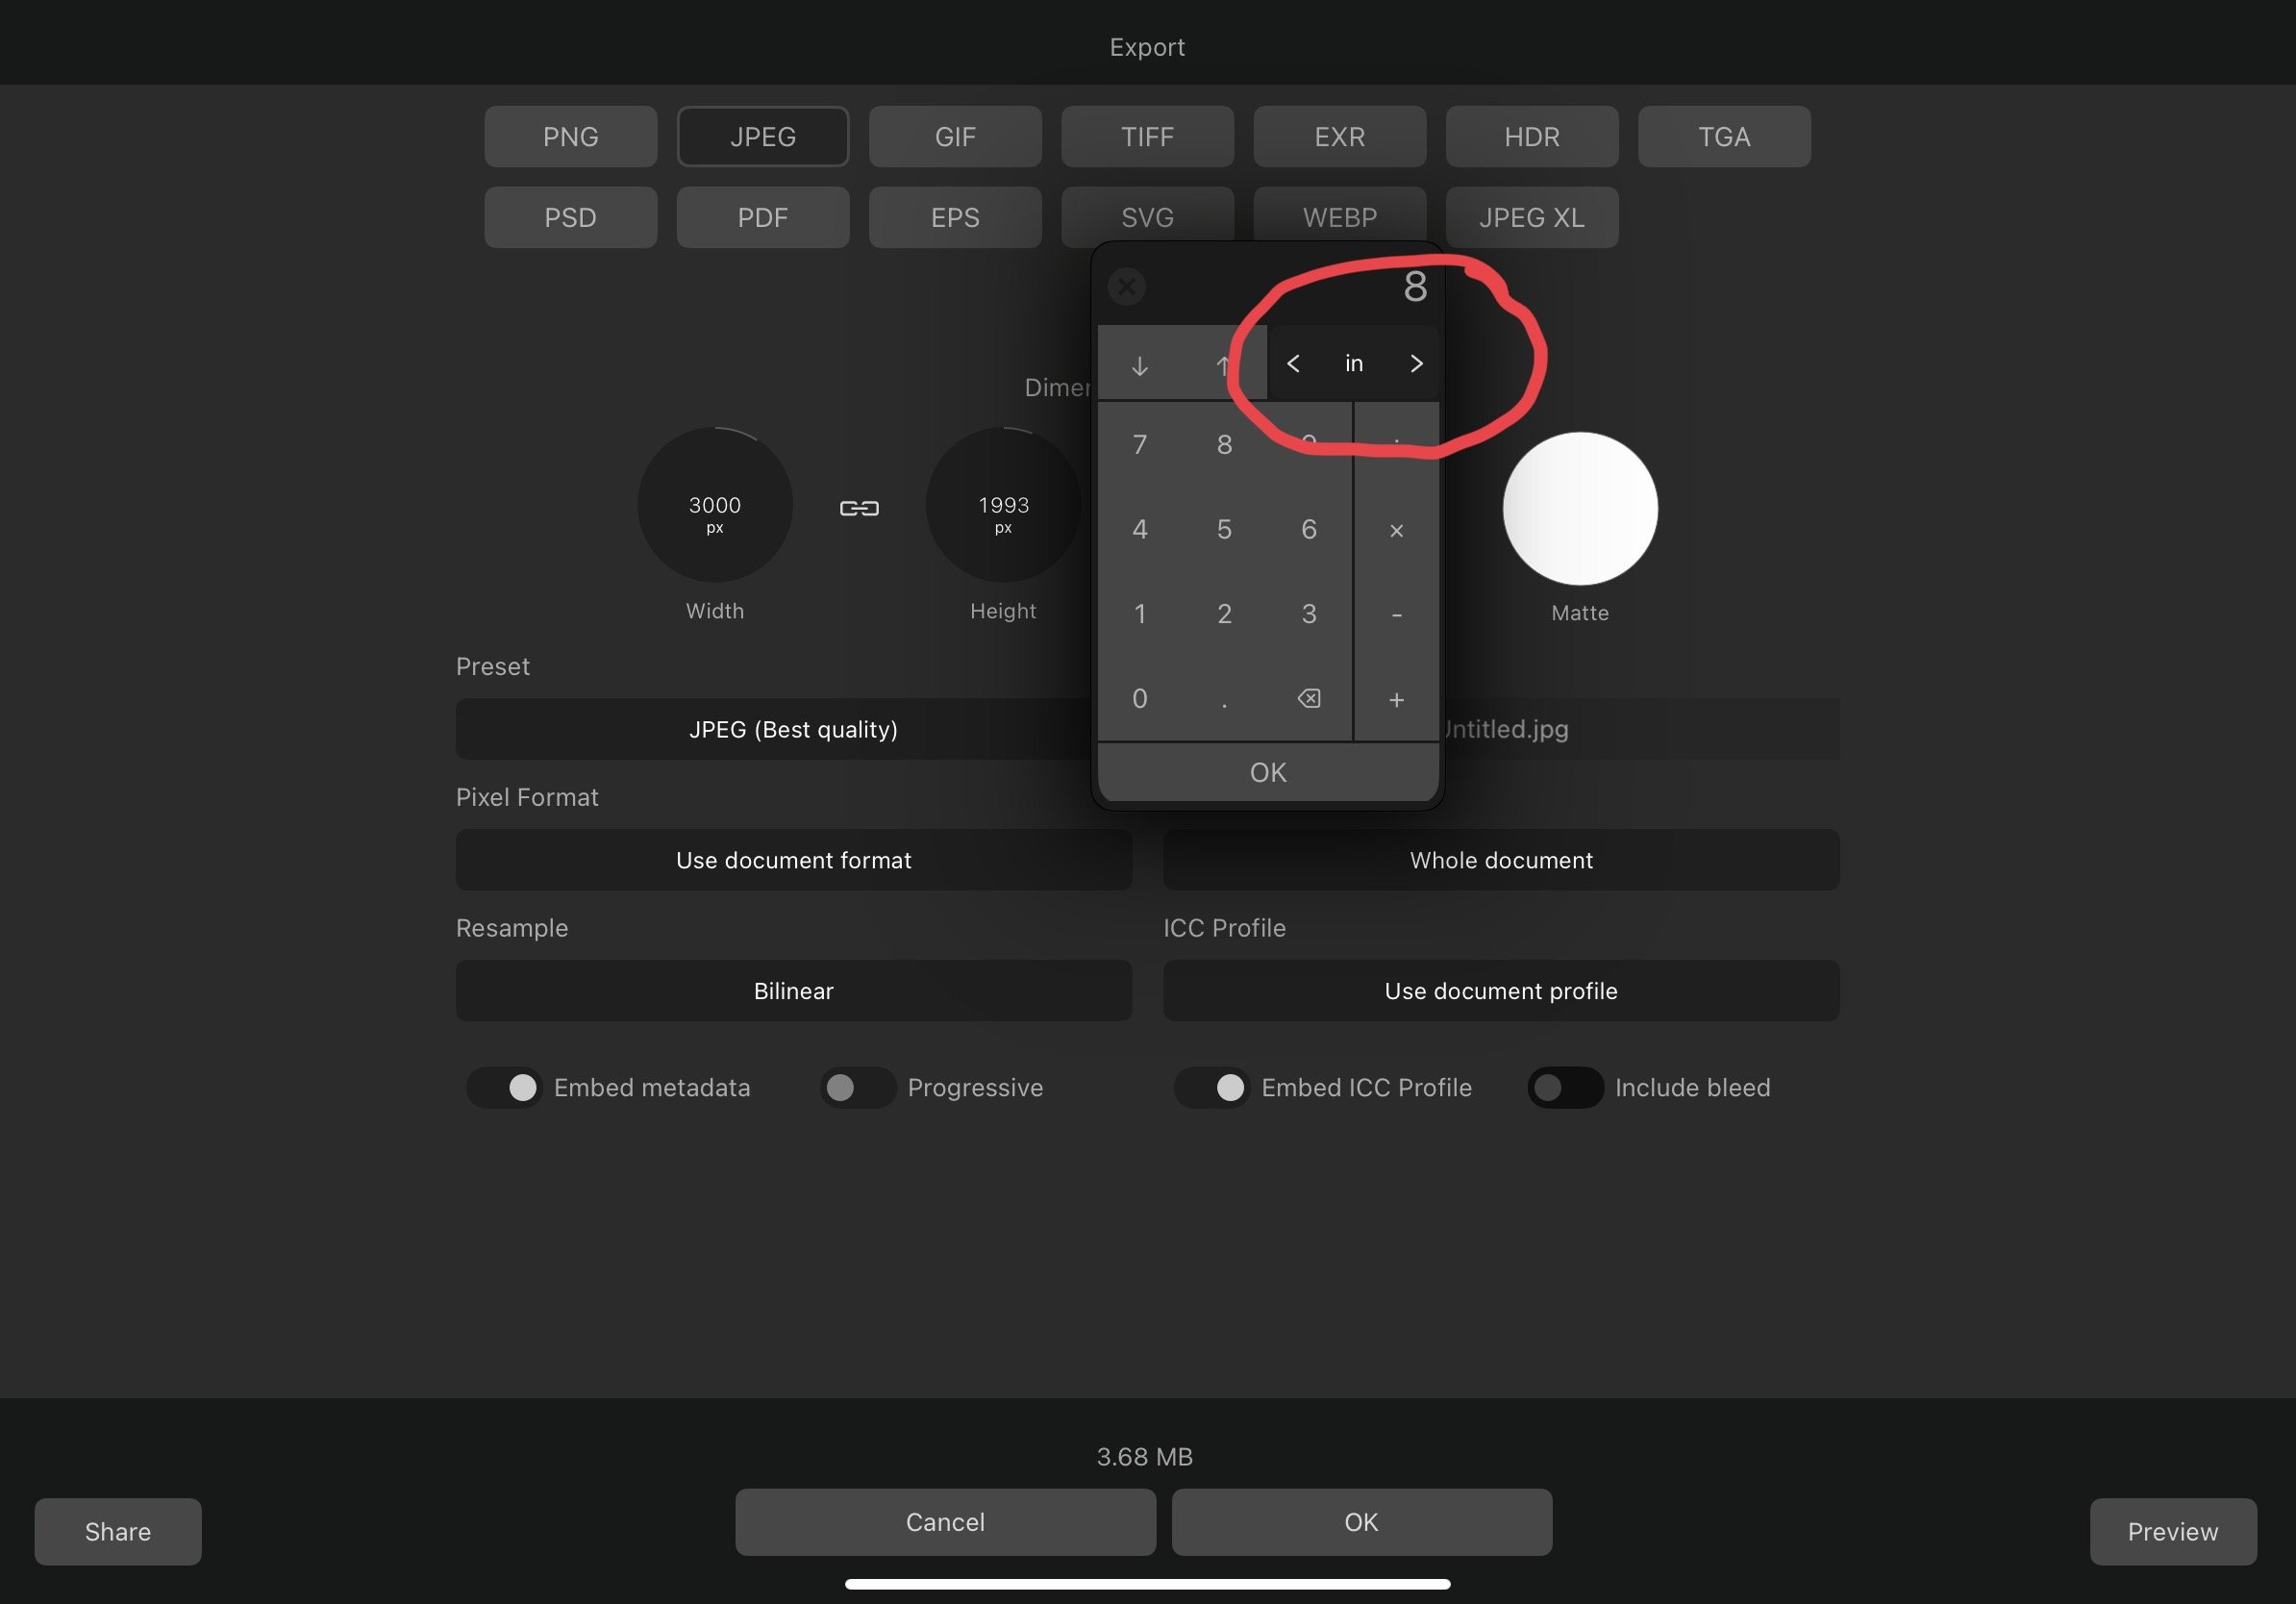
Thank you again, @DM1. I have always used the “Open New Document” rather than the “New Document” to start working on a new photo. I found the setting you were showing and was able to change the default settings for a new document. However, the new document is blank and I have to go to the “Document” menu and then click on “Place” to select the photo. I then click and drag the photo onto the document. I can then resize the document to make the short side 8 inches for example, and then crop it to get rid of the white borders. Then when I try to export the file the dimensions in the export panel are in pixels again and if I try to change the size in the export panel it shows that I changed it to 8 inches but when I click OK it makes it 8 pixels. The other thing is that when I place a raw photo onto the new document it is in the photo persona rather than the develop persona. I included screen shots so you can better see what I’m trying to explain. If, rather than creating a new document, I “Open” a document, it pulls the photo into the develop persona. But the size is in pixels and I need to resize each one individually. I do not see a way to change the default size when using this method.

-
Thank you, @DM1. I was able to change the dimensions to inches as you described. But if I open another document, the size goes back to pixels. Is there a way to change the default setting to inches? If not, at least I now know how to change the document size individually. I appreciate your help.
-
In Affinity Photo 2 for iPad, can I change the default dimensions from pixels to inches?
-
I got it. Thank you very much for your help, @walt.farrell.
-
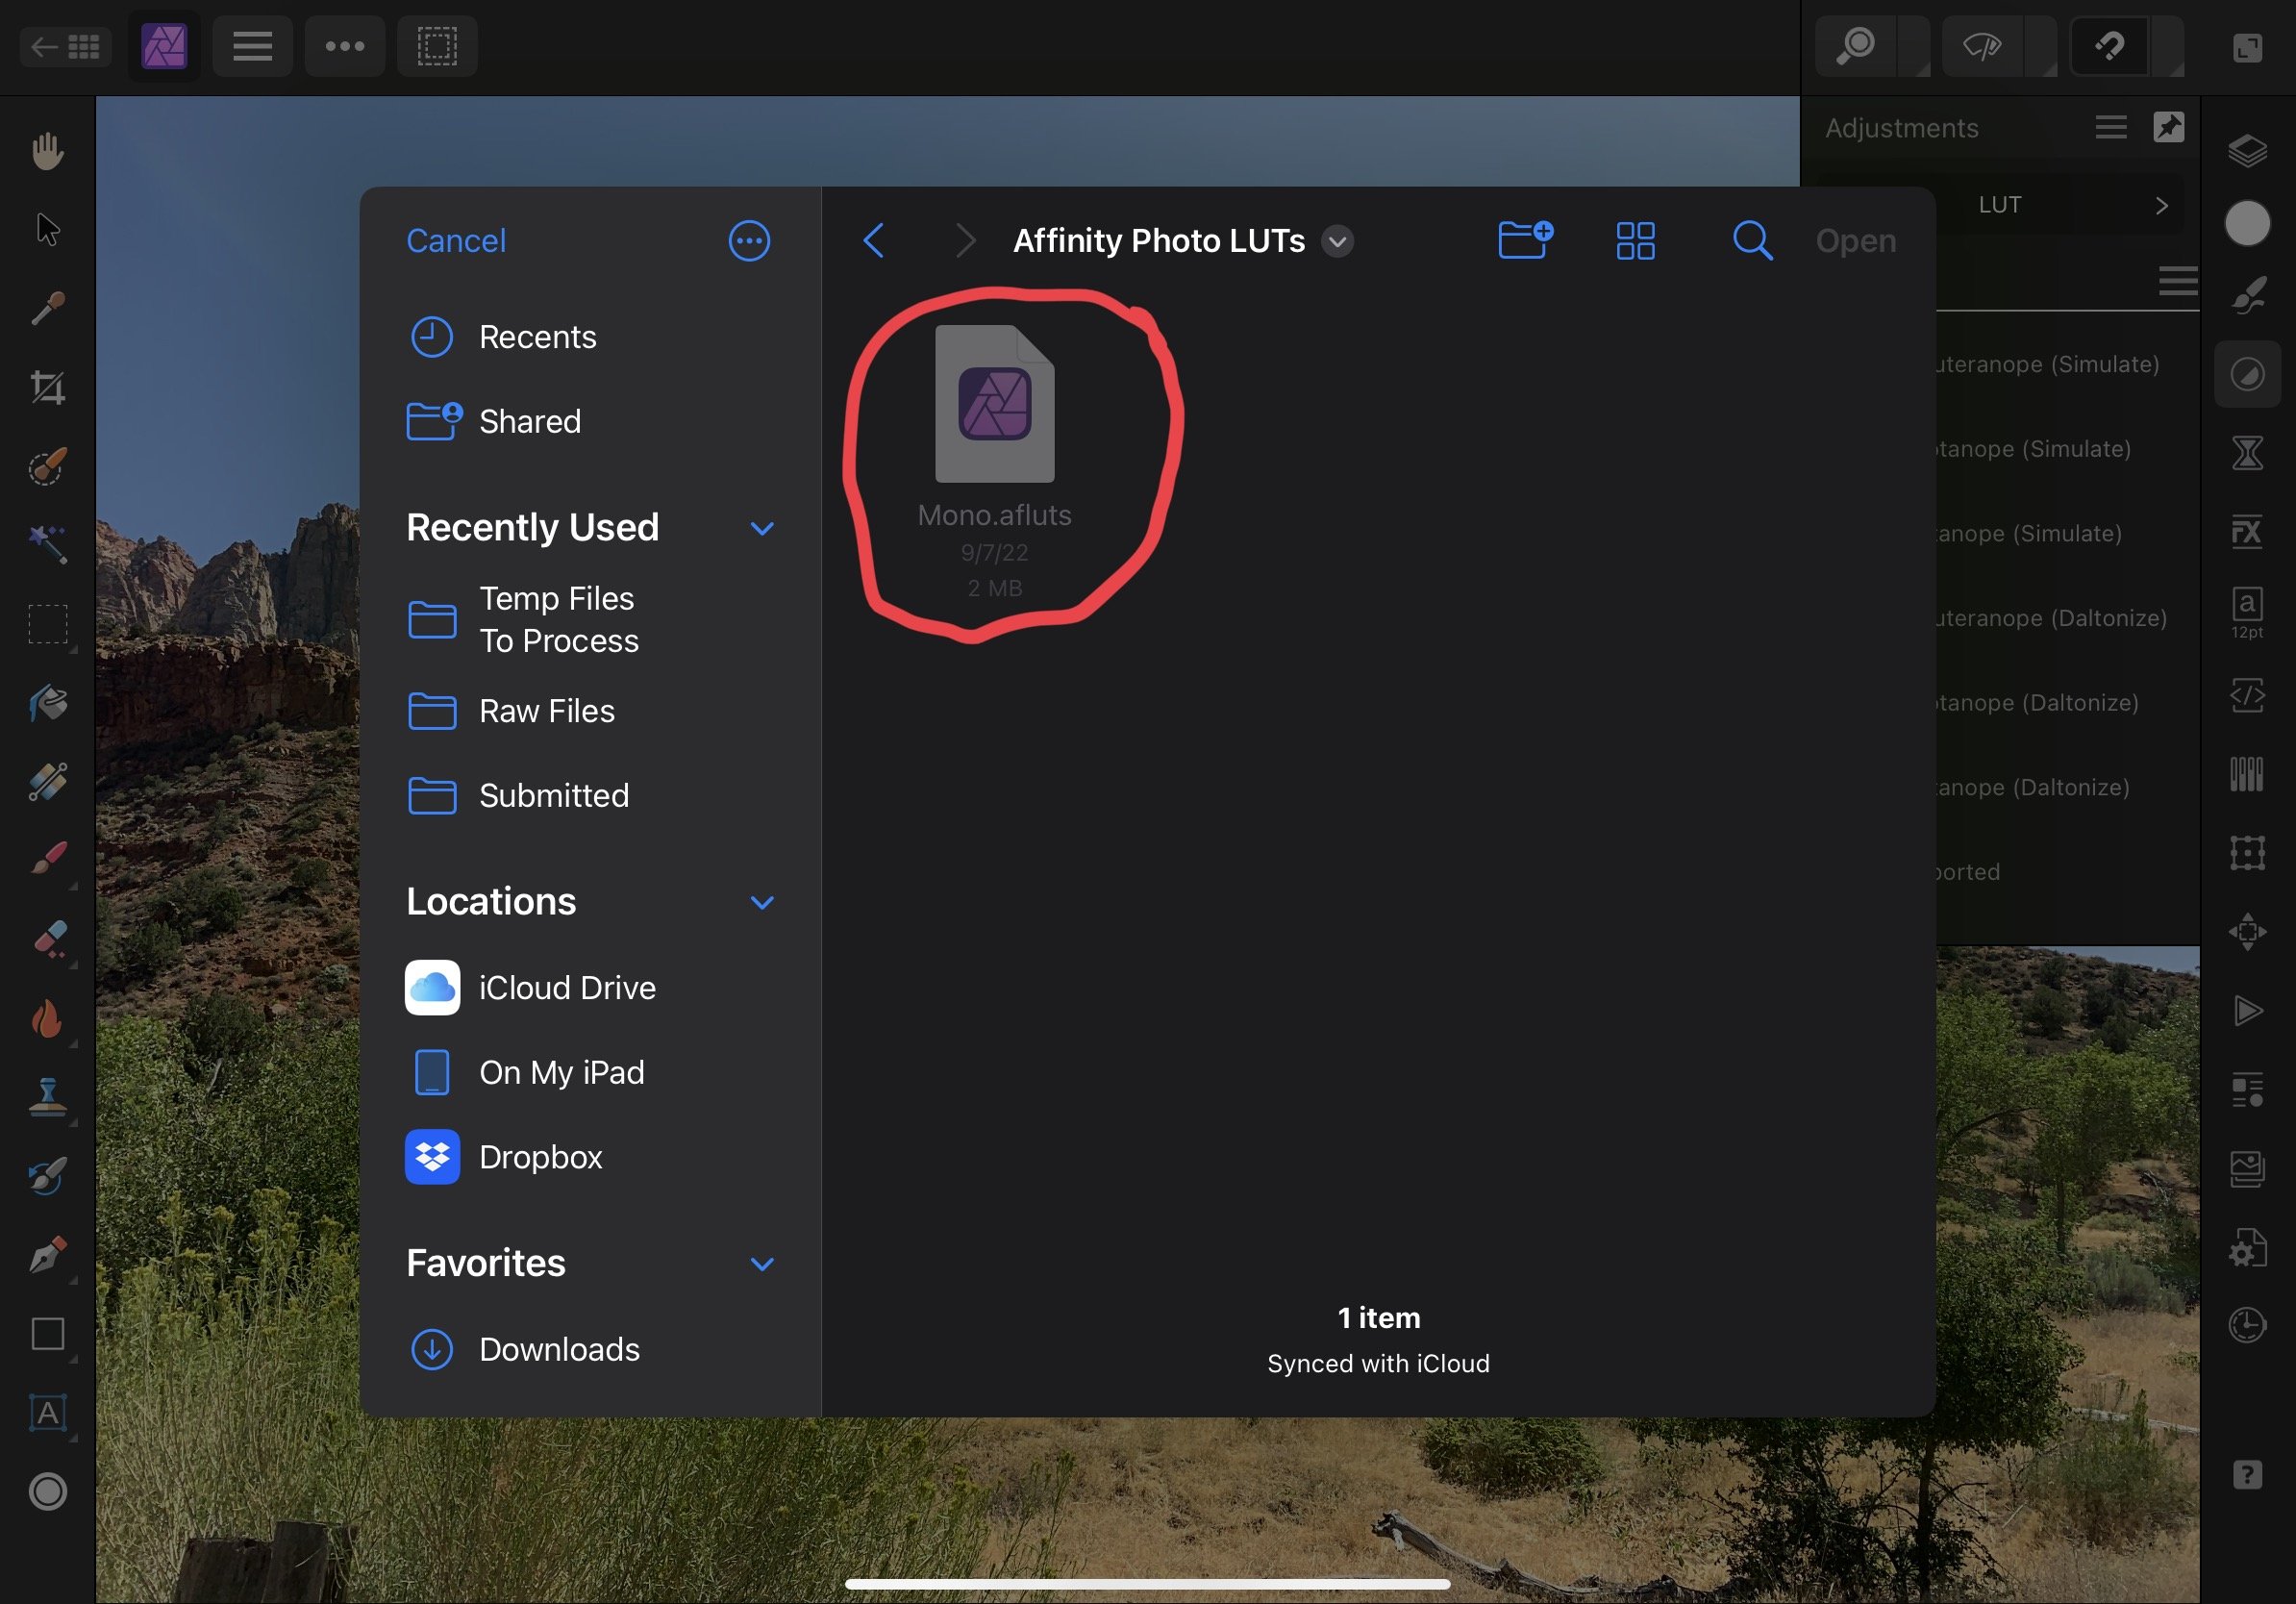
Thank you again @walt.farrell, With your screenshot, I found the hamburger menu. I am attaching more screenshots to show what I’m now seeing. The first 2 show the path to get to the file to import. The 3rd screenshot shows that when I navigate to the afluts file is grayed out, so I cannot select it to import. Is there something else I need to do?
-
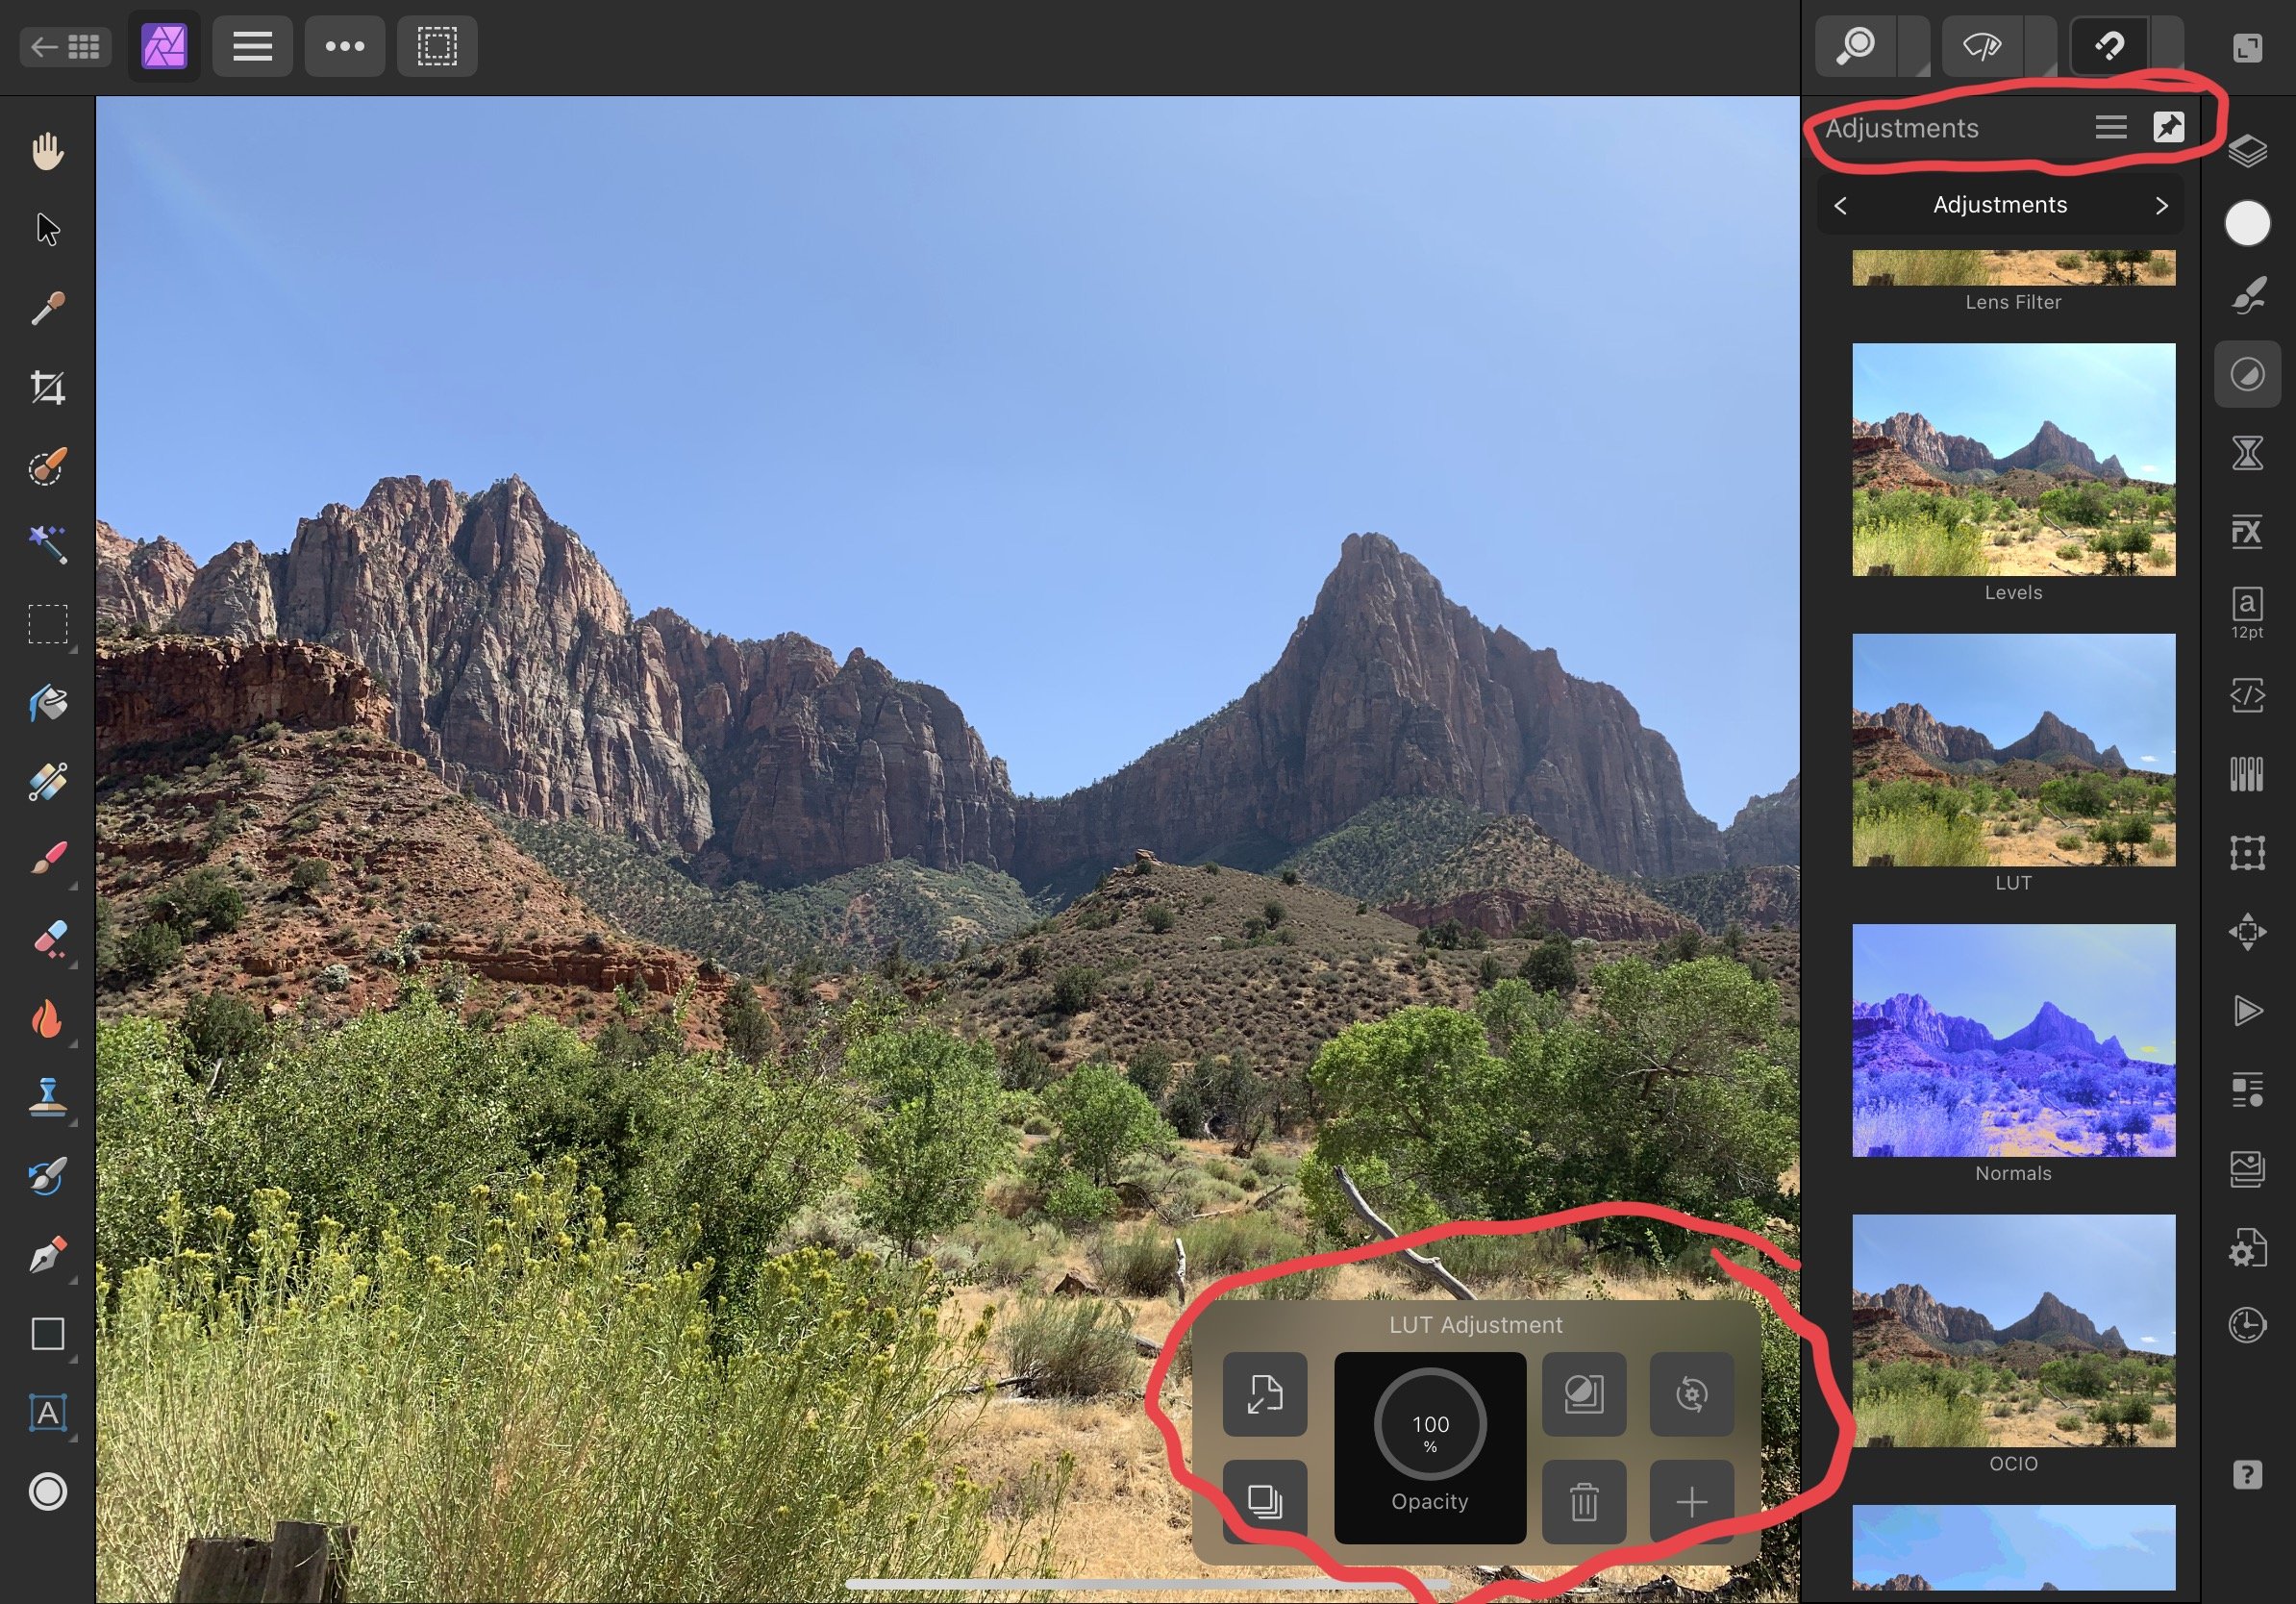
Thank you, @walt.farrell, I do have a flat files. When I follow the steps you suggested, I do not see the studio panel hamburger menu or Import Category. I am attaching a couple screenshots to show what I see. The first screenshot shows that there is no hamburger menu in the LUT adjustment panel. This shot also shows a hamburger menu in the upper right corner. The second screenshot shows that this menu only allows the adjustments to toggle between a list mode and the larger icon mode. The last screenshot shows the menu when I click on the hamburger menu in the upper left. What am I missing?
-
There was a recent release of some LUT presets to convert photos to B&W. I cannot find a way to import them to Affinity Photo 2 for iPad. Is it possible to import these LUT’s to the iPad version? Thank you, Neal Schneider
-
Thank you @NathanC.
-
DM1 reacted to a post in a topic:
Live High Pass Filter
-
Thank you, @DM1. I’m sure that there are several bugs with such a big update to the software. I hope they get it figured out quickly.
-
@AlainP, I tried that and it did the same thing. I’m also seeing that this is a known bug. Thanks again for your help.
-
@AlainP, Thanks for your quick response. Do you mean that I should duplicate the background layer and apply the High Pass filter to the duplicate? I normally do the High Pass filter as one of my last steps. Do I need to make that the first step after duplicating the background layer and before making all of my other adjustments?