solved
-
Posts
39 -
Joined
-
Last visited
-
 Raptosauru5 reacted to a post in a topic:
Shortcut to resize a rectangle to artboard or canvas size ?
Raptosauru5 reacted to a post in a topic:
Shortcut to resize a rectangle to artboard or canvas size ?
-
 solved changed their profile photo
 -
Still amazes me how well this forum works. Thanks to everyone for contributing!
-
Thank you again, another feature I was not aware of. Solves most of the issues in Designer I had with my question. In this case, a "fit to Artboard" function or Photos approach with Fill-Layers still would be a nice thing for some situations.
-
 solved reacted to a post in a topic:
Shortcut to resize a rectangle to artboard or canvas size ?
solved reacted to a post in a topic:
Shortcut to resize a rectangle to artboard or canvas size ?
-
solved reacted to a post in a topic:
Shortcut to resize a rectangle to artboard or canvas size ?
-
Interesting approach, thank you for taking the time putting this together. I appreciate that. The Fill-Layers solved my problem for now, but one day I might have a more advanced problem for your advanced solution here.
-
solved reacted to a post in a topic:
Shortcut to resize a rectangle to artboard or canvas size ?
-
Perfect, thank you very much, this solves my little problem in a very elegant (and non destructive) way and saves me a lot of time. I just did not know that they exist. Now I do and I will use them for quick background color changes, create gradient overlays or mask them with a white brush stroke or stamp etc. And all that non-destructive because they are vector based, nice. Just what I needed. At least in Photo this makes my "fit to canvas" point superfluous.
-
Thanks for the response... Interesting tip with the "spreadwidth", did not know that. And yes... still too much work;) Using Templates and Assets extensively,, but they just do not to solve this little "problem". Dragging and snapping is fine, just hoped there is a faster way to accomplish this task.
-
I am dragging way too much rectangles to fit the artboards dimensions in designer or to fit a canvas in Photo. Draw a rectangle with the rectangle tool and then dragging the corners to snap to the artboards or canvas corners does work fine but it just takes too long. Is there a quicker way or a shortcut I am missing ? Something like "fit to artboards size" or "fit do canvas size" ?
-
NotMyFault reacted to a post in a topic:
Color Gamut Simulation
-
solved reacted to a post in a topic:
Color Gamut Simulation
-
solved reacted to a post in a topic:
Color Gamut Simulation
-
Looks like I triggered someone ;)
-
Thanks for the input, did that with an opacity of 75%. It does the trick quite well...
-
Sweatman reacted to a post in a topic:
My vectors are too clean
-
Just guessing... It looks like he uses texture, grain and some airbrush brushes in pixel layers overlaying the actual vectors to achieve that look. At some parts the vectors could be rasterised and then further edited (blurred, smudged etc.) as pixel layers to get rid of that "vector look" you mention.
-
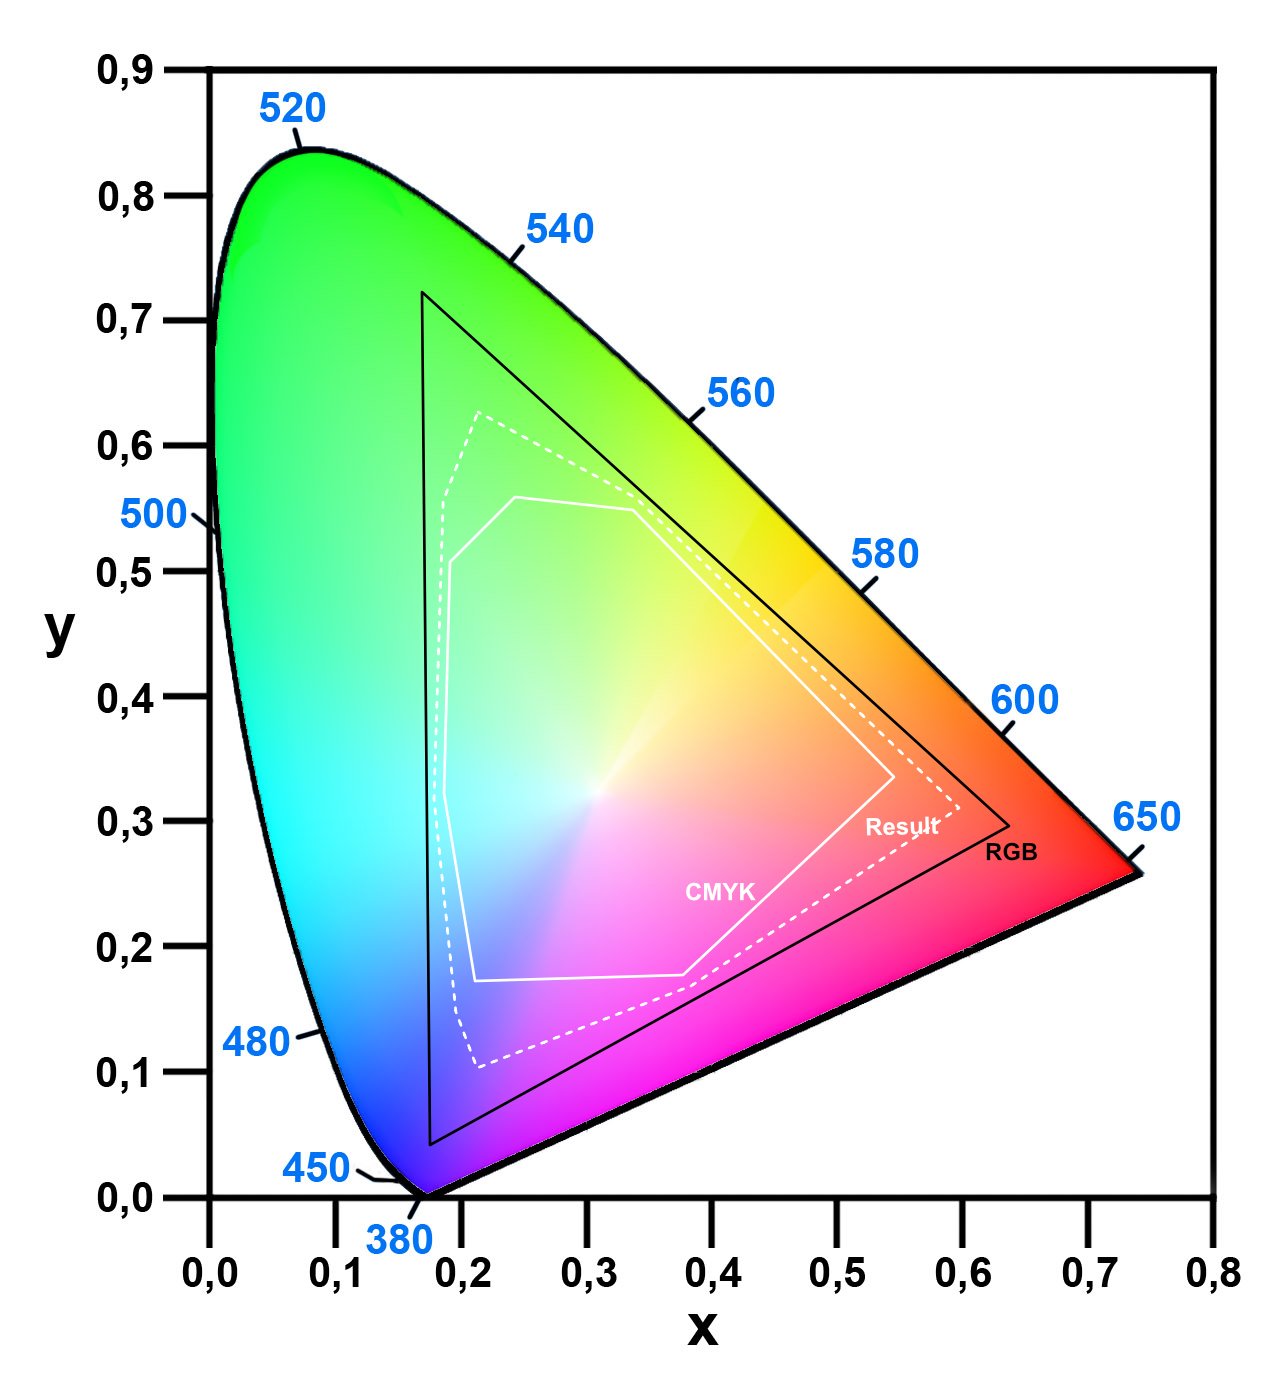
I want to simulate the limitations of color gamuts from 2 different color profiles in a editable way. A random picture containing colours that are possible in the RGB spectrum, could be a color circle for example. Using filters, adjustment layers or other techniques to simulate something in between RGB and CMYK is the goal. Less colours than possible in RGB but more colours than possible in CMYK. The result should be something in the middle between RGB/8 sRGB IEC61966-2.1 and CMYK/8 U.S Web Coated (SWOP) v2. I am curios and I want to learn, so any input regarding this is welcome.

-
Dan C reacted to a post in a topic:
Templates Folder mess
-
Templates Folder mess
solved replied to solved's topic in Pre-V2 Archive of Affinity on Desktop Questions (macOS and Windows)
The 1.9.2 update fixed this. Many thanks... -
Fixx reacted to a post in a topic:
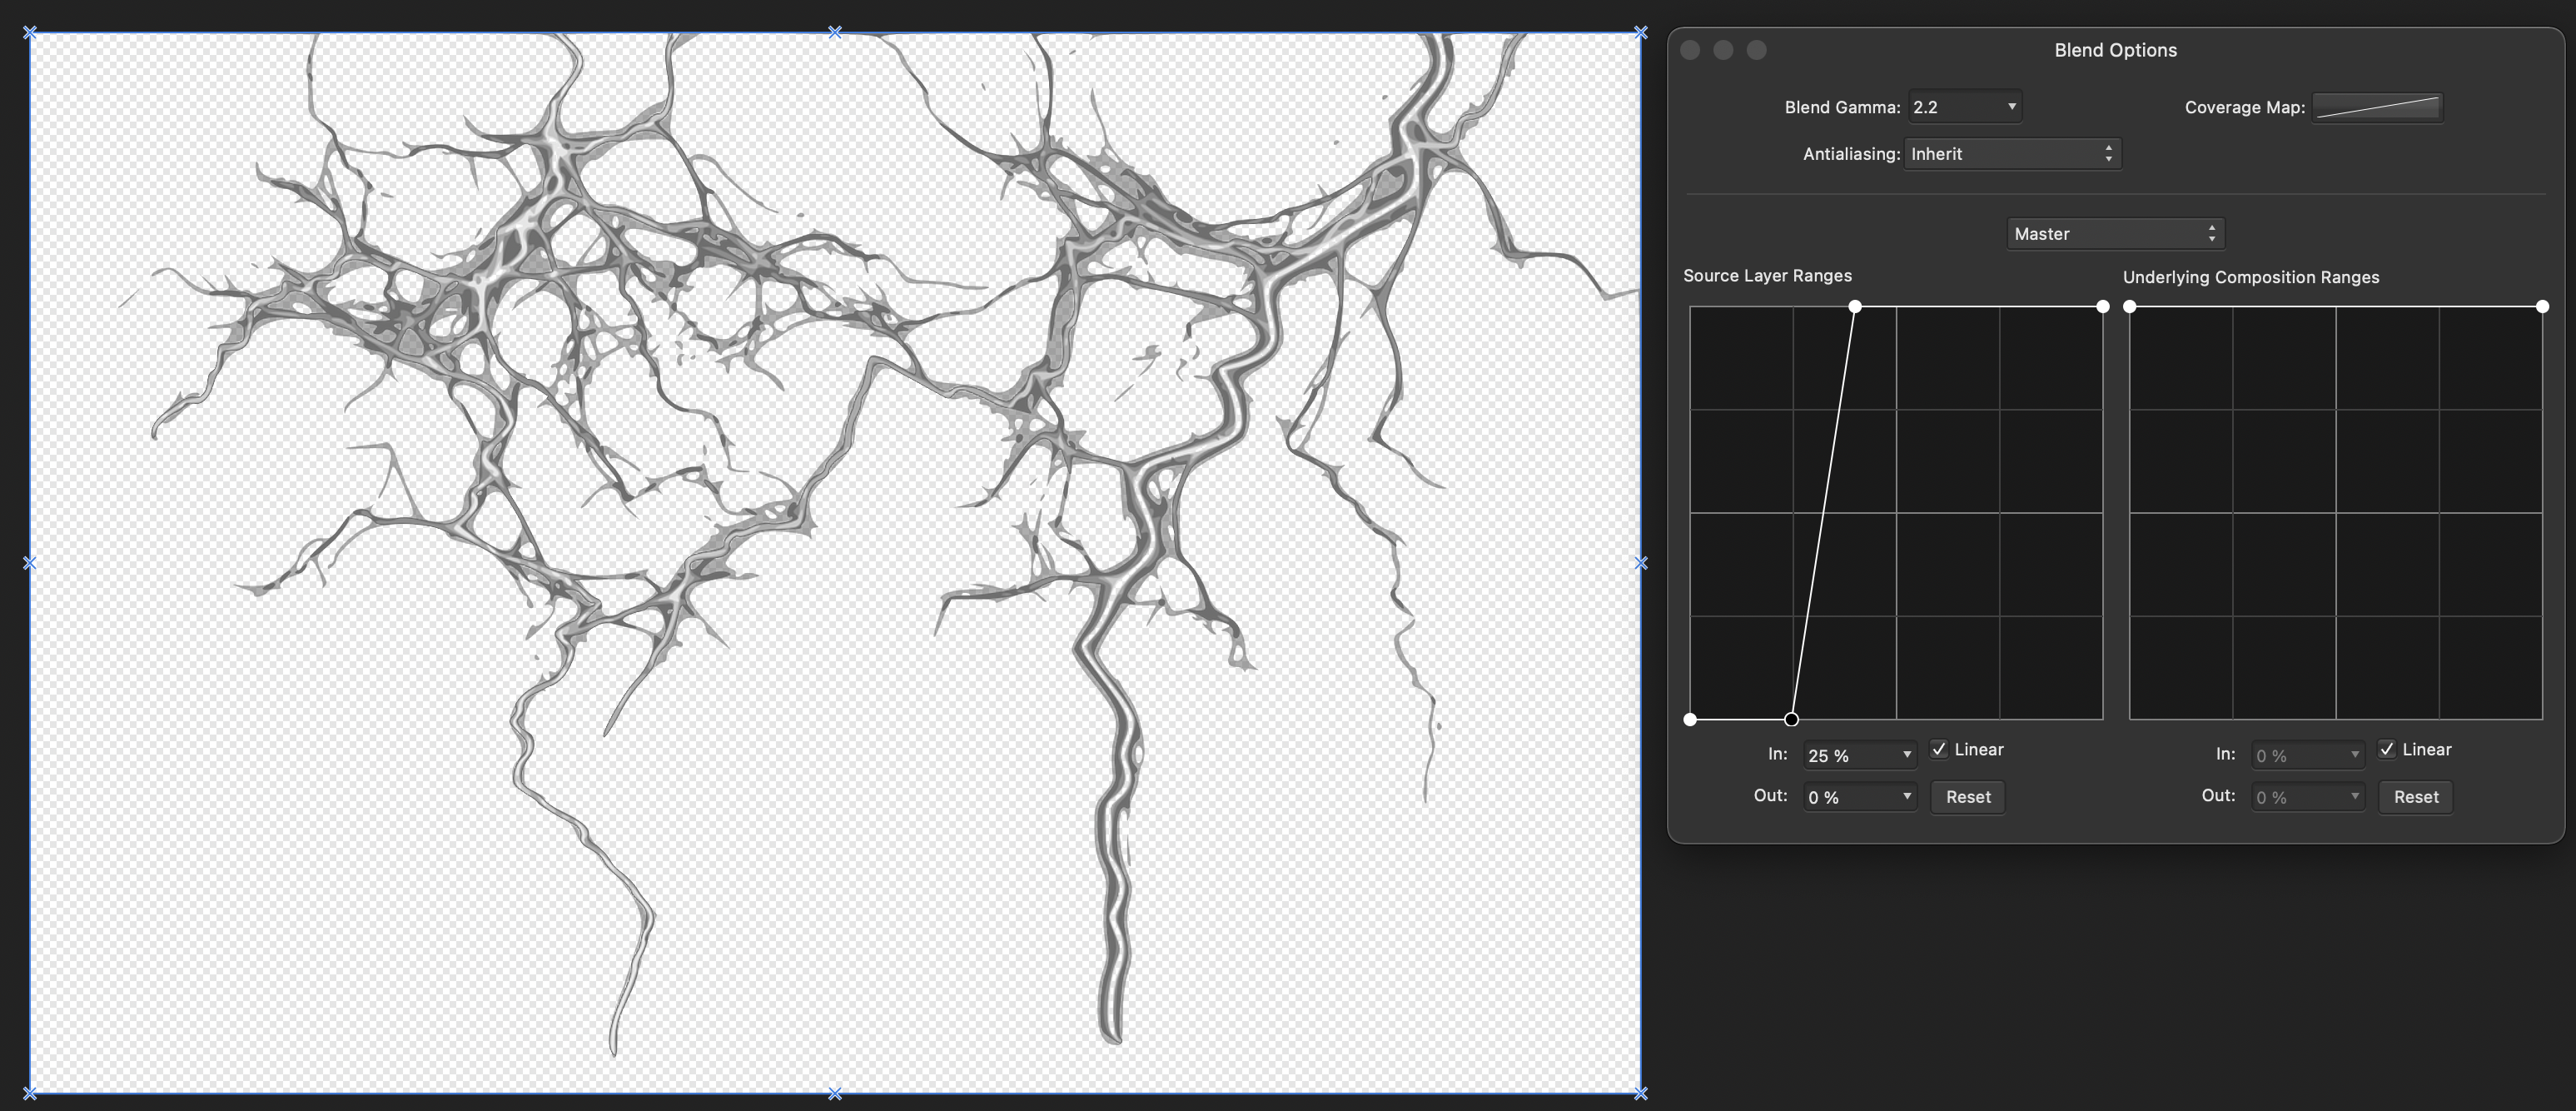
Remove all pixels darker than ____
-
You could try it with Blend Ranges...
-
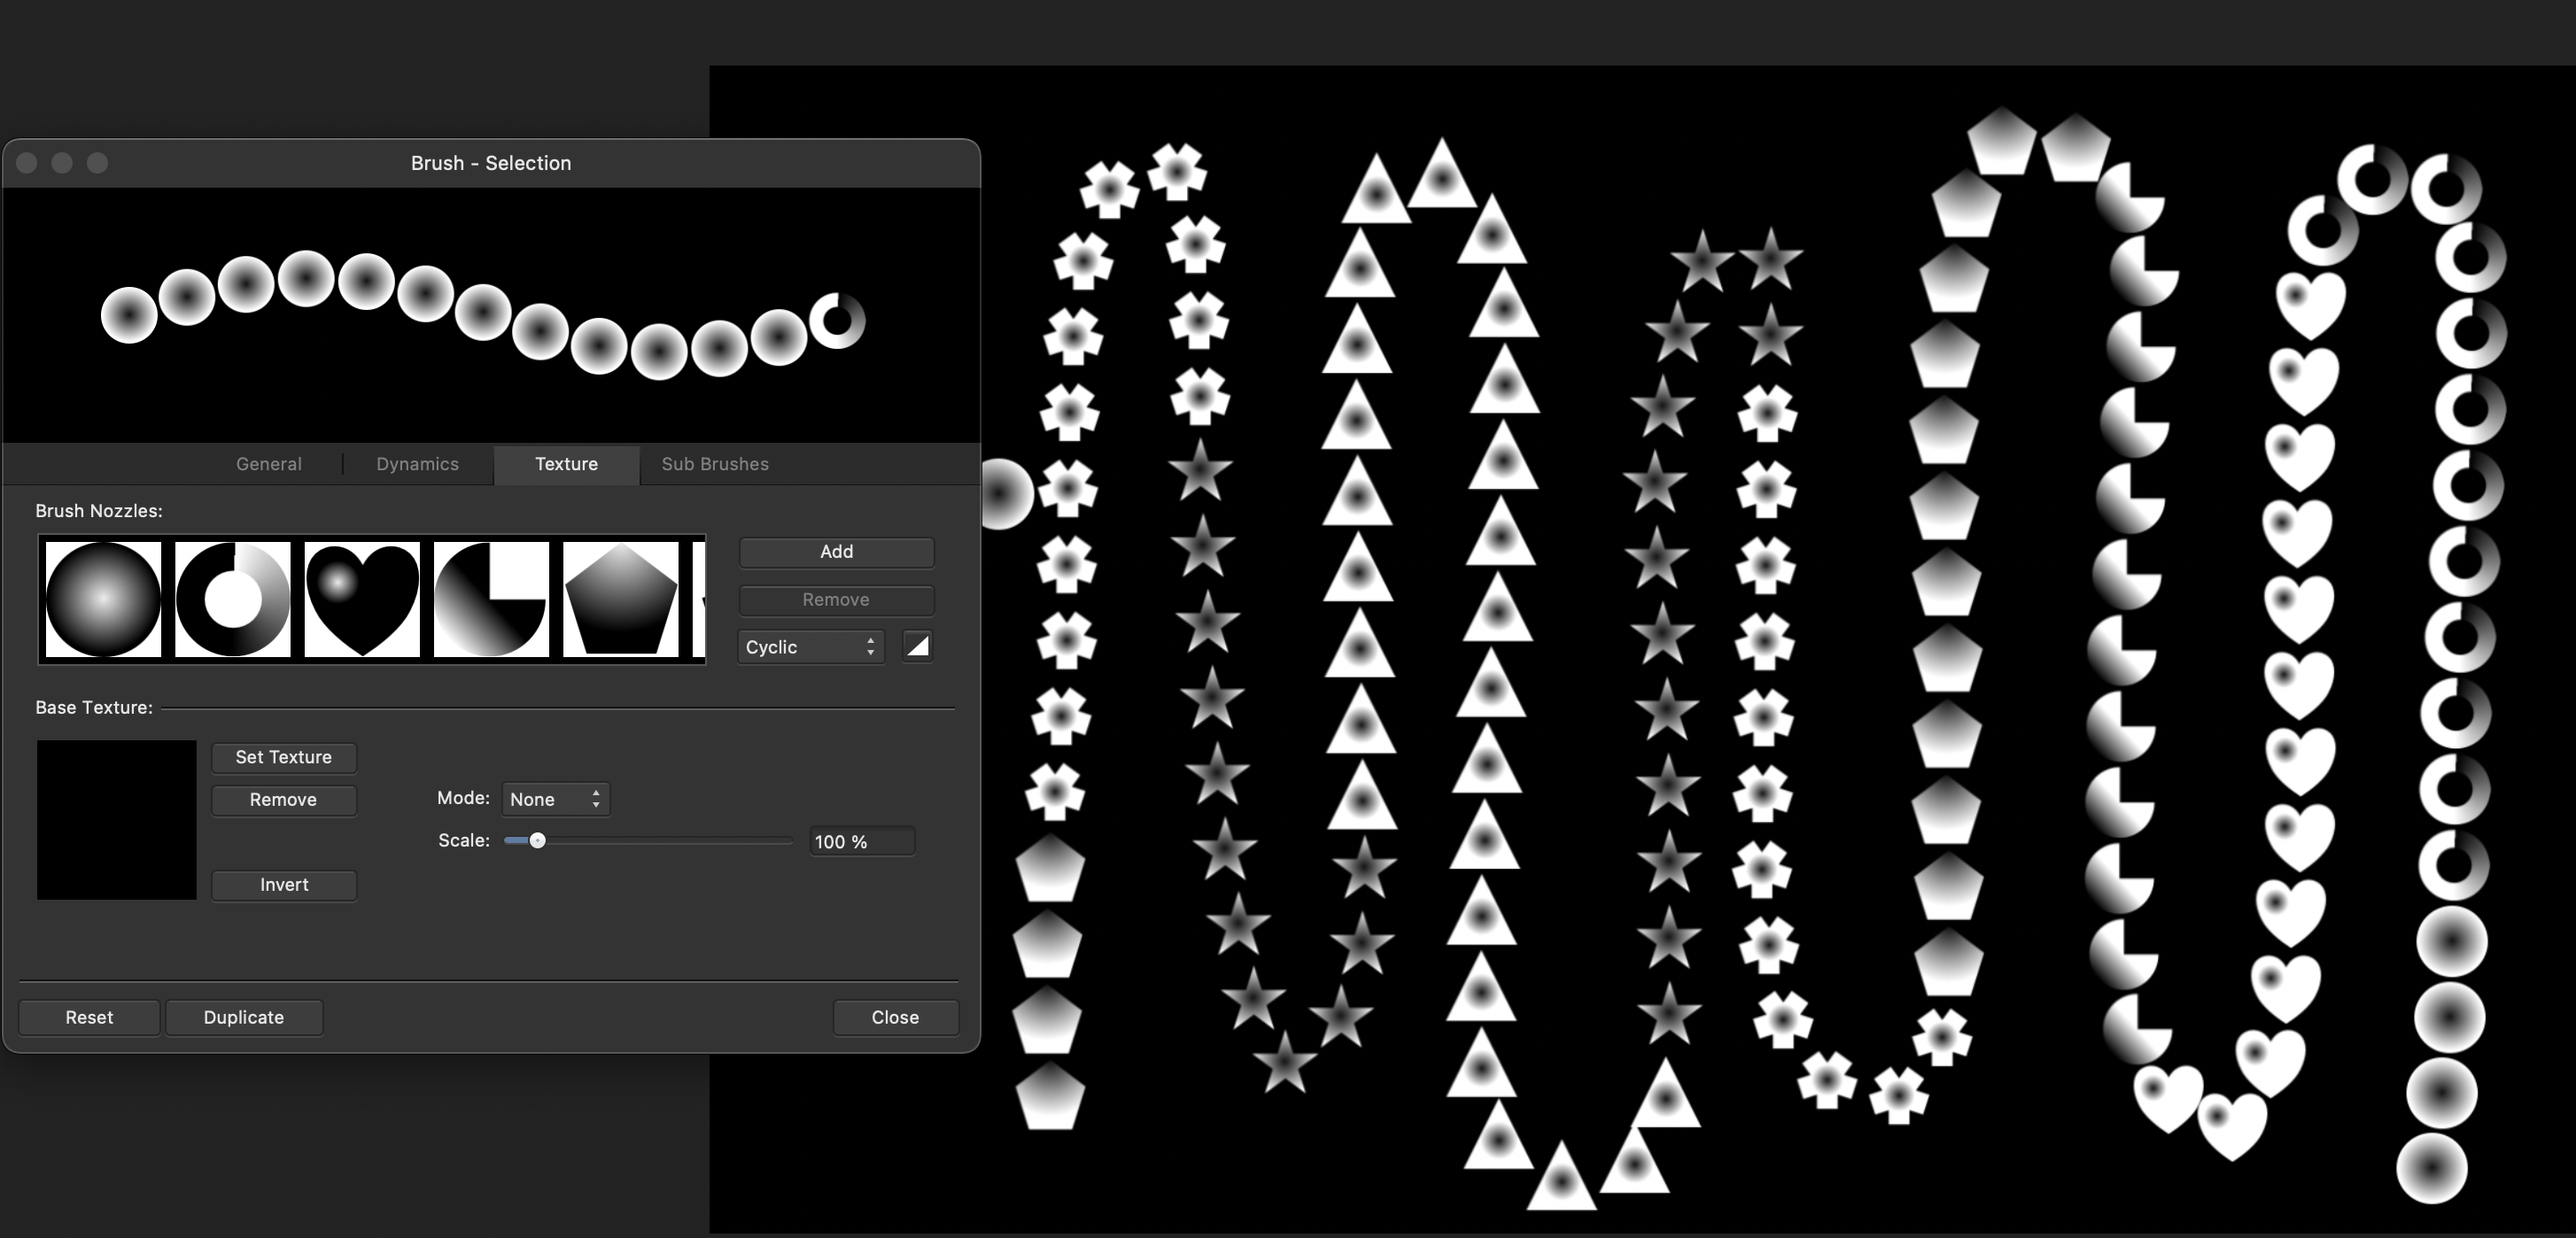
correct. The Affinity Help explains it like this: Nozzle-specific controller (Pressure, Velocity, Rotation, etc.)—For multi-nozzle brushes, pick a controller from the pop-up menu and click the adjacent Ramp profile icon to select a standard profile from lower thumbnails or create your own using the ramp chart.
-
No, for what is this curve setting ?
-
For some use cases it could work very well. Yes I have tried all the possible settings. Cyclic results in a brush stroke like this: