

pbasdf
-
Posts
53 -
Joined
-
Last visited
Posts posted by pbasdf
-
-
Personally I would add a separate text frame for the subheading, with the appropriate text and text style, and then hide (untick) it in the layers panel. It will be included in the ToC whether it is hidden or visible.
-
-
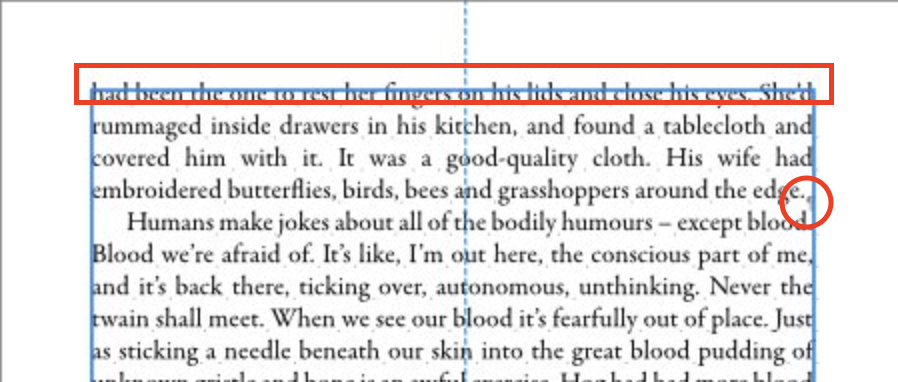
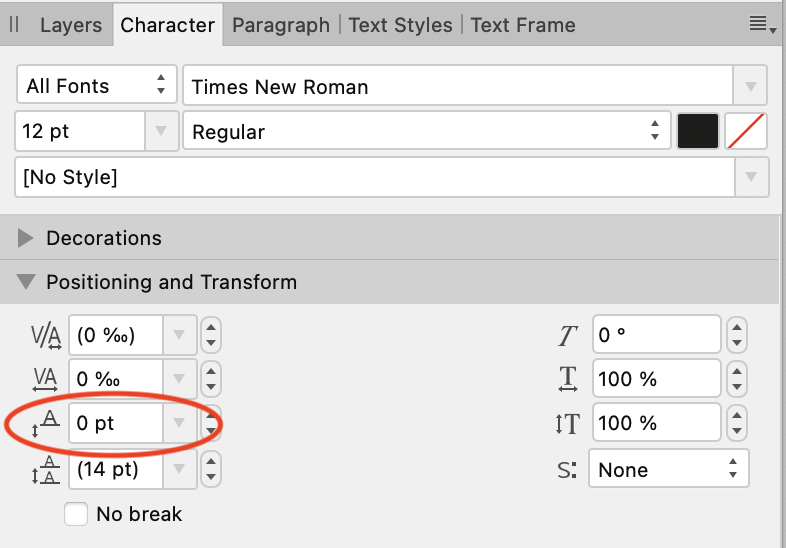
This might be unrelated, but looking at that text you seem to have quite a strong baseline adjustment - note the ascenders on the top line are above the frame box, and the text is out of line with the pilcrows.

Unless you have adjusted the baseline for a reason, try setting it back to zero: it might be confusing the text flow options that @GarryP mentioned.
(shown here in the Character panel, but if you are using styles check those as well).
-
Is it possible you have a hidden object which has text wrap applied?
-
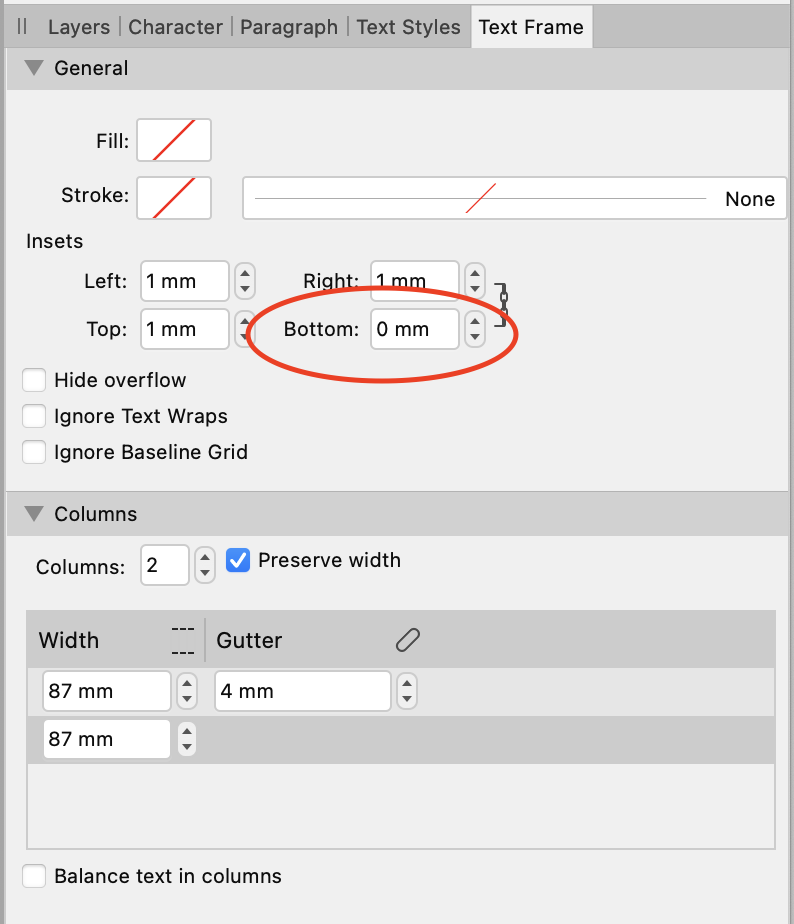
Also worth checking the bottom inset on the text frame:
-
Glad you got it sorted. Does your solution use APub's ToC functionality, or is it built manually?
-
47 minutes ago, jatclat said:
Many thanks.
You're very welcome.
-
4 hours ago, jatclat said:
In the system you describe here I would have to make the alterations twice over.
I think you can achieve the layout @PaulEC describes without copying at all: use the N-Up print layout, with 2x2 pages per sheet, double-sided, but set the page print order to 4,1,4,1,2,3,2,3.
-
To adjust the stroke for the border of the text frame, use the Text Frame panel (on the left hand side of your screenshot). It currently shows 1pt (though it's unclear whether that relates to the caption box in question). Note that if you use the Stroke panel when you have a text frame highlighted, it will add/adjust the stroke for the text itself, not the text frame border. It looks like your caption text might have a stroke - it seems slightly heavier weight than the other text.
-
Not sure if this is available in the Windows version, but in MacOS you can use the N-Up print option. In addition to specifying a 2 x 2 layout, there is an option for duplicates (so you get two copies of the one booklet). You just might need to specify a different page order (4,1,2,3). Worth playing with that option to see if you can get what you need?
-
-
Hi @globso,
2 hours ago, globso said:but since there is no merge tool it is impossible to make them merge together.
I think what you are looking for is "joining" curves, not "merging": you need to join curves together to define the boundary of the area you wish to fill. As you've found, if you just group them and then apply a fill, Affinity will apply the fill to each curve independently.
Joining curves is achieved using the node tool: select the two curves, then select the two end nodes (which might be on top of each other), and use the "Join curves" tool in the context toolbar.
You can only join the ends of curves; you can't join the end of one to the middle of another - which from the look of your picture, you will need to do. The only option is to break curves into segments where necessary, and you might also need to duplicate curves: one for the fill on each side.
For your image, that's going to be a long and complicated business. I'd be tempted to take a different approach: use rectangles and triangles (and others of Affinity's basic shapes) to apply colour (ie. with a fill but no stroke). Place those behind your existing curves. If necessary, convert those shapes to curves and then use the node tool to adjust the lines to match (or at least be hidden behind) your curves. Something like this:
(Note that I have given the shapes a stroke, just because I don't have your existing curves). I've done this fairly quickly, so it doesn't match exactly (and isn't symmetric!).
PS Sorry for the insanely large images; can't figure how to shrink them.
-
-
I believe the "PDF (digital - high quality)" preset will use a RGB colour space. You can check by clicking the "More" button. For CMYK output I would use the "PDF (for print)" or "PDF (press ready)". You might need to adjust some of the other settings (in the "More" dialog) as well.
-
What file format are you uploading to Ingram Spark? PDF? Please show (screenshot) the export options when you export from Publisher.
-
1 hour ago, Catshill said:
However I cannot work out how to intersect two existing lines. In other words, say you draw a line but forget to use the "Add new curves to selected object object" when adding the second line. I have tried selecting the two lines and using Layer > Expand stroke > Add but this crashes ADe so no luck there.
Does Layer > Geometry > Merge Curves do what you require?
-
Hi Ronnie,
Does it work any better if you use a different font? - note the “?” by the Open Sans font name in the context toolbar. Suggests there’s a problem with that font.
-
2 minutes ago, Old Bruce said:
My memory of this is that this is a bug and will most likely be fixed. Meaning we are not supposed to be able to do this and it may not be available in future versions. As I stated this is my memory which is not perfect.
Noted. Thanks for the warning. R C-R has just made the same point in another post, so your memory serves you well:
Odd that two people should post about issues with "text frames" doing things they shouldn't (strokes in one case, fills in the other) in AD within a few hours.
-
2 minutes ago, R C-R said:
The developers have said this is a bug in AD & should not be used because it might cauae othee issues, particularly after an update to AD.
Regardless, AD should always remove the color from a curve converted to a text fram or text path.
Noted. Thanks for the warning.
-
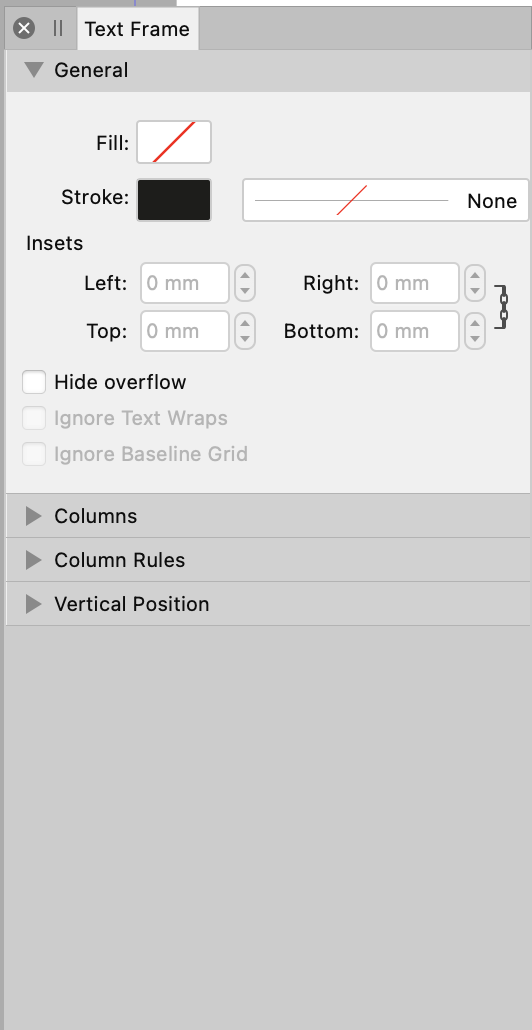
It turns out the Text Frame Studio panel is available in AD, but just really hard to open: it's not listed in View -> Studio and not available from the Context Toolbar for Frame Text or Artistic Text. But it is available from the Context Toolbar if you have Text on a Curve. So, create a curve, then select the Artistic Text tool, and click on the curve to create the Artistic Text. Now the Context Toolbar should include an option to open the Text Frame panel:
The panel will open
and can be docked and used any text frames, artistic text, text on a curve, etc.
-
The "absence" of the text frame panel is one of the key differences between AD and AP. It turns out it's there in AD, but can only be accessed from the Context Toolbar if you have Text on a Curve selected. Standard Text Frames and Artistic Text don't show it as an option, and it's not listed in View -> Studio -> . But once you have it open, you can dock it and leave it open.
-
Hi Steve,
This might work only because I have both Publisher and Designer installed, but it seems you have both so give it a go: Select the text. In the Context toolbar, select the Text Frame option:
The Text Frame studio panel should appear, from where you can adjust the stroke and fill.
-
One thing you could experiment with is to leave the pages in their original order in the Publisher file, but to print/export them in a different order (eg. to move pages 71-120 to appear after page 170, print/export in this order: 1-70, 121-170, 71-120, 171-600). You will need to define sections and change the starting page number for each section, in order to get the printed page numbers to appear in the correct sequence. Not sure how this will work with indexes and ToCs though.
-
Does Edit -> Defaults -> Revert (or Edit -> Defaults -> Factory Reset) fix it?


Indent on second paragraph
in Pre-V2 Archive of Affinity on Desktop Questions (macOS and Windows)
Posted
In the Text menu, "Show Special Characters":