LuiG
-
Posts
4 -
Joined
-
Last visited
-
 LuiG reacted to a post in a topic:
RAW DNG Negative Film Scanned from Plustek Optic Film
LuiG reacted to a post in a topic:
RAW DNG Negative Film Scanned from Plustek Optic Film
-
LuiG reacted to a post in a topic:
RAW DNG Negative Film Scanned from Plustek Optic Film
-
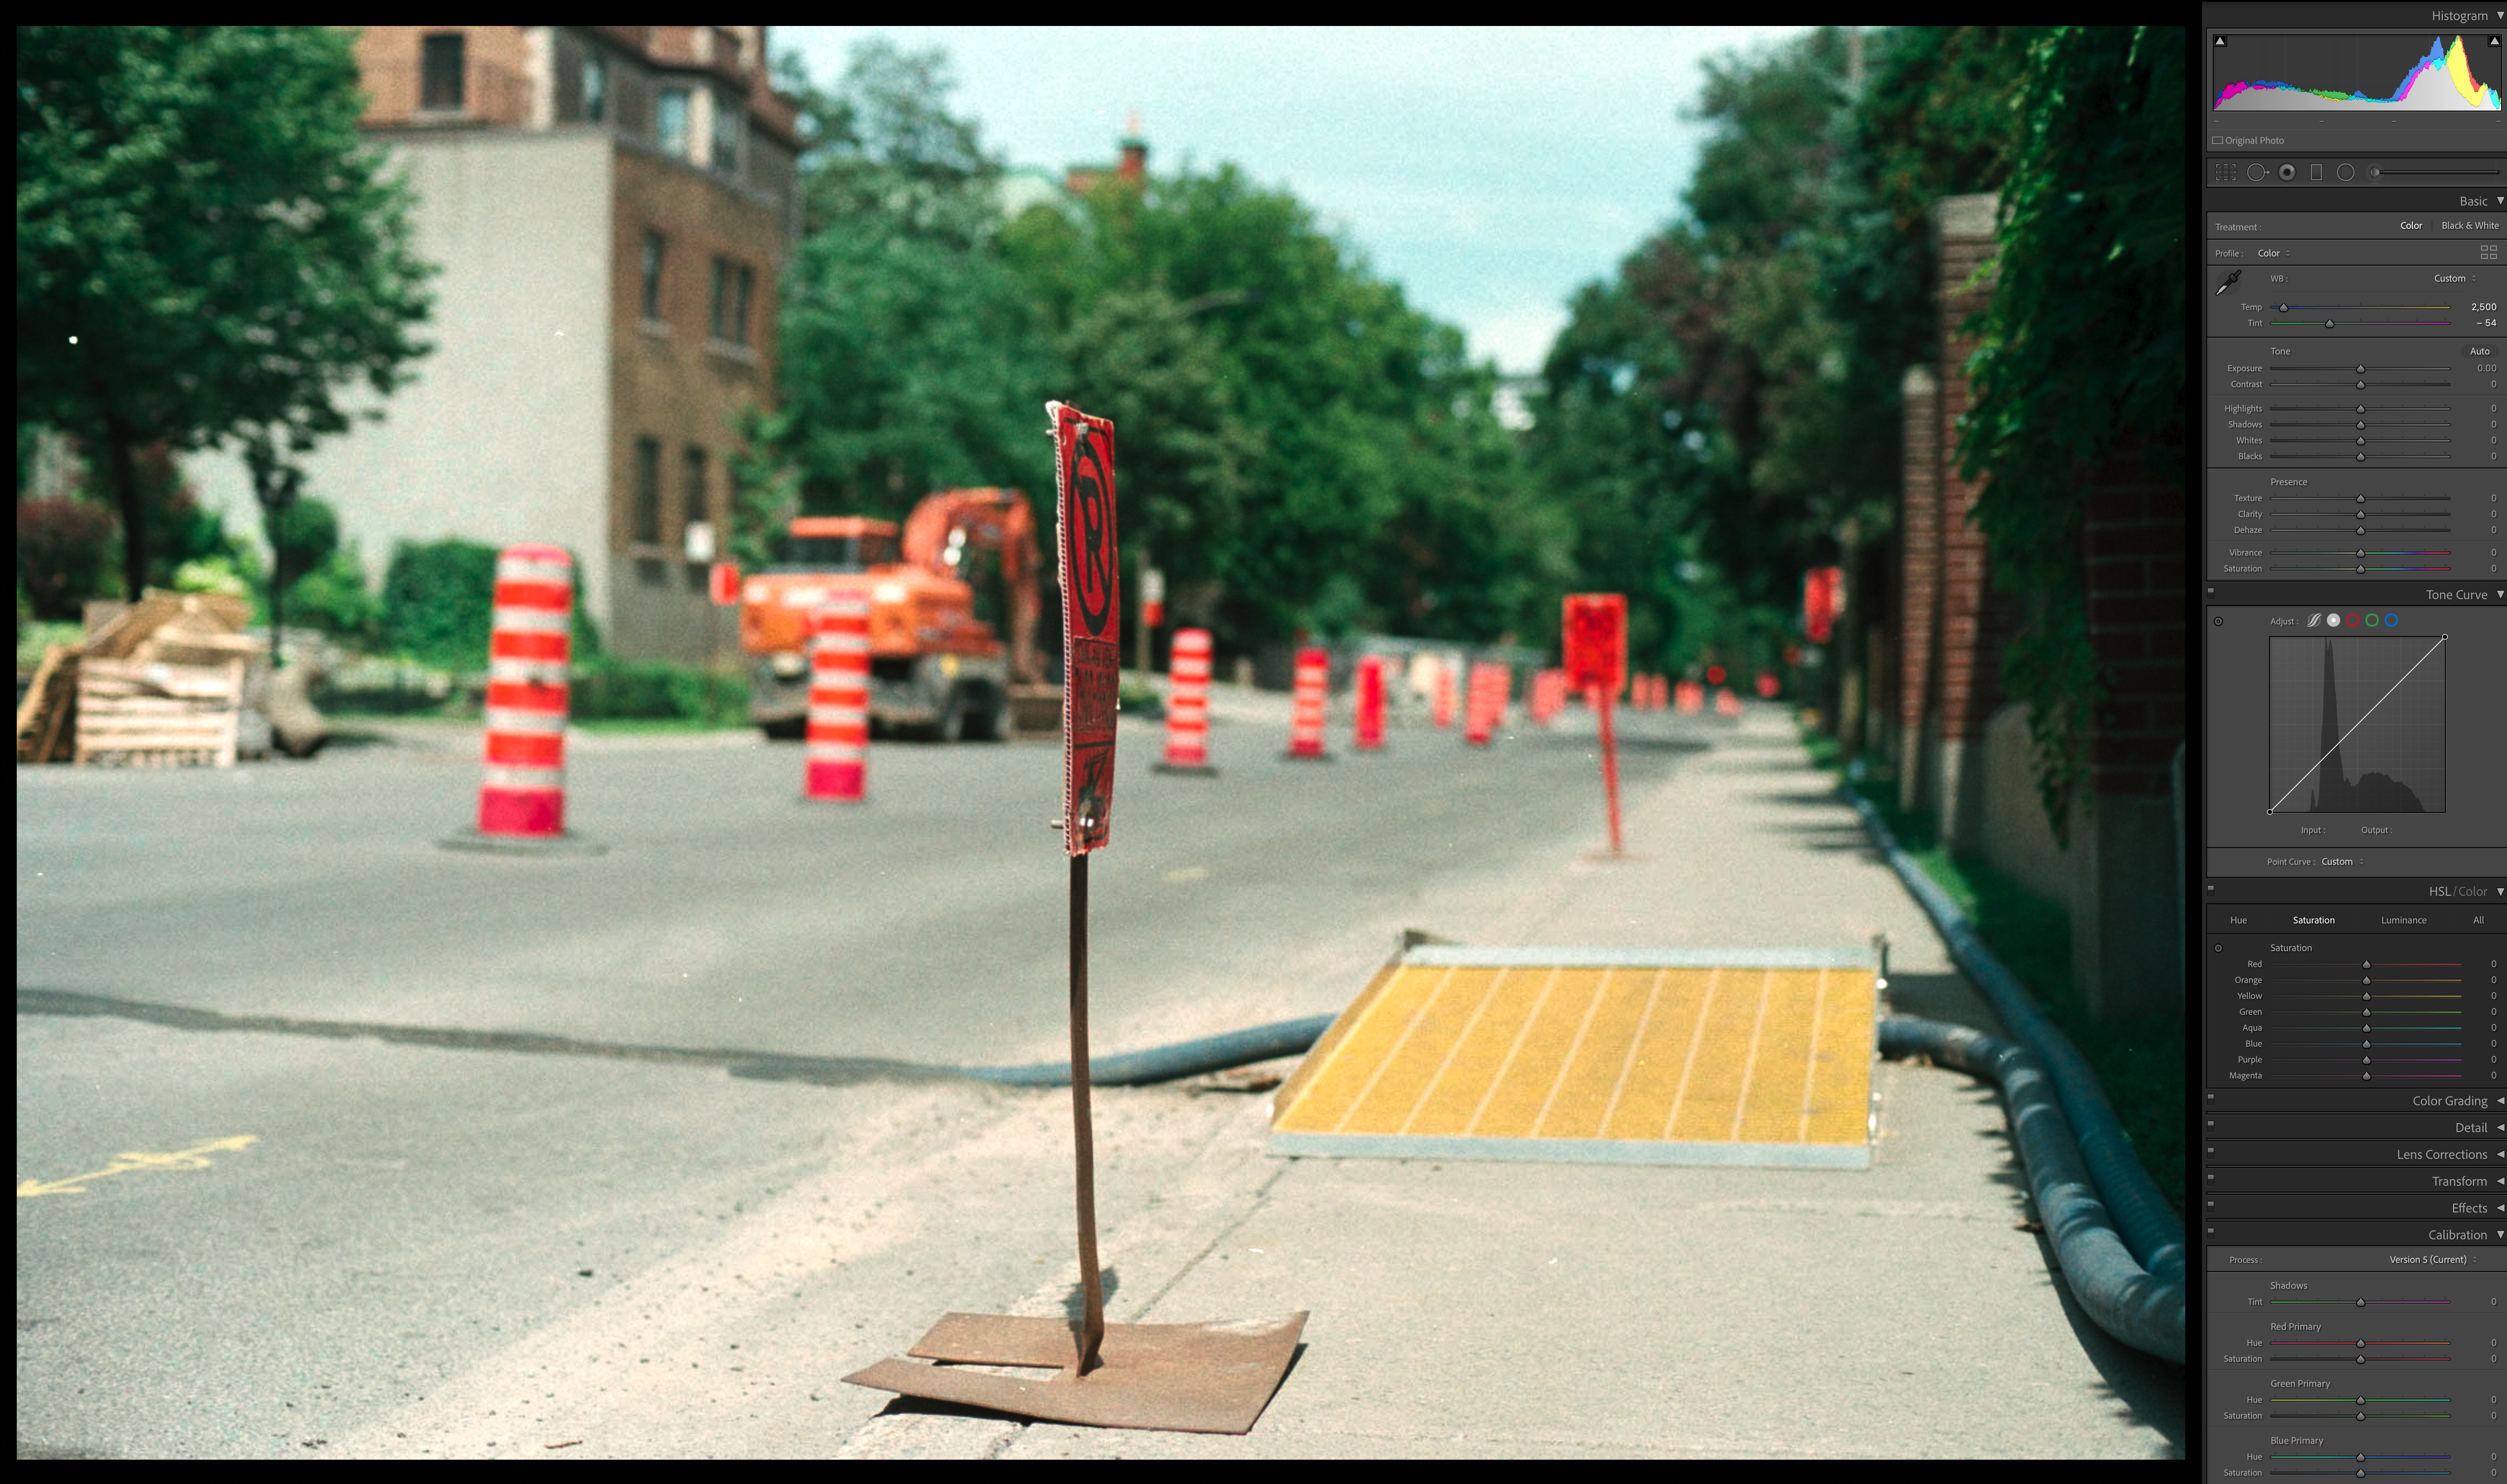
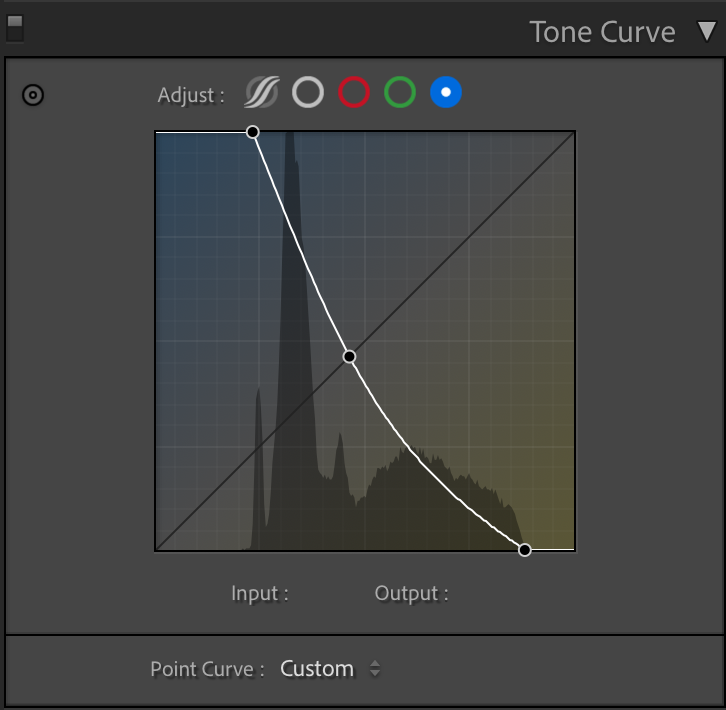
Hi @GregV The last part is a no. What I am doing currently is having a workflow with silverfast scanning, save the negative in DNG (not tiff because it messes with the color in RAW) and opening the dng in Lightroom (not photoshop) What I’m trying to figure out is a similar workflow between Silverfast RAW and affinity to ditch Lightroom once and for all. but sadly the colours I get are slightly different from the RAW DNG. That’s why I post the images from Lightroom and the colours I get and how I do it so see if someone can figure a method of convert the RAW DNG negative from Silverfast in Affinity. Sadly I haven’t found one yet, at least one I can be confortable with the colours yet. Still trying though. Applying many suggestions I got here from other users and my own trial and error.
-
LuiG reacted to a post in a topic:
RAW DNG Negative Film Scanned from Plustek Optic Film
-
 John Rostron reacted to a post in a topic:
RAW DNG Negative Film Scanned from Plustek Optic Film
John Rostron reacted to a post in a topic:
RAW DNG Negative Film Scanned from Plustek Optic Film
-
It might be the problem, my scanner is a Plustek Opticfilm 8200i which I can only scan one image at a time, the light might be readjusting every time it scans, I didn't think about that, well, I still continue if you or anyone can find a solution inside AP before Ic an buy it and ditch Lightroom once and for all LOL. Thanks.
-
John Rostron reacted to a post in a topic:
RAW DNG Negative Film Scanned from Plustek Optic Film
-
Hello @John Rostronand thanks for trying in the file I added. I tested a lot of workflows to be able to have the most control possible for my scanned photos, at the beginning I was trying to let Silverfast to do all the inverse colouring, but I felt that the process was not giving me stable results, to explain this, every time I was scanning, silverfast gave me different automatic colours, It uses a first automatic balancing which ruins the photo for me. and it was impossible to have consistent results across the entire roll scanned, this workflow I found it as a trial and error in an almos 1yr and a half, let's say I'm happy with this and I can have the consistency I need for an entire roll... Having said that I do confess I still need to know how to use Silverfast the right way, but I never was able to turn the "first automatic" colour balance off. Having tested Affinity two months ago, at least for my digital photos was a delight! is fast and is like having Lightroom and photoshop in one single pay-to-keep-it software, but this process with the film scanning I use it more than the digital one, so is the only process I'm stuck with Adobe until I find the solution. And if I'm paying now the Adobe subscription (which I hate subscription base softwares) still, is pointless to go and buy Affinity for now. I will try anyway your suggestions and learn to use better silverfast. Thanks @Callum, I'm going to take a look at the post threat as well, thanks for taking the time. @v_kyr, I definitely going to take a look at it, thanks really.
-
LuiG reacted to a post in a topic:
RAW DNG Negative Film Scanned from Plustek Optic Film
-
LuiG reacted to a post in a topic:
RAW DNG Negative Film Scanned from Plustek Optic Film
-
LuiG reacted to a post in a topic:
RAW DNG Negative Film Scanned from Plustek Optic Film
-
LuiG joined the community
-
Hello, I trying to search for help and see if anyone knows the workflow I could adopt inside Affinity for my DNG RAW Film Scanned files. I scanned my films with a Plustek Opticfilm scanner and Silverfast, but I'm not doing colour correction inside Silverfast, my usual workflow is that I extract a DNG RAW file from silverfish and I Grade the Negative in Lightroom, this process is very straight forward for me because Lightroom gives me the RAW file as it should, with the sepia tones I expect from importing a raw file into any software, the problem here is that this color management is the only one that binds me to Lightroom I tried Affinity photo's trial mode 2 months ago and when I imported the raw file the colour were... odd, it did't resembled any of the colours I had in Lightroom, also I tried (as a test) importing the files in 2 compositing softwares, Nuke and Fusion, all gave me the exact same result as I tend to do it in Lightroom except Affinity. My workflow is simple, import into Lightroom the DNG file, pick colour to balance white point, invert RGB curves separately and that's it. I tried the same workflow in Affinity and I get stuck right when I import the raw file due to I don't get the same "colour space". This is the only featured it keeps me attached to Lightroom, if I can figure out how to solve this workflow I will definitely switch to Affinity, I think is a great software and the fact that is a pay to keep it is an amazing plus, I really hate the paid subscriptions. Info of the file: OpticFilm 8200i Negative / 48bit HDR / Saved as DNG. Thanks, I'm adding the raw file and the images I get from Lightroom. (sorry, I don't have access to the trial of affinity anymore to post the difference of colours a get) OLYMPUS_-_Fujicolor_200_-_2020-05-01_B_-_RAW__(11).dng