Fizmarble
-
Posts
25 -
Joined
-
Last visited
Everything posted by Fizmarble
-
Thanks for the info on Fill Mode. Here is a little more about my "font". I downloaded the font Art Brush and modified the ends of the "brush stroke" in the letters to make them look how I want. So, they aren't simply text letters converted to a curve. They are text letters converted to curves and then manipulated. It seems that this manipulation may have done something awry. But it worked fine with the many other letters I created via the same process. Big shrug.
-
That information is gone with the seasons I did your same steps to the node to the left of the one you highlighted and the same action occurred, so maybe they are buddies. Also, What's with this mess? 20231115-1747-37.5836244.mp4
-
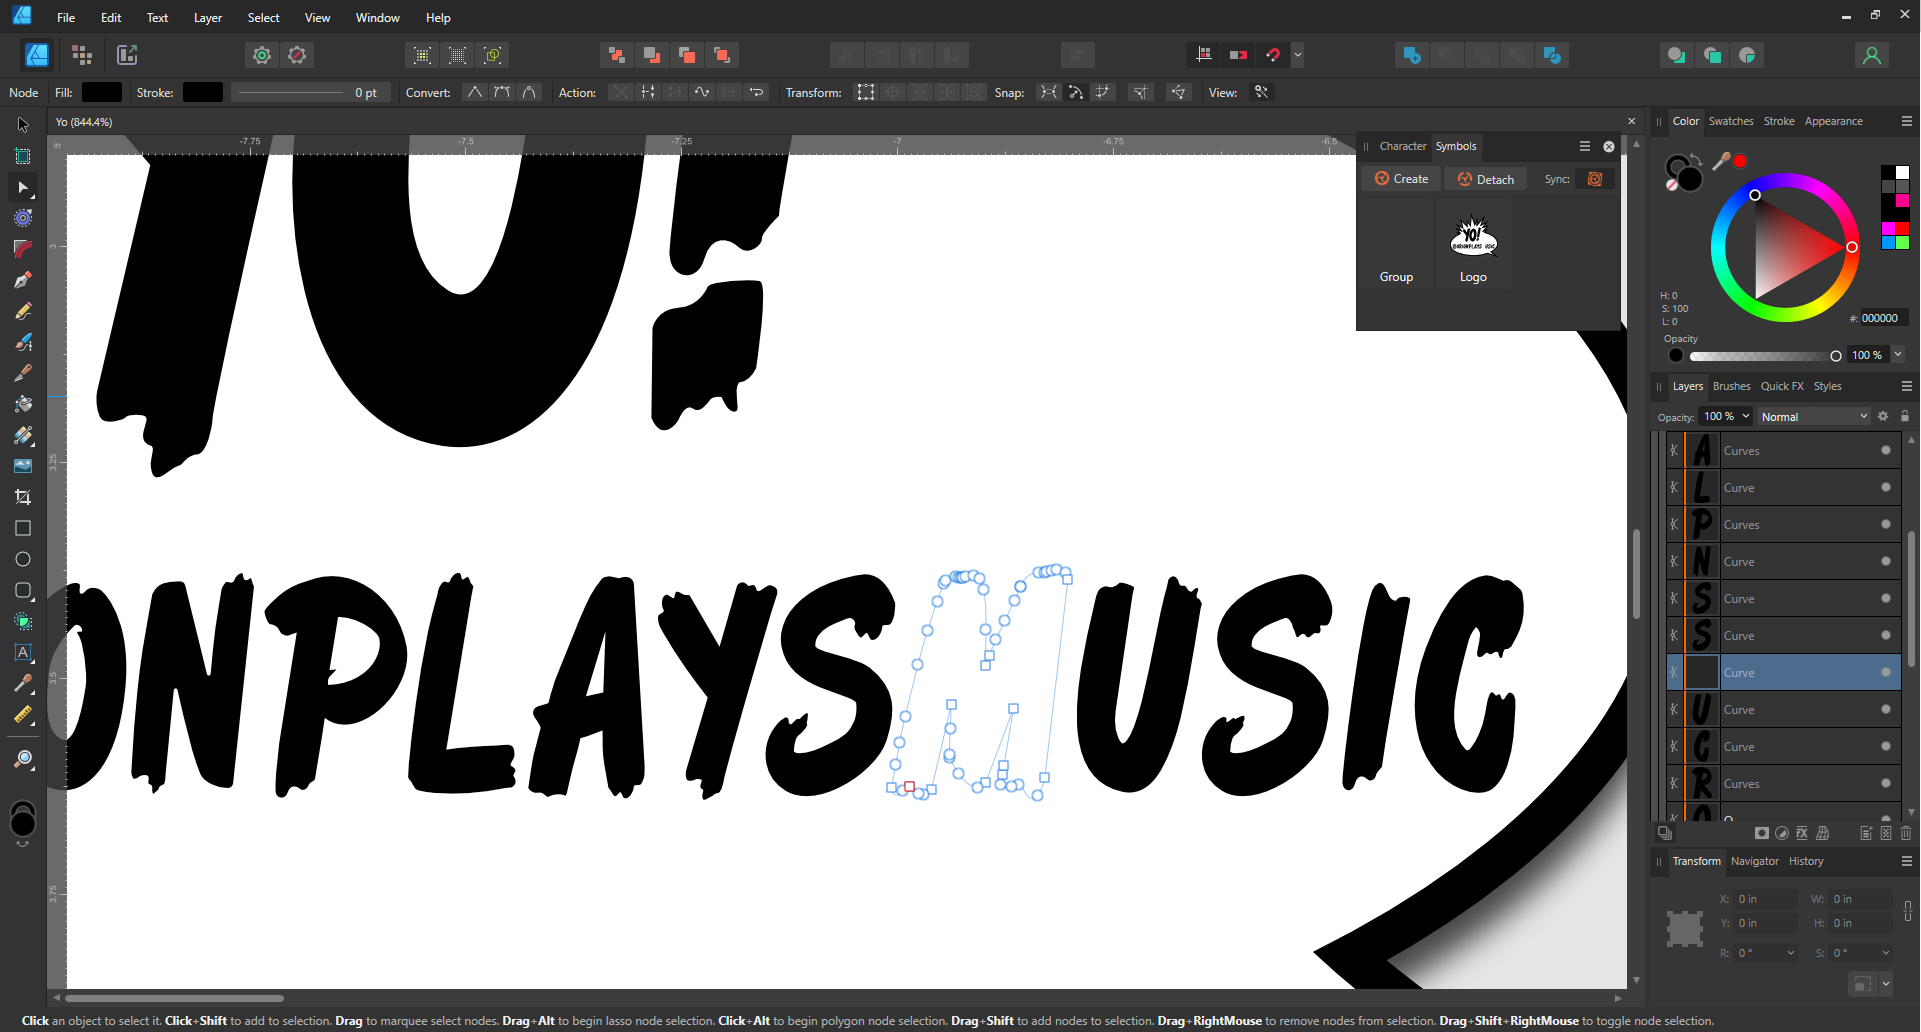
For example. I copied the M and changed one node to smooth node, making it visible. Then I applied a contour of -0.014 to both curves. The one on the right is the "good" one. The one on the left is the original, uncooperative one.

-
On other curves, I'm allowed to have a negative value. But I also noticed on this one when I increase the contour to positive values, it seems to increase stroke but not fill, which I'm sure I'm saying it wrong, but that's how it looks.
-
I, unfortunately, don't know exactly what the fill mode is. Is it solid vs. gradient and the like? Regardless, I've attached a copy of the file with only the problem curve. It sure seems like a bug to me, though I don't know how to replicate it. It was part of a symbol and a series of other letters, but those letters were all visible. Invisible M.afdesign
-
I was able to select a node and choose "smooth node". That revealed my curve and I can now change its appearance and everything. I suppose the smooth node change modified the curve in some way, and it may not be exactly as it was, but at least I can see it.
-
I opened a file that I had last used in Designer V1, but this is in V2. Almost all of my image is present, but I can't see a single letter (that is actually a curve). If I use the select tool, it's just a rectangularish shape around it. If I select the node tool, I can see my curve's ghost. I can't (or don't know how to) apply any fill or stroke to it. I found this thread, but I wasn't able to resolve my issue with the information included. Any ideas?
-
Different strokes on an object
Fizmarble replied to Fizmarble's topic in Affinity on Desktop Questions (macOS and Windows)
Thanks for confirming my concern, but also for a solution! -
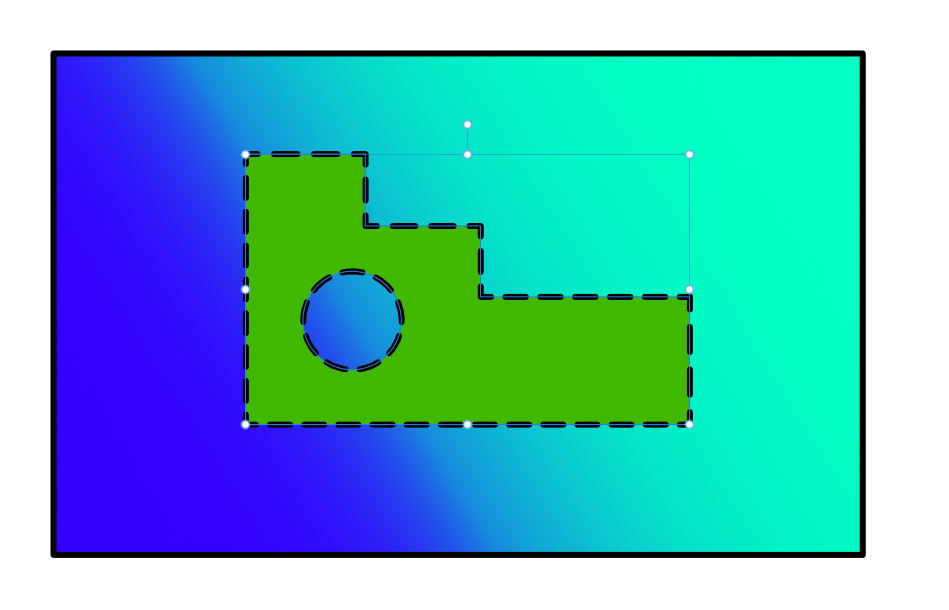
Affinity Designer 2.1 Currently, I have a compound object, as I thought that would get me some more flexibility. I'd like the circle to have a solid stroke, and possibly a different color stroke. Is this possible?
-
Maybe this is a niche issues, but I wanted to denoise a photo in Publisher, so I loaded the Photo Persona. I was surprised to find that I couldn't invoke a plugin from there. I understand Publisher doesn't support plugins yet, but since Photo does, and I was in the Photo Persona, I expected it to work. Thanks for listening!
-
I did notice that. I also noticed if you have 255,255,255 holding shift doesn't give the expected result of moving them all in unison to gray which seems obvious. This is evidenced when moving from 0,0,0 and the sliders all move together towards white (in RBG mode). If it's by design, then by your reasoning they should not all move together when any value has a 0 in it.
-
It works as long as none of sliders is all the way to the right. This sounds like a bug. A single 255 will prevent shift dragging the sliders together. I just tested Publisher V2, same problem. 255 breaks it. I also tested this in Photo V1 and it's apparently always been broken. I just learned about this shortcut (from an Affinity tutorial) and had only tried it in V2, but it's always been broken.
-
Photo/Designer V2, Color Panel, the help file says holding Shift while dragging a color panel slider moves all sliders at once. This is only true if any slider is NOT all the way to the right. Windows 11
-
Export to .BMP
Fizmarble replied to Fizmarble's topic in Feedback for the Affinity V2 Suite of Products
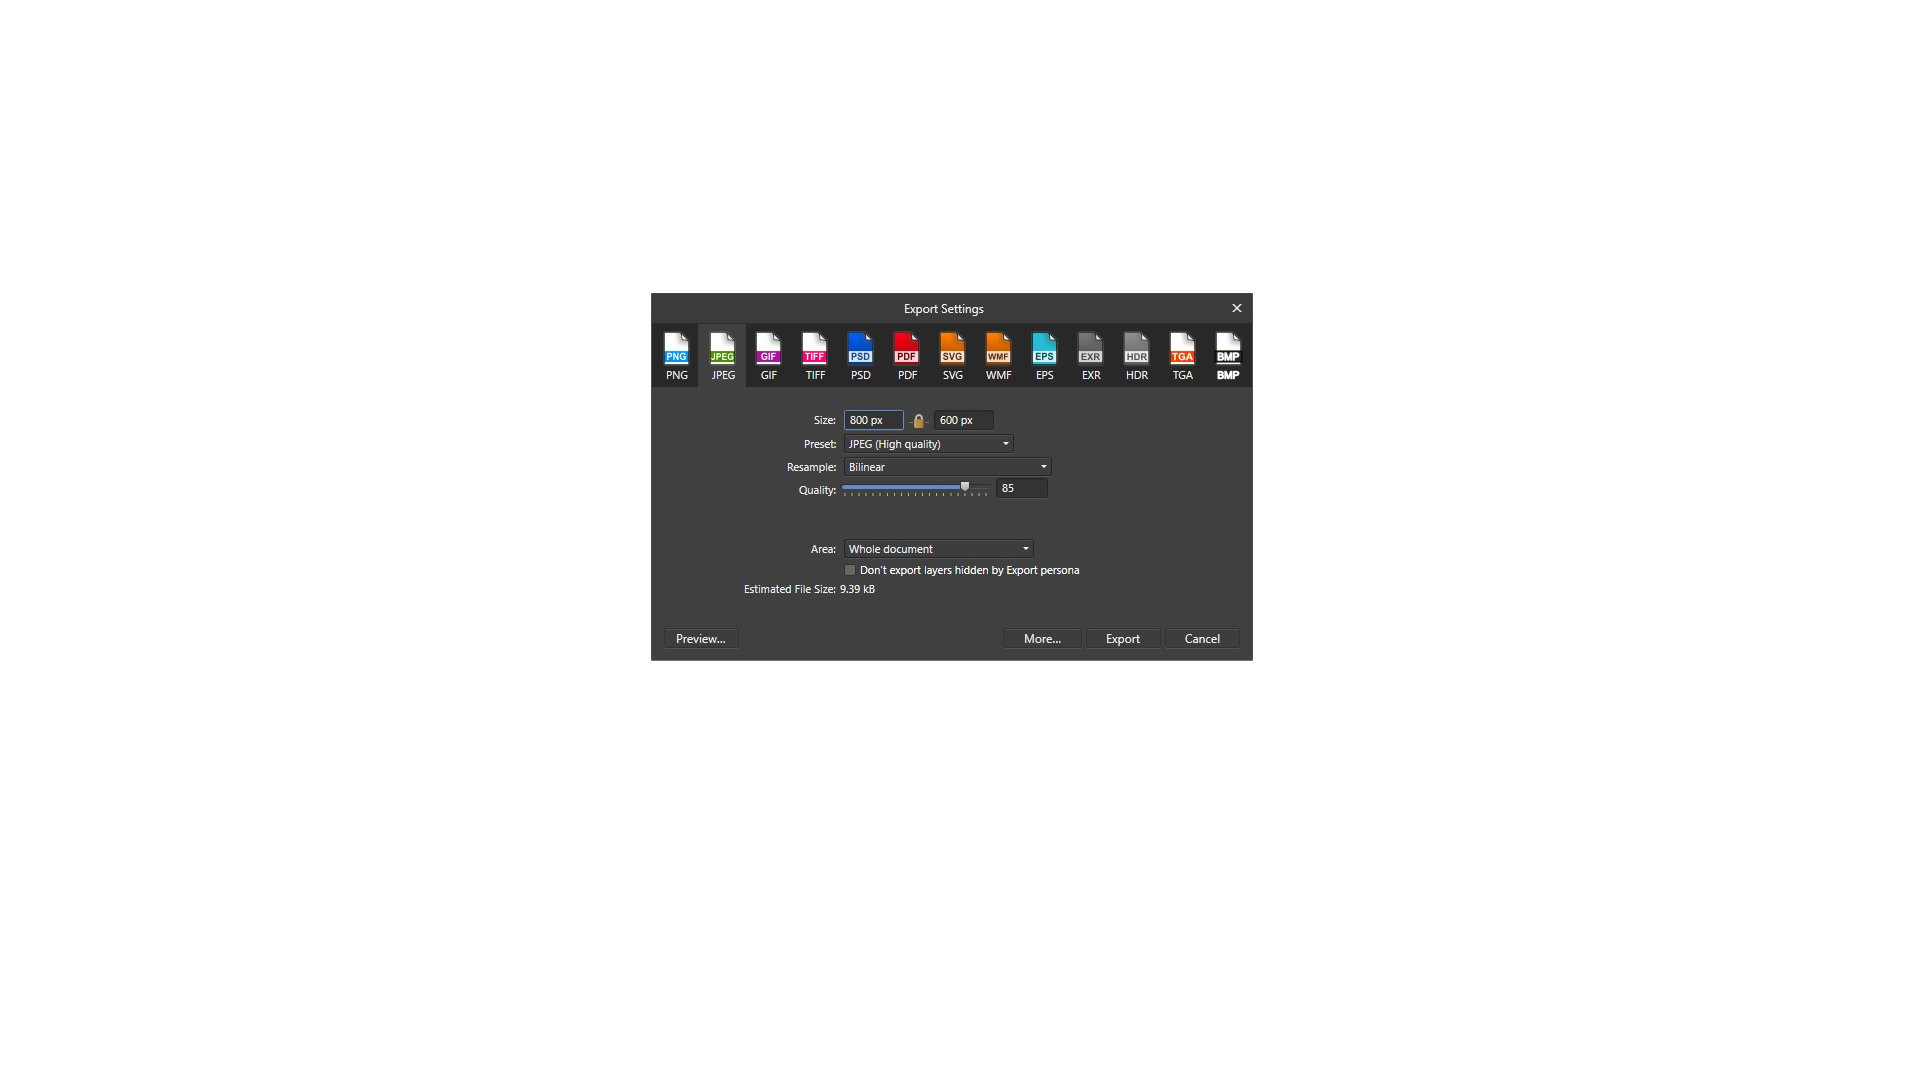
The common defense for its exclusion is "nobody uses BMP anymore". I've never exported to TGA or TIFF, but I'm not assuming no one uses them. I figure they are valuable to some groups, and I'm glad they have the option. I need BMPs, but have to use another application to get them. -
I half expected to see BMP export after all the discussion and suggestions for V1 to include it. That thread is closed, so here is my official suggestion for BMP export support to be included in V2. It's the standard for several Industrial Controls software packages and using MS Paint or IrfanView breaks my workflow and creates unnecessary intermediary files. Thanks for listening.
-
I tried the Point Transform Tool and was able to align the rectangles but had to resize the right one after snapping the upper left corner to the left rectangle and then moving the "center point" of the object. It took some messing with. Is there a better way than that or is that basically the method?
-
That works. Thanks! Would be neat if AD would recognize that the shape has nodes that could also snap as parts of its whole, but at least I can proceed thanks to your suggestion.
-
These rectangles are rotated. I would like to move the right rectangle to be aligned with the left rectangle at the point where their respective colored corners meet. Can this be done?
-
I got an extra icon on the right side by squeezing them together a bit. I didn't make the dialog box any wider.
-
Thanks, @rubs. I had figured it wasn't a challenge. Still curious that it's not implemented.
-
I'm not a developer. Can anyone shed light on why .BMP support would be missing? In the industrial automation space, .BMP seems to be favored. Is it difficult to add support for outputting to .BMP? I know it takes some time. I just don't understand why it wouldn't be added if it's such a common format. Thanks for any insight.
-
Alright, I'll just have to be content with the fix. Thanks again!
-
Thanks @Alfred. I did the same method on my Surface Pro 6 screen instead of the external monitor, and the problem didn't occur. Can you say why the issue wouldn't occur in Photoshop CS2 or in MS Paint?
-
I may be doing something wrong, but I'm not sure what. I start with a blank white background and screenshot it using the built-in Windows Fullscreen Snip tool. Then I copy that and in Affinity Photo go File->New From Clipboard. Now there is a funky dinge instead of the brilliant white. Dropping the same copy and pasting it into Microsoft Paint preserves the white color. I did it multiple times to exaggerate the problem. I added a pure white rectangle next to the now-yellow one.
-
This is the exact reason I need BMP support. I used Photoshop for 15 years and just switched to AP. Hit this snag today. C-more HMI.