

marble51
-
Posts
75 -
Joined
-
Last visited
Posts posted by marble51
-
-
Yes, that's how I did it in the end but I thought there might be a way of feathering the edge as I can with selections.
-
HI.
I watched a tutorial about creating a mask using one of the vector shapes. Is there a way to feather the edges of that vector mask?
-
6 hours ago, Ash said:
Hi - in the latest 2.1 beta we have now reverted behaviour of the mask button in the layers panel back to the same as V1. So one click to add mask, alt-click to add empty mask. There are more details in the post below and it would be great if you wanted to try it out in the beta and let us know what you think - you can sign up to the beta program here.
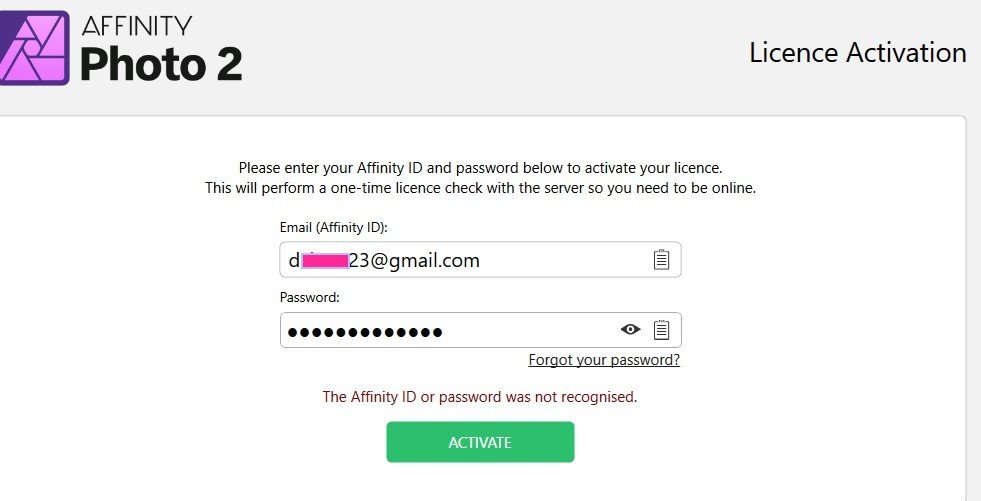
Yeah, it might have been nice to try the Beta but the Serif site will not accept my V2 Licence (or maybe my email - but that has never changed). I followed your link and signed up for the Beta program, downloaded the beta for Windows but no luck with the activation.

-
Yes, thanks Lee. I'm sure Serif will roll-out more and more tutorials to catch up with the V1 coverage.
-
Thanks for the video link, Lee. My main point was that the tutorials for masking are mostly for V1 of Affinity Photo and the menus, etc., have changed in V2 so I was a little lost in trying to repeat what I was used to doing in V1 without knowing what to click in V2. This video you have linked at least shows what to do in V2.
-
Ah well, some trial and error and I seem to have found a way.
I had to manually move the second layer below the first. Then I clicked on the first, clicked on the Mask icon and selected "Mask" from the options. I found I could control the opacity by using the Greyscale of the brush with the Mask Layer selected.
If anyone knows another way, please feel free to jump in.
-
Hi,
I have tried to understand this from watching various videos and looking at the manual but I can't seem to find the answer I am looking for. Perhaps it is right under my nose but I can't see it. Perhaps I just don't understand masking. I explain all this because the last time I asked a question here I was chastised for not reading the manual.
So, in AP V1 I used masking in the following manner. Load the first picture and then load a second. Select an area of the second image and paste it to the first. The selection now appears overlayed on top of the first picture. Now I hold the ALT key and click the Mask icon at the bottom of the Layers panel. What was the overlay is now a layer beneath the first picture and I can use a black brush to paint on that first picture in order to reveal some of the image underneath. I can also control the opacity of the reveal.
I have tried the same process with V2 and it doesn't work. Specifically, the Alt-click on the Mask icon does not do what it does in V1. In fact, it seems to do nothing at all. I have tried clicking without holding ALT and selecting one of the mask options but I just can't get it to do what I was able to do in V1.
-
4 minutes ago, N.P.M. said:
You could have read the manual beforehand.
And you could have just ignored my question but you just couldn't resist, could you?
-
A screenshot would still have been more direct help but then it is easier for people to just post RTFM replies, I guess.
Anyhow, for anyone else trying to find it, it is here:
-
On 1/9/2021 at 12:23 AM, MEB said:
Hi @ANGRYMAN,
You have two ways to do this: you can either draw all the paths, select them all, go to menu Layer > Geometry > Add to turn them into a single curves object then convert it to a selection clicking on the respective button in the context toolbar in the Pen Tool, or, when creating the paths, enable/click Add New Curve To Selected Curves Objects in the context toolbar for the Pen Tool (the icon looks like two rings), to add the paths automatically to a single curves object while you draw them, then click the Selection button to convert it to a selection.This is exactly what I was trying to figure out. One problem though ... I'm using AP V2 and I have no idea what you mean by the "context toolbar for the Pen Tool". Where would I find that? This is where a screenshot is worth a thousand words.
-
Further to that, I then tried to move the "Stock" tab (or any other tab) after the panel had become undocked but I found it impossible to move the tabs at all, even after clicking the little vertical line in the top LH corner.
-
OK - I did get OBS to show the details so here's another video ...
-
1 hour ago, R C-R said:
Your video doesn't show where the panel is moving to, or how at the end you got it back to the starting position.
Where did it move to & how did you get it back?
As I explained in my text - the screen capture software (OBS) does not capture what happens to the panel group after the tab is moved out.
I don't know how to change that.(See Below) ... But I can tell you (as I have already) that the panel group becomes undocked as soon as the "Stock" tab moves out of the panel. So all I did after that was to drag the panel back to its docking position and, at that point, OBS sees it again and you can see it in the video. -
4 minutes ago, R C-R said:
Can you post a video of that, starting with moving the Stock tab to the right within the studio & without releasing the mouse pointer, pause there for a second or two, & then continuing the drag until the whole panel moves?
I am running out of ideas about why this is not working for you but does for everyone else, so maybe this will provide a clue....
I was doing that as you were posting so I hope the attached video is what you were looking for. By the way, I tried it with another tab (the "Channels" tab) and that does the same thing - trying to move it outsdie the panel group results in the whole panel group becoming undocked.
-
7 hours ago, R C-R said:
What specifically happens when you try to drag the Stock tab out horizontally past the edge of the Studio panel group it is in into the workspace area?
What happens is that the whole panel moves and becomes un-docked. I can re-dock it again but can't move the Stock tab outside the panel. Here's a screen capture but for some reason, OBS doesn't capture the undocked panel although it re-appears when I re-dock it.
-
Yep - tried both. I'm just hoping someone else confirms this problem because right now it seems like I'm the only one experiencing it.
-
Yeah, we've been through this movie before (see above). It just doesn't work for me. I don't know why my installation (Windows 10) is so different to anyone else here but the drag is not working as it should. I can click and drag the word "Stock" all day and, although I can move it along the panel (change its position) I can't move it out or to another panel. And if I click the little vertical line in the corner before trying to move it out, it decides to undock the panel itself and move it around.
-
Just to update this thread ... I have now bought and installed AP version 2 and still have the same issues. Trying to organise the UI is still a PITA. For example, I have a tab labelled "Stock" which I just cannot move out of that panel window. I have to turn it off in the Window Menu but if I turn it on again it re-appears in the same place and it is impossible to move it to another panel group.

-
Now I am wondering if there is a way to avoid that step of dragging to the child layer? This is why I didn't realise it was possible in the first place.
Isn't there a way to select just the mask layer and apply adjustments to it without having to create an adjustment layer first and then make it a child of the mask layer?
-
14 hours ago, firstdefence said:
Try making the adjustment layer a child of the image mask layer, that way it will only affect that layer, or group the mask layer and adjustment layer.
I am sure I have tried that but I went back and tried. I am now somewhat confused because I don't have an adjustment layer. I have a Background layer and above that I have the image I want to show through and that has a mask layer as a child. If I try to apply ajustment to just that mask layer, it goes ahead and applies the adjustment to the whole image (all layers).
There is no adjustment layer.Correction: Sorry the adjustment layer does appear after the adjustment has been applied so, as you say, I can drag that on to the mask layer and it works as I wanted it to work.
Thanks. Sorry for the confusion.
-
Hi, I hope I am describing this correctly (Affinity Photo).
I am using one image as a mask layer for another image so as I paint with the black brush the mask layer shows through. All standard stuff.
However, I often need to match the colours, etc., of the upper layer so I attempted to use the adjustments (HSL, Brightness/Contrast, etc.) but I can't figure out how to stop Affinity Photo from adjusting the whole image (both layers) when I just want to adjust the mask layer.
I'm sure this must be something simple but being so simple I can't find a tutorial which explains how to do it.
-
1 hour ago, R C-R said:
It probably won't make any difference but does anything change if this second display is disconnected & you restart your computer?
Well I tried your suggestion but as you suspected - it made no difference. I may well have to resort to a complete uninstall of Affinity but I need to be sure I have removed all traces (user prefrerences, registry entries, etc.) before I re-install. Is there a document explaining how to do this?
-
5 hours ago, Old Bruce said:
Do you have a plain vanilla mouse you could try instead of a 'gaming' mouse?
No. I bought this when my old "vanilla" mouse died. I bought it because of reviews saying it was a good quality mouse, not because it claimed to be a gaming mouse. I am not a gamer. It works perectly well in all my other applications. It works in Affinity other than the the problem described here. Another point that comes to mind which suggests that the mouse is not the problem is that if you watch the screen capture above you will see that I am able to move the tabs only after clicking the corner icon. Why would a mouse suddenly change behaviour after selecting that icon? Surely if it has a problem dragging those tabs it would have that problem whether or not I clicked that icon?
Oh damn ... of course I should have mentioned that I do have an alternative to the mouse. I have a pen. My second monitor is an XP-Pen Graphics Display. I have not yet got into the habit of using it a lot but I do use it for more detailled drawing and selection, etc. I have just confirmed that the same problem is there whether I use the mouse or the pen.
-
7 minutes ago, walt.farrell said:
Thanks for the recording.
Have you checked the list of known issues with third-party apps to make sure you don't have any of them installed?
Have you updated your mouse and graphics drivers? What kind of mouse do you have?
I have none of those Third Party applications.
My mouse is a Steel Series Rival 100 and it checks for updates automatically every day. Also, it works fine apart from dragging those Affinity tabs and panels.


Mask edge feathered - how?
in Affinity on Desktop Questions (macOS and Windows)
Posted
Sorry, I should have explained that in my second comment because that's how (Selection from Layer) I eventually got there. I know there is a big conceptual difference between selections and shapes/curves but I thought there might be an easier way that I was not seeing in any tutorials. NVM, at least I can always refer back to this thread for a reminder.
I think theis might be the thing I was looking for but, alas, this is for Photoshop