

Matt James
-
Posts
23 -
Joined
-
Last visited
Posts posted by Matt James
-
-
Thank you for the replies. Unfortunately I can't work out how to do a lot of what's described there!! 🤦🏻♂️ I'm pretty inexperienced with AD. I'll try Googling to see if I can follow the steps. Thanks.
-
6 minutes ago, Old Bruce said:
No.
One thing I will do on occasion is use the Perlin Noise filter on a pixel layer and choose a darken blend mode.
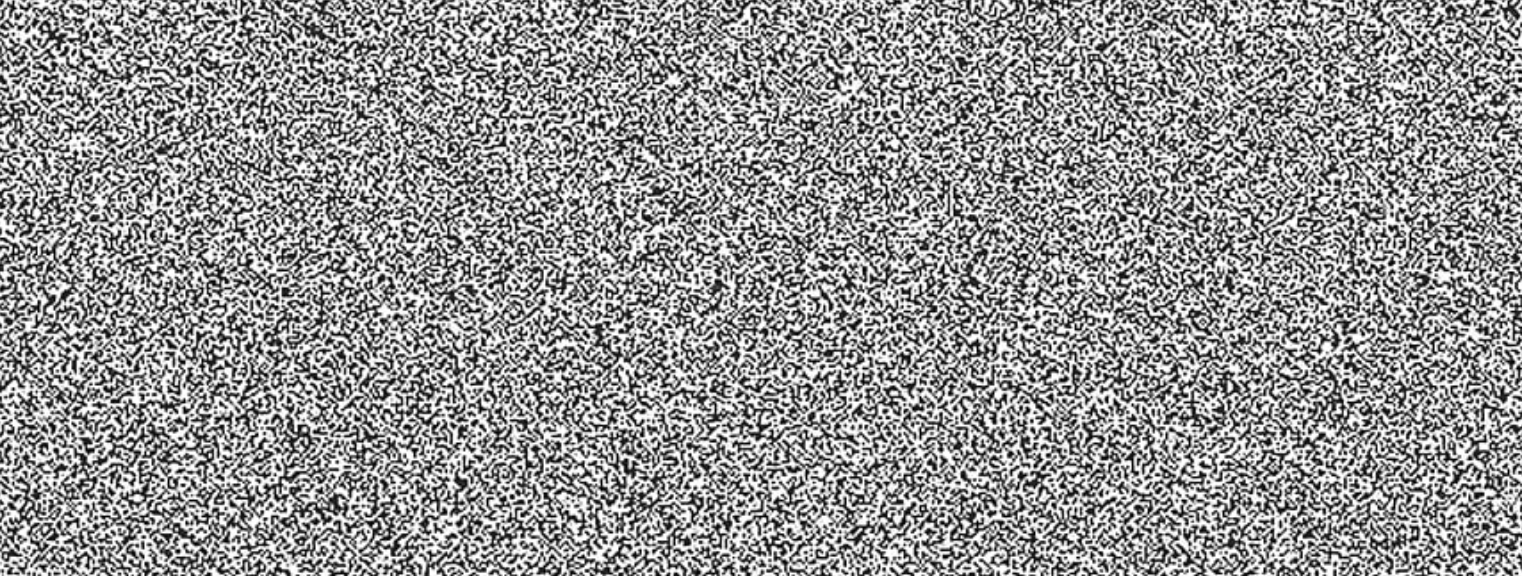
Ah OK. So do you have any idea how people create images like this that are so heavily grained?

-
I'm not sure if I'm asking this using the right terminology, but can noise in Designer be greater than 100%?
As an example:
I create a simple blue rectangle to use as a background on a website and change the noise to 100%. However, I want it to look more 'grainy' than this, so when setting it as the website background I have to 'zoom in' on the image. This does make it much more grainy, but the image also becomes very blurred as I'm now so zoomed in.
So is there a way to keep increasing the noise beyond 100%?
-
+1
I'd really value this feature. I run a small business and have to regularly send out forms I need customers to complete like order confirmations. I need to be able to 'put it on a plate' for them by making the document editable, but really don't want to be sending Word docs to do that
-
8 minutes ago, Hens said:
Variable fonts are not(yet) supported in Affinity.
Maybe do a search before asking. https://forum.affinity.serif.com/index.php?/search/&q=variable fonts&quick=1🤦♂️ Crikey that's embarrassing, apologies. I didn't think to search as I naively assumed they were supported. Apologies again.
-
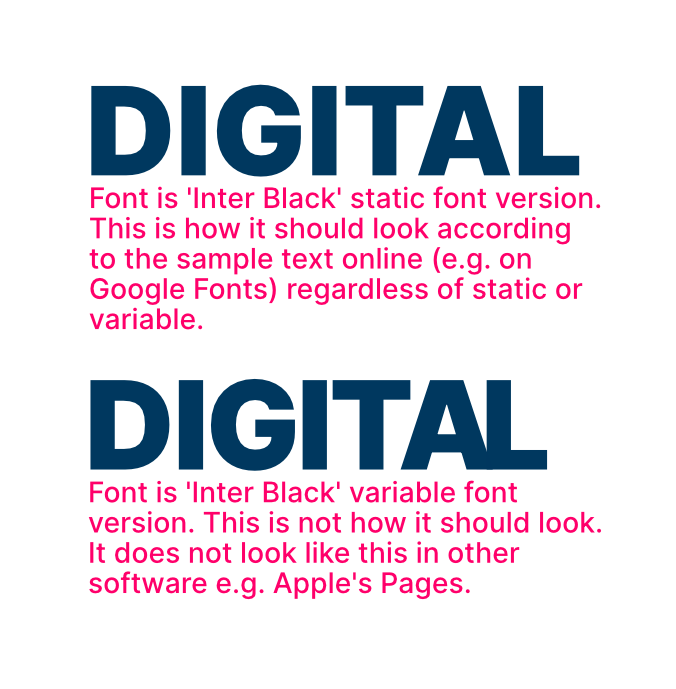
Having a really odd issue with variable fonts. I downloaded 'Inter' font in the variable version, typed out the word 'Digital' for a logo I'm making in Affinity Designer, and it didn't look right. The A and the L being too close together is what initially caught my eye. I went back to Google Fonts and it wasn't displaying how it does when I typed sample text on there. So I downloaded the static font too, and that shows exactly as expected.
Initially I tried reinstalling the fonts etc but nothing worked. So then it occurred to me it might be an issue specifically with Affinity, and it turns out it is! If I do this comparison in other software (e.g. Apple Pages) both the variable and the static font look identical.
I've attached a screenshot from Affinity Designer to show the problem. Can anyone help?
-
MagicPrefs doesn't seem to work for me any more, thanks for the suggestion though.
I guess the next best alternative if Affinity can't actually disable horizontal scroll would be to just maybe add a different 'Page View' where, say, the page filled the width of your screen and in that mode scrolling only went up and down.
Thanks for the replies anyway.
-
When I used my MacBook's trackpad and scroll through pages in Affinity Publisher, the scrolling 'wobbles' all over the place as it slightly horizontally scrolls at the same time, and (personally) I find this really annoying. Can horizontal scroll be disabled?
-
Just came across this thread whilst Googling this problem as it's annoying me. Has there been any solution?
-
28 minutes ago, VectorWhiz said:
In Designer you may want to try this as well: Go to File - Document Setup.... Click the colour tab in the dialog box. In Colour Format select RGB/16 or LAB/16. Click OK.
Also in the Document Setup... I set the DPI in the Dimensions tab to 400, even though some claim this does not help (because I'm a stubborn type probably).
Best of luck.
Thanks for that, it was on RBG/8 so will change to /16. Does colour profile matter much? It's currently set to sRGB IEC61966-2.1.
DPI was currently lower I think, so will change to 400.
-
1 minute ago, loukash said:
Well, the display resolution vs the zoom factor will definitely affect what you're seeing when it comes to such subtle nuances.
Thanks, seems obvious now!
-
11 minutes ago, loukash said:
When I export as 24-bit PNG, open it in Photo and view it at Pixel Size zoom factor, it looks exactly the same as your original document also viewed at Pixel Size zoom factor.
So, to tell you what may have happened, you may want to attach the PNG as well.But in general: zoom factor matters. Artifacts or banding can be the result of your computer display attempting to antialias and compensate for non-integer zoom factors.
Ah OK, so apologies for the stupid question, but am I interpreting that correctly as meaning I'd need to make the document the same size as the screen it's being viewed on to avoid seeing banding?
-
Total inexperienced guy here, so apologies if this is obvious. If I create a design in Designer with a gradient, I get what I think is called 'banding' when I export it as a PNG file (i.e. where I can see almost 'stripes' where the colour changes with the gradient).
Is there a way to stop this? I've attached a sample file - when I export that as a PNG the banding is clear (especially if I view the PNG on my iPhone).
-
-
Hmm, I can't seem to get my head round this one! I keep just making a mess of it and it ends up looking worse. I really appreciate your help though thank you
-
21 minutes ago, smadell said:
I confess that I didn’t spend an abundance of time on the selection, itself. If you wanted to smooth the jaggies at the bottom, select the adjustment layer and paint on it with black and/or white. In that way, you’ll get a better layer mask for the adjustment layer.
As in literally just paint colour onto the layer? I tried that but I just have a big black line where I used the paint brush which I'm thinking isn't what you meant.
(Apologies, real neewbie here)
-
15 minutes ago, smadell said:
I was able to match the curtains to the truck panels using 2 different methods – a Black & White adjustment and a Recolor adjustment. I've attached an edited version of your Vehicle file.
In brief, the first thing I did was to make a selection of the blue parts of the curtain. This is saved in the .afphoto file as a Spare Channel (called "Blue Truck Curtains"). I applied a Black and White adjustment, and then right-clicked the Spare Channel, choosing "Load to Black and White Adjustment Alpha". This applies the selection to the adjustment layer as a mask. In the black and white adjustment, I lightened the Blues and the Cyans. I set the blend mode to Screen. Alternately, I used a Recolor adjustment (also setting the Alpha to the Blue Truck Curtains spare channel) and changed the Hue, Saturation, and Lightness sliders to match the truck panel (which aren't really white, but rather a really light blue). Again, I set the Blend Mode to Screen.
Here's the result of the Black and White adjustment:
Also, here's a link to a PixImperfect tutorial on YouTube, wherein he changes colors to Black or White. Although it's a Photoshop tutorial, you can do the same thing(s) in Affinity Photo. Also, I used the Screen blend mode instead of Lighten (as he used) because this was able to maintain the slight bluish tint of the truck panel more easily.
The version you've done using recolour is just what I'm after!! Thank you.
With one exception - the edges of the selection around the grey tape very near the bottom are really jagged, is there a way I can smooth these out?
Thanks for the help
-
In the attached picture, I'm trying to change the colour of the blue curtains to the same sort of white as the rest of the truck, and I can't work out how. I've found many ways of changing them to another colour (red, green etc) but not to white.
Can anyone help?
-
Thanks for the replies, it helped and is much appreciated.
-
I have the attached icon as an svg file, but I want it to be thinner. Is it possible to do this, perhaps convert it to a stroke so that I can then easily adjust the stroke width like if I just drew a line?
-
Absolutely perfect! Thank you for that, that's brilliant
-
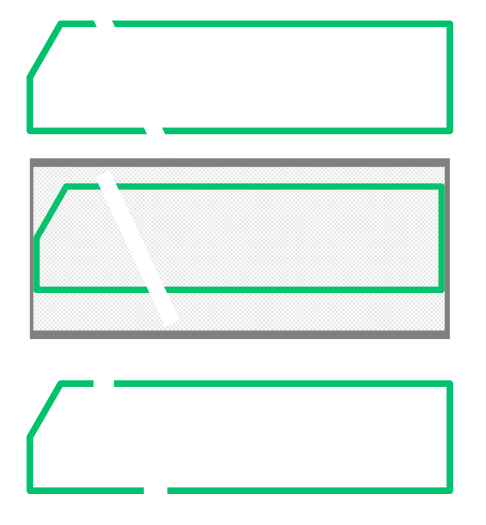
Complete and utter novice here to both Affinity and graphic design in general, so apologies if this is really easy! I've attached an image. I'm trying to create a vector logo for my company which includes the top shape, and want the effect of the 'slash' through it. At the moment, I'm only achieving this by putting a white line through it, which as you'll see in the middle image doesn't work when I then try to save it as a vector. I tried creating the lines myself using the 'pen' tool, but the ends of the line are flat which means I lose the effect of it being a slash.
Can anyone tell me how I could do this? And apologies, but I'll need very simplistic instructions!!
Can noise be greater than 100% in Designer?
in Affinity on Desktop Questions (macOS and Windows)
Posted
Ah! Makes sense thanks.