Dangerous
-
Posts
288 -
Joined
-
Last visited
Everything posted by Dangerous
-
Warp Text.
Dangerous replied to Dangerous's topic in Pre-V2 Archive of Affinity on Desktop Questions (macOS and Windows)
Many Thanks. It works better than with the rounded text. Thanks All -
Warp Text.
Dangerous replied to Dangerous's topic in Pre-V2 Archive of Affinity on Desktop Questions (macOS and Windows)
Thank you @JimmyJack and @G13RL. The things I was doing wrong were. 1: Clicking on a node rather than using the shear arrows. 2: Using a circular O and not the elongated O as in the original image and and in your images, what font style is it? 3: Using A-Photo, lol. I've managed in in photo but designer probably would be better. -
Warp Text.
Dangerous replied to Dangerous's topic in Pre-V2 Archive of Affinity on Desktop Questions (macOS and Windows)
I have played around with the method and get a bit better results one char. at a time but still poor on the letter O. Any Ideas? Thanks for the help. -
Warp Text.
Dangerous replied to Dangerous's topic in Pre-V2 Archive of Affinity on Desktop Questions (macOS and Windows)
This has got me half way there but the O isn't working. If I grab all the nodes (above the bend line) of the O curves and skew it goes out of totally out of shape. If I only grab the top one it bends in a new place. Any Ideas? Works great on the Ls. Maybe Designer would do it better but I believe it was done in Photo. Bend O.mp4 -
Warp Text.
Dangerous replied to Dangerous's topic in Pre-V2 Archive of Affinity on Desktop Questions (macOS and Windows)
I have A-Photo. -
I have seen a warped text I would like to re-create but every time I search I can't locate any tutorial of how to do this. Can anyone point me to where I can find out how to do it. This is what I would like to do.

-
Having been a photoshop used for 4 years before changing to affinity photo, I also struggled to do several things I found easy in photoshop. It was a few weeks before I realised what I was doing wrong. I was using affinity as I would use photoshop. Reminded me of when I first started riding a motorbike after a great many years driving cars & vans. I was useless until I 'got out of car mode' and in to bike mode. What needs to happen is those that have used adobe products realise that affinity is not an adobe product and either adjust to the new way or go back to paying expensive subs, I spent £480, cancelled my subs & had nothing to show for the money. I can use AP for as long as I want and all it will cost me is the £25 it cost me at the time.
-
I would if I could remember where it is, lol. UPDATE I tried to post this reply twice a couple of days ago but it didn't work. Found the wish list and posted there.
-
Does anyone here think that Affinity Photo would benefit from the facility to drag & drop Images from a folder/image view in to the PANORAMA, STACK, FOCUS MERGE or HDR 'Add Files' box as an alternative to the current file manager search? I know it would speed things up for me as I have usually identified all the required files prior to loading them in to AP.
-
One thing from file menu can be set by a macro and that is the 'Save History with Document' setting. I've not found anything else that can. Can you record alt+x combo?
-
If you wanted a 100 step macro then create 10 macros each with 10 steps and name them A1 to A10. Create a new macro with the correct name (ie Full Edit) and record it calling macros A1 through A10. You can then store A1 - A10 in a backup category (or delete if you wish). If you need to amend the macro delete & re-record macro A? then delete 'Full Edit' and re-record it again calling A1 through A10. 'Full Edit' will contain all 100 steps from A1 - A10 which is why you can delete the parts A1 - A10 if you won't need them again. Keeping them all means you can call any block (s) you want, all of them using 'Full Edit' or amend them quickly as long as you know what steps are in each block.
-
NEF RAW issue
Dangerous replied to chrisday10's topic in Pre-V2 Archive of Affinity on Desktop Questions (macOS and Windows)
I took your file and could see the edges were cropped, Disables LENS CORRECTION and all the image was visible. You also loose some detail top & bottom but as it is plain sky or water you do not notice. To me that seems to be the answer. Just saw this thread so hope you are sorted but at least it gives an answer for anyone wondering the same. -
Having been using Affinity Photo for nearly a year now I wonder why the same complaint is prevalent. There are so many comments of 'AP is great but' the but referring to the fact that RAW development is destructive. At first it didn't bother me but now I find there are more and more times I would like to go back and tweak my initial raw development but I have to return to the RAW file and start from scratch. I used to hate PS's sidecar file but now realise it's benefit. How hard would it be to implement non-destructive RAW adjustment? This would make it easy to copy the RAW adjustments from one edit and paste in to many files speeding up workflow. From comments I have seen there are many people who will not use AP purely because of this 'issue'. I am looking at another program that has a far better 'RAW' development tool but sadly lacks on the photo editing side as, among other things, it does not support layers. IMHO AP comes second to PS but only because RAW development is destructive, fix that and AP would be number 1.
-
Crop Tool Set Default to Original Ratio
Dangerous replied to Sugar Lion's topic in Feedback for Affinity Photo V1 on Desktop
It would also be nice if we could set our own crop size in pixels, millimetres and maybe some other measurements as well unless that feature is there and I've not found it yet? EDITED just to say I found how to add a preset but still not how to set it to default to the main one I use -
Crop Tool Set Default to Original Ratio
Dangerous replied to Sugar Lion's topic in Feedback for Affinity Photo V1 on Desktop
I to need the default crop to be constrained but will we get it? Affinity (Serif) are like most companies, they know what is best for us and the sooner we accept that the better it will be for us. I personally like Affinity Photo (although photoshop was more user friendly in many ways) but there are a number of improvements that could be easily made in time for the next upgrade. Even a reply from them wouldn't go amiss. (Serif, can you see that?????) -
My problem is similar to those here. Canon printer and windows 10 system fully up to date. I set printer to use 5" x 7" photo paper (automatically sets cassette 1, photo paper tray) but clicking ok to go back to the AP print dialog settings revert to cassette 2 (plain paper tray) and A4. I can't get the settings to stick so can't print to photo paper at all. No problems with printing in any other program so definitely an Affinity Photo issue. I don't think I had this problem before but then I can't say for definite that I have printed to photo paper since getting AF. How do we report issues to Affinity/Serif?
-
Sorry I took so long to reply, got too busy this end and didn't have the chance to check things, including emails.
-
I have printed it out but there are lines on it.
-
As I say if I rasterise or export the .afphoto file it prints perfect. If I print to CUTEPDF (which to all intent & purposes is a printer although it creates a pdf instead) it prints perfect. It prints perfect on your system (what printer?). Unless I was able to try another printer or 2 (one a MG7550 and the other a non-canon [and/or canon but not the MG range]) then I am stuck and in future export the .afphoto prior to printing retaining the .afphoto for future edits (deleting the unwanted exported file). It's a workaround for now. I can't understand where these lines come from, they do not line up as the edges of ANY image/text frame that appears when you click the element to move. transform etc. Thanks to all how have attempted to help with this. Have to hope that Affinity pick up on this issue, check the driver & find a solution.
-
maybe so but cheaper & better than costa and you don't have to go out to a cafe (if they are open that is). Back on topic. This seems like a random bug as why would rotating them change which image had the lines, why would rasterising the embedded image fix the fault which is also fixed by exporting, why would the file print out ok for you? Maybe it is the Canon or the MG 7550 driver profile, I don't know but I know something is going wrong!
-
Used coffee pod (punctured by machine) and part of lid removed
-
Nespresso coffee Pods not cups or helmets, lol.
-
Rasterised all the layers and printed out ok, no lines Reverted back to all embedded images then rasterised the text on one and the image on another, the one with the rasterised image no lines but lines on the other. reverted them all back to embedded & this time rasterised the image on the one I'd rasterised the text & rasterised the text on the one I'd previously rasterised the image. Again no lines on the rasterised image but lines on the other. This suggests (or proves?) that the problem exists with the printing of a document with embedded images (and possibly only if the layer/layers are rotated).
-
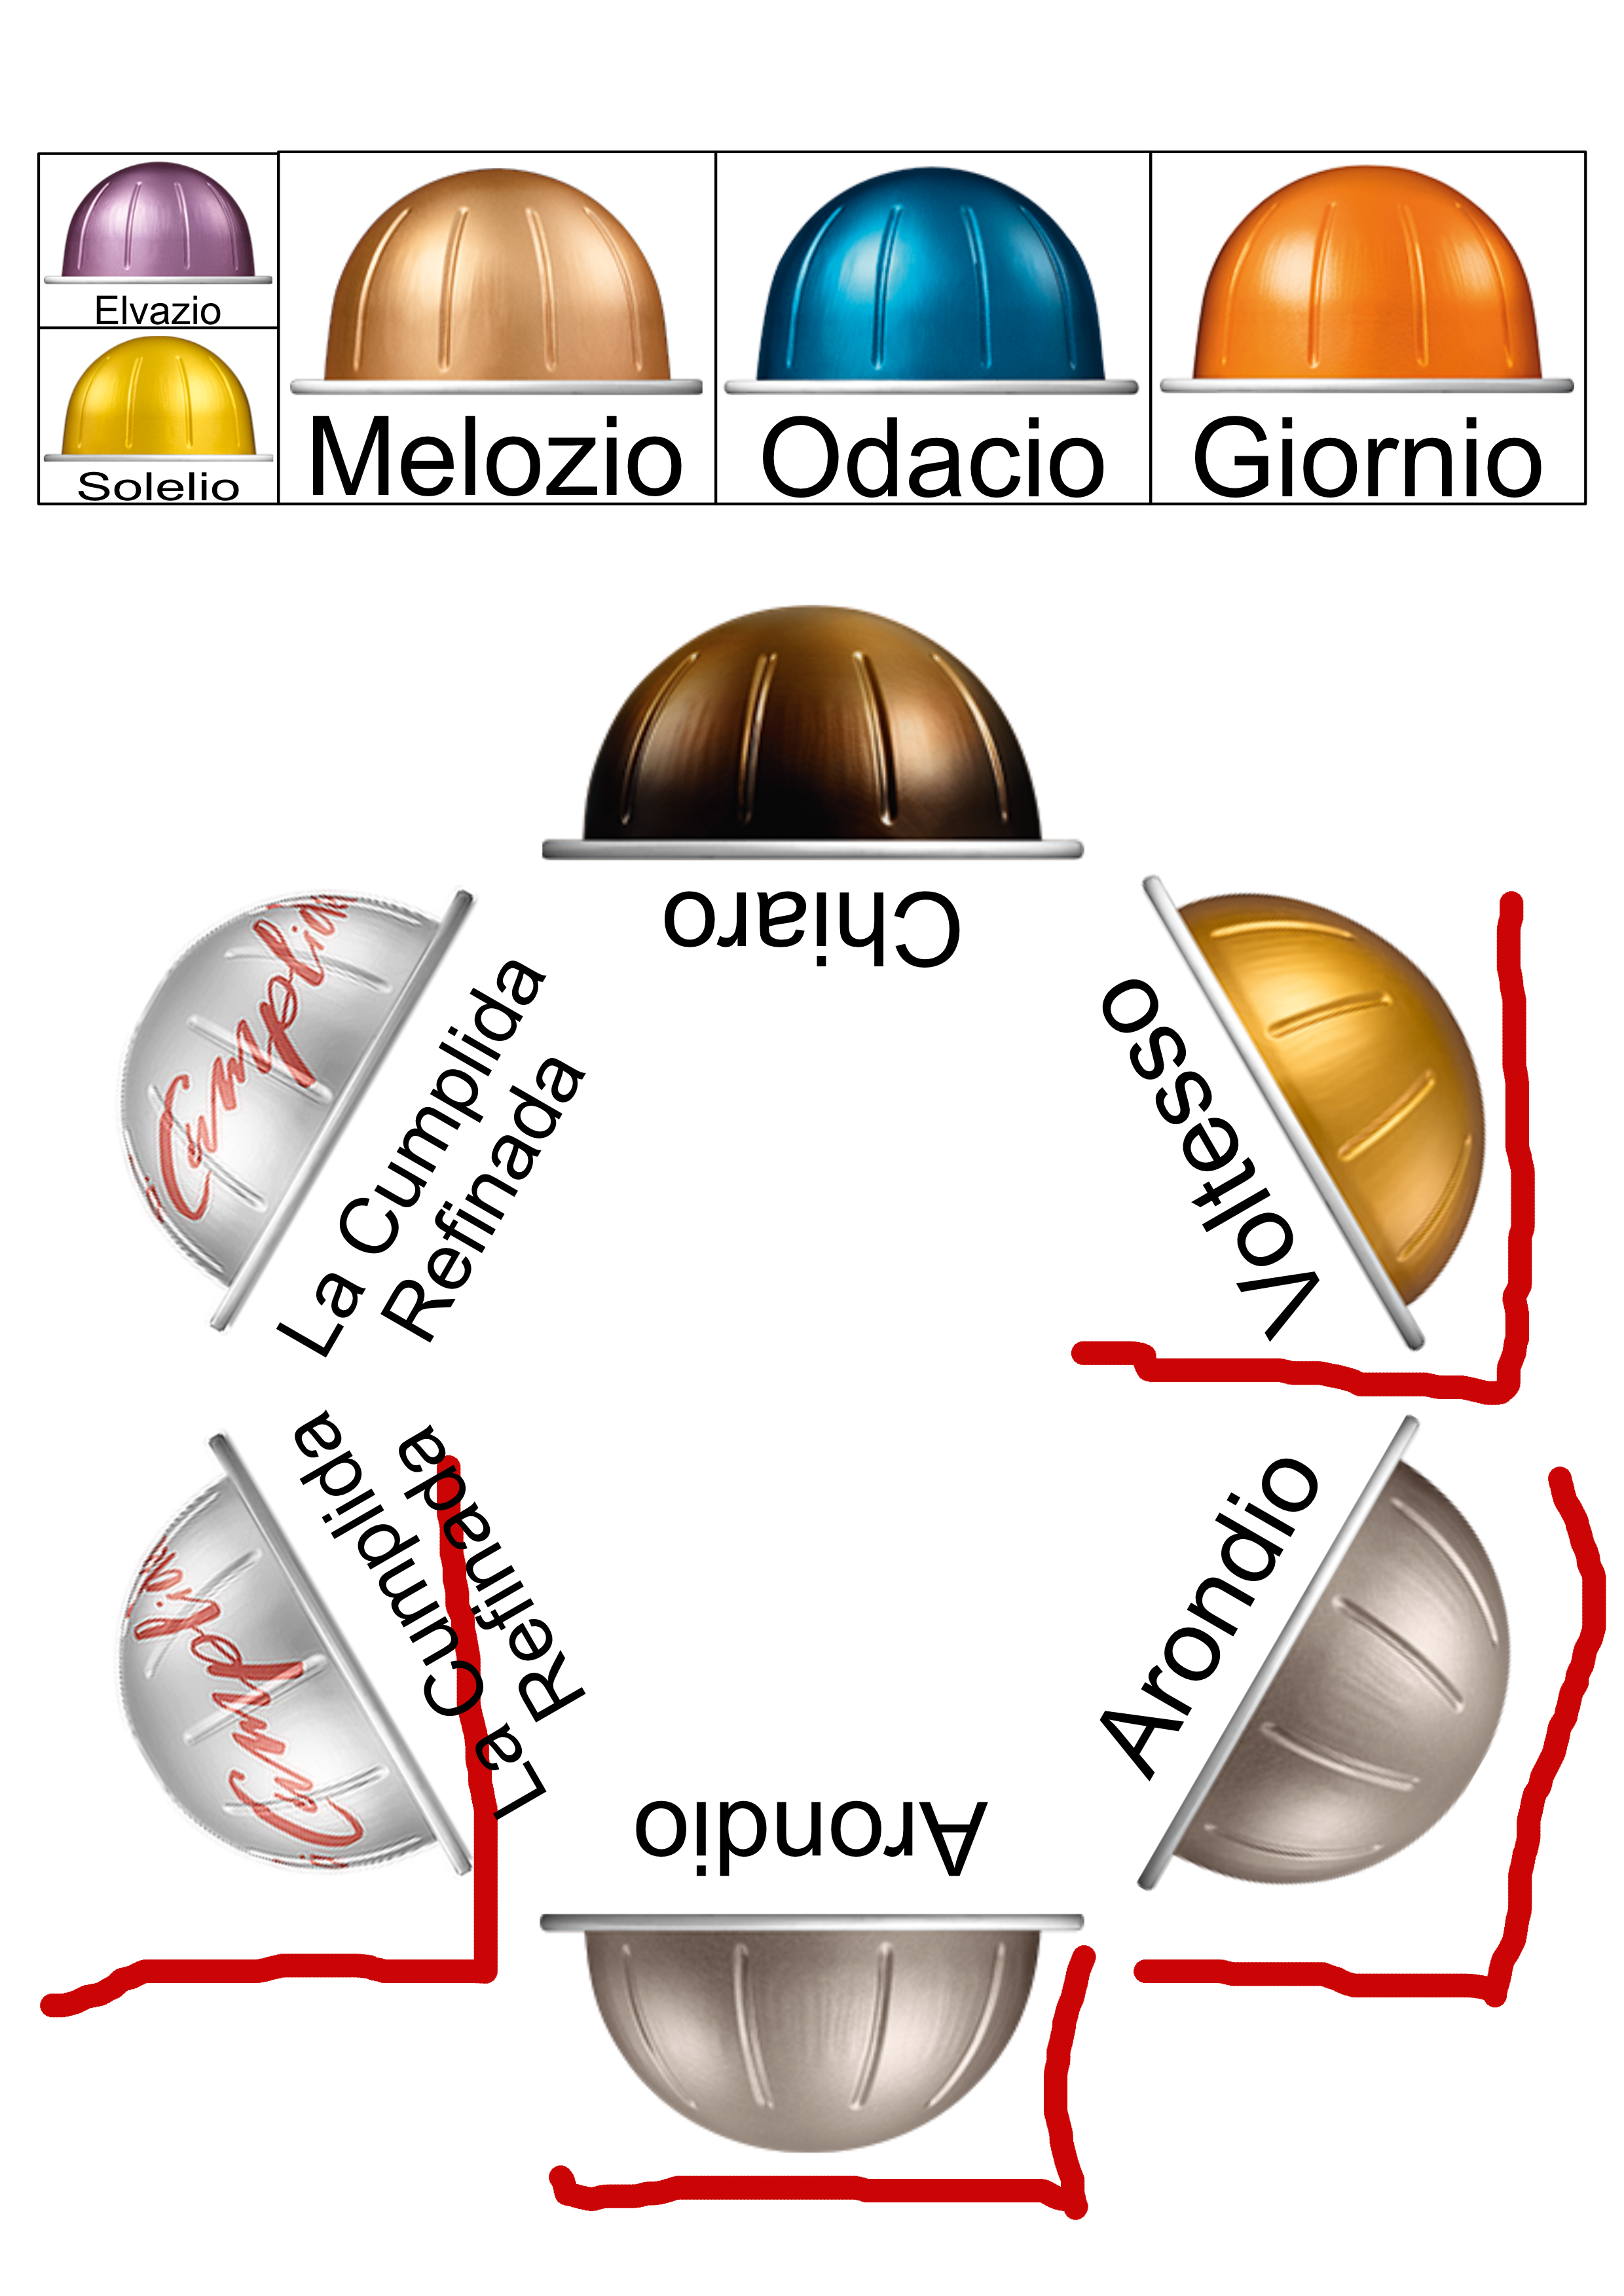
To show the randomness of this issue I rotated the 6 pod hexagonal group by 120 degrees (nothing else done) then printed it out. On this image I have drawn lines in red to indicate the position the spurious lines are now added. As you can see from the image there are 3 pods that did not have line now have lines. One pod that did now does not and one that did now has the lines in a different position in relation to the pod. This to me indicates that the lines are not in the image files. As I say, Random lines!
-
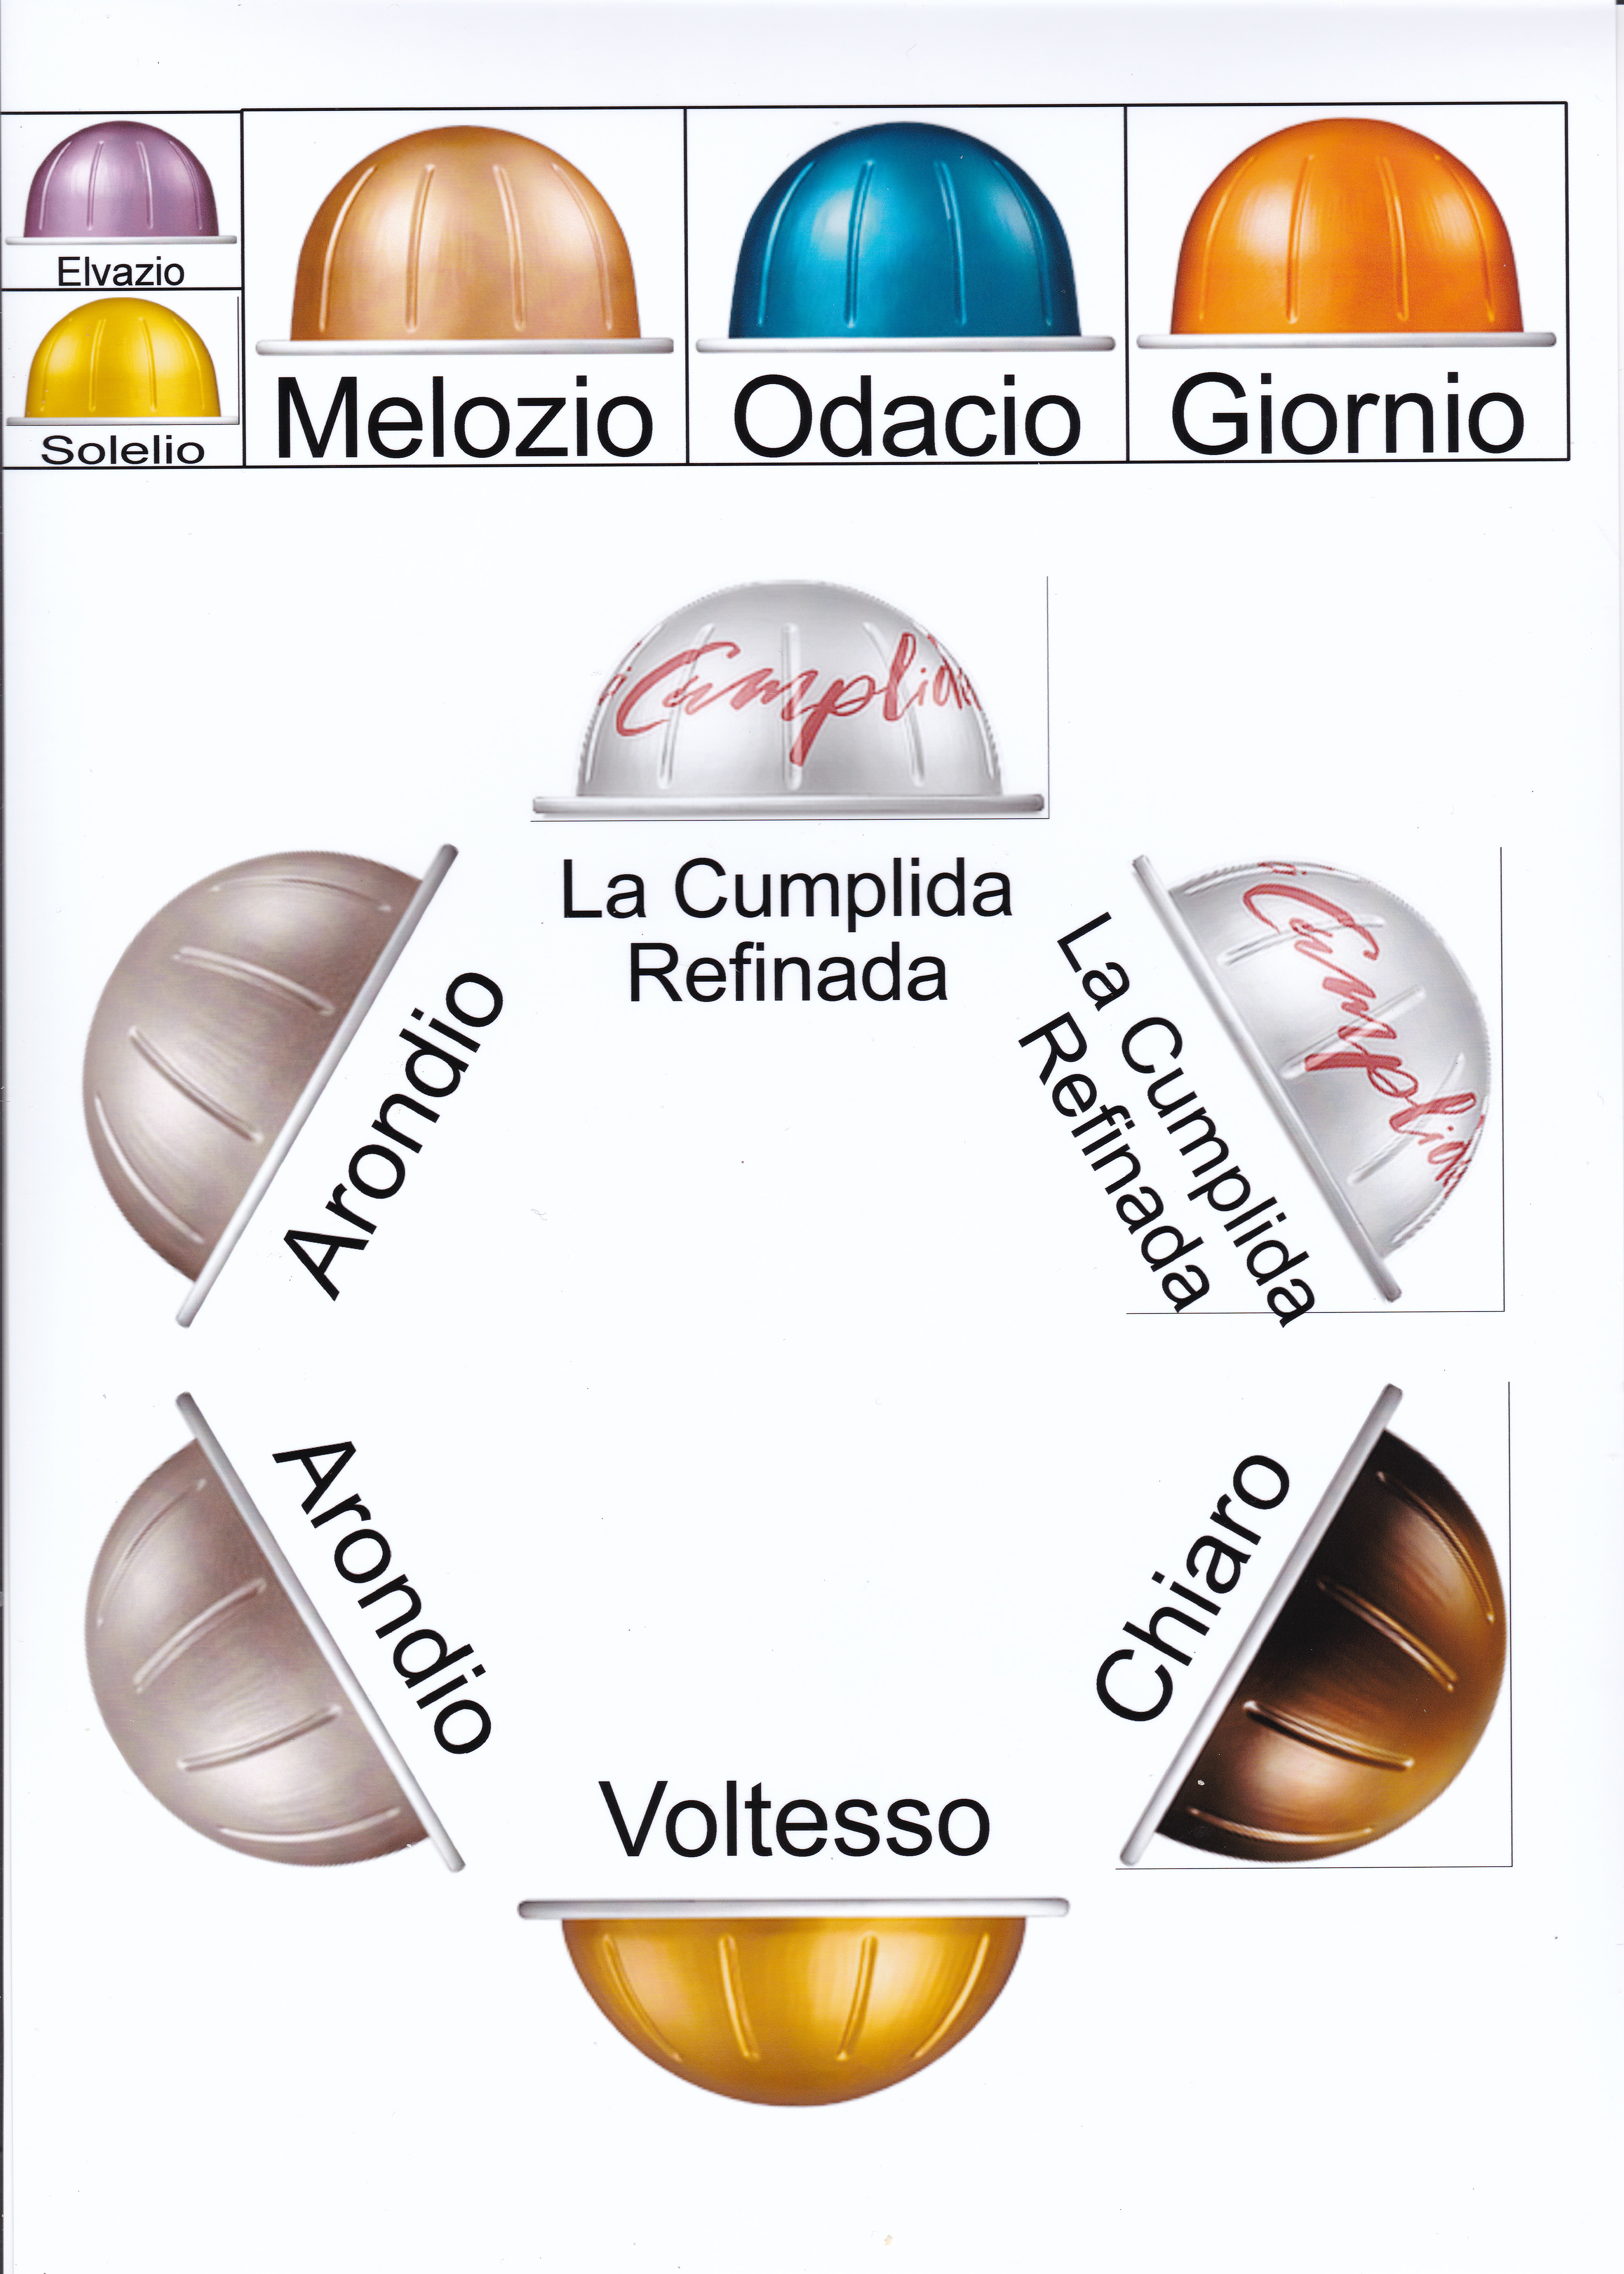
It has arrived. This png is a scan of the actual printout.