iaing
-
Posts
172 -
Joined
-
Last visited
Everything posted by iaing
-

Backspace Key Doesn't Work on Imported IDMLs
iaing replied to Seneca's topic in [ARCHIVE] Publisher beta on macOS threads
Confirmed - backspace doesn't work on returns for me on Mojave - I can move cursor back and use forward delete - but backspace key does nothing, only applies to full returns, works OK with a soft-return -
Moving a text-wrap object over text leaves ghosts or echoes in its wake - left half of video is Publisher 1.7.3, right half is beta 1.8.0.549 - sometimes doing this causes a crash, though it's not consistent. Have tried with filler text and placed text, same results. Screen_Recording_720_2020-02-05_at_19_33_02.mov
-
I'm seeing the same as Bruce - but also sometimes instead it instantly closes without saving. This is with any standard preset from the new document dialog (A4, A5, A6). The Save as dialog that comes up is pointing to the last-used location.
-
Editing linked files - confused result
iaing replied to iaing's topic in Feedback for Affinity Publisher V1 on Desktop
Fixed in the latest beta (1.8.502) - - nice work Affinity! -
[1.8.0.502] Text Frame column rules.
iaing replied to Old Bruce's topic in [ARCHIVE] Publisher beta on macOS threads
The extra handle also appears on a picture frame (when you've manually moved it's content). But you're right the behaviour is consistent. Hadn't realised before that the stroke on the text frame itself behaves that way too. The point is if I lengthen my text frame to allow for more text, why would I want the column rules or frame stroke to increase in width? But if I scale up the whole frame, increasing the text size in the process, then yes I would expect the strokes to 'scale with the object' - I guess I just need to remember to disable scale with object The stroke width for the text frame does correctly update when scaled though, so column stroke needs to do the same.
-
[1.8.0.502] Text Frame column rules.
iaing replied to Old Bruce's topic in [ARCHIVE] Publisher beta on macOS threads
I'd expect 'Scale with object' to alter the weight if I use the scale contents handle (sorry can't remember the proper name, the one that sits outside the object bottom right) - but not if I just used the side or bottom handle - just like the text within isn't scaled if I use those handles. Also, when the column rules are scaled up, the width readout doesn't update to match in the studio panel. One other thing, the tooltip on the column rule width shows 'Frame Stroke'. -
Screen Recording 2019-10-08 at 07.36.27.m4v
-
I'm also getting the same weird things with text frame tab, like @janichsan there's no scroll bar, and depending what other panel is open, clicking the Text Frame tab may not open the tab at all - instead clicking on it 'blanks' the other open tabs - Macos 10.14.5, Publisher 1.7.3 - screen record below Screen Recording 2019-10-08 at 07.36.27.mov Screen Recording 2019-10-08 at 07.36.27.m4v
-
Don't know if there's a way to select the node beneath, but you could do shift+arrow to nudge the top node a set distance, then nudge it back once you've moved the one you want: select top node shift+right arrow to move it select next node and move wherever you want select original top node again shift+left arrow to put it back where it was How far it moves depends what you have set in preferences > tools > modifier nudge distance, but it should be enough to work from the defaults
-
Combine Document & Spread Setup
iaing replied to iaing's topic in Feedback for Affinity Publisher V1 on Desktop
Agreed, that's why I said in two tabs - they're separated, just easier to get to when you click on the wrong one -
Could these just be two tabs in a single window - so often I open Document Setup only to realise I need to be in Spread instead - they're so closely related and are combined at New Document dialogue.
-
I opened your .ai file and it looks like each piece of the feather is a gradient mesh. Affinity understands .ai files as they're basically pdfs (I believe?) but can't cope with the gradient mesh part so it's turning the fills to white instead. Looks like exporting as an svg from illustrator brings it in to Publisher OK, but I haven't looked too closely.
- 3 replies
-
- 2
-

-
- affinity publisher
- illustrator cs5
- (and 3 more)
-
I can't find a solution - I figured a better way to do it was to create a rectangle, also in the spot pms colour and then paint a mask over that in pixel persona. Turn the mask off and all exports with spot colour intact in Acrobat - turn the mask on and re-export and AGAIN, it's converted it to CMYK!!!
-
Correct, but there is 'Insert behind the selection' - it's in the tool bar, also menu 'Layer > insertion > behind' so you can assign a keystroke to it - but it does make it a two-step process as you have to do that then follow it with paste - the advantage is, you can follow it with 'place' instead of 'paste' if you want
-
Scalable font sizes
iaing replied to Davidtherapy's topic in Feedback for Affinity Publisher V1 on Desktop
I'll let a PagePlus user answer your first bit as I'm not really sure what you're asking - but for brush previews, to to Preferences > User Interface - tick 'Show brush previews' -
Text activation across multiple pages
iaing replied to Frank71's topic in Feedback for Affinity Publisher V1 on Desktop
I'm seeing this working fine - are you folks on Windows or Mac? -
Overflowing Text Frames
iaing replied to handshaper's topic in Feedback for Affinity Publisher V1 on Desktop
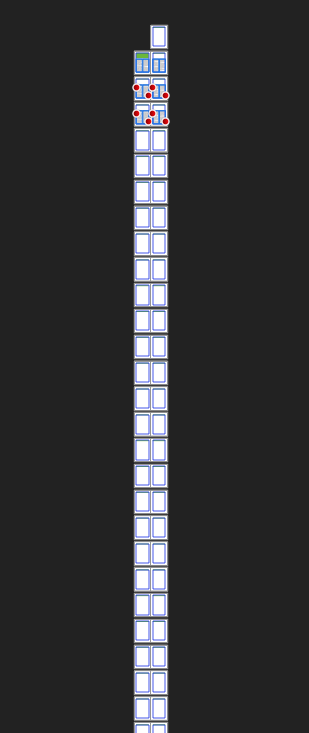
Just a thought until there is a preflight panel - in terms of tracking down the culprit text-frames, if you do 'view > zoom > zoom to document' - no matter how many pages you have, you will zoom out to see thumbnails of all pages at once - the little red alert dots do NOT scale down with the thumbnail, so it's really easy to spy which page(s) have overflowing text (assuming as above, that you have 'show text flow' enabled and are not in preview mode)
- 15 replies
-
- 13
-

-
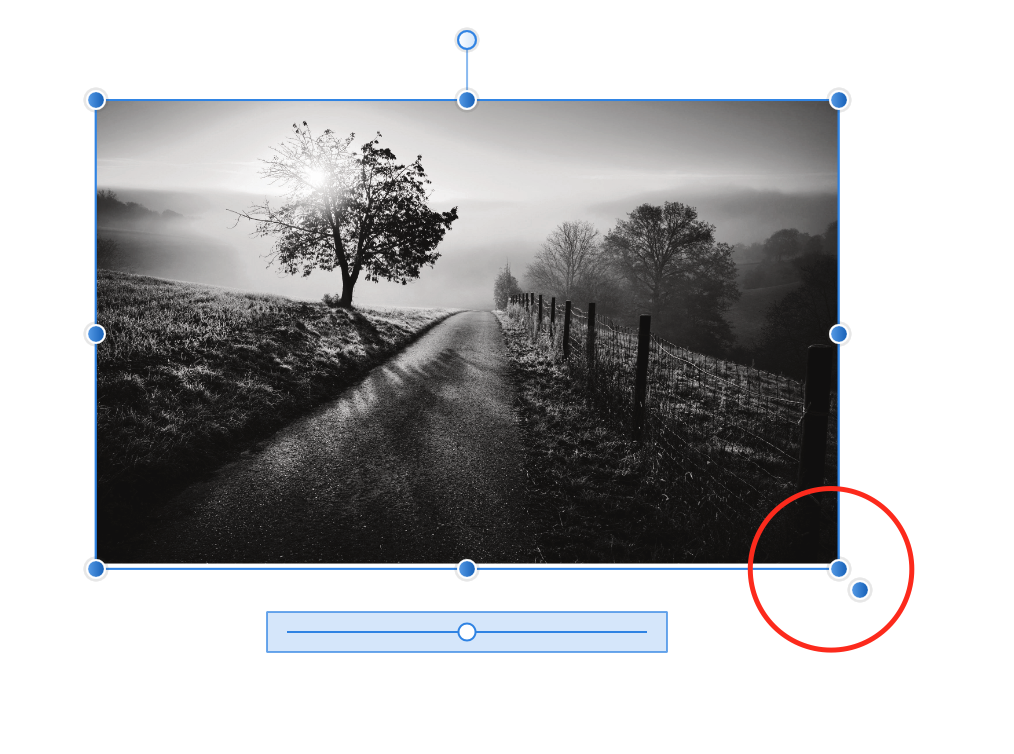
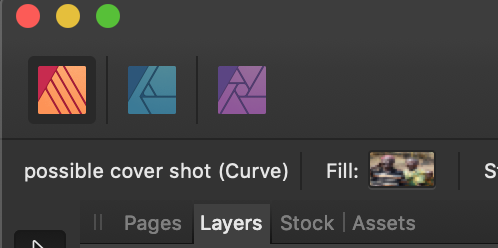
Despite the title of this post, I think @larsh is saying he had an image selected and clicked 'Convert to curves' - just tried this and it creates a curve object with an image fill (see screenshot) and the image is no-longer listed in resource manager, either linked or embedded - other than undo, there doesn't seem to be a way to convert back from there. Without any control over that fill I'm not sure this is a useful feature?
-
Right now editing linked files is a little confusing - if I place a Designer file in Publisher as linked, and click 'Edit Document' it opens in a new tab and I can choose to edit it in Publisher mode, or with Studio Link switch to Designer mode, switch back to the first tab and the 'linked' file has updated. But if this is a linked file; I think one of two things should have happened at this point: My linked original Designer document should have been updated as well - if I chose to use linked documents that's because I want any changes I make to take effect in all documents that use that resource. Failing that, the file should have switched to embedded (with a warning that that would happen if I went ahead and edited) Instead, though the file is still linked, if I now go back and open the original of the linked file in Designer, it hasn't updated with the changes made in Publisher. Further, if I go back to the original Designer file and make changes there and save, in the Publisher file, it correctly shows the file as updated in Resource Manager, but if I update from there, there is no warning that 'local' edits to the file (within Publisher) will be discarded. linked-editing.m4v
-
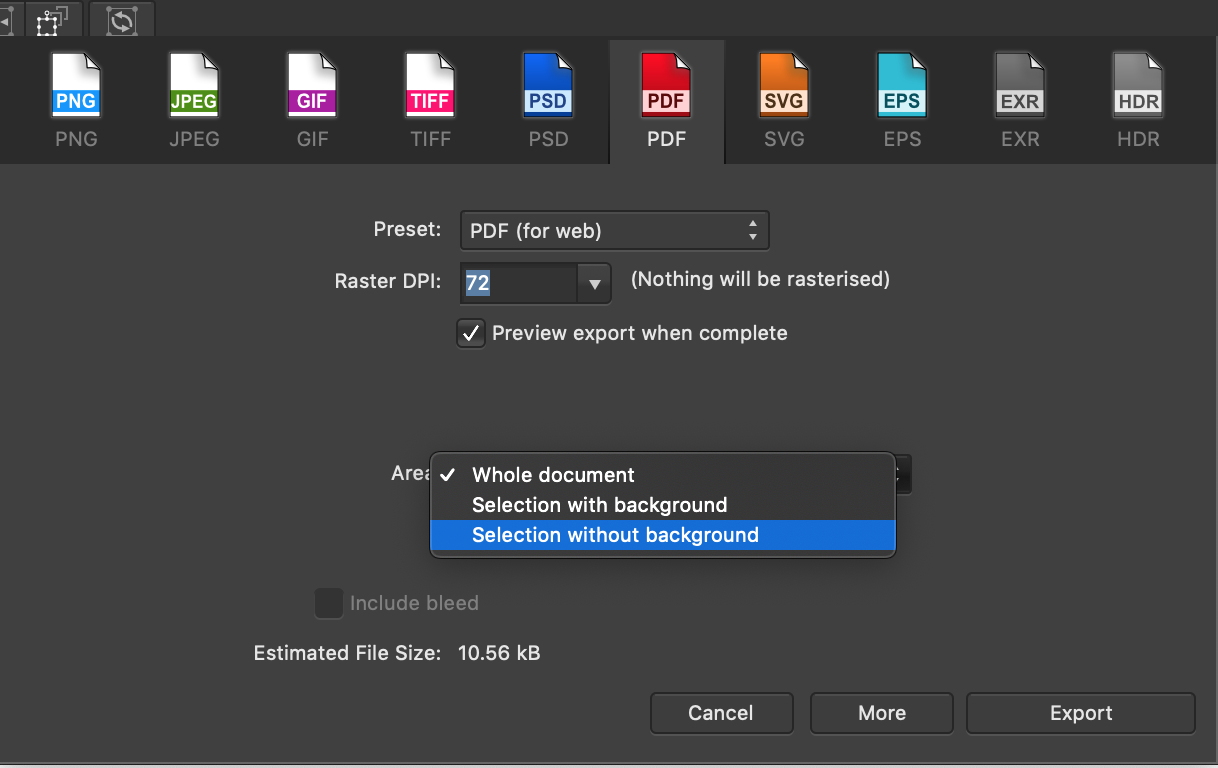
select the object(s) you want to export, then 'File > Export' and choose 'Selection with (or without) background' from the 'Area dropdown.
-
A minor point, but when you print or export a document and type in a page-range the 'Area' drop-down appears to stay active. It would be good if that changed (like the 'Preset' drop-down above which shows blank if you don't use a preset) - it's not clear which option will happen - it does do the page-range but a bit disconcerting. Even pickier consistency point - in the print dialogue it says 'Range: Entire Document' in export dialogue it says 'Area: All Pages'
-
Publisher Layers are Chaotic!
iaing replied to dkibui's topic in Feedback for Affinity Publisher V1 on Desktop
Yes that works, thanks - TBH I'd been wondering what that 'new layer' command was for, given that each element you draw or place creates its own layer automatically. 'New Layer from selection' would be a useful command - also agree with @dkibui though - automatically splitting pages in layers panel would be best. -
PDF Export - bleed setting
iaing replied to Jeremy Bohn's topic in Feedback for Affinity Publisher V1 on Desktop
+1 - glad I searched forum before posting the same thing -
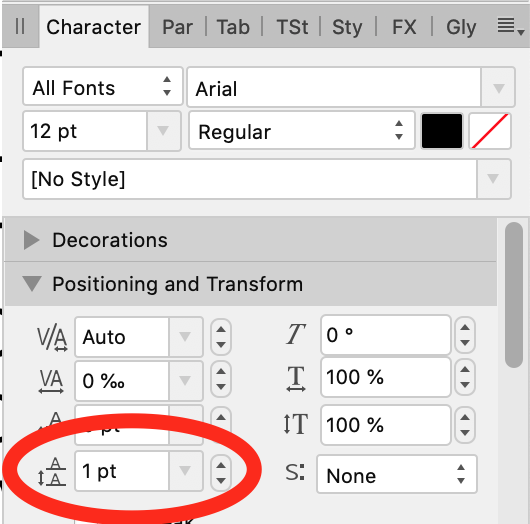
Leading (I think) question
iaing replied to Marc van der Holst's topic in Feedback for Affinity Publisher V1 on Desktop
Have a look in your Character panel - as well as Paragraph leading, Affinity apps have Character Leading Override: Leading Override—applies local override to selected text to increase the leading with regard to the paragraph’s leading you might have accidentally set that really low?
-
Hi Gabe - try this: 1. Create a new 'device' document - your artboard will automatically be at X:0 Y:0 2. Make sure you have snapping and force pixel-alignment enabled 3. Now option-drag a copy of the artboard, keeping option held down as you drag, release the artboard - it WILL end on a sub-pixel, because option-dragging overrides all snapping 4. Delete that artboard and again option-drag your first one, this time release option key before releasing the artboard - this time it will snap to whole pixels. By the way, can we rename 'artboards' as 'dartboards' - would save me correcting auto-correct