ronanski
-
Posts
103 -
Joined
-
Last visited
Everything posted by ronanski
-
Oh wow! That worked! Thank you Michail! No, that won't work v_kyr. This would just be a very long winded way of moving it at 45⁰. My point was I wanted to move it anything NOT a product of 45⁰, eg. parallel to the tag.
-
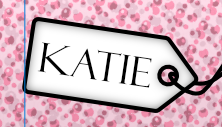
So I have a word inside a tag shape, and they are both parallel to each other. I want to be able to move the word left or right within the tag but not horizontally, I want it to stay in line with the tag shape. Is there a way to do this other than moving them both back to horizontal, adjusting and then rotating them both back?

-
Hi Dan C thanks for getting back to me. So if I wanted to keep the bitmap design to use in future fills I would need to keep it as a fiel somewhere, it wouldn't work from assets is that correct? I tried out your method and I noticed the adjustabel scaling and rotation that is very useful! As for the method for changing colour this would work on a monotone pattern such as this but not if I wanted to edit lots of different colours within a more complex pattern unfortunately. In this case would I still have to use symbols for these more complex patterns? or can you think of another work around?
-
Well I can't just redesign all my repeating pattern assets to be exact pixels as opposed to exact mm, that would take days! and I shouldn't have to as they are designed for print they need to be designed to exact measurements to make them fit properly. Because it is alot quicker once I have the stepped dot pattern to just repeat the symbol than realligning the dots in alternation. However like I said this particular pattern is very basic and probably isn't a problem, however some repeating patterns I've created contain lots of different shapes and colours. So if I were to need to adjust colour combos this would take only seconds or minutes adjusting one symbol to change the whole thing, whereas your way would take me literally hours or more likely days, which is obviously impractical.
-
Well because the symbol was an exact mm and so not exact pixels, if I were to align them all to exact pixels one end the other edge would not be aligned and then there would be a gap before the next symbol. Unless snapping to pixels also stretches the symbol, which I don't really want. As I am designing for a physical thing I need things to be accurate measurements. But are you saying affinity designer doesn't work when designing for print? Is this a long term bug, as I am sure I have noticed this few times before though not everytime I use symbols. Are they in the process of fixing this. If the objects line up exactly wether it be in pixels, mm, points whatever it should line up. Ah thankyou, that looks like a handy tip. I'll try that next week when I have a chance. But is there a way to have those bitmaps selectable from the programme somewhere, like with assests? or would they have to be just stored in a file on my computer somewhere? And is there a way to have them editable, so I could put that fill in and then say adjust the colour or sizing?
-
This would surely create an even bigger problem though wouldn't it? as if they are aligned to exact pixels, then the patterns won't be aligned so I will either have overlaps or real gaps as opposed to ones created by a glitch, so it will definitely print with gaps in then as there will actually be gaps in the design, whereas at the moment I have atleast created a design without gaps but it seems to show gaps and lines because of this glitch. Can you explain to me what anti-aliasing means? And with the one you created unfortunately I cannot then edit it at all which isn't any good for me. However I did try following the steps you mentioned about turning anti-aliasing to force off on my own one and this seemed to work on screen without loosing editability, but when went to print the gaps still appeared. So how do I go about creating a repeating bitmap fill? Thankyou for logging that with the developers. Rasterising at print stage did indeed solve the dark lines issue around the butterflies but not the little gap lines unfortunately. Thanks for your help thus far.
-
So why has it become a fraction of a pixel? How do I find out how big things are in pixels? And how do I prevent this from happening? The initial asset I created is just 40 x 40mm (and I assume an exact number of pixels). I just shrunk it down by dragging to a sensible size for the design, but surely this should snap to only exact numbers of pixels? I suppose with this particular design I could recreate it without symbols but alot of the time I need the symbol function especially if constantly adjusting colours etc. so how would I get around this issue? And any idea what is going on with the black lines, can you see if it prints like that for you?
-
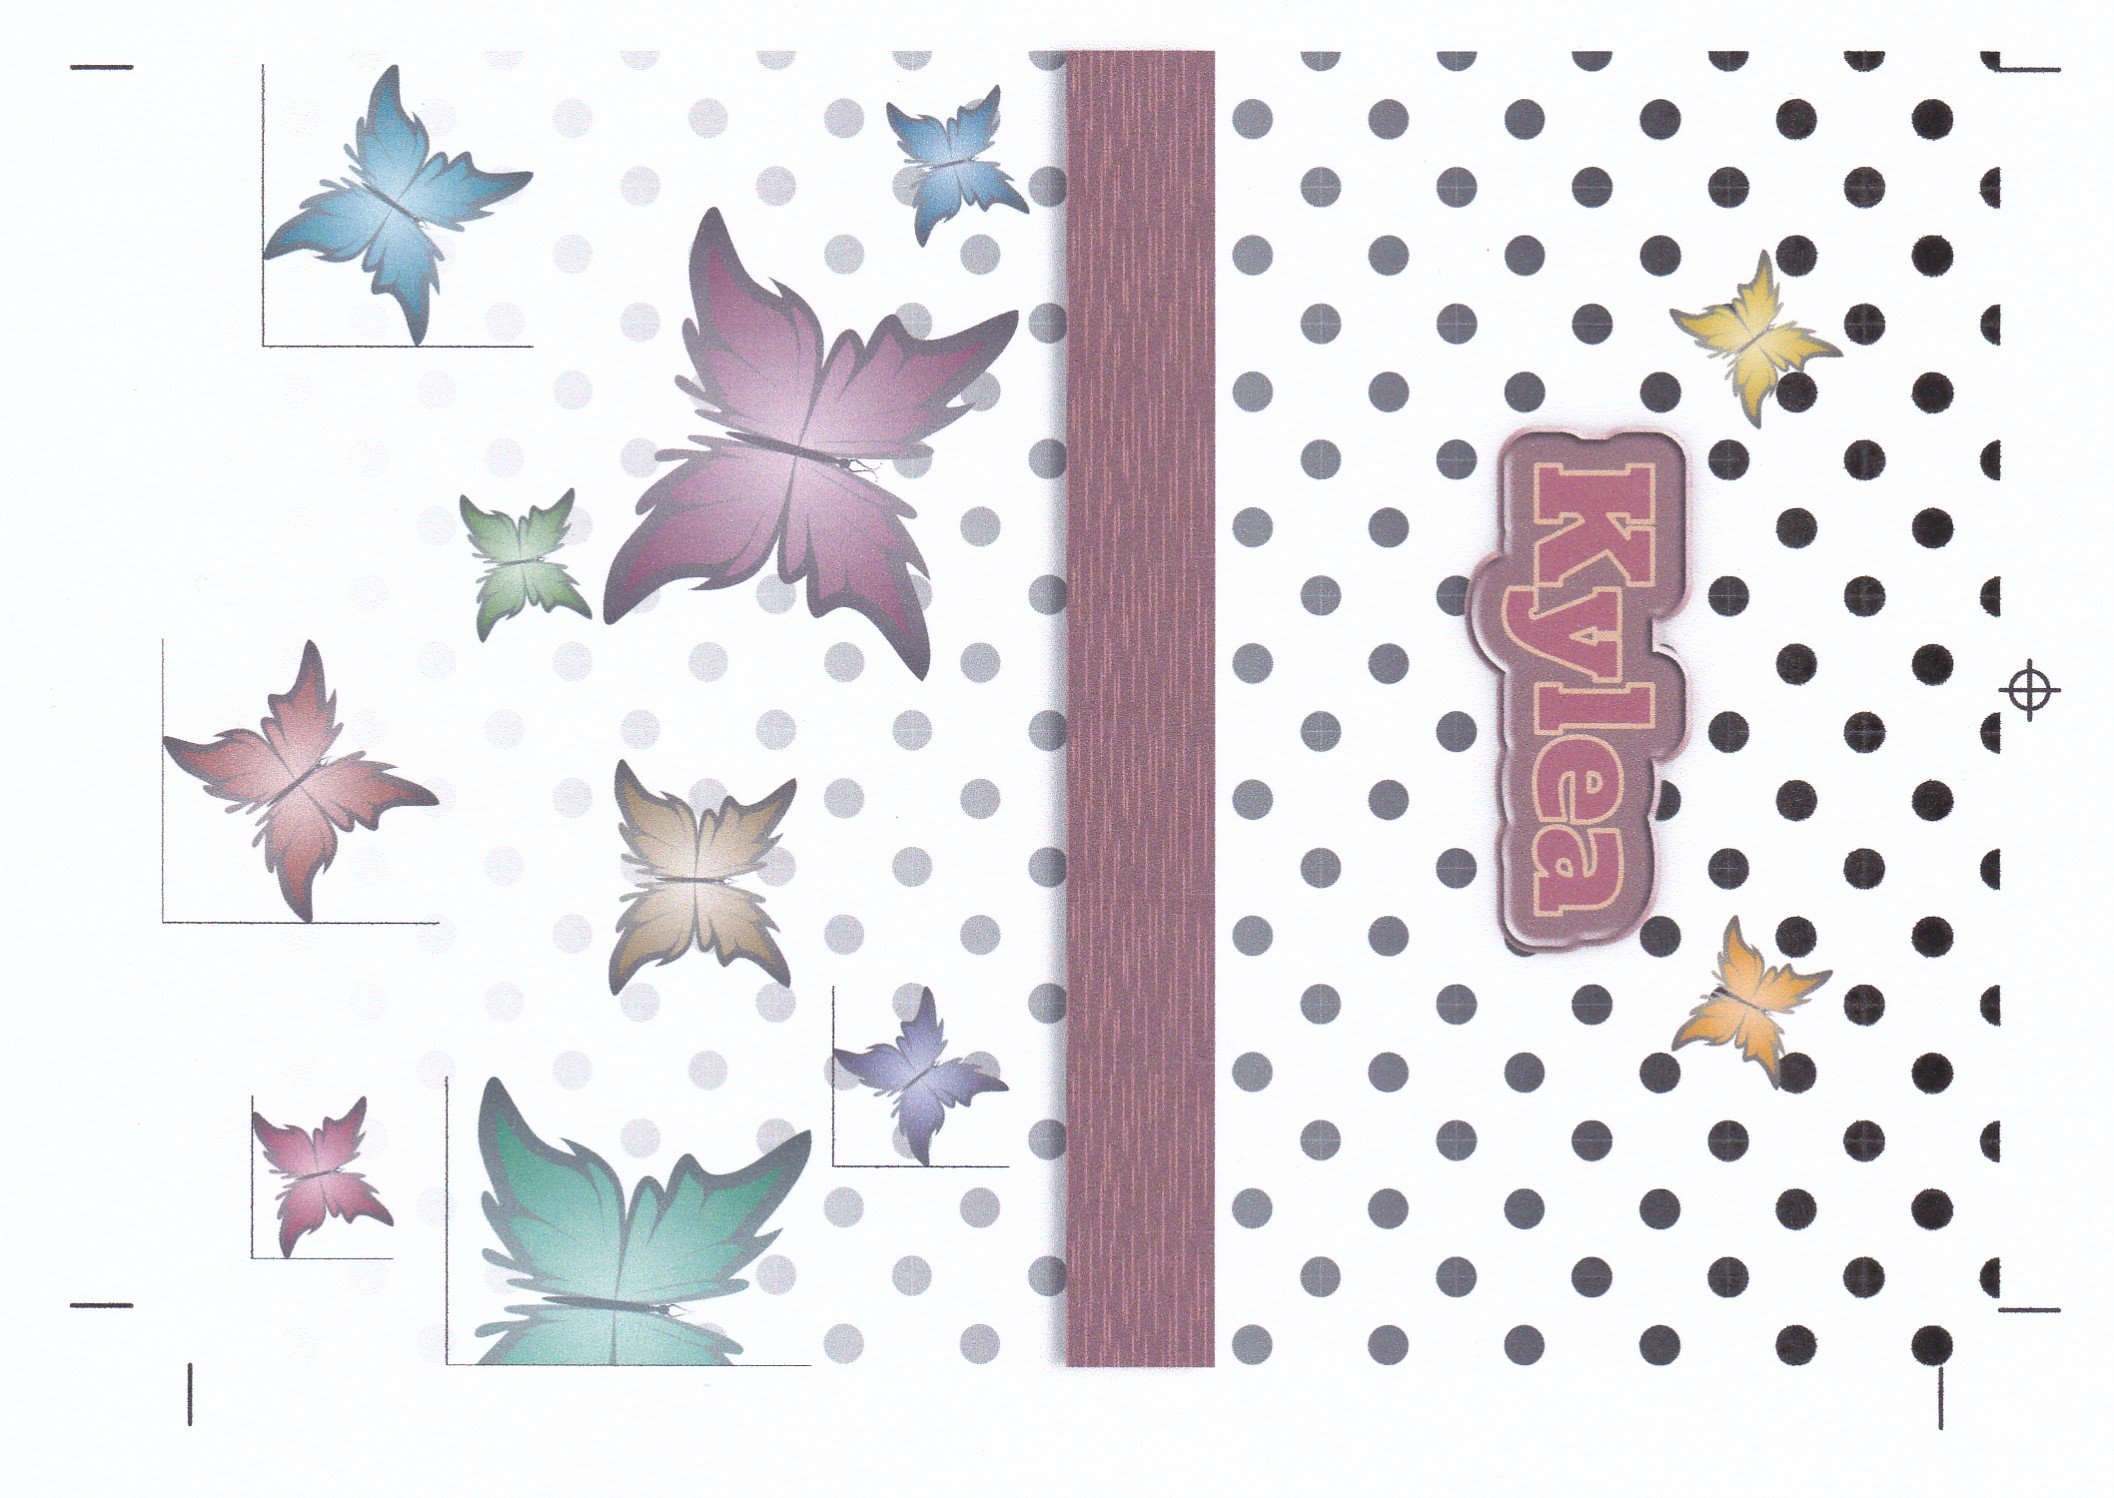
Similar problem again. Now seems to be printing random lines that are not part of design. Delved down into all the layers and cannot see any reason for these appearing as they are not part of the design. Firstly there are the black lines around some of the butterflies. Secondly there are the white lines (or gaps) going through the black circles even though these are perfectly flush with no space inbetween. These do atleast appear on the programme even though they are not there. I am aware this is a long term bug where it looks like there are lines there when there aren't and you can check by zooming in and they get thinner and thinner or dissapear so you know they're not actually there, and they shouldn't print out. But occasionally they seem to show up even on the printed version like this time. Though they never will if i export to another programme or file type, so again it seems to be another bug with affinity. I have checked and the print profile and colour profile of document match so not sure how to rectify this issue. I have attached both the design file and a scan of what printed. Please help. butterfies on polka.afdesign
-
Oh wow, not sure I fully understand but thank you!
-
Thanks. So when I print normally from affinity designer, that is when the weird shapes appear. If I export as anything else and print that from another programme or within affinity it prints normally. Oh I see what you mean, I have added that colour profile now.
-
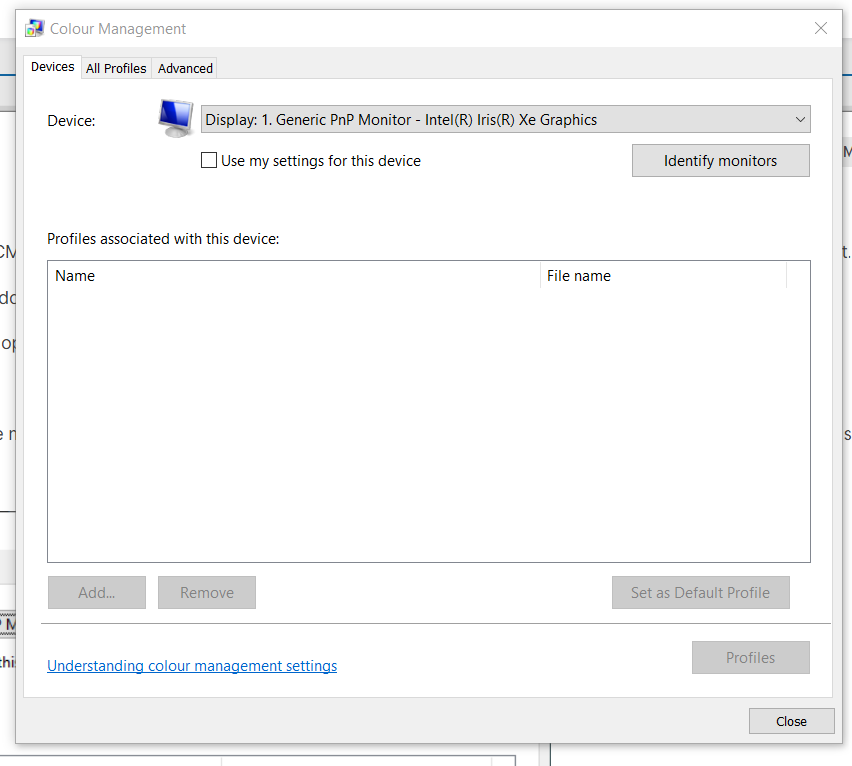
Ah! So when I changed the document colour format to RGB it actually instantly changed the colours on the screen, is this normal? And printing from that it did indeed seem to print more or less correct colours in reference to what was on the screen. When I change this setting will it change globally? or will I have to change it on all of my documents individually? So I have attached another document that was having a slightly different problem. As you can see on the jpg it is printing incorrectly with random blue bits cutting into the birds head which are not in the design and do not print when I print from other file types such as png. I tried changing the colour format for this but it did not resolve it. Any ideas what is going on here? So I ticked that box and nothing came up. I tried 'add' and the other screenshot here is what I saw. I didn't select any of them as not sure what is the 'same profile that is in use for my monitor' and what that would do. Don't know if this list tells you anything or not? newbaby.afdesign
-
I haven't chosen either of these profiles, it was just on that. But surely I should be using CMYK if I am intending to print and RGB for digital? I should mention it appears there are about 20 other options I can choose for the printer profile, but don't understand what any of these mean and cannot see a cmyk related one. But as I said before this cannot be related to my issue as whatever the difference in colour between the screen and printer, there is also a difference in colour between the same exact colours in the screen version in the print version. I tried as you requested above with the screenshot below but there don't appear to be anything listed in mine...
-
Oh I see, it says sRGB IEC61966-2.1. I am using windows
-
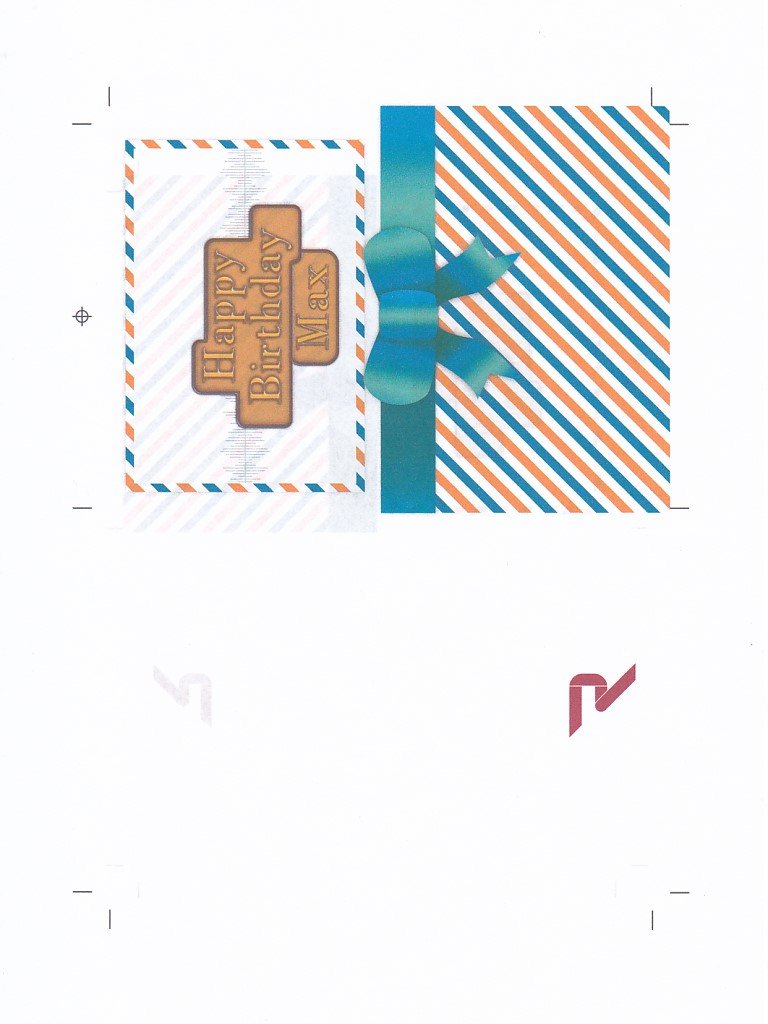
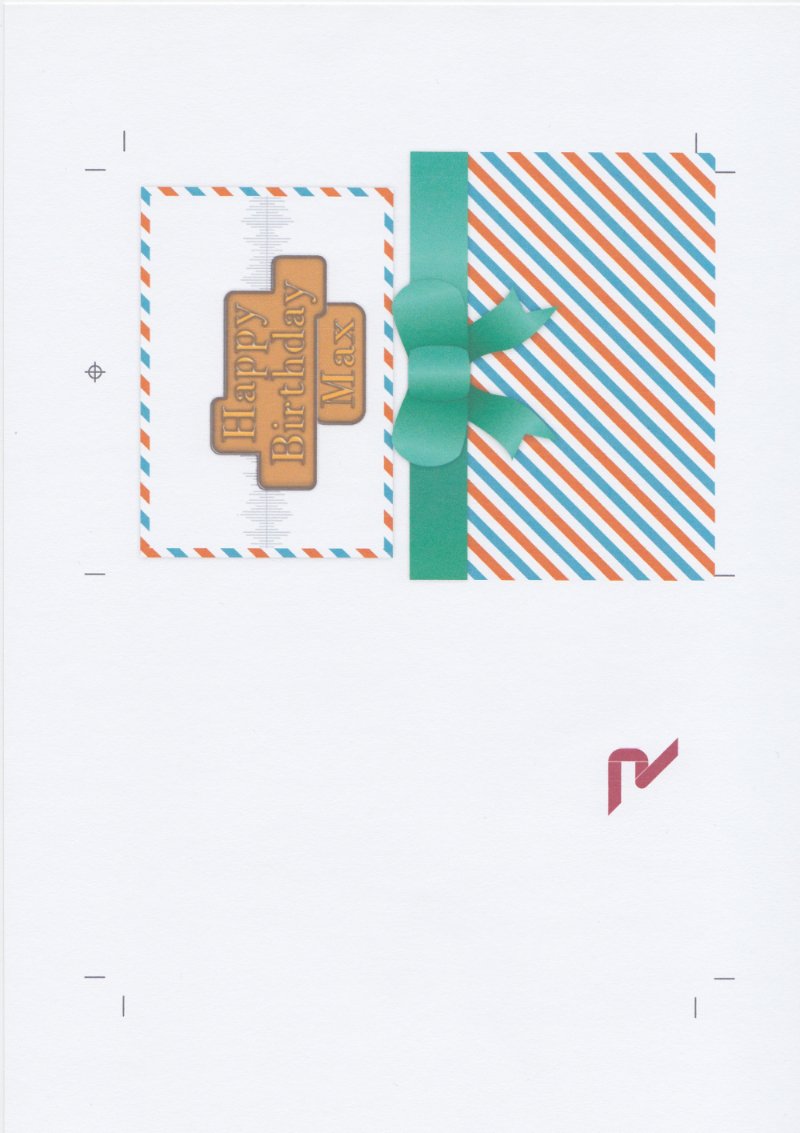
Hey heres the file. So colour format says CMYK/8 & colour profile says U.S. Web Coated (SWOP) v2... all I really understand is cmyk and rgb. But this cannot really be the issue here as some of the colours that are the same in the document are printing differently than each other, but they will print the same as each other from any other programme. stripes & bow hb.afdesign
-
Quite often I will finish a design I am happy with, go to print it only to have something else print that isn't what was shown on the preview. If I print it from another programme or in the case with this example export as different file type and then print from affinity designer it prints correct colours. In the past I have even had random big shapes added when printing from designer that won't appear if printing from a different file format. Anyone else had this or know what is going on?
-
Preview on OneDrive
ronanski replied to ekweb's topic in Pre-V2 Archive of Affinity on Desktop Questions (macOS and Windows)
Hi ekweb, when i click on that link it just takes me to a generic list of feedback, not your specific point -
Cannot see brush stroke until after drawn
ronanski replied to ronanski's topic in V1 Bugs found on Windows
Ah yes I didn't even realise I was within a layer. Thank you so much. -
So I'm sure this never used to happen but now I cannot really use the brush tool as it won't show what I am drawing until after I have finished a stroke and even then I have to hover over the whole area I have drawn before I can see it all. Rather a problematic glitch, so thought I close and restart the programme. I even tried restarting the computer, but it still persists. As you can imagine I clearly cannot use the app in this condition. Anyone else seen anything like this or know how to resolve it? Affinity Designer 2021-09-01 21-50-41_Trim.mp4
-
Preview on OneDrive
ronanski replied to ekweb's topic in Pre-V2 Archive of Affinity on Desktop Questions (macOS and Windows)
Okay fair enough -
Preview on OneDrive
ronanski replied to ekweb's topic in Pre-V2 Archive of Affinity on Desktop Questions (macOS and Windows)
But my point is that there must be something Affinity can do as it works on onedrive with other files (adobe files, png, pdf, jpeg, microsoft docs, spreadsheets & powerpoints all work fine on onedrive) - So how does microsoft, adobe and the others manage it? I even tried just making the affinity files 'always on this pc' but that still didn't work. -
afphoto file thumbnails in explorer window.
ronanski replied to Ludgateman's topic in Older Feedback & Suggestion Posts
I tried disabling files on demands, but this would not be a viable solution anyway as need this feature. This did indeed show the thumbnails and previews for affinity files but bizarrely it got rid of all the thumbnails and previews then for all my adobe files, and even more bizarrely it doesn't show the adobe icon for them but the affinity icon?! Anyone found a solution yet?? -
Preview on OneDrive
ronanski replied to ekweb's topic in Pre-V2 Archive of Affinity on Desktop Questions (macOS and Windows)
So I have read that this is a problem between Affinity and OneDrive not windows explorer. And thumbnails and previews work fine for all other programmes in OneDrive, it is just affinity that don't work. Is there a solution to this on the horizon? as this is a major issue. -
I just tried this and the thumbnails and preview appeared outside onedrive but as soon as i moved it to onedrive it vanished again. Am I missing something?
-
I have same problem but with designer files (probably same would happen with other 2 apps but not used them yet so don't know). All my files are on onedrive. I don't want to risk downloading a strange new app to my new computer. And I had a look at that solution but couldn't follow it but it seems very laborious to the point I would need a spare month every time I wanted to save a file which should take seconds.
-
2021 - This and many other basic functions that we are constantly being told are on the roadmap are still nowhere to be seen 5 years down the road... The raster workaround is useless. I need it to be an editable text path, or at the very least vector.