

CRWillow
-
Posts
80 -
Joined
-
Last visited
Posts posted by CRWillow
-
-
Thank you for checking into it. Just so you know I've tried using an old studio preset as well as saving a new one however all the windows change except for the swatch panel.
Thanks again.
-
I seem to have a similar problem with that my swatch panel keeps reverting to one I made and it appears to have a lock symbol on it like the colours and greys panel. So it's not just me. Thanks for looking into it.
-
No it's not solved. I had written about another issue too, that I decided not to bother people with it which was that Affinity V2.3.1 has been changing settings like my shortcuts or the angle on the clone tool which I can easily adjust when I figure out whats messing up but I can't figure out why it blends out side of the selected area sometimes. Today it's working fine.
-
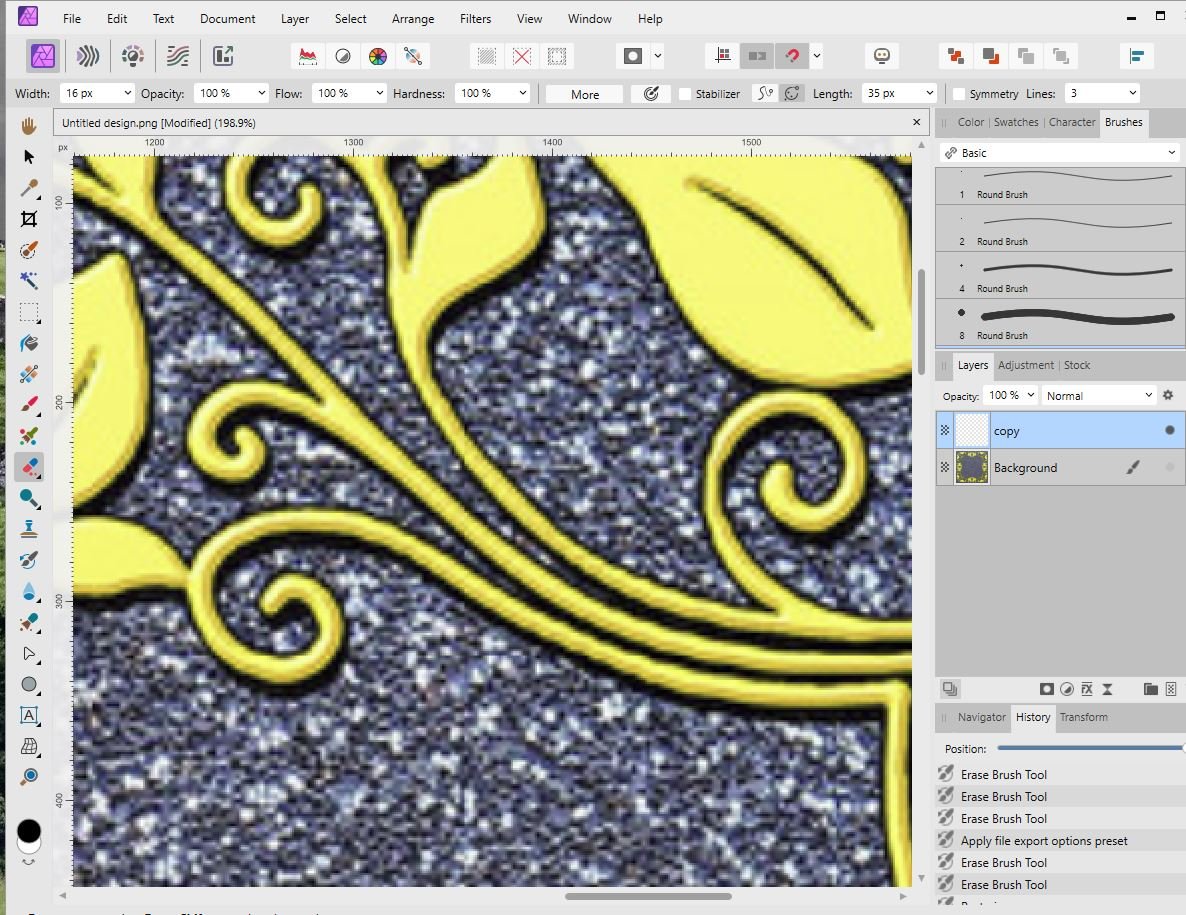
Maybe someone can help me figure this out. This doesn't happen all the time and restarting occasionally helps, not this time though.
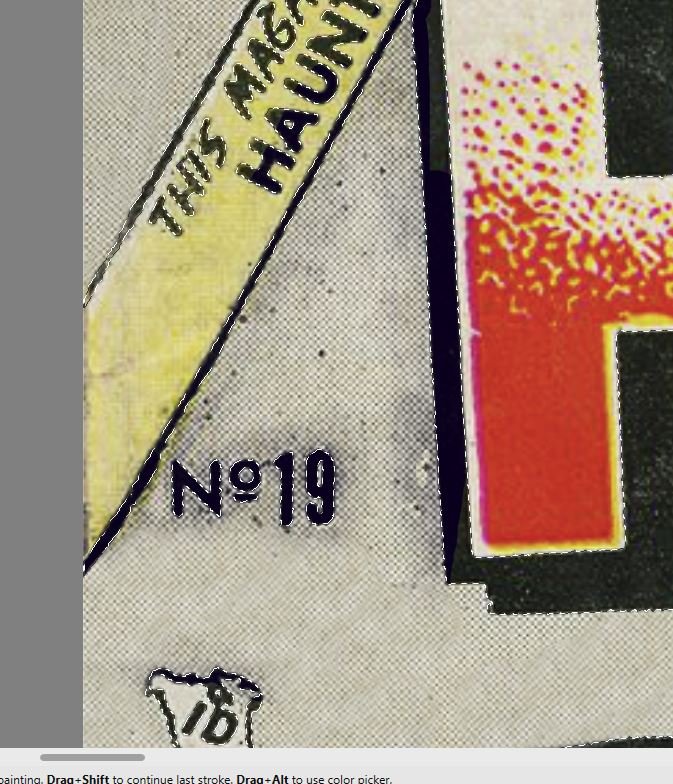
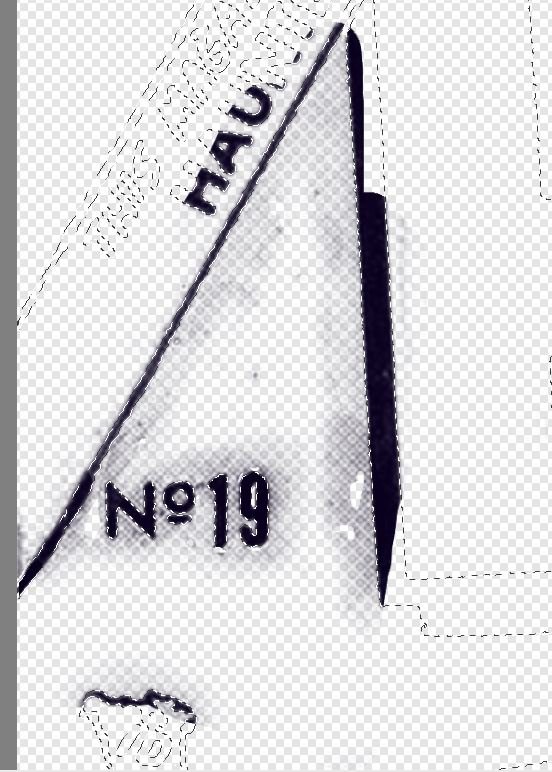
I use the wand to select an area, here I didn't use refine (but sometimes I do). I used the selection brush to clean up a bit which takes some time, then I add another layer to fill in selection to see how it will look. Then I select the paint brush tool, this one was hard round basic brush. Then as shown in the images the brush feathers/fades outside of the selection.Cloning tool doesn't feather.
The wet edges is off. I have the right layer selected.
PC Windows 10 Home
AMD Radeon (TM) Vega 8 GraphicsAffinity Photo 2.3.1.

-
I guess I'm having a dense moment because after reading this, I can't tell if this was solved with something that can be adjusted. I have the same issue. One unsharp mask seems to work until it's merged then it's looks much the same as without a mask. I've resorting to duplicating the mask a couple times and merging one by one until the image is sharpened to what is acceptable. I'm cleaning up old comic book covers and between the wear and tear, the bad print jobs and the not great download quality, they need to be sharpened quite a bit.
-
Thank you all for confirming there's a problem, I'll play with and make copies so as not to restart from scratch.
-
I did as you showed and it worked as long as I had a fill and stroke color and the two small circles are together on one layer, which you divided.
However I tried it again without a fill or stroke and got the following results.
The steps I took were -
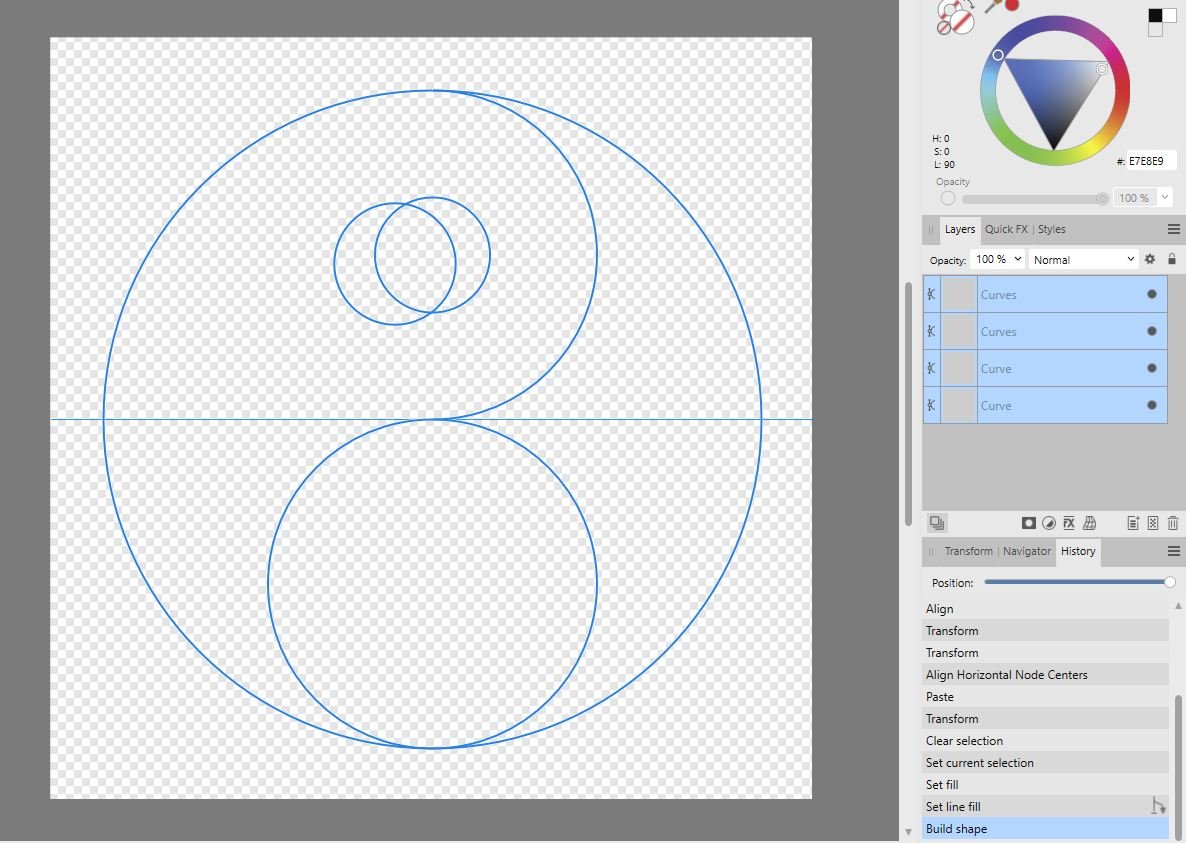
Draw a large circle, add donut with 35% hole at the top of circle, duplicate and place at bottom of circle. Select all layers, clearing fill and stroke. (Capture 1)
Click shape builder while all is selected, click the +/ add button and draw through the outer donut and the left side of large circle. (Sometimes the piece stays empty as in Capture 1a, Sometimes it goes grey as in Capture 1b) Now a double small circle appears on the first shape created. Plus as you see in 1a the second shape lost the small circle and left the outer part not joined to the large circle. In 1b the first shape changed to grey, gained a circle and the other side stayed clear without a fillable circle - just the hole.
Now on something simple like this I can clean it up but on a more complicate design I can see a headache arising. Are the shapes and lines suppose to have strokes and fills?, I don't remember reading that they needed to be plus most of the tutorials I've watched aren't filling the shapes until they finish the design.

-
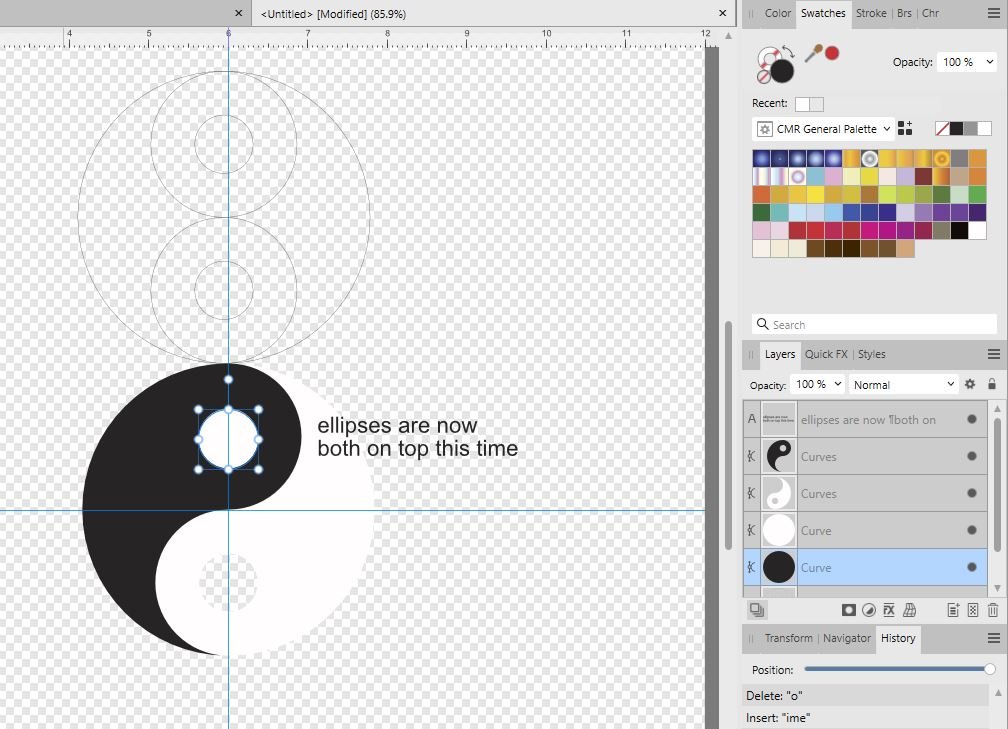
Hello Gurus, I have a question about the shape build and see others are having some issues too. I'm just play around with it trying to get the idea of what works and doesn't so this could definitely be a me problem and not a AD problem. I was following a YouTube demonstration for a ying and yang which I thought worked but when I started filling the shapes I find that both little circle end up together instead of where they are supposed to be.
I used the donut and ellipse tools as shown in the copy. You can see that the black circle is under the white one in the layer's panel instead of filling the empty space on the white yang? shape. I tried it several times and depending on which shape I add to first is where the circle disappears. If I start on the left, the circles are on the bottom, start on the right, they're on the top. So they're sticking to the last shaped added to. Any thoughts?
-
Thanks, at least I know I didn't shut something off by mistake. (Which probably would have been better since then I could turn it back on.) I'm using V2 and don't see according palette selected in the swatches panel.
I noticed the swatch stayed highlighted if I didn't apply it to anything, not terribly helpful.
-
Is there a way to highlight the swatch that's in use? When I'm using colors or gradients that are very similar, I have a really hard time identifying which is being used. I'm trying to renumber the swatches but it would be so much easier to see the swatch highlighted. I can't find it in the settings maybe it's there and I'm not seeing it?
-
Thank you so much, this is a help. I would love to work only in RGB but it will end up as printed material like paper and I prefer to see it as it might be instead of thinking it is vibrant and clear only to print drab and well drab. I have the document as CMYK but the color panels keeps popping to other color choices. I usually add documents making sure their all the same but it does as it likes.
I'll definitely add you above advice to my Affinity book of do this not that.
Thank you again.
-
-
I saved as and deleted all but two pixels and the mask. The history disappeared, so I deleted the mask and redid it at 000000 black as I did before and saved history with document in case you needed it.
-
The dots are on the parent layer - the one above the mask.
I selected that layer then clicked the mask icon, it appears as a child layer.
-
I'm trying to mask, hide some of the dots to see how it looks with fewer of them, I click the mask icon, the white block appears, I use a 000000 black and it doesn't mask the dots fully, their transparent like I've used a grey instead of full black. When I paint white over black solid dots on the mask if changes nothing. Painting over the transparent dots exposes them which is the opposite of what I'm trying to do.
Well I figured it out, it doesn't make sense but it works- I hit D to use the white and as I said it just demasks what I had painted over, I then clicked X and it changed to the default non total black of #231F20. This makes the mask opaque hiding the dots fully. I'm at a loss why it does but as long as I remember not to use real black I'll be set. Thanks for the help.
-
Hello gurus,
Foolish mortal here can't figure out why my masks aren't always fully opaque. My wet edge is off, color is 000000, the brush is 100% hard, all layers are 100% opacity, mask layer is selected, blend is normal. I've looked and looked to discover what I'm doing to cause this, because I'm sure it's user error, but I just can't think or find anything else to check. I used it about an hour before this and it worked fine.
I did find that duplicating the mask layer seemed to hide it but I'm not sure how well it would export.
I'm not sure if this is anything, however, I think I noticed that sometimes (maybe it does it all the time and I haven't noticed) when adding a mask the color panel changes to grayscale away the RGB color wheel. The black is still 000000 when I doubled check.
Thanks in advance.
Edition Windows 10 Home
Version 22H2
Installed on 4/6/2021
OS build 19045.3086
Experience Windows Feature Experience Pack 1000.19041.1000.0Edition Windows 10 Home
Version 22H2
Installed on 4/6/2021
OS build 19045.3086
Experience Windows Feature Experience Pack 1000.19041.1000.0AMD Radeon (TM) Vega 8 Graphics
AP V 2.1.0 -
In this case my goal was to have a the hat match that sort of matched the shorts. I ended up painting it with a 80% clone and paint brush. I just didn't understand why I get a bright flash when I hover over an area to patch. I guess it's a area size thing. I'll keep working with it and get better hopefully. Thank you all for your help.
-
I guess I'll keep trying to figure out what's wrong with it.
-
I hope this is a stupid me thing -I'm new to using the patch tool since I thought it was basically a stamp/clone tool only different so maybe I'm missing something because I can't get it to work consistently . Some times it's correct other times it is almost a blurred transparency, other times it turns dark almost a negative of what I rolled over but most of the time it's like here, I get a overexposed version of what I selected. This patch for the boys hat is suppose to be from his blue shorts. It's some what like it's got a blend on it some where but I can't find it to shut it off.
I thought it was the hardware accelerator but turning it on and off and restarting didn't seem to improve anything.
Thanks for any advice.
Edition Windows 10 Home
Version 22H2
Installed on 4/6/2021
OS build 19045.3086
Experience Windows Feature Experience Pack 1000.19041.1000.0
Processor AMD Ryzen 3 3200G with Radeon Vega Graphics 3.60 GHz
Installed RAM 8.00 GB (5.91 GB usable)
Device ID 7E73E226-816B-4557-B3CE-DE7BB0EFE693
Product ID 00325-81911-10548-AAOEM
System type 64-bit operating system, x64-based processor
Pen and touch Pen supportAMD Radeon (TM) Vega 8 Graphics
AP V 2.1.0 -
Yes, the blank thumbnail is a pain too. Nearly every time I merge, rasterize, or copy a layer it goes blank in the thumbnail. The actual canvas image is there as you see but no thumbnail. Some times it comes back before I shut down, other times when I restart in the morning, it's very temperamental.
Thanks Not My Fault, I'll try that the next time it gets fussy.
-
Did any one figure this out? I still have this problem off and on. Last night I had to restart three times, gave up and went to bed and it still doesn't work today. The brush has a circle outline and you can see the image through it.
Edition Windows 10 Home
Version 22H2
OS build 19045.2965
Experience Windows Feature Experience Pack 1000.19041.1000.0
Processor AMD Ryzen 3 3200G with Radeon Vega Graphics 3.60 GHz
Installed RAM 8.00 GB (5.91 GB usable)
System type 64-bit operating system, x64-based processor
Pen and touch Pen support -
Thanks Firstdefense I installed the brushes but my pen tablet seems to have stopped working with pressure. It remains the same size throughout. I was hoping Affinity would have added scripts and spirals to V2. found it here. Thanks for the effort - not your fault my tablet won't cooperate.
-
Maybe that's i; sounds like something I'd do.
-
This happens sometimes for several hours then it starts working. It's very difficult to know what I'm doing when I can't see the edges of a brush. It happens on both Photo eraser and paint brushes even the basic brushes won't show the edge. I'm working in Affinity 2 though this happened in the 1st version too.
Is there anything that needs to be turned on or off somewhere? I'm working on a PC with windows 10.Thanks for any help.


Is there a way to gradually reduce font size from one end of a sentance to the end?
in Affinity on Desktop Questions (macOS and Windows)
Posted
Sorry didn't see the update in my email. I am still experimenting with the suggestions, thank you all by the way,. I was hoping to find/make a PC macro, so I could try out different quotes. Your perspective warp came out much better than mine and I'll keep experimenting/playing however I don't get consistent results and it takes me more time than I'd like. The constancy and speed of a macro is what I'm hoping for but I haven't made many and don't seem to have gotten it right yet.