crabtrem
-
Posts
401 -
Joined
-
Last visited
Everything posted by crabtrem
-
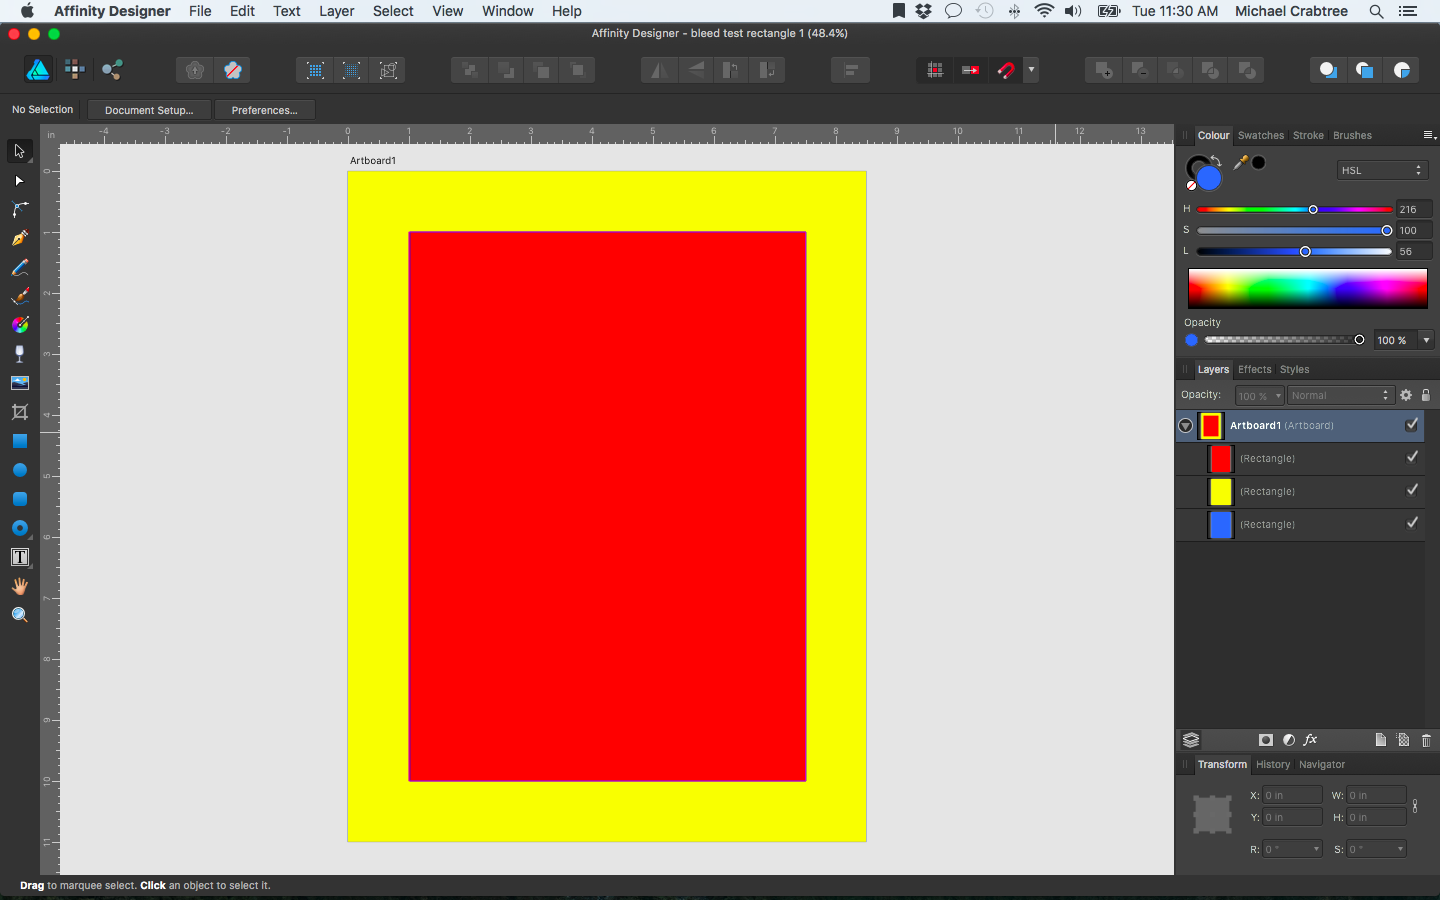
 I am no expert. But this is what I did to check various outputs. First I created my artboard example by using rectangles to highlight document areas, margin areas, and bleed areas. You can see them on the layers panel, even though the bleed is not visible on the main view. I then duplicated the artboards, and placed them under a single group. Then selecting the group, I went into File-Document Setup to check the new composite dimensions, and make sure the margins and bleeds were set. I then create that new slice from the group. So the normal 3 separate artboards with a bleed will look like this. trifold.pdf The grouped slice will produce this output. trifold_slice1_ver2.pdf But to be clear, I take the printer marks off. trifold_slice1_ver3.pdf So what you get is the 3 artboards as a single page pdf, but there is an apparent white area bordering that equates to a bleed. But it is white, and does not reflect the bleed areas produced by the blue rectangle under each artboard. At least that is my interpretation of what I believe is most likely going on. I could be wrong.
-
I would say your problem is inherent in the total size of your montage. No matter what you start at, you are reducing the pictures down to approximately 100 pixels or less in dimensions. And that means your detail will be degraded no matter what you do. You may try to reduce the size down using various resampling methods for each picture on their own to try and get a better result. But I am not sure you will get results much better. Pixel counts are absolute to the final file and the resolution detail available. All I can recommend you do is to try and increase your total pixel size of our final montage if possible. You may want to try a very large composite to begin with, and then begin to export your final down to various sizes trying various resampling methods as you go. There will be a point where you just won't be able to go any smaller for the detail desired. Of course these are only my personal observations, and may not be complete. But I feel that it is the crux of your problem.
-
Forgive me, but I am unclear on what your final result is supposed to be. Are you saying that you are making a montage from high res images into a composite that is 637x325 pixels total?
-
Unite Shapes
crabtrem replied to boomeraudio's topic in Pre-V2 Archive of Affinity on Desktop Questions (macOS and Windows)
I think I would use the same process of pasting two circles inside another with a significant stroke. spaceship_window.afdesign
-
I just wanted to finalize my interpretation of what might be happening. What I believe is going on, is that when you group the separate dartboards into a new document, and set the bleed. The bleed area of the new document takes precedence. There is a bleed area for the new document, but it is blank, or white. The previous bleeds of the individual artboards reside somewhere below the group, masked out.
-
I believe the easiest method would be to go to the View-Customize Tools-Reset. When you launch, you can also hold the Control key and you will have a long list of reset options.
-
I am no expert. Have you tried selecting the image you have labeled Alpha, and do a Layer-Rasterize to Mask command.
-
I am going to have to agree that if you want a useable bleed for a trifold brochure, don't use the group, create a slice method of merging the artboards into a single pdf page.
-
I went through the tutorial you mentioned, and if it is the correct one it is the organizations of your trifold into a group. Please, check, but for me, when I group them. So the group acts like a new document that includes its child artboards. Please try to select the group and go to document setup. You will have a document with the new dimensions, and you will notice that your margins and bleeds have been reset. Because it is in effect a new document, you have to put in the new bleed and margin parameters for the new merged document. If my interpretation is correct, you should just have to make sure your new trifold document settings has bleed parameters defined and it should work fine. Assuming I have understood your problem in the first place of course.
-
I actually was thinking of just used very small rectangles as lines as a solution. rectangles as strokes.afdesign
-
I doubt is this idea is any good. But I used two overlapping rectangles. The first with a stroke aligned on the middle, and I made that wider. The second on top is an inside align. I adjust the lower rectangles ends to fit and adjusted the stroke to looks. line width.afdesign
-
Selecting Objects
crabtrem replied to Bond's topic in Pre-V2 Archive of Affinity on Desktop Questions (macOS and Windows)
About selecting text within groups, I believe it does, but I am not sure. Just be sure to focus your click while actually over a character, not any white space, and it should select it fine. -
Photo ball
crabtrem replied to pappe's topic in Pre-V2 Archive of Affinity on Desktop Questions (macOS and Windows)
You can download the file at, https://dl.dropboxusercontent.com/u/83398901/grid%20of%20pictures.afphoto I will keep it up for a few days. -
Selecting Objects
crabtrem replied to Bond's topic in Pre-V2 Archive of Affinity on Desktop Questions (macOS and Windows)
Cmd-click on the objects to select it no matter if in a group or another layer. Making sure the all layers button is pushed in, I believe. Shift-cmd-click for selecting multiple items. If I understand your question, the text tool you can select text without first selecting with the move tool. Or at least I can. With the text tool, I select on the text object I want, then drag to select the text. You may just have to practice. Are you asking a question, or stating a feature request? -
Photo ball
crabtrem replied to pappe's topic in Pre-V2 Archive of Affinity on Desktop Questions (macOS and Windows)
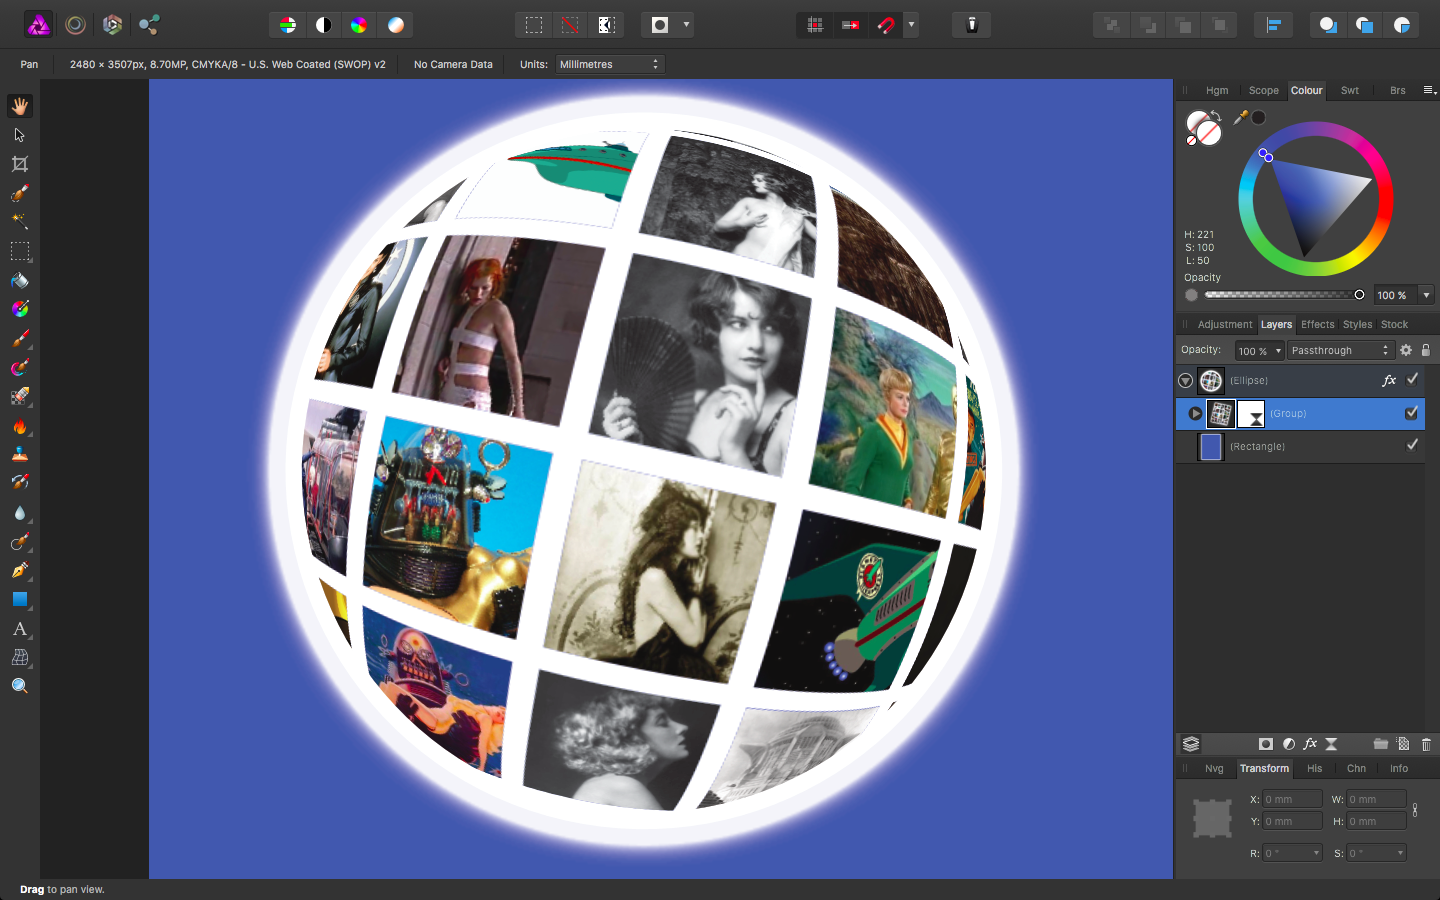
Good luck to you. I have decided against the File-Place in place of making an array of squares, and using paste-inside to hold the pictures. I then went through the same process of using the spherical filter, and pasting that inside a circle with some FX added. Hope you find success with your method. Look forward to seeing a result.
-
I'm not showing you a completed work by far, but just quickly using the inpainting brush to see the possibilities. You may consider starting with the inpainting brush as a start. I did the key first, then quickly went over the face. I think the results would be better if I had spent more time on it. From there you can use the clone tool to fine tune, or maybe even a mask to finish your work. Just something to consider.
-
Good Luck. Not that you want more things to consider. But I like to add, that many times the layer FX are sometimes overlooked. Or not thought of, and they can offer some really good tools. For blending in a selection, I find the Color Overlay FX, selecting a primary tone from the background will help you with your selection.
-
Photo ball
crabtrem replied to pappe's topic in Pre-V2 Archive of Affinity on Desktop Questions (macOS and Windows)
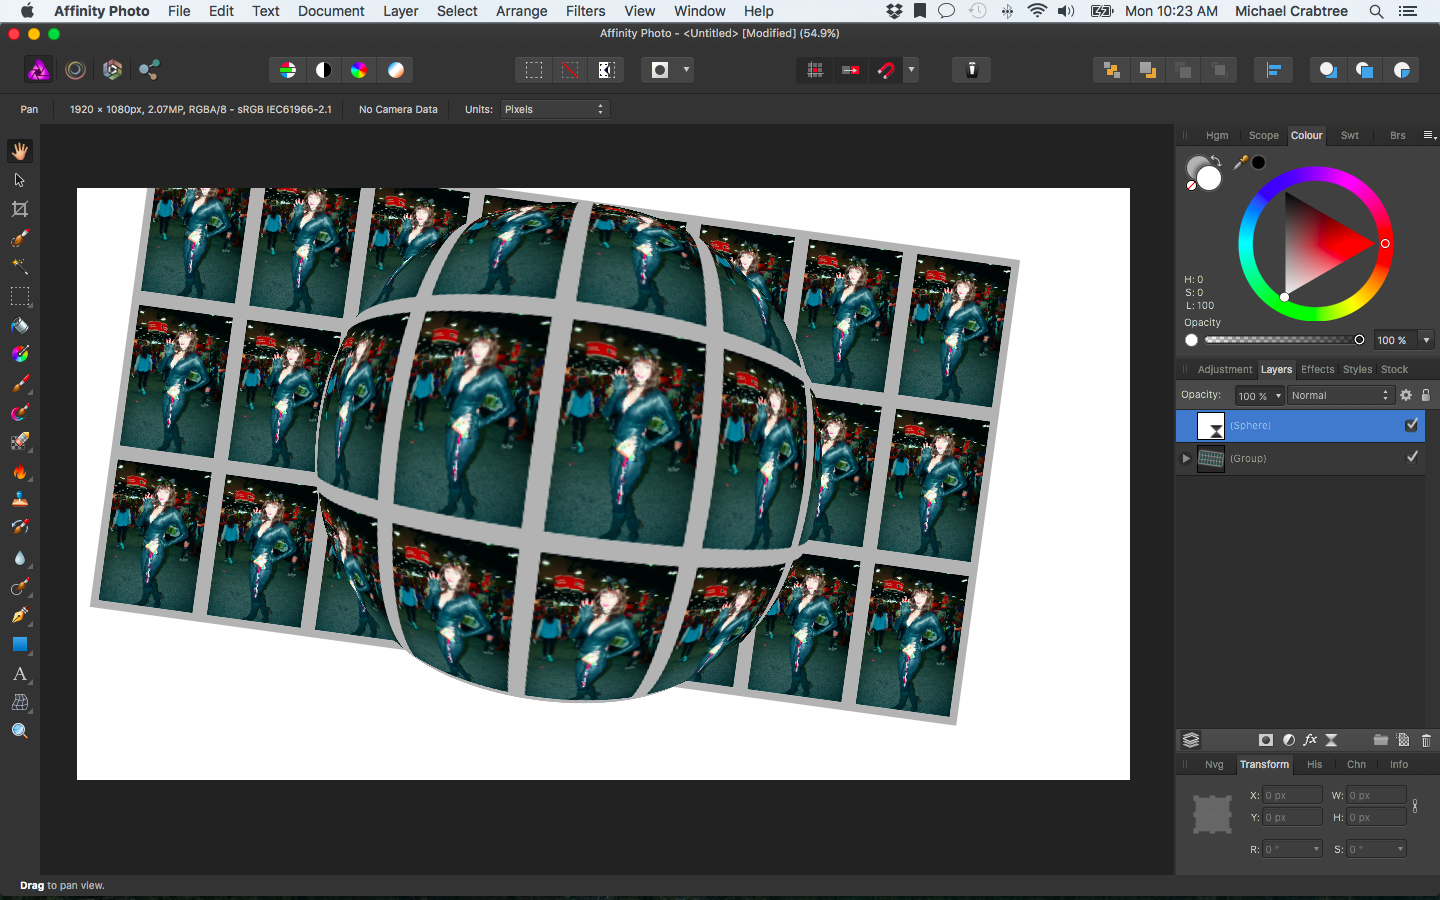
I'm no expert. But here is my input to you, for what it is worth. There appear to be two elements, foreground and background. For the background, I would probably use a combination of brushes and colors to create a streak pattern. Then place those within an ellipse object, adjust size rotation, add some FX like blur, etc. Use a combination of outer glow and inner shadow on the ellipses used. For the foreground. Assuming the array of picture is not created. I would start by creating that. First place an image into a file, File-place command. Set the size and stroke to your desired appearance. I would start with one image and with snapping on, place the original in the left corner, alt-drag to place a copy to the right of it, power duplicate, cmd-j across the top. Select the row, shift-alt-drag down to make a second row. Power duplicate that down the page. I grouped them together. select each place image and change it as appropriate. I then added an spherical filter and adjusted. I would then place that array of images distorted within a circle/ellipse object and adjust it with a combination of outer glow, and inner shadow. Now I am sure there are many methods, and most likely better than the one I used. But I add this for your consideration.
-
So not a default, but as MEB mentioned in Photo you can size your crop and add a custom preset, name it and you can recall it whenever you need it.
-
I didn't see your criteria to make the fastest way. I am sorry. I thought you were just asking ways to accomplish it?
-
Affinity Designer or Photo?
-
You can also make a duplicate by selecting your artboard and pressing CMD-J.
-
Well, I believe you are in the right area. I believe that video is in the Affinity Photo vimeo collection, which is where all of the tutorials reside. I think these will give you a good start for what you want.
-
My bad. For some reason I thought we were talking AP.