Steffenvy
-
Posts
31 -
Joined
-
Last visited
Everything posted by Steffenvy
-
It seems this bug still exists?
-
Can you not scroll by dragging the scrollbar instead?
-
I know, but I was referring to the star "Points" count

-
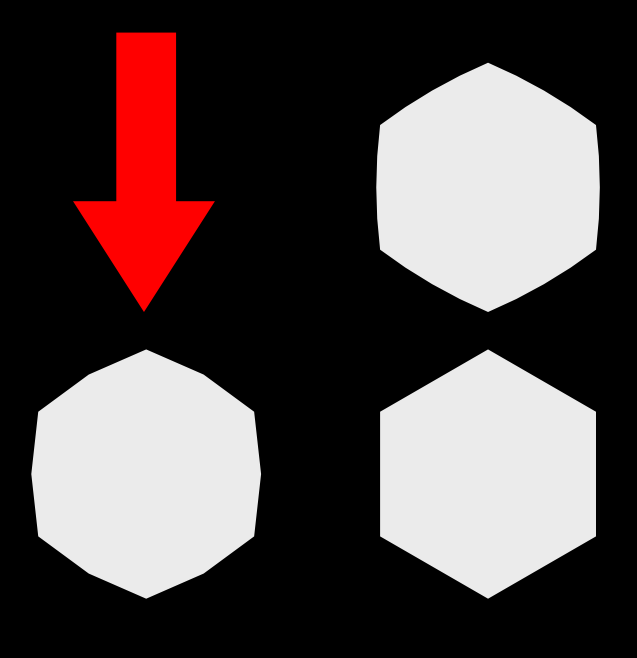
This shape, but without using double star so I can use an odd number of points:
-
That's a different shape because it's a smooth curve. It's just I've once wanted to use the star tool farther than the straight edge and I think there's no good reason it shouldn't be possible
-
Affinity Designer 2021-12-13 12-14-38.mp4
-
Masks can't snap to their parent, the masked layer. In the attached file, in the layer "Problem Here" there is an ellipse as mask; it's not possible to snap this ellipse to the rectangle it's masking. Snapping Problem.afdesign
-
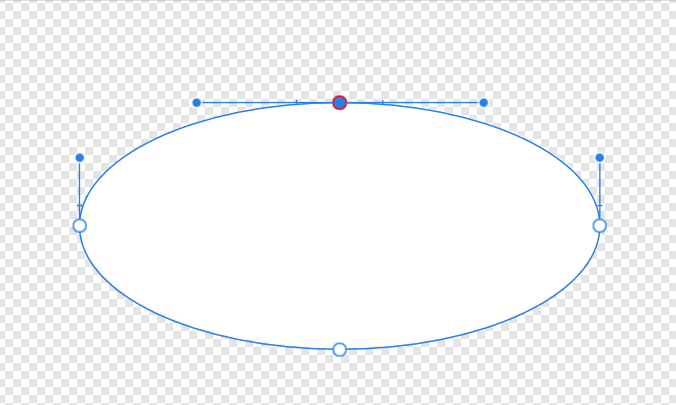
It's frustrating to have to select a point to show the handles: I don't have any reason to have any handles hidden, and if I press ctrl-a to select every point so that every handle is shown, then if I want to move a point I have to click click-drag when I want to move any point without moving all the other points.
-
With the double star, you can move both inner radius and point radius to 100%, whereas the star tool's inner radius is clamped to be no farther out than the straight edge (the percent depends on how many points there are) I would like to be able to make shapes like the one on the left, which works because it uses double star, but without being limited to multiples of 2.
-
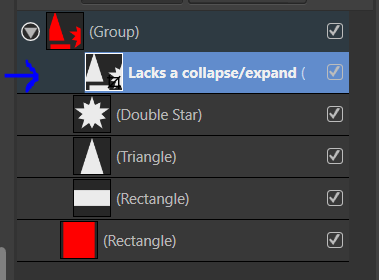
The expanded/collapsed state of a layer/group should save. It's annoying to expand many nested layers when reopening a file, especially when the layer is a mask:
-
When a group/layer with children is used as a mask, it doesn't have a button to expand/collapse, so I have to right click on it, scroll, and press "Expand Selection" Bug.afdesign
-
When setting up a bitmap fill, you can rotate and scale it, and when replacing the image (especially if you modified the fill image and want to update it in designer) it remembers most of that, except the aspect ratio gets reset. It seems this is done because it sets the aspect ratio to the aspect ratio of the image, but preferably it would instead set the aspect ratio as: newFillAspectRatio = (previousFillAspectRatio / previousImageAspectRatio) * newImageAspectRatio so that it remembers how you stretched the texture.
-
Create a shape such as a rectangle Convert it to curves Turn it into a symbol Select the shape inside the symbol in the layers panel Select the node tool, with [A] Click on an edge to insert a point in the shape. It will fail to do so, selecting one of the existing points instead. Undo. Depending on which edge you inserted the point into, it will either remove one of the original points, and create a desync from the symbol (the dashed orange line in the layers) even with sync enabled, or crash the program (probably by trying to remove an out of bounds point index, because it thought a point was added but it wasn't).
-
Layer/Group opacity inherited by masks
Steffenvy replied to Steffenvy's topic in V1 Bugs found on Windows
Whoa! This bug has been known since 2014! -
Crash.mp4 Crash 2.mp4 Crash 2.mp4
-
The node/move tool usually show a "procedural" shape's generation settings (as well as fill, stroke, etc.) in the context toolbar, but it doesn't when it is a mask. Only "curves" shapes display properly in the context toolbar when used as a mask. In the example: select the node or move tool select Triangle A and look at the context toolbar, then select Triangle B and look at the context toolbar. There is a lot of missing information, for example "Top point" But if you select one of the shape tools, it will show these settings properly. Context Toolbar Shape Bug.afdesign
-
It seems that dragging a symbol into a clone of itself is possible when it's a nested symbol (a symbol inside a symbol). This leads to a crash Drag the child symbol of one of the symbols to be the sibling (drop it underneath) of the parent's clone's child (the clone of itself in the other parent). Crash Bug 2.afdesign
-
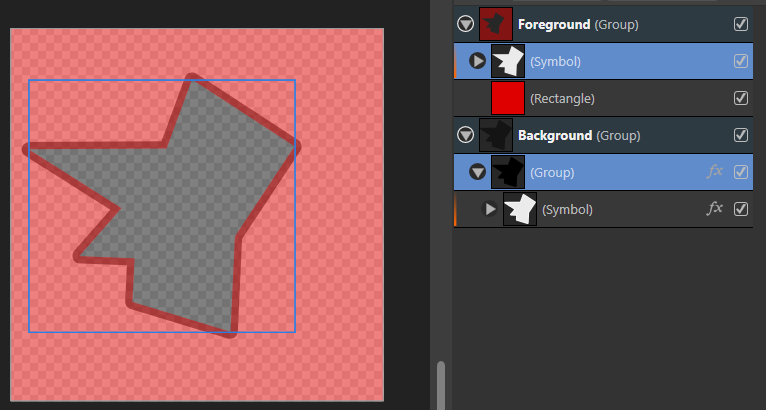
Adding a mask to a layer/group will multiply the end result's opacity by itself, since the mask inherits the opacity; so a 50% opacity layer/group will look like 25% opacity if a mask is added. In the attached file, the right layer and group are given a mask, and as such they look half as opaque as on the left (because 50% * 50% = 25%). (And the more masks you add, the less opaque it will end up being (so long as the opacity is not 100%), because each of them will inherit the opacity) Alpha Bug.afdesign
-
A group containing 2 objects with erase blend mode, changing/hovering over some of the blend mode options for only one of them will cause designer to crash Select one of the circles in the group. Try to change the blend mode to "normal". It does work to change them both to something like "normal", and then change one of them back to erase. But changing one of them when both of them are erase will crash. Crash Bug.afdesign
-
Has this still not been resolved? Or has it just reappeared, because it's a problem still
-
I frequently have objects with different parents which should always transform together, for example I can have an Erase object which cuts a certain layer and reveals itself underneath, something like this (but generally much more complicated): They are separated so I can export the layers individually. It would be good if I could save a selection of objects (whose relative positions, rotations, and sizes should always be maintained), similar to how snapshots or symbols are created. Then if I want to move them all I can easily select them all, by selecting the selection group.
-
Alpha curves doesn't work in export
Steffenvy replied to Steffenvy's topic in V1 Bugs found on Windows
You haven't forgotten this right? -
Alpha curves doesn't work in export
Steffenvy replied to Steffenvy's topic in V1 Bugs found on Windows
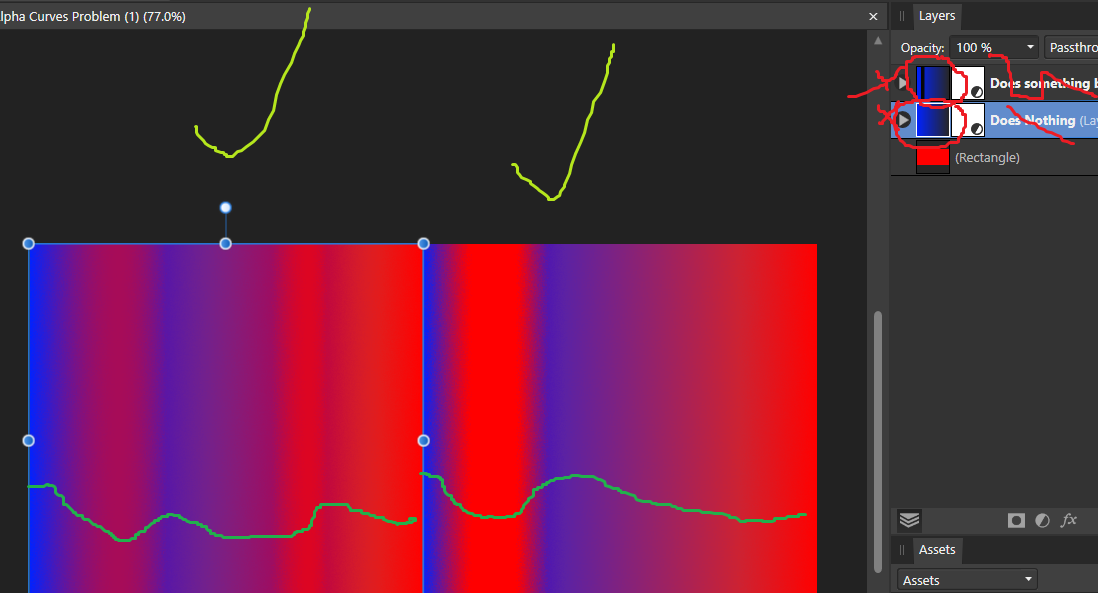
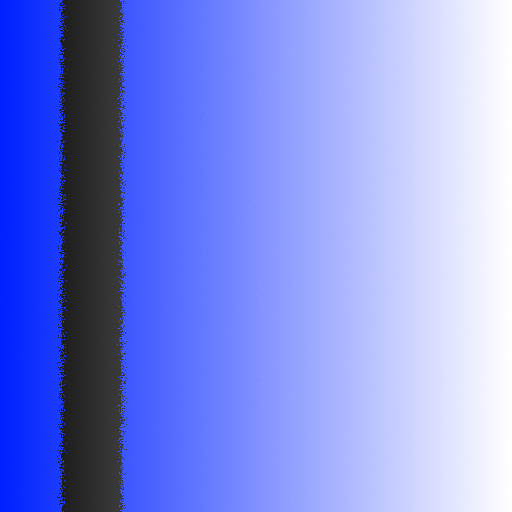
For one, it's a visible problem before even exporting. The problem shown in the main window and in the "background" (whole canvas) export is correct, but the icons the rest of the place is how it looks on exporting the individual layers: broken.
-
Alpha curves doesn't work in export
Steffenvy replied to Steffenvy's topic in V1 Bugs found on Windows
It's... still a problem guys! -
Try exporting this file, it won't remap at all. Only when the alpha is remapped below 0 does it do anything, but it's still wrong. Alpha Curves Problem.afdesign