Switcheroo
-
Posts
11 -
Joined
-
Last visited
Everything posted by Switcheroo
-

Crop according to selection
Switcheroo replied to San Lee's topic in Feedback for Affinity Photo V1 on Desktop
+1 -
Shortcut for applying macro
Switcheroo replied to larsbre's topic in Feedback for Affinity Photo V1 on Desktop
+1 People that make macros like to apply them a lot. -
Perfecto. Thanks Carl! This will work for now until it is a feature that can have a keyboard shortcut. The magic happens in the "Apply Image" step where Carl lays the background over the span of the selected area to invent a bounding box one layer up, before the Clip Canvas step. This works with the magic wand and other complex selections too. Nice one.
-
Virgoram, yep that method (New from Clipboard) works when your selection is a perfect rectangle, and is worth knowing in the current state of this issue. When that method (New from Clipboard) is applied to Dru's example, the new image is mostly transparent in the middle. This selection bounding box to crop is the issue to have Affinity chime in on.
-
Dru, we agree. Another good example of using the selection tools creatively.
-
+1
-
Thank you for pointing this feature out to me. Very handy. This solution does allow automation, but does not include the missing pixels from the selection, which is what a crop is.
-
Yes, I covered the reasoning for magic wand above... The whole point of requesting Crop to Selection (the nature of this thread) is to make use of the powerful selection tools Affinity provided. You are suggesting alternate marque tools, but there are a crazy amount of other ways to get an active selection (ie: CMD + click layer icon, selecting ranges, loading selections, etc..) which is why being able to isolate the image down to the bounding box of that selection is so desirable. I appreciate your continued ideas and seeking clarification on an answer.
-
This is a difficulty (or pinch point) presented by Affinity Photo due to the only programmable crop method being Clip Canvas. If there are other methods I am not aware. My example was to illustrate the desire to go from a variable selection shape down to a crop. ie: Crop to Selection. I could give other examples so we don't get hung up on the magic wand; multiple additive square selections creates the same problem. CaiAllin's post currently gives the closest answer so far: File > Export > Area > Selection with Background I tested it, and this does include all of the pixels within the selection boundary (upper left corner through lower right). However, this requires dialog boxes and leaving the program to reimport exported work from disk.
-
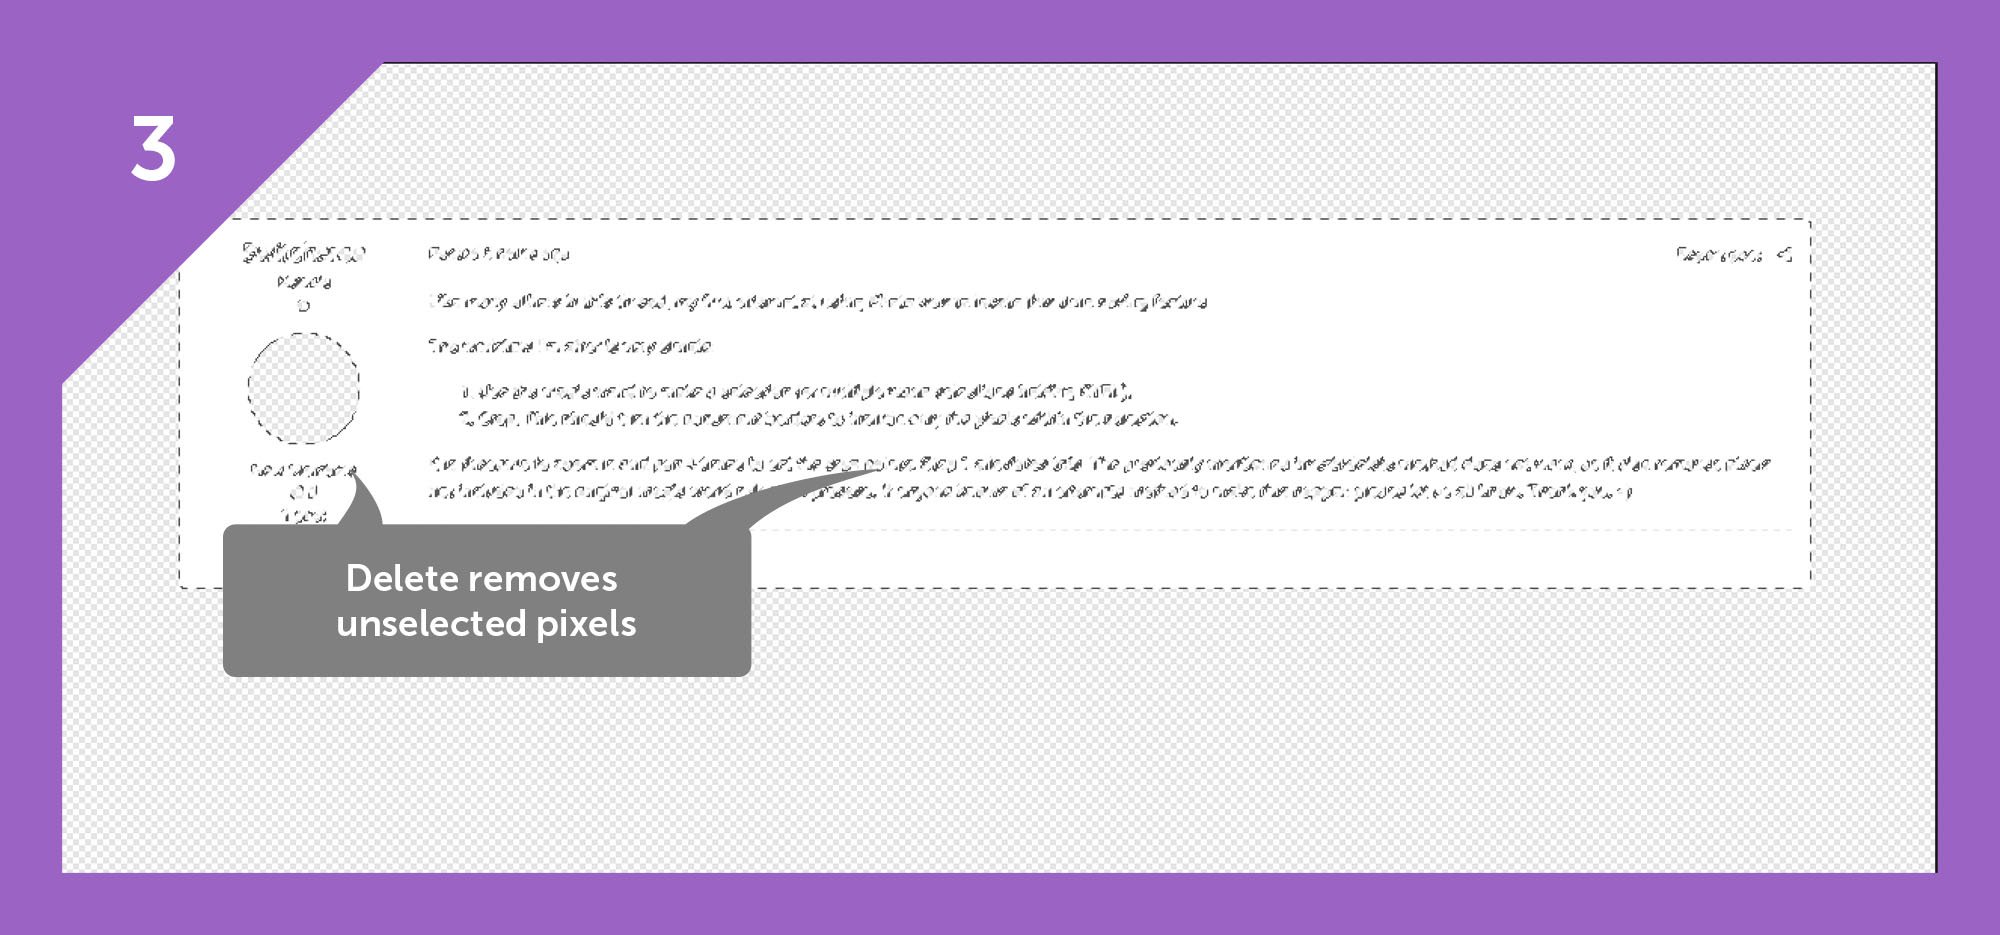
Thanks Walt. How about a quick example so that you can see what I mean by: "it also removes pixels not included in the original selection" Let's pretend I wanted to extract my own quote above for use in another app (ie: video editor, or website project, etc..). After I take a screenshot and open it in Affinity Photo, I will walk through your steps that show the failure (images below): Select the white area of my post using magic wand with a zero tolerance Invert the selection to prepare for Delete Press Delete (checkerboard is transparent) Clip Canvas (dark grey is UI frame) As you can see the initial step to make quick use of the wand tool also removes inner pixel data during step 3. The main topic of this thread "Crop to Selection" would solve this as it negates the need for the Delete key. I use "Crop to Selection" in both GIMP and Photoshop, but would like to migrate this type of workflow to Affinity, especially the batch/macro tool. Basically, I'm look to see if there is any way of making the crop tool precisely target all four corners quickly.

-
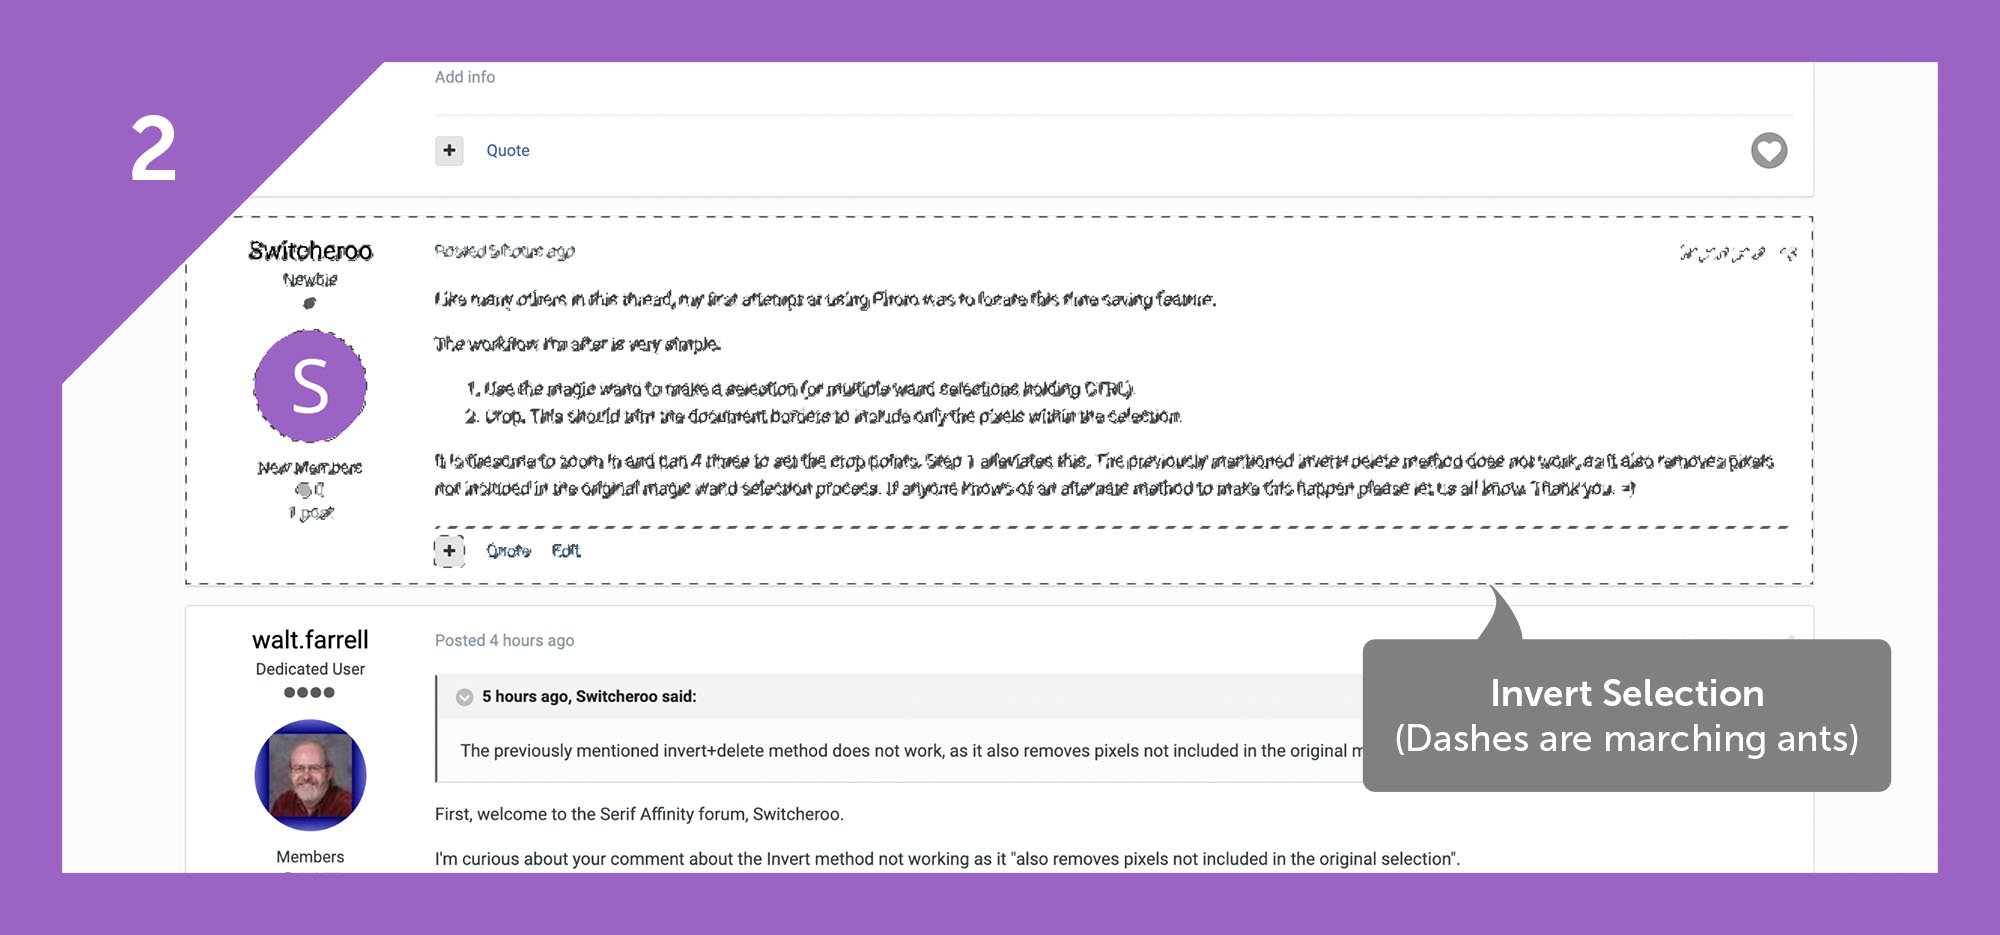
Like many others in this thread, my first attempt at using Photo was to locate this time saving feature. The workflow I'm after is very simple: Use the magic wand to make a selection (or multiple wand selections holding CTRL). Crop. This should trim the document borders to include only the pixels within the selection. It is tiresome to zoom in and pan 4 times to set the crop points. Step 1 alleviates this. The previously mentioned invert+delete method does not work, as it also removes pixels not included in the original magic wand selection process. If anyone knows of an alternate method to make this happen please let us all know. Thank you. =)