Little Owl
-
Posts
26 -
Joined
-
Last visited
Everything posted by Little Owl
-
Thanks Brian. I just remade the portion of one of the logos I had issues with using the pen tool & it looks clear now. I found some odd stuff happening in that it had somehow grouped a portion of the text to the image. Totally weird.
-
Thanks Brian, is the pencil tool also vector?
-
Hi Everyone, Happy New Year & thank you for your replies. I'm trying to achieve the quality I want in my logos & still struggling & unfortunately Serif Support have not been very helpful - they just tell me my files contain non vector graphics. QUESTION: If I create a line drawing using the designer pen or brush tool how do I get it to export as vector so it's clear like the text portion is in PDF etc??
-
Thanks heaps - I'll give that a go tomorrow as end of the day here in Australia.
-
Medical Officer Bones - hope you can reply as per my question above?
-
Yes, it looks sharper - thank you. Did you achieve that in Affinity or with Color Quantizer? I tried editing pixels but it didn't work - I ended up with blocky edges instead. If you could share your process I'd appreciate it.
-
SVG is vector format so it's not converting a vector to a bitmap from my understanding when exporting as SVG, simply converting a vector to a different type of vector?
-
I had the export setting selected but also tried high quality but unfortunately it made no difference.
-
Brian - The logo is being used in email signatures & in a web site, so it has to be viewed in a web browser. SVG was designed for internet use so you would think it would be the bets option. Palatino - at large size it looks fine - it's when used for a web logo that the client is seeing that it's pixelated - compared to an older logo she had elsewhere a few years ago - that old one is clearer & it uses script style font & has very thin lines in the graphic component as well, so I don't see why my design isn't at least as clear as that one. It's late night here in Australia so I have to sign off for now - I do appreciate all the advice from everyone, but it seems there is nothing I can do to fix it so I'm thinking I'll just refund the client the money & call it quits. I don't know what else to do.
-
But SVG export is vector, so I don't understand why my leaf elements in the design are not clear when exported as SVG? The original reply I received was as follows - can anything mentioned here make a difference? " They are likely not pixel aligned. View > View Mode > Pixels preview You may also want to turn on pixels as document unit, Force pixel alignment snapping, use and snap to a 1-pixel subdivision grid, set Preferences > User Interface > Decimal Places > Pixels: 6 (to see the actual misaligned values in the Transform panel), etc. "
-
So why is my grey shape not clear when it's made with vector tools?
-
I appreciate your help, I have created a 450px wide artboard & copy pasted the logo. Viewed in pixel view - it looks a mess. I added a rectangle to compare & it's crisp as anything. I drew a shape with the pencil tool & filled it - jaggy. Why? Here is a screen shot at 200% so you can see what I mean.

-
I am still trying to find out why it is not clear.
-
Thanks, I'm still seeing some jaggy in the white strip inside the leaves on both your version & mine. Can anyone expand on what Loukash said below regards not being pixel aligned? See my reply to him top of thread to see what settings I have.
-
That's odd as even the leaf is a bit jaggy in the SVG for me & the client. Could you attach your version so I can compare?
-
Also, only thing changed regards how I normally create logos etc is that I updated designer to the latest version 1.10.6.1665.
-
Thanks for the replies - I have uploaded the file in my reply above, so any suggestions to get this to export as PNG & SVG & not be jaggy would be appreciated.
-
Yes, here is a copy of it attached. Thanks for any assistance. TEST Meliora Logo.afdesign
-
Thanks for your reply jimsim, but it doesn't help answer my question as to why my PNG's & SVGS are jaggy.
-
The attached logo is the size it says in the file name, I export the image at different pixel sizes as PNG or SVG (which is vector so shouldn't pixelate) for the client to use in various media, but this particular logo unlike others I have done when added to a website for example at the correct pixel size if PNG or as an SVG is still jaggy as explained.
-
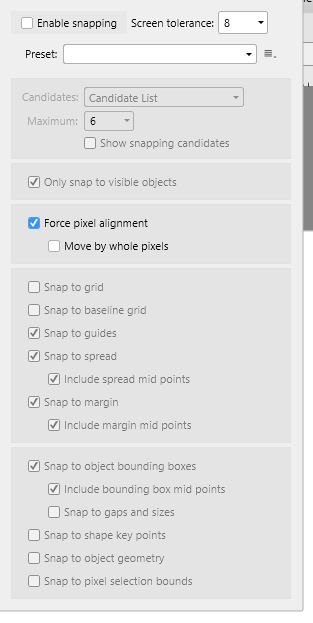
Thanks for your reply. I'm not greatly familiar with all the settings you have suggested, so any further clarification would be appreciated. In View > View Mode > I don't see ant pixels preview option - see screen shot. I have the document unit set to pixels. I set decimal places - pixels to 6 in my user interface. I have turned on 'force pixel alignment snapping', I have 'move by whole pixels' turned off. - is that correct? In the drop down in that snapping group - the settings are currently as per attached screen shot.
-
Hi, I created a logo for a client in designer, looks great in the PDF version, but all the pngs, jpgs or svgs I export look slightly jaggy. I thought maybe it was the font I used, but the leaf graphic I drew in designer is also exhibiting the same issues. Any ideas how to fix this issue as I've never encountered this before - could it be associated with the latest update? I'm using version 1.10.6.1665
-
Thanks, that worked for existing frames with borders & also new text frames are now border free.
-
My Affinity publisher seems to be doing quite a few odd things lately. I have version 1.8.5.703 On export to PDF any new text frame I add has a 1px border around it - I have tried to remove it using text styles etc but no luck. If I however I copy one of the previous text frames in my publication before this happened which is using the exact same text style & copy/paste the text from the offending text frame into it - it has no border! This is driving me crazy - how do I add a new text frame where the default is no border?
-
Thanks for the helpful replies - much appreciated. I tried out the different suggestions, but in the end found a quicker way by just playing about that suited the end result I needed. After enlarging the image as above I created a duplicate of the image. On one image I used new adjustment > levels> selected colour type as grey. I then increased the black level to enhance the image & reduced the white level to make the background white. I then applied a filter > sharpen> unsharp mask & played around with the settings to sharpen it without getting to jaggy. I then did the same with the duplicate but making it a tad lighter, cropped the image to leave just the left side flowers. Then used the erase tool to remove bits I didn't need & placed it over the other image, matching it up, grouped the lot & exported. I also used the erase tool to clean up a few spots on both images. Probably totally unconventional but what ever works I'm good with. Image attached - what do you think?