

im140.6
-
Posts
28 -
Joined
-
Last visited
Posts posted by im140.6
-
-
58 minutes ago, Dan C said:
Hi im140.6
")
Are you referring to the following stroke?
This may be caused by the Spacing of your brush - can you please select this small brush using the Paint Brush Tool, then select More on the context toolbar to open the brush editor and provide a screenshot of your settings here?
Many thanks in advance!
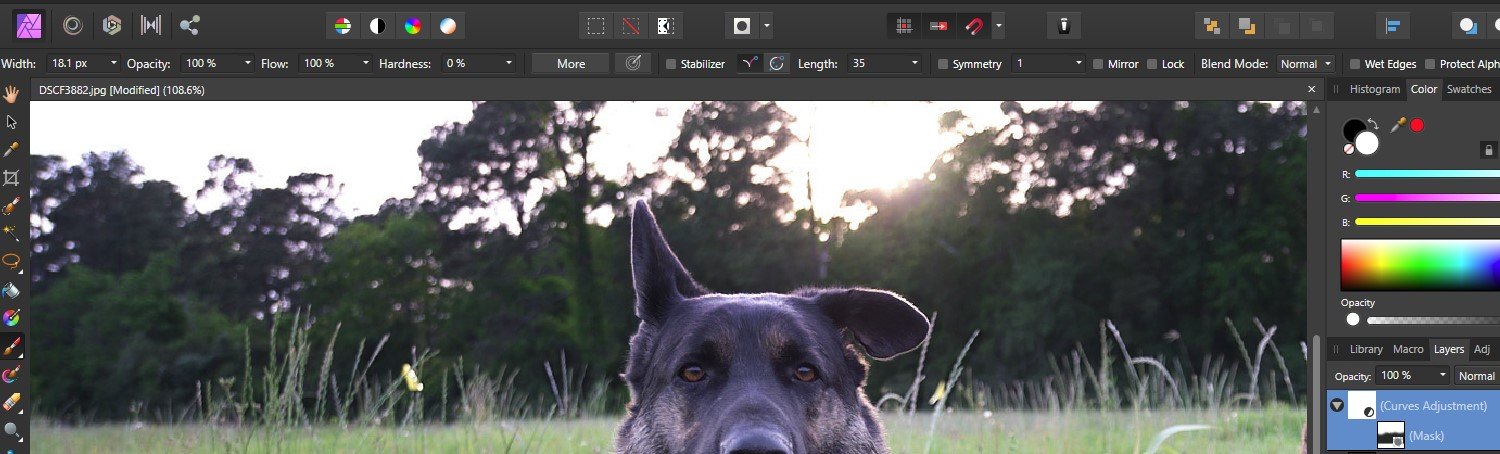
Hey thanks for your reply @Dan C! For the sake of illustration, I used a big brush, about 400-500px, 100% opacity & flow on the trees in the background. Since the "softness" of that huge brush won't get the detail around the dog's head, I decreased the size to 18px to work around the head. In my 2nd post in this thread (above), you can see I blurred the background but when I tried refining my brush around the tall grass between the dogs, it's clearly masked.
How do I get a smaller brush to act like the larger brush in terms of softness? Or am I asking the impossible? Apologies, I'm still learning everything so I may be requesting a workaround that's not possible.
Yellow #1 is the huge brush, yellow #2 is the smaller brush:
-
8 hours ago, Ray S. said:
Maybe you have set "wet edges" on, it's on the right side of the context-tool-bar.
I double-checked and "wet edges" isn't checked. Thank you for your reply too, I really appreciate it.
-
8 hours ago, RichZep said:
Hi im140.6,
Welcome to Affinity forum.
I was a bit confused by your explaination and I am also unsure what you are trying to achieve but I hope I have it.
If you set the hardness of a brush at 0% that is the softest and 100% is the hardness. The softer the brush, the further it will 'fade'. So if you want an edge with a sharp defined edge use 100%.
Now to the bit as to why it looks harder when using a small brush. It's to do with the 'feather' or softness as a percentage of the brush stroke. If you set the hardness to 0% and brush to 2000px you will see the feathered edge but if the brush size is 80px it looks solid.
Hope this makes sense. Sorry if it doesn't
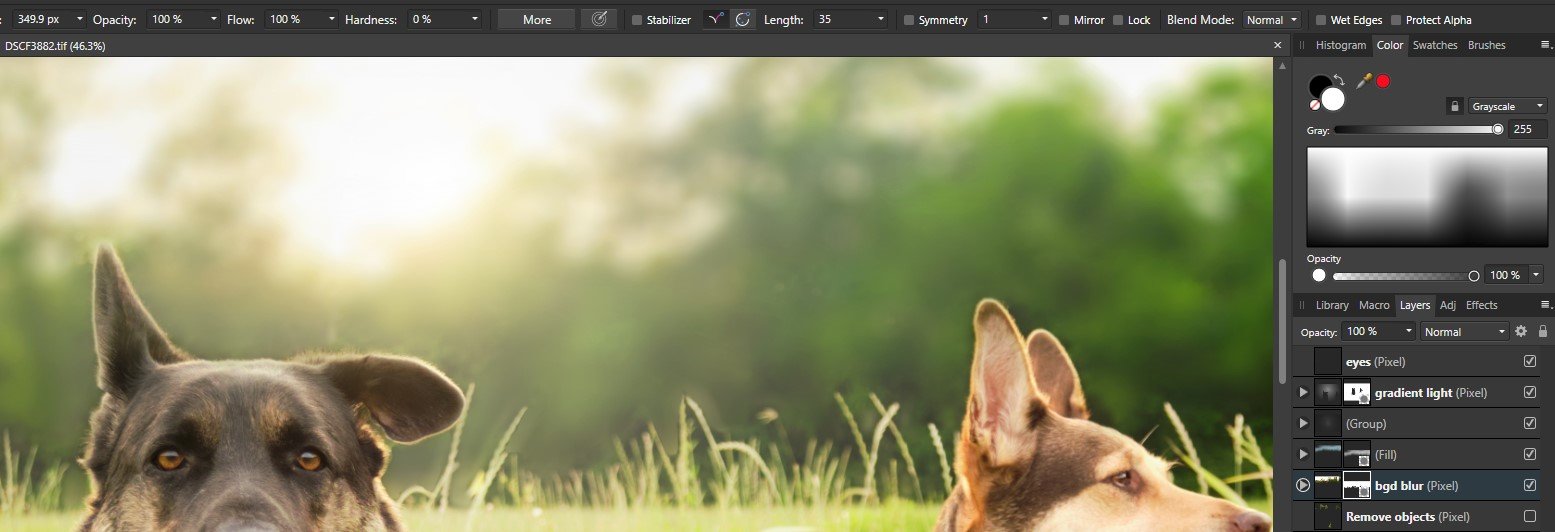
Hey @RichZep I think I understand. In the attached screen capture, the upper part of the background was done with a large brush, 100% opacity/flow, 0% hardness. When I got to the tall grass between both dogs, all I did was decrease brush size but, as you can see, it's very noticeable.
How do I decrease brush size to get my detailed brush work done without having to deal with the hard edges? Thanks for your help!
-
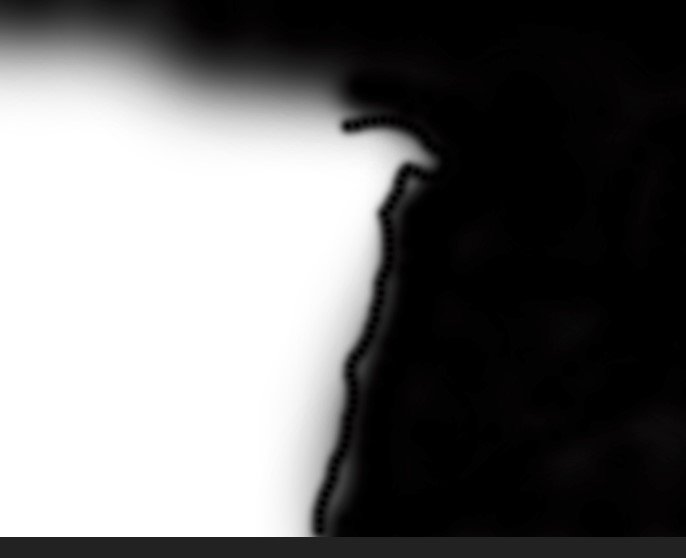
I know it's user error, just can't seem to figure it out. In my example, I used a big brush on the right side set to opacity/flow 100%, hardness 0%. The darker middle line, same settings just a smaller brush. Why do I get such strong/hard lines when I have a small brush? In a photo, it's very obvious I used a hard brush when compared to the surrounding softer area. I'm just not understanding. TIA for your help - this is a great community!
-
49 minutes ago, carl123 said:
I'm pretty sure that's just an Edit > Fill > Inpaint command.
Exactly. Thank you again for the macro.
-
On 12/31/2017 at 1:12 AM, carl123 said:
Try the attached "Blur Background" macro, hopefully no halos
1. Make and refine your selection (This selection is the object/person you want to remain in focus, i.e. NOT blurred)
2. Run the Macro
3. Adjust the strength of the background blur via the added Live Gaussian Blur filter.The macro is imported and run via the Macro panel, you can then save it to your Macro library if you want to keep it.
It has been tested and seems to work OK but it has not been intensively tested.
It is added here as a RFC and for others to improve upon if they wish to.
Or you can just use it to blur all the in-laws out of your wedding photographs
Yeah I realize this is an old discussion but I don't want to start another thread with the same question(s).
@carl123 what is actually happening when the macro gets to "fill" line? Thank you for a great resource!
-
Hey @Murfee!! Thank you SOOOO much!! I used the Inpainting brush, just like you said, and it worked perfect! I wouldn't say the selection is perfect but, for my use, it'll work. You wouldn't happen to know of another good selection tutorial, would you? Thanks again!
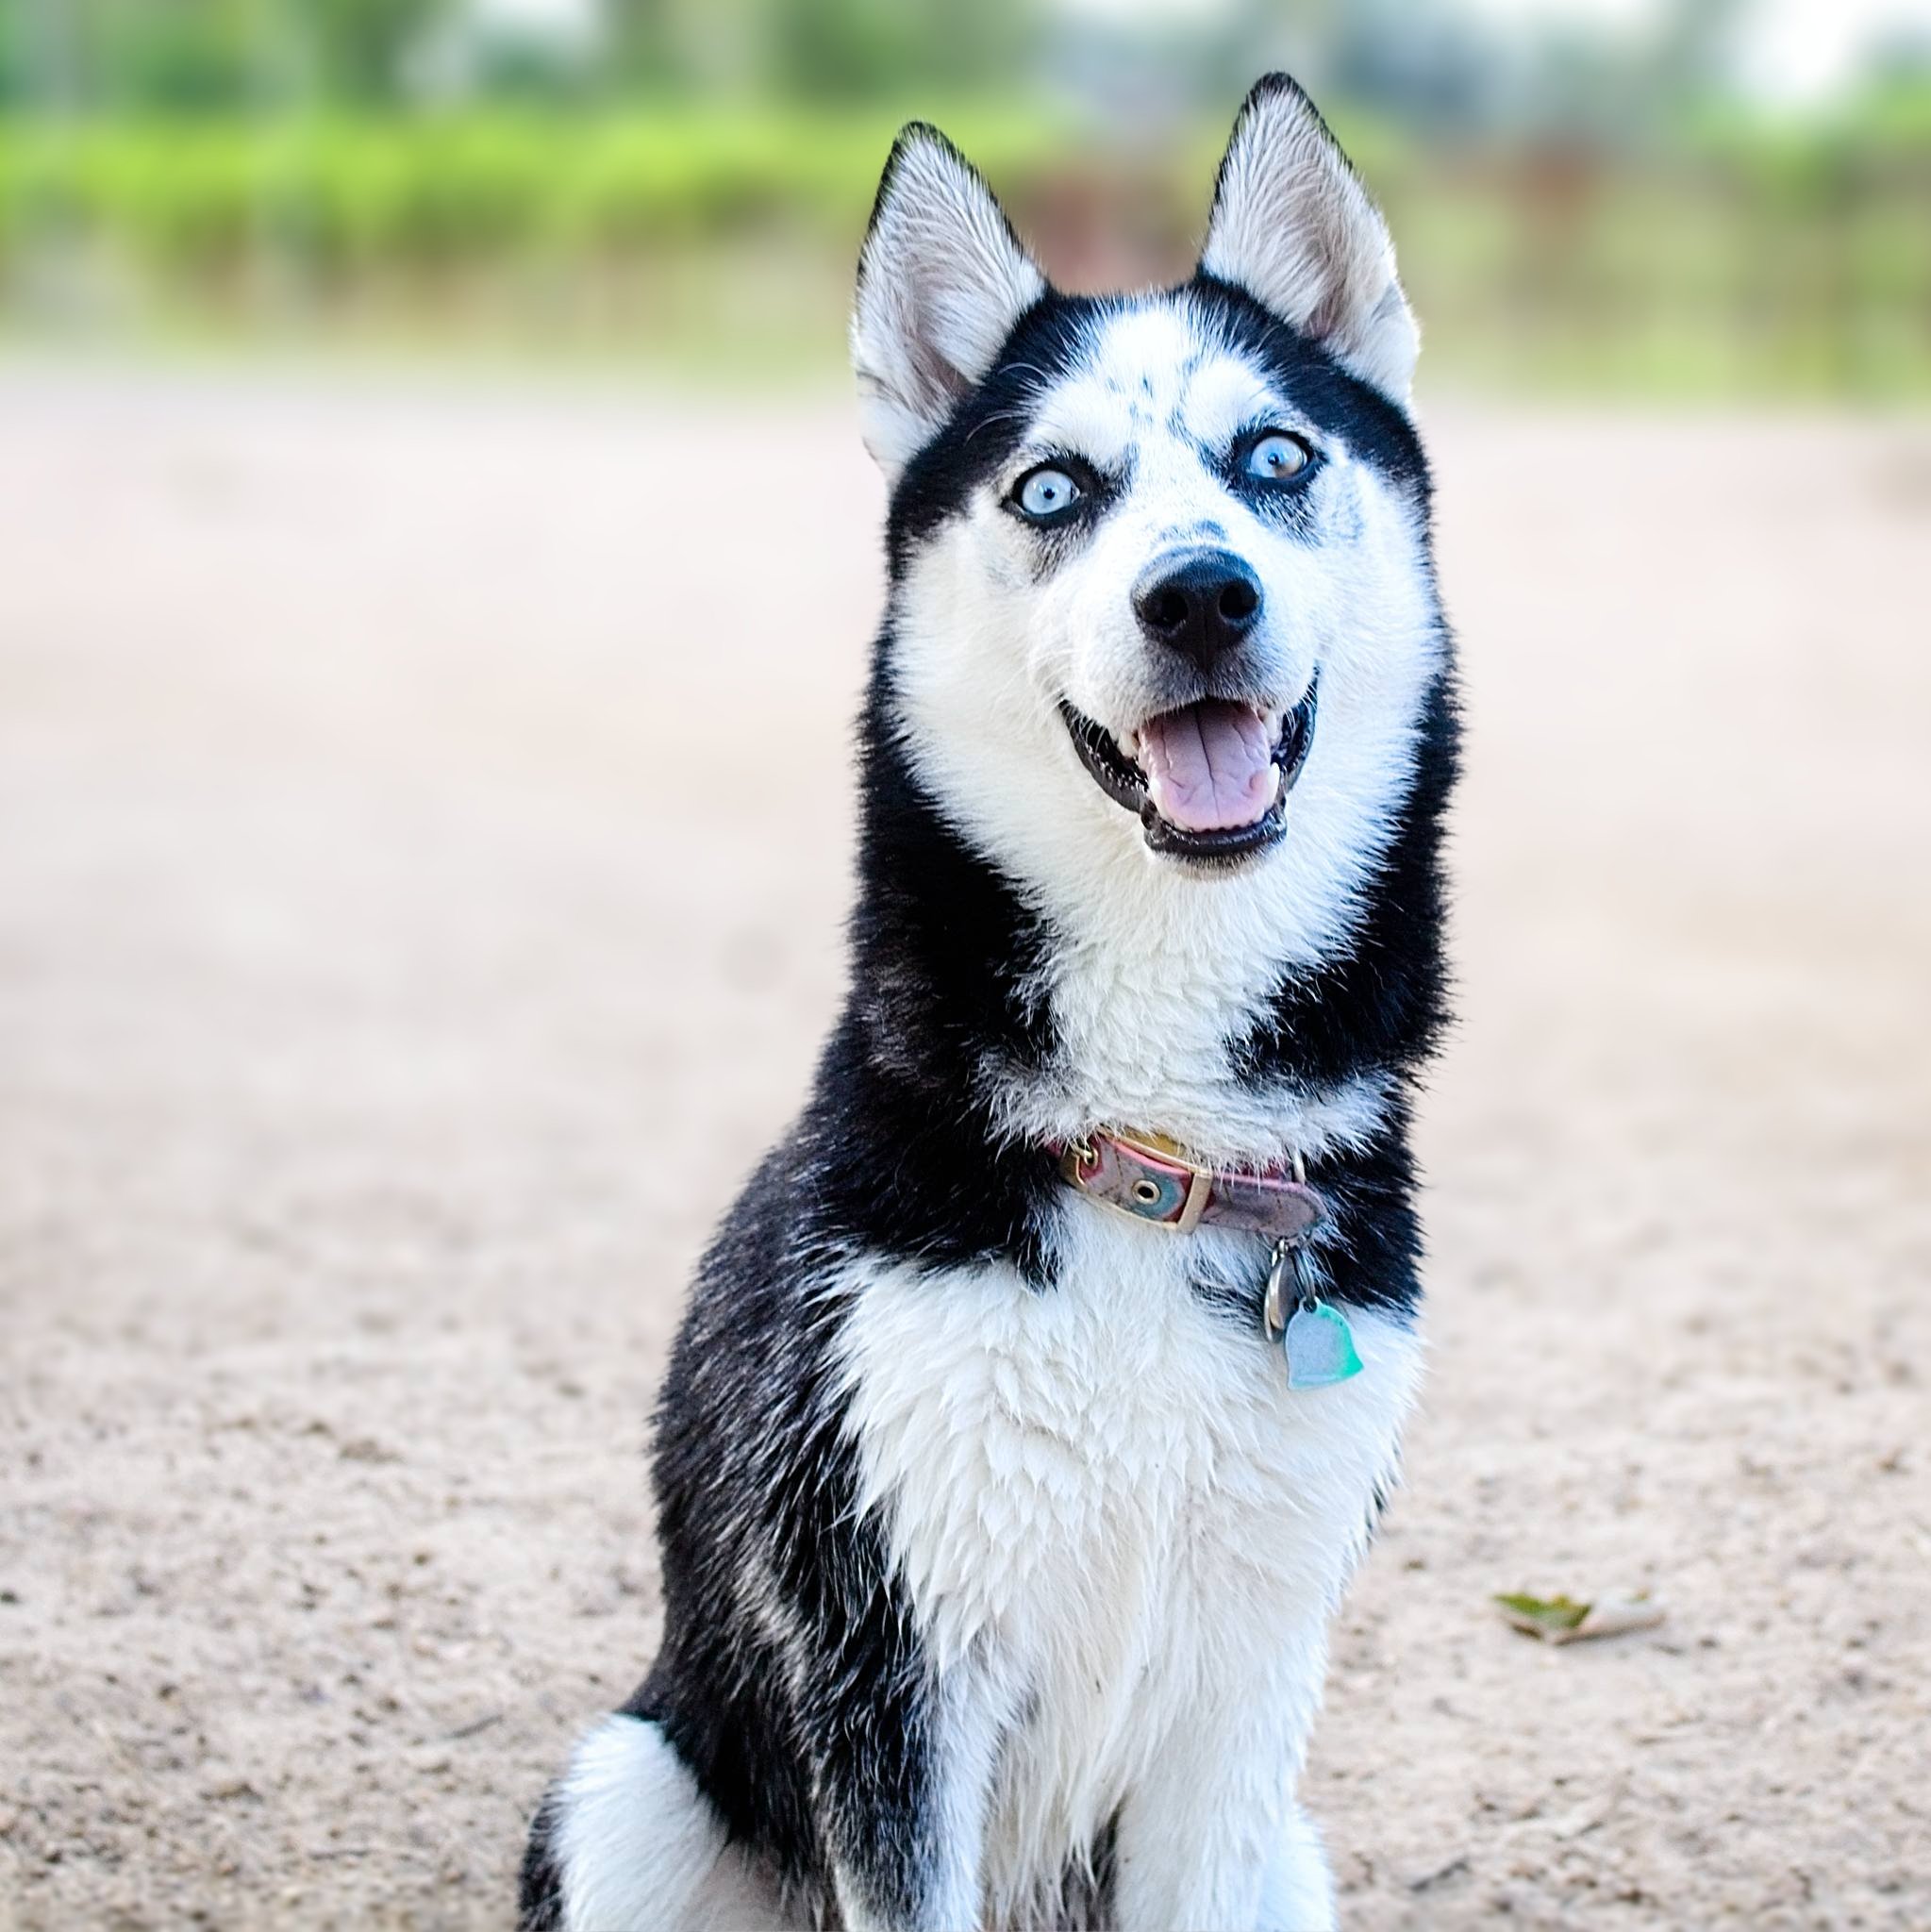
The Husky is Sky. We met her at a dog park last year. She has her own IG @skyhusky13 🙂
-
I realize it's user error and I'm only following tutorials the best I can. This is the tutorial I followed: https://youtu.be/coJ0jypAE2k
I copied & pasted my selection then selected the original background layer and added an elliptical depth of field blur. As you can see, there's a nasty halo around the dog and I really don't know how to fix it. Any help would be greatly appreciated. 🙏
-
OK so I may have just created more confusion for me than I even realized. 🤦♂️ 😁
-
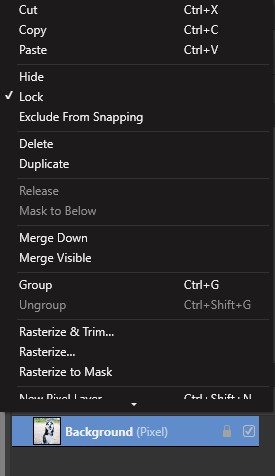
Right-clicking on my background layer, I'm just curious why there isn't the CTRL+J hint for Duplicate (Windows ver). Not a huge deal... just curious...
-
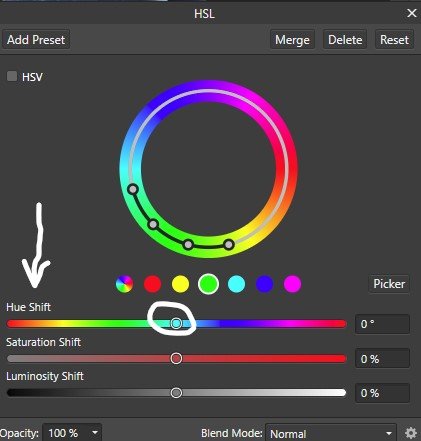
4 minutes ago, carl123 said:
The attached image show how the HSL adjustment used to be.
The top colour (static) bar represented the original colour and the bottom bar showed what it would change to when you moved the slider.
When they added the rings they removed the static colour bar as the 2 rings showed you the same information but I can't understand why they simply didn't just leave the static colour bar in place as the moving spectrum bar will just confuse new users if they don't know how to first eyeball the colour they want to change and then shift the new colour to that spot.
@carl123 Yeah, lots of confusion on my part. Thanks for posting that capture - that definitely makes more sense.
@MEB thanks for logging this
-
8 minutes ago, anon2 said:
I never mentioned the rings. I was talking solely about observing the horizontal bar. However, yes, the rings do show the mapping of each input hue to output hue.
The moving spectrum in the horizontal hue slider is redundant when there are the dual rings, I guess, but it's a hangover from an earlier version of the HSL Shift where there was no ring and, instead, there was a fixed spectrum bar above or below the moving spectrum slider to show the mapping of input hue to output hue. Now that there are rings, the slider could be a solid grey or any colour.
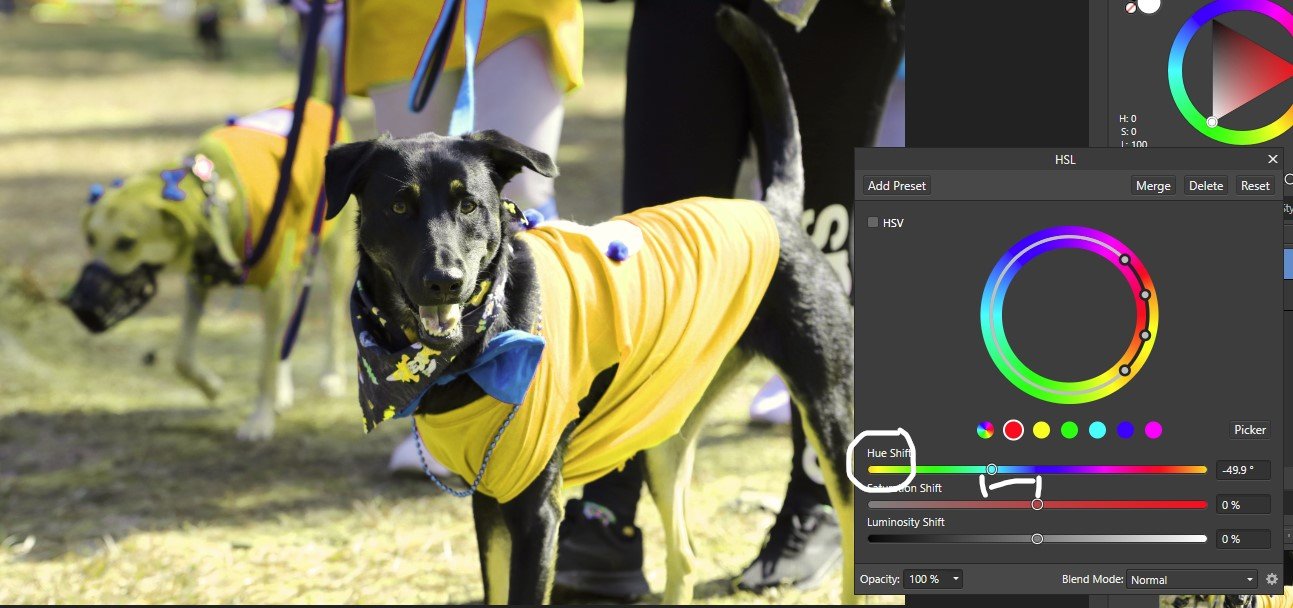
Thanks again, anon2. So basically, I decided (just for testing) that I wanted everything in the photo that's originally red to have a yellow color. I chose red, noted where red is located in the horizontal spectrum, then moved the slider slightly left until yellow occupied the space where there was originally red. Is this the correct functionality?
-
33 minutes ago, anon2 said:
The behaviour of the horizontal hue slider looks correct to me (and it is broken on macOS where the spectrum in the slider does not move as the handle is dragged). You have dragged the handle so that purple is now where green initially was - about a third of the way from the left of the slider.
To replace green with orange, drag the handle so that orange is where green initially was - about a third of the way from the left of the slider.
Thanks anon2. So what you're saying (correct me if I'm wrong), is to move the handle and keep an eye on the outer part of the ring until the desired color falls in line with the inner ring? If that's correct, I understand that but it's still confusing why there's a spectrum of colors in the horizontal slider bar. Thanks again.
-
3 hours ago, MEB said:
Hi im140.6,
Thanks for the screenshot and video. Something's not right here. I'm checking/logging this to be looked at.Is this something I need to reach out to support? Or, is your role here to log issues like this?
-
Here's a video. All I did was select green and try to get my slider to change green hues to orange. You'll see orange move away...
-
6 hours ago, MEB said:
Hi im140.6,
Welcome to Affinity Forums
Seems you are doing things correctly. If you drag the Hue Shift slider to orange part only the only the green areas of the image should be affected (and you should the the outside ring near the green turning orange).
I'm not sure what you meant with the entire color bar shifts. Can you record a small clip showing what you are doing or post a screenshot with the Hue Shift slider moved to the orange area and take a screenshot of the HSL adjustment panel so we can see what's going on? Thanks.Thanks for your reply. In my OP, the green color was selected and, in the Hue Shift bar, orange is under the "h" in Shift. In my post now, I did 2 things: selected green and moved the Hue Shift control slider to the left, under the "h" in Shift. As I start moving the slider, the entire bar (hue shift spectrum) starts shifting. As you can see, orange (in the horizontal hue shift) has moved center-right. What's even more confusing, even though my slider appears to be stopped on cyan, the color wheel outer ring is purple. Where does THAT come from?!
Isn't there a way for me to pick red, yellow, green, cyan, etc, then with the hue shift slider just move it to the color on the hue shift spectrum that I want?
-
I'm not sure I completely understand the HSL adjustment > hue shift slider. I selected "green" and want to move the control dial over to the "orange" part on the left but when I drag the slider, the entire color bar shifts. How do I set my color to orange, or any other color I choose? TIA
-
7 minutes ago, GarryP said:
You’re welcome.
The Inpainting Brush Tool usually only works on the Current Layer, which is the one selected, but there’s an option on the Context Toolbar to make it work with Current Layer and Below. I’ve never used it in this ‘mode’ so I don’t know how it works but I guess you could use it to inpaint non-destructively on an empty pixel layer above all the others. I think there’s an official video tutorial that uses it this way.Super! That may have been the step I was missing (Current Layer and Below). I appreciate your help GarryP!
-
3 hours ago, GarryP said:
You will probably need to work on the layer where the ‘background line’ exists for any of the tools to work on it.
If the ‘background line’ exists because of interaction between layers then it may be more difficult to remove and you might have to start merging layers.Thanks GarryP. I was trying to InPaint and/or Clone on the background layer with no luck. If I turned OFF the 5 layers above the background layer, I could see the InPainting stroke and make corrections. Seems like no matter what I did, I couldn't get it removed because I'm not sure which layer (or how) to work with.
-
Apologies.. looks like learning curve is taking me a bit longer... I realized, after adding those adjustments, that I want to remove that line on the left. Either InPainting tool or Clone, I'm not picky LOL
I can't seem to grasp how to do it. No matter which layer I select, I'm not getting the result. I'm sure the answer is obvious and I'm over-thinking.
-
23 minutes ago, Callum said:
Hi Im140.6
If possible please could you try another keyboard if you have one to see if you get the same issue?
Thanks
Callum
Hi Callum, I only have this one KB. I saved my work, re-launched AP and all the keyboard shortcuts worked again.
-
I'm on the trial, only using this 2-3 times. Just now my keyboard stopped working in the app for Win 10. I couldn't ctrl+1 to zoom in, Z wouldn't zoom, ALT wouldn't do anything. Basically all shortcut functions stopped working. I saved my edits, re-launched the app and it's all working fine now.
I saw there were issues of non-responsive keyboards in the past. This is a fresh install and I was under the impression that bug was fixed? I didn't do any customizing, basically I was just following a video tut and doing some simple edits.
Any ideas? I went ahead and purchased since it's a killer deal but I'd really like to log this keyboard issue with the devs.
-
1 hour ago, drippy cat said:
Steve! Thanks so much for your kind words! After the day I've had I really appreciated reading them.
im140.6 - why not try the Five Steps course and see how you get on? It's free so you can't lose. Beyond that I'd agree with SteveB523 - the Solid Foundations or Beginner to Pro via Reference and Workflow. Maybe the latter if you go through the 5 steps course first.
Simon
I'm going through your free Five Steps course now and I'm enjoying it. I'll look a little closer at Beginner to Pro later tonight. Thank you and have a great weekend!
-
When I press "C" or select the crop tool, it defaults to Mode: Custom Ratio - a value that I input when I was exploring the app a couple of days ago. Is there a way to make the default behavior as Mode: Original Ratio?
Thank you.


Brush size, flow, opacity question
in Pre-V2 Archive of Affinity on Desktop Questions (macOS and Windows)
Posted
Hi @RichZep! Thanks again for your reply!
Yes, I'm using a layer mask. I applied a field blur to the entire photo, masked it and using my brush to reveal the blur (in the background trees). So I used a large brush to cover the big areas but when I went to brush around the detailed area, that's where the brush became "hard" and really shows the strokes.
Yep, I think I was trying to do something that can't be done - the way I'm trying to do it. I'm sure there's a better way though and I'll keep looking.
Your explanation and suggestion(s) are excellent and I'm going to give those a try! You've been very helpful and just one more reason I'm glad I invested in Serif instead of the "other" apps.
I hope you have a great day!